

微服务实现win系统一键安装
背景:内网环境,微服务搭建的项目需要在客户电脑部署,实现一键安装,开机自启等功能
项目打包exe使用NSIS(HM VNISEdit)
链接:https://pan.baidu.com/s/1G8u-tSiXxucRu1d5e_vwGA
提取码:2gni
win系统可能需要的.net服务
https://www.microsoft.com/zh-cn/download/details.aspx?id=17718
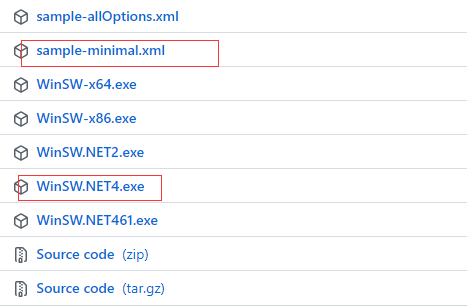
应用程序注册win系统服务使用的winsw,自行下载适合的版本
https://github.com/winsw/winsw/releases/tag/v2.11.0
一键安装内容:mysql5.7 jdk1.8 nacos nginx-1.19.2 redis-5.0.9 gateway 项目应用
基本流程是 1.安装时配置mysql jdk运行环境,并设置mysql开机自启,2.安装nacos、nginx、redis gateway 项目应用为系统服务 3.安装完成打开相应网站进行使用
一.安装mysql服务并实现开机自启,安装包使用的绿色版免安装版本,数据使用db文件
1.安装mysql为系统服务
@echo off
@echo 正在安装MySQL服务......
cd /d %~dp0
cd ../
echo %cd%
set startDir=%cd%
set myIni=%startDir%\mysql-5.7.22-winx64\my.ini
cd "%startDir%\mysql-5.7.22-winx64\bin"
%startDir%\mysql-5.7.22-winx64\bin\mysqld --install mysql "--defaults-file=%myIni%"
@echo MySQL服务安装成功
2.设置mysql服务开机自启
@echo off
net start mysql
sc config mysql start= auto
net stop mysql
net start mysql
3.设置用户密码
@echo off
set sqlpath=%~dp0mysql\
cd ../
set startDir=%cd%
set sqlfile=%cd%\mysql-5.7.22-winx64\initSql.sql
cd "%startDir%\mysql-5.7.22-winx64\bin"
mysqld --initialize-insecure --user=mysql
mysqld -install
@echo net start mysql
mysql -uroot < %sqlfile%
set password for root@localhost = password('123456');
use mysql;
update user set host='%' where user='root';
flush privileges;
4.服务停止及卸载
@echo off
@echo 正在卸载MySQL服务......
cd /d %~dp0
cd ../
set startDir=%cd%
set myIni=%cd%\mysql-5.7.22-winx64\my.ini
cd "%startDir%\mysql-5.7.22-winx64\bin"
net stop mysql
%startDir%\mysql-5.7.22-winx64\bin\mysqld --remove mysql
@echo 卸载MySQL服务成功
二.jdk 环境配置
@echo off
@echo 正在配置jdk环境......
setx  "JAVA_HOME" /m "%cd%\jdk8"
setx /M CLASSPATH ".;%%JAVA_HOME%%\lib;%%JAVA_HOME%%\lib\tools.jar;"
setx /M PATH "%PATH%;%%JAVA_HOME%%\bin;%%JAVA_HOME%%\jre\bin;"
@echo jdk环境配置完成
三.redis、nacos、nginx配置为系统服务
1.1redis 设置系统服务并启动
@echo off
cd "%cd%\Redis-x64-5.0.9"
redis-server --service-install redis.windows-service.conf --loglevel verbose  注册服务
timeout /nobreak /t 2  等待2秒
redis-server --service-start 启动服务
1.2 redis服务停止及卸载
@echo off
cd ..
cd "%~dp0Redis-x64-5.0.9"  redis安装包文件路径
redis-server --service-stop 停服务
redis-server --service-uninstall 卸载服务
2.1 nacos设置系统服务并启动
@echo off
cd ..
cd "%cd%\nacos"
nacosServer.exe install
timeout /nobreak /t 2
net start nacos
2.2 nacos服务停止并卸载
@echo off
cd ..
cd "%~dp0nacos"
net stop nacos
nacosServer.exe uninstall
3.1 nginx设置系统服务并启动
@echo off
cd ..
cd "%cd%\nginx-1.19.2"
nginxServer.exe install
timeout /nobreak /t 2
net start nginx
3.2 nginx服务停止并卸载
@echo off
cd ..
cd "%~dp0nginx-1.19.2"
net stop nginx
nginxServer.exe uninstall
四.应用服务注册为win系统服务
1.使用winsw,下载相应的版本, 我使用的V2.11.0 稳定版,支持.net2.0~.net4.0的(win7预装.net3.5,win10预装.net4.0)。现在最新的版本能支持.net6.0
1.1下载相对应的exe和xml
1.2把xml和exe放到需要注册服务的同一目录,修改exe文件名称与服务名保持一直,修改xml文化名与服务名称保持一直

1.3修改xml配置
<service>

  <!-- ID of the service. It should be unique across the Windows system-->
  <id>sys-gateway</id>   //与jar服务名称保持一直
  <!-- Display name of the service -->
  <name>sys-gateway</name>  //注册到系统服务的名称
  <!-- Service description -->
  <description>This service is a sys-gateway-1.0.0 created from a minimal configuration</description> //说明文字

  <!-- Path to the executable, which should be started --> //需要执行的命令文件
  <executable>java</executable>
  <arguments>-jar sys-gateway-1.0.0.jar</arguments>
</service>
1.4应用服务的服务注册及启动
@echo off
cd ..
cd "%cd%\sys-gateway"
sys-gateway-1.0.0.exe install
timeout /nobreak /t 2
net start sys-gateway
@echo off
1.5应用服务的停止与卸载
@echo off
echo "%~dp0sys-gateway"
cd "%~dp0sys-gateway"
net stop sys-gateway
sys-gateway-1.0.0.exe uninstall
五.使用NSIS把文件目录打包为exe,安装过程中执行对应的bat脚本
NSIS使用向导模式就可以,具体能多操作查看操作文档
主要执行编码
Section "MainSection" SEC01
  SetOutPath "$INSTDIR"
  SetOverwrite ifnewer
  File /r "..\one\ghzTest\*.*"   //目录下所有文件打包并转移的新的目录(类似于copy)
  ExecWait "$INSTDIR/bin/my.bat" // 执行对应的脚本服务
  ExecWait "$INSTDIR/bin/start.bat"
  ExecWait "$INSTDIR/bin/init.bat"
  ExecWait "$INSTDIR/jdk.bat"
  ExecWait "$INSTDIR/install.bat"
SectionEnd
bat批处理文件知识:
当前盘符     %~d0
当前路径     %cd%
当前执行命令行  %0
当前bat文件路径  %~dp0
注释  rem
打印  echo
空格确认  pause
本文来自博客园,作者:小辉辉。。,转载请注明原文链接:https://www.cnblogs.com/zjylsh/p/15822343.html

 浙公网安备 33010602011771号