[Intel Edison开发板] 06、Edison开发在linux中烧写、配置、搭建开发环境
1、前言
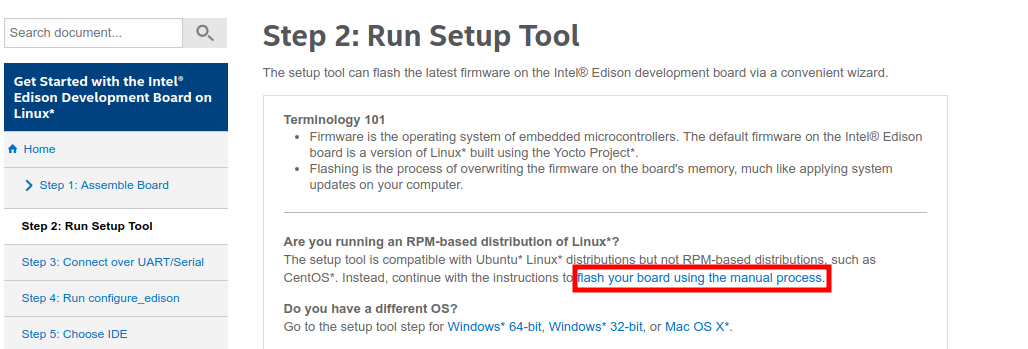
linux上烧写、配置、搭建Edison环境,千万不要用默认的setup tool for ubuntu!!! (即使,你用的就是ubuntu)
因为,其默认的工具会从一个坏链接下载配置文件:https://downloadmirror.intel.com/25871/eng/iot_data.xml,而该链接早已变为404。
建议到下面这一步从我圈的红色部分继续进行!
>> https://software.intel.com/en-us/get-started-edison-linux-step2

2、烧写固件到Edison
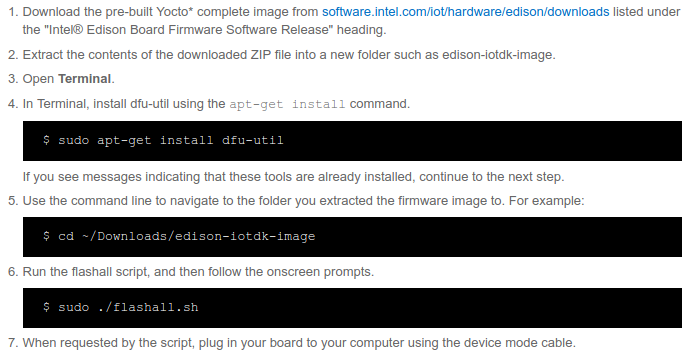
官方介绍setup tool是一种较好的方法来烧写固件,而dfu-util是为了某些手动想烧写固件的需求准备的。而在linux中setup tool会有第一节中描述的问题,因此我们选用dfu-util进行烧写。
This process uses dfu-util, an open source program that implements the USB DFU (USB Device Firmware Upgrade) protocol.
利用dfu-util操作比较简单,可以完全按照介绍进行:
>> https://software.intel.com/en-us/getting-started-troubleshooting-edison-for-linux#manual-flash-process

注:需要注意USB数据线的连接方式及switch开关的拨动位置;烧写大概用5min,不要断电或拔下数据线!
╭─btfz@btfz-pc ~/Tool/Edison/Image
╰─$ sudo ./flashall.sh                                                                                                                                                        254 ↵
Using U-Boot target: edison-blankcdc
Now waiting for dfu device 8087:0a99
Please plug and reboot the board
Flashing IFWI
Download    [=========================] 100%      4194304 bytes
Download    [=========================] 100%      4194304 bytes
Flashing U-Boot
Download    [=========================] 100%       237568 bytes
Flashing U-Boot Environment
Download    [=========================] 100%        65536 bytes
Flashing U-Boot Environment Backup
Download    [=========================] 100%        65536 bytes
Rebooting to apply partition changes
Now waiting for dfu device 8087:0a99
Flashing boot partition (kernel)
Download    [=========================] 100%      6144000 bytes
Flashing rootfs, (it can take up to 5 minutes... Please be patient)
Download    [=========================] 100%   1373159424 bytes
Rebooting
U-boot & Kernel System Flash Success...
Your board needs to reboot to complete the flashing procedure, please do not unplug it for 2 minutes.
3、串口连接与配置密码及wifi
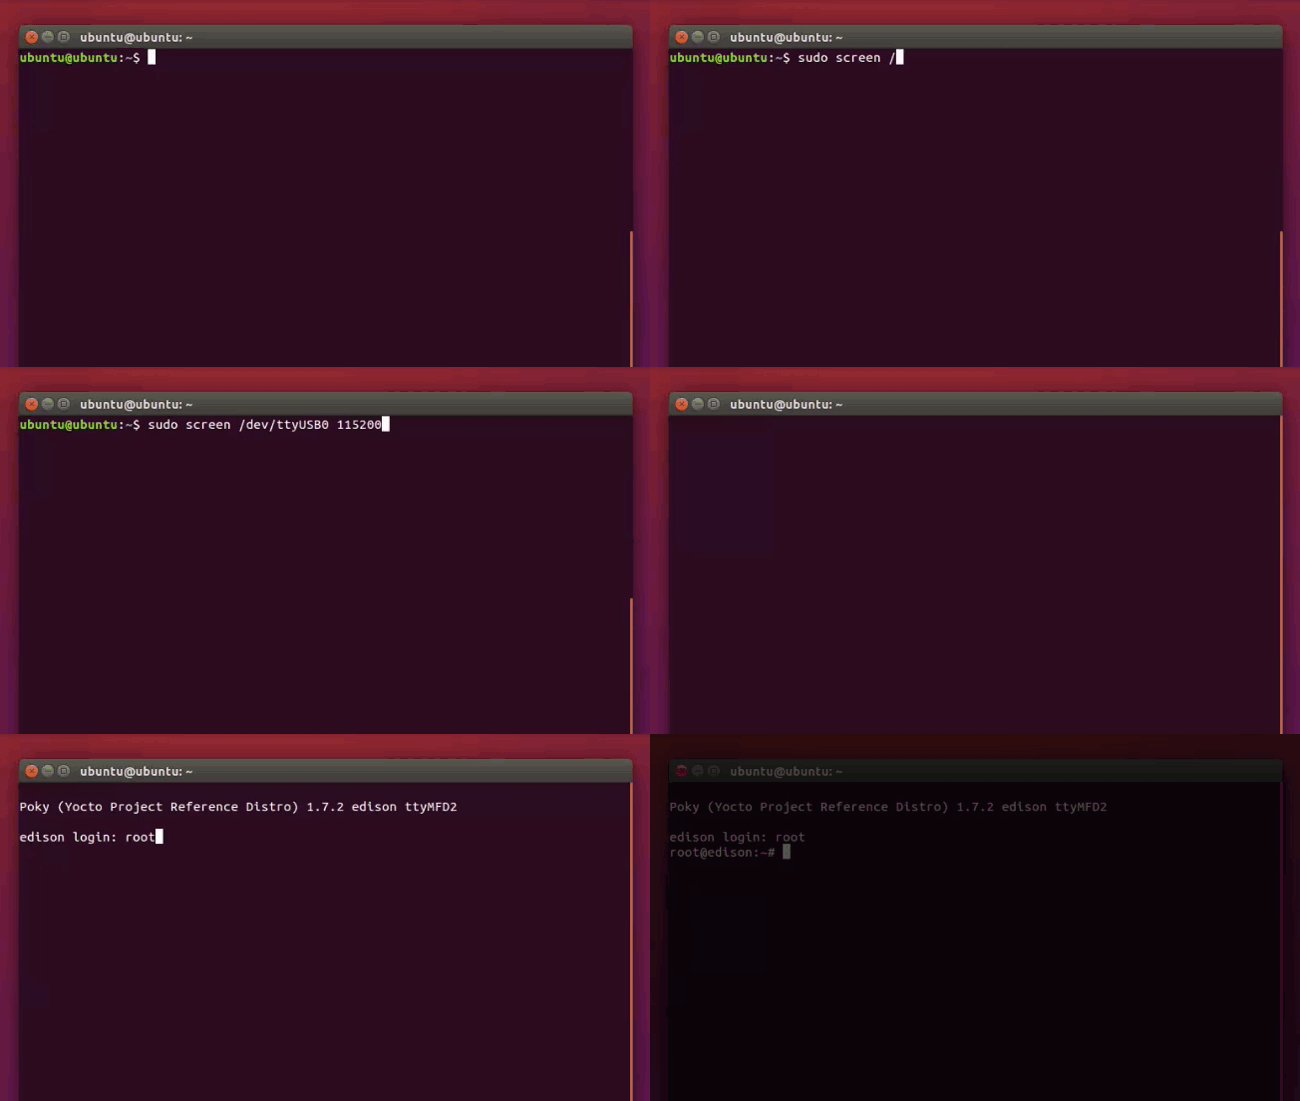
参照官方介绍,使用screen进行连接:
>> https://software.intel.com/en-us/get-started-edison-linux-step3
- 主要是安装screen:sudo apt-get install screen
- 将板子通过USB线连接到电脑,查看USB设备:ls /dev/ttyUSB*
- 通过USB连接到板子:sudo screen /dev/ttyUSB0 115200

等用screen登录成功板子后,便可参考:https://software.intel.com/en-us/get-started-edison-linux-step4 对板子进行配置用户名和密码,以及配置wifi等操作~
系列链接:
- [Intel Edison开发板] 01、Edison开发板性能简述
- [Intel Edison开发板] 02、Edison开发板入门
- [Intel Edison开发板] 03、Edison开发IDE入门及跑官方提供的DEMO
- [Intel Edison开发板] 04、Edison开发基于nodejs和redis的服务器搭建
- [Intel Edison开发板] 05、Edison开发基于MRAA实现IO控制,特别是UART通信
:: 如果您觉得不错,请推荐给更多人,帮助他们更快地解决实际问题中的坑~
@beautifulzzzz
智能硬件、物联网,热爱技术,关注产品
博客:http://blog.beautifulzzzz.com
园友交流群:414948975


 浙公网安备 33010602011771号