

springMVC(六)——文件上传
SpringMVC文件的上传
直接来步骤和代码:
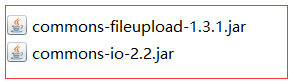
1、首先需要导入jar包
2、前端代码
加颜色的代码需要注意
<%@ page language="java" contentType="text/html; charset=UTF-8"
    pageEncoding="UTF-8"%>
<!DOCTYPE html>
<html>
<head>
<meta charset="UTF-8">
<title>Insert title here</title>
</head>
<body>
    <form action="upload" method="post" enctype="multipart/form-data">
        姓名:<input type="text" name="name"/><br>
        年龄:<input type="text" name="age"/><br>
        请选择上传文件:<input type="file" name="multipartFile"/>
        <input type="submit" value="上传">
    </form>
</body>
</html>
3、在springmvc中配置文件上传解析器
<!-- 配置文件上传解析器 -->
    <bean id="multipartResolver" class="org.springframework.web.multipart.commons.CommonsMultipartResolver">
        <!--设置文件上传的大小  字节  -->
        <property name="maxUploadSize" value="20971520"></property>
    </bean>
4、控制层处理代码
@Controller
public class TestController {
    @RequestMapping("upload")
    //HttpServletRequest:作用是为了获取上传文件的路径
    public String uploadFiles(MultipartFile multipartFile,HttpServletRequest request,Student stu,Model model) {
        //获取文件上传真实保存路径
        String path = request.getServletContext().getRealPath("/upload");
        System.out.println(path);
        //创建一个对象
        File file = new File(path);
        if(!file.exists()) {//该路径不存在
            file.mkdirs();
        }
        //获取文件名
        String filename =System.currentTimeMillis()+ multipartFile.getOriginalFilename();
        System.out.println(filename);
        File targetfile = new File(path+"/"+filename);
        try {
            //把文件写到指定的目录下
            FileUtils.writeByteArrayToFile(targetfile, multipartFile.getBytes());
        } catch (IOException e) {
            // TODO Auto-generated catch block
            e.printStackTrace();
        }
        stu.setImgname(filename);
        model.addAttribute("stu", stu);
        return "info";

    }
}

 浙公网安备 33010602011771号