Vue基础学习
1.vue基础
1.1 Vue下载安装
1.1.1js文件安装
进入网站:https://cn.vuejs.org
下载:学习--教程--左侧的安装---下载开发版,点击进入,复制---到项目中创建vue.js文件,将内容复制即可,用script引入
<script type="text/javascript" src="Vue/vue.js" ></script>1
<script type="text/javascript" src="Vue/vue.js" ></script>3.或者可以直接引入
<script src="https://cdn.jsdelivr.net/npm/vue@2.5.16/dist/vue.js"></script>1
1
1
<script src="https://cdn.jsdelivr.net/npm/vue@2.5.16/dist/vue.js"></script>1.1.2 win下安装node.js
- 下载安装:
- http://nodejs.cn/
- 下载msi的版本,安装即可
- 测试:
- 打开cmd,输入node进入,然后就可以测试了
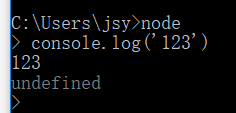
- 退出:两次Ctrl+c
- 查看版本号: npm -v
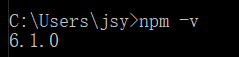
若是没有版本号,需要修改环境变量:在用户变量的path中加上:C:\Users\jsy\AppData\Roaming\npm
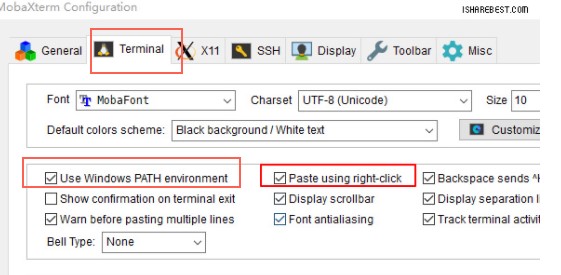
1.1.3安装命令行工具MobaXterm
打开即可使用;
配置:打开Settings
- 安装cnpm
- 方法1:
npm install -g cnpm --registry=https://registry.npm.taobao.org
//但是这样版本可能会不一致
x
1
npm install -g cnpm --registry=https://registry.npm.taobao.org2
//但是这样版本可能会不一致- 方法2:
或者你直接通过添加 npm 参数 alias 一个新命令:
alias cnpm="npm --registry=https://registry.npm.taobao.org \
--cache=$HOME/.npm/.cache/cnpm \
--disturl=https://npm.taobao.org/dist \
--userconfig=$HOME/.cnpmrc"
5
5
1
或者你直接通过添加 npm 参数 alias 一个新命令:2
alias cnpm="npm --registry=https://registry.npm.taobao.org \3
--cache=$HOME/.npm/.cache/cnpm \4
--disturl=https://npm.taobao.org/dist \5
--userconfig=$HOME/.cnpmrc"1.1.3vue-cli下载和安装
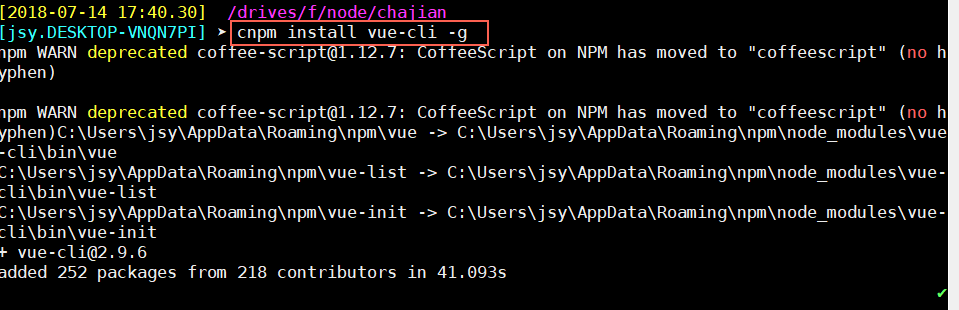
使用node.js(MobaXterm )安装vue-cli
- 安装vue-cli: cnpm install vue-cli -g
- 初始化项目: vue init webpack my-project
- 安装项目依赖 cnpm install
- 在locallot启动测试服务器 : npm run dev
- 生成上线日录(部署) : npm run build
- 具体使用
具体使用
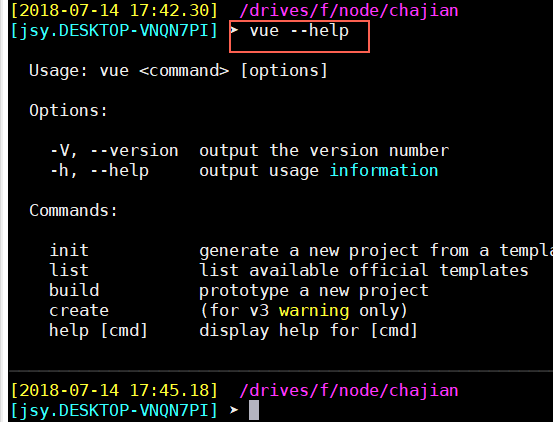
vue版本2.9.6,输入 vue --help 有一下内容
- 查看版本
vue -V111vue -V

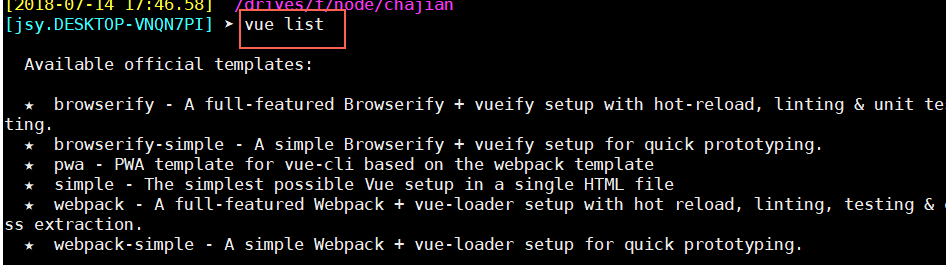
- 查看官方提供的模板
vue list //速度回有点慢111vue list //速度回有点慢
- 使用webpack搭建项目
vue init webpack my-project    //搭建项目
    接下来是配置:
        项目名
        描述
        作者
        安装vue-router   y
        代码校验ESLint   n
        测试工具tests  看个人需要 n
        e2s tests 测试工具    n
  生成项目;
启动项目:
    1.安装依赖:
        进入项目文件夹my-project
        cnpm install    //安装依赖  node_modules
        npm run dev    //启动项目
生成部署用的文件:
    npm run build     //运行之后,会有一个dist目录
17
17
1
vue init webpack my-project //搭建项目2
接下来是配置:3
项目名4
描述5
作者6
安装vue-router y7
代码校验ESLint n8
测试工具tests 看个人需要 n9
e2s tests 测试工具 n10
生成项目;11
启动项目:12
1.安装依赖:13
进入项目文件夹my-project14
cnpm install //安装依赖 node_modules15
npm run dev //启动项目16
生成部署用的文件:17
npm run build //运行之后,会有一个dist目录1.1.4 sublime text 添加vue高亮
1.准备语法高亮插件vue-syntax-highlight。
下载zip并解压;
2.进入sublime,首选项--浏览插件目录,在打开的文件夹中创建“Vue”文件夹。
3.在Vue文件夹中,将vue-syntax-highlight-master压缩包解压后的所有文件考入
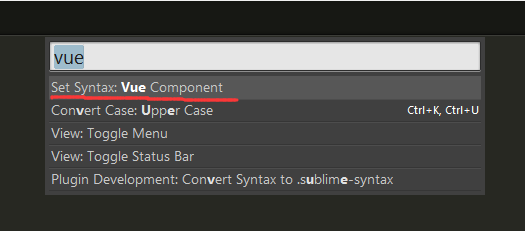
4.按下快捷键“ctrl+shift+p”,在打开的packages输入框中输入vue,选择“Set Syntax:Vue Component”进行加载。
加载后重启sublime,重新打开.vue文件,即能看到语法高亮
1.1.5 安装vuex
在项目中安装
cnpm install vuex --save
//若是重启了工具,要重新把上面的npm转cnpm的代码运行一下,
安装完之后,重新运行项目
    npm run dev
5
5
1
在项目中安装2
cnpm install vuex --save3
//若是重启了工具,要重新把上面的npm转cnpm的代码运行一下,4
安装完之后,重新运行项目5
npm run dev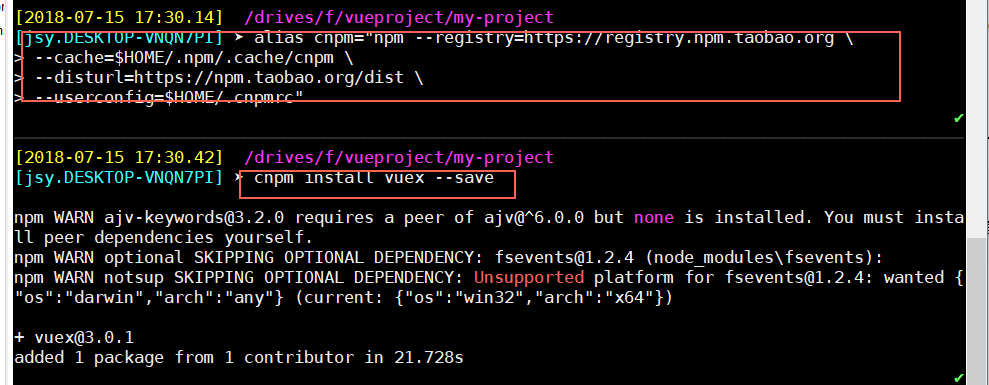
1.1.6 安装vue-resource
cnpm install vue-resource1
1
1
cnpm install vue-resource1.1.7 json-server 虚拟的后端(只能get)
cnpm install json-server --save
打开项目,进入build 打开dev-server.js文件,
在第四行express下:
    var jsonServer=require('json-server')
在第16行var app = express()之下写
    var jsonServer=new jsonServer()
在最底下module.exports之前设置:


var jsonServer=require('json-server')
var apiserver=jsonServer.create()
var apirouter=jsonServer.router('db.json')//此目录是项目的目录,放置此文件到项目文件夹中
var middlewares=jsonServer.defaults()
apiserver.use(middlewares)
apiserver.use('/api',apirouter)
apiserver.listen(3000,function () {//监听的接口,
  console.log('JSON Server is running')
})
19
19
1
cnpm install json-server --save2
打开项目,进入build 打开dev-server.js文件,3
在第四行express下:4
var jsonServer=require('json-server')5
在第16行var app = express()之下写6
var jsonServer=new jsonServer()7
在最底下module.exports之前设置:8
9
10
var jsonServer=require('json-server')11
var apiserver=jsonServer.create()12
var apirouter=jsonServer.router('db.json')//此目录是项目的目录,放置此文件到项目文件夹中13
var middlewares=jsonServer.defaults()14
apiserver.use(middlewares)15
apiserver.use('/api',apirouter)16
apiserver.listen(3000,function () {//监听的接口,17
console.log('JSON Server is running')18
})19
配置后端接口路径
打开config中的index.js文件,其中配置的就是后端1
1
1
打开config中的index.js文件,其中配置的就是后端1.1.8虚拟后端接口
var apiServer = express()
var bodyParser = require('body-parser')
apiServer.use(bodyParser.urlencoded({ extended: true }))
apiServer.use(bodyParser.json())
var apiRouter = express.Router()
var fs = require('fs')
apiRouter.route('/:apiName')//动态设置路由接口
.all(function (req, res) {
  fs.readFile('./db.json', 'utf8', function (err, data) {
    if (err) throw err
    var data = JSON.parse(data)
    if (data[req.params.apiName]) {//判断是否有这个接口
      res.json(data[req.params.apiName])//设置返回值
    }
    else {
      res.send('no such api name')
    }

  })
})


apiServer.use('/api', apiRouter);
apiServer.listen(port + 1, function (err) {
  if (err) {
    console.log(err)
    return
  }
  console.log('Listening at http://localhost:' + (port + 1) + '\n')
})
30
30
1
var apiServer = express()2
var bodyParser = require('body-parser')3
apiServer.use(bodyParser.urlencoded({ extended: true }))4
apiServer.use(bodyParser.json())5
var apiRouter = express.Router()6
var fs = require('fs')7
apiRouter.route('/:apiName')//动态设置路由接口8
.all(function (req, res) {9
fs.readFile('./db.json', 'utf8', function (err, data) {10
if (err) throw err11
var data = JSON.parse(data)12
if (data[req.params.apiName]) {//判断是否有这个接口13
res.json(data[req.params.apiName])//设置返回值14
}15
else {16
res.send('no such api name')17
}18
19
})20
})21
22
23
apiServer.use('/api', apiRouter);24
apiServer.listen(port + 1, function (err) {25
if (err) {26
console.log(err)27
return28
}29
console.log('Listening at http://localhost:' + (port + 1) + '\n')30
})1.2 vue概述
生命周期
1.2.1 挂载点、模板、实例的关系
挂载点:就是页面的标签,vue只会处理挂载点下面的内容
<div id="root"></div>1
1
1
<div id="root"></div>模板:挂载点内部的内容,都是模板内容,可以写在挂载点(标签中),也可以写在template中.
显示的时候,显示的是template中定义的内容,页面本身的内容会去掉
    <body>
        <div id="root">{{msg}}</div><!--显示msg中内容-->
    </body>
    <script>
    /*创建一个vue实例,让这个实例接管页面上的id为root的标签*/
        new Vue({
            el:"#root", /*绑定:id为root的*/
            template:'<h1>你好,{{msg}}</h1>',/*在root内部设置内容*/
            data:{
                msg:"hello world"
            }
        })
    </script>
13
13
1
<body>2
<div id="root">{{msg}}</div><!--显示msg中内容-->3
</body>4
<script>5
/*创建一个vue实例,让这个实例接管页面上的id为root的标签*/6
new Vue({7
el:"#root", /*绑定:id为root的*/8
template:'<h1>你好,{{msg}}</h1>',/*在root内部设置内容*/9
data:{10
msg:"hello world"11
}12
})13
</script>
实例: 在vue实例中的data中,可以设置任意的名字,只要用{{ }}就可以显示
1.2.1 vue实例显示方法(html,text)
1.用{{ }}显示
{{msg}}1
1
1
{{msg}}2.在标签上使用v-text显示:(若是HTML格式的内容,会直接将标签显示)
<h1 v-text='msg'></h1>1
1
1
<h1 v-text='msg'></h1>3.在标签上使用v-html显示:(会将标签转义,显示处理后的页面样式)
<h1 v-html='msg'></h1>1
1
1
<h1 v-html='msg'></h1>1.2.2 vue点击事件
点击标题,将标题的内容改为123
- 点击标题时,调用root的vue中的handleClick方法,将vue的data中的msg改为123;
绑定点击事件的方法:
1.使用 v-on:click='handleClick'
2.使用 @click='handleClick'
注意:写方法的时候,方法要写在vue的methods中
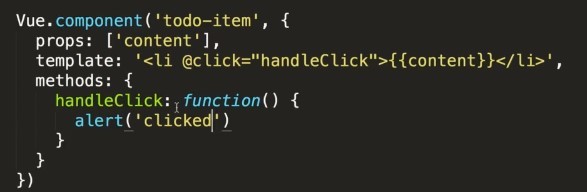
<body> <div id="root"> <h1 v-on:click='handleClick'>{{msg}}</h1> <!--设置点击方法--> </div> <!--显示msg中内容--> </body> <script> new Vue({ el : "#root", /*绑定:id为root的*/ data : { msg : "hello world" }, methods : { handleClick : function() { his.msg = "123" } } }) </script> |
1.2.3 Vue中的属性绑定
(1)属性绑定
使用:
(1)v-bind:
(2):
3
3
1
使用:2
(1)v-bind:3
(2):<!--使用v-bind对title中的内容绑定,绑定为data中title中的内容--> <div v-bind:title="title">hello world</div><!--v-bind可以省略--> ------------- new Vue({ el:"#root", /*绑定:id为root的*/ data:{ title:"this is hello world", } }) |  |
| <div v-bind:title="'123 '+title">hello world</div> | 则页面上提示内容为:123 this is hello world |
简化:
| <div :title="title">hello world</div> |
(2):绑定class
这种class绑定不会冲突,页面上回自动整合未一个class的两个样式
| <div :class="link" class="aaa"></div> 在data中: link:'class1' |
- 绑定多个class(class对象)
link:{ 'class1':true, 'class2':false }//true的class会在页面显示 |
- 数组形式class
| link:['class1','class2'] |
或者:
| <div :class="[classA,classB]" class="aaa"></div> ---------------------- classA:'cla1', classB:'cla2', |
- 混合使用:
| <div :class="[classA,{'classB':iferror}]" class="aaa"></div> ****************** classA:'cla1', classB:'cla2', iferror:true |
1.2.4 双向数据绑定 v-model
v-model双向绑定,当INPUT中的内容变的时候,下面div中的内容也会变
<input v-model="content"/> <!--v-model双向绑定,当INPUT中的内容变的时候,下面div中的内容也会变--> <div>{{content}}</div> |  |
(1)绑定表达式
- 支持三元表达式
{{content?content:"你好"}}
当content有值的时候显示值,没有的时候显示"你好"
2
2
1
{{content?content:"你好"}}2
当content有值的时候显示值,没有的时候显示"你好"(2)lazy修改器:延迟修改
只有当修改完之后,点击了enter或者失去焦点的时候,才会修改,input必须定义type为text
<input type="text" v-model.lazy="myVlaue" /><!--延迟-->
{{myVlaue}}
2
2
1
<input type="text" v-model.lazy="myVlaue" /><!--延迟-->2
{{myVlaue}}(3)number数字转为number格式
<input type="text" v-model.number="myVlaue" /><!--延迟-->
{{typeof myVlaue}}     输出的是类型
2
2
1
<input type="text" v-model.number="myVlaue" /><!--延迟-->2
{{typeof myVlaue}} 输出的是类型
注意:是数字格式的会转化为number,但是字符串的不会影响
(4)trim去掉前后空格
<input type="text" v-model.trim="myVlaue" /><!--延迟-->
{{myVlaue}}
2
2
1
<input type="text" v-model.trim="myVlaue" /><!--延迟-->2
{{myVlaue}}1.2.5 Vue中的计算属性(多个属性)
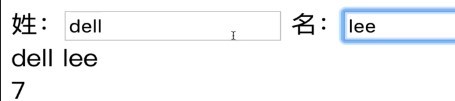
姓:<input v-model="firstName"/> 名:<input v-model="lastName"/> <div>{{firstName}}{{lastName}}</div> |  |
| 整合之后: 姓:<input v-model="firstName"/> 名:<input v-model="lastName"/> <div>{{fullName}}</div> -------------- new Vue({ el:"#root", /*绑定:id为root的*/ data:{ firstName:"", lastName:"" }, computed:{/*计算属性,表示一个属性通过另一个属性计算而来*/ fullName:function(){ return this.firstName+' '+this.lastName; } } }) |  |
(1)案例:获取输入中的数据,将数字清掉,只显示其他部分
- 方法1:使用计算属性
<input type="text" v-model.trim="myVlaue" /><!--延迟--> {{myVlaueNoNumber}} |
computed:{ myVlaueNoNumber:function (){ return this.myVlaue.replace(/\d/g,'') } |

- 方法2:添加事件:
定义方法: getValue:function(){ return this.myVlaue.replace(/\d/g,'') }调用: {{getValue()}} 显示:  |
- 区别:
- 计算属性只会根据其中调用的值改变(只有这个值改变的时候,他才会变);
- 方法只要调用就会进行数据处理
1.2.6 Vue中的侦听器,监听: watch
watch监听的属性的方法可以有两个值,一个新值,一个旧值
	watch:{
		myVlaue:function(val,oldVal){}
	}
3
3
1
watch:{2
myVlaue:function(val,oldVal){}3
}()
当姓或名做了改变的时候,count+1,使用watch监听器
姓:<input v-model="firstName"/> <!--v-model双向绑定,当INPUT中的内容变的时候,下面div中的内容也会变--> 名:<input v-model="lastName"/> <div>{{fullName}}</div> <div>{{count}}</div> ------------- new Vue({ el:"#root", /*绑定:id为root的*/ data:{ firstName:"", lastName:"", count:0 }, computed:{/*计算属性*/ fullName:function(){ return this.firstName+' '+this.lastName; } }, watch:{ /*监听firstName*/ firstName:function () { this.count++; }, lastName:function () { this.count++; } } }) |
 |
此处监听的是firstName和lastName,也可以监听fullName,只要fullName改变,就count++
1.2.7 v-if, v-show与v-for指令
(1)案例:点击按钮,标签显示、隐藏
- v-if
<div id="root"> <!--只有show是true的时候,标签才会存在--> <div v-if='show'>hello world</div> <button @click='handleClick'>toggle</button> </div> -------------- new Vue({ el:"#root", data:{ show:true, }, methods:{ handleClick:function(){ this.show=!this.show;//将show的值取反 } } }) |
- v-show
| 上述代码,直接将v-if换为v-show即可,使用时,结果相同 |
 |
- v-else
<a v-if="isshow">456</a> <a v-else>123</a> |
(2)v-for 案例:将list中的内容,循环展示出来
遍历的时候,item of list ,用in或of都可以
<ul> <!--遍历list中的内容,定义Wieitem,将他显示--> <li v-for="item of list":key="item">{{item}}</li> </ul> ------------- data:{ show:true, list:[1,2,3] }, |  |
注意:,使用了key,要求item中的内容不能相同,(list中的内容不能相同)
若是list中有相同的内容,使用index:
<!--item放的是内容,index放的是下标,用index作为key值,就不会重复了--> <li v-for="(item,index) of list":key="index">{{item}}</li> |
- 对象列表
list:[ { name:'apple', price:323 },{ name:'aaa', price:1123 } ] | 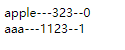 |
| <div v-for="(item,index) in list":key="index">{{item.name}}---{{item.price}}--{{index}}</div> | |
| 也可以直接在标签中引用: <div v-for="(item,index) in list":key="index" v-text="item.name+'---'+item.price+'---'+index"></div> | |
- 遍历对象
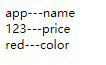
<div v-for="(value,key) in objlist" >{{value}}---{{key}}</div>
	objlist:{
			name:'app',
			price:123,
			color:'red'
		}
6
6
1
<div v-for="(value,key) in objlist" >{{value}}---{{key}}</div>2
objlist:{3
name:'app',4
price:123,5
color:'red'6
}
(3)v-if, v-show区别
v-if:当为false的时候,会之间将代码移除;
v-show:当为false的时候,会display为隐藏none;
当需要频繁的显示隐藏的时候,v-show更好,它不需要重新创建,性能更高;只需要一次的话,v-if更好;
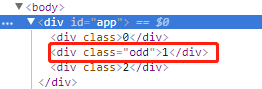
(4)v-for 操作class
<div v-for="(item,index) in list" :class="{odd:index%2}">{{index}}</div>1
1
1
<div v-for="(item,index) in list" :class="{odd:index%2}">{{index}}</div>当index%2有余数的时候odd显示
(5)案例:当点击提交的时候,input的内容显示在list中,在页面显示(同步更新)
<!--当点击提交的时候,input的内容显示在list中,在页面显示--> <div id="root"> <div> <input v-model="inputValue"/> <button @click="handleSubmit">提交</button> </div> <ul> <li v-for="(item,index) of list":key="index">{{item}}</li> </ul> </div> </body> <script> new Vue({ el:"#root", data:{ inputValue:'', list:[] }, methods:{ handleSubmit:function(){ //点击提交的时候,将input的值放到list中 this.list.push(this.inputValue) this.inputValue=''//将inputValue设置W为空,这样输入框就会自动为空了 } } }) </script> |
(5)数据列表修改数据
为列表中某一项修改数据
- 直接修改----不会自动更新
- 使用vue的setfnagfa
<button @click="changelist">changelist</button>
-----------------
methods:{
		changelist:function (){
			Vue.set(this.list,1,123)
		}
	}
7
7
1
<button @click="changelist">changelist</button>2
-----------------3
methods:{4
changelist:function (){5
Vue.set(this.list,1,123)6
}7
}1.2.8 组件
组件:指页面的某些部分
(1)全局组件
//将页面显示的ul部分作为一个组件, //Vue.component创建的是全局组件 Vue.component('todo-item',{ template:'<li>item</li>' //模板(其中的HTML代码) }) -----------调用: <ul> <!--使用组件--> <todo-item></todo-item> </ul> |
(2)局部组件
- 局部组件声明
var TodoIrem={
    template:'<li>item</li>'
}
3
3
1
var TodoIrem={2
template:'<li>item</li>' 3
}由于是局部的,需要在要使用的实例哪里声明
new Vue({
    el:"#root",
    components:{        //做组件声明
        'todo-item':TodoItem
//若是左右相同,可以只写一边的  TodoItem
    },
6
6
1
new Vue({2
el:"#root",3
components:{ //做组件声明4
'todo-item':TodoItem5
//若是左右相同,可以只写一边的 TodoItem 6
},- 组件使用:
- 方法1:
<todo-item></todo-item> <!--一样-->1
1
1
<todo-item></todo-item> <!--一样-->- 方法2:使用is引入
<p is='todo-irem'></p>1
1
1
<p is='todo-irem'></p>方法2优势,可以动态的使用组件,使用:is 的时候,可以引用变量
动态引入:
<p :is='getTodo'></p>
data中:   getTodo:'todo-irem'
3
3
1
动态引入:2
<p :is='getTodo'></p>3
data中: getTodo:'todo-irem'(3)子组件多级调用
var my2={ template:'<div>123456</div>', } //创建一个子组件 var my1={ template:'<div><my2></my2></div>',//多级调用,要在这里 components:{ //my1 'my2':my2 } } new Vue({//根组件 el: '#app', data: { content: 'Hello' }, components:{ 'my':my1 } }) |
(4)子组件data赋值
子组件要避免引用赋值,
//创建一个子组件 var my1={ template:'<div>{{f}}<my2></my2></div>', components:{ //my1 'my2':my2 }, data :function(){//也可以使用 data (){ return{ f:2 } } }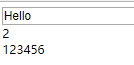 |
(3)组件与实例的关系
每一个组件,就是一个实例,每一个组件上都可以定制方法等内容
(4)父组件向子组件传递数据组件通信
- 父组件向子组件传递数据,属性:
- 父组件调用的时候,设置:key=value,(key是父组件的数据的key)
- 子组件接收参数:使用props接收参数,就可以正常调用了
- 子组件方法中可以用this.xxx调用数据
- 注意,key值设置的时候大小写不敏感,要使用-,props中也是,当时子组件调用的时候,使用的是驼峰的样式.
- 使用全局组件完成input提交显示,
<!--使用组件--> <todo-item v-for="(item,index) of list" :key="index" :content="item" > <!--设置key值,1.传参--> </todo-item> |
| 设置全局组件,接收参数,显示内容 Vue.component('todo-item',{ props:['content'],//2.接收参数content template:'<li>{{content}}</li>' //3.设置显示模板(其中的HTML代码)也可以在页面中调用 }) |
(5)props接收参数
接收参数可以是list格式,也可以是对象格式:
| props:['aaa','bbb'] |
对象格式:
props:{ 'aaa':[Number,String,Object]//指定参数运行的格式 } |
(6)子组件向父组件传递事件
1.子组件的模板中添加时间(vue事件);
2.在事件中,通过 this.$emit('delete-a',this.index) 创建自定义的事件,并传递参数,自定义的事件不支持驼峰形式.
3.在父组件中调用子组件的时候,在标签中用@...调用这个事件,@...='父组件中的方法名',
4.在父组件中编写方法,
5.调用子组件的事件的时候,调用的就会是父组件的方法了.
- 案例:下方的删除功能
(7)插槽:子组件显示父组件定义的标签
在父组件中调用子组件,再向子组件的标签中添加内容的时候,不会显示,只会显示子组件本身的内容
<todo-irem><!--调用子组件,子组件中有内容<li>i123131132tem</li>-->
	<p>123</p>
</todo-irem>
3
3
1
<todo-irem><!--调用子组件,子组件中有内容<li>i123131132tem</li>-->2
<p>123</p>3
</todo-irem>只会显示: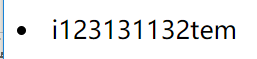 子组件本身定义的内容
想要这部分内容显示,可以在子组件的模板中使用标签
| template:'<div><li>i123131132tem</li><slot></slot></div>' 在子组件中加上这个标签,就会把父组件调用的时候添加的内容显示 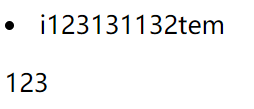 注意:子组件必须在一个大标签之下, |
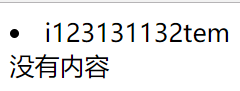
- 插槽设置默认内容
当插槽没有设置的时候,默认显示内容
| template:'<div><li>i123131132tem</li><slot>没有内容</slot></div>' , |
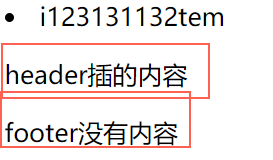
- 插槽设置名字
<todo-irem><!--调用子组件,子组件中有内容<li>i123131132tem</li>--> <p slot='header'>header插的内容 </p> <!--<p slot='footer'> footer插的内容</p>--> </todo-irem> |
| template:'<div><li>i123131132tem</li><slot name="header">header没有内容</slot><slot name="footer">footer没有内容</slot></div>', |
(8)动态组件is
在父组件中声明子组件之后,在页面中:
| <p :is='getTodo'></p> |
这样就可以动态设置了,getTodo是data中的属性,通过改变它的值改变绑定的子组件
| getTodo:'todo-irem' |
(9)组件缓存:<keep-alive>
<keep-alive> <p :is='getTodo'></p> </keep-alive> |
当组件从a切换到b,的时候,a就会缓存起来,从b切换回a的时候,直接读缓存
1.2.9案例: 删除功能(子组件向父组件传递事件)
- 已有功能:
点击提交,会将input中的内容保存到list,子组件会遍历list,设置为item,以content传递到props,在template中显示.
- 需要实现:
要想删除子组件,在每一条上加上click方法,删除的时候,要删除的是父组件list中的内容.调用的是子组件的方法,删除父组件的数据,需要两个组件之间进行通信(此时需要子组件中,这一条的下标,来和父组件中对应).
- 传递顺序:
1.点击子组件(显示的内容中)的方法handleClick(click方法),调用方法, this.$emit创建在父组件中显示的名(@...自定义事件)和参数,在父组件中调用@...(<xxx调用子组件)之后的方法注意,自定义事件不支持驼峰形式
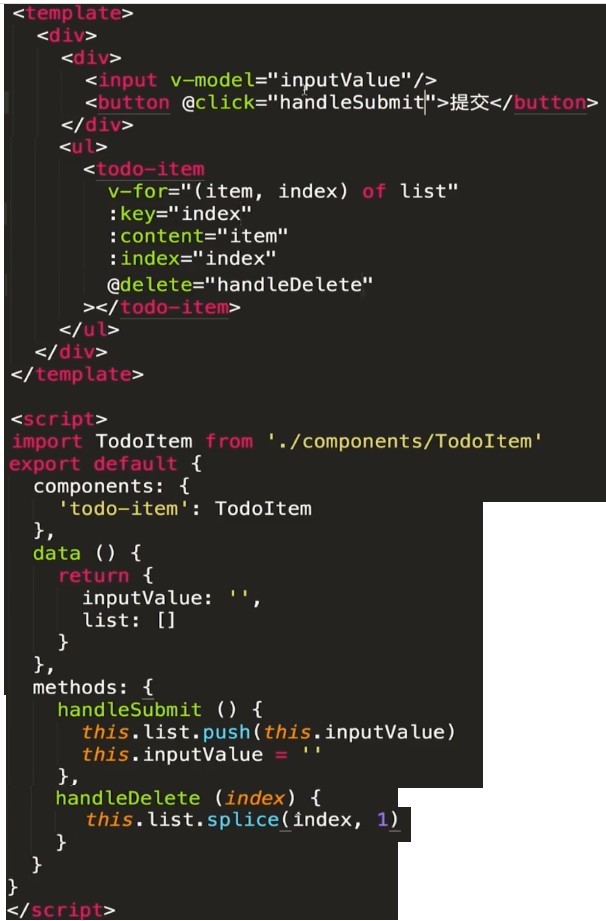
<body> <!--当点击提交的时候,input的内容显示在list中,在页面显示--> <div id="root"> <div> <input v-model="inputValue"/> <button @click="handleSubmit">提交</button> </div> <ul> <!--在父组件中调用子组件----使用组件--> <todo-item v-for="(item,index) of list" :key="index" :content="item" :index="index" @delete-a="handleDelete" > <!--设置key值,1.传参,下标,--> <!--监听子组件的delete事件,当子组件触发了delete事件的时候,调用方法handleDelete(父组件的方法)--> </todo-item> </ul> </div> </body> <script> //将页面显示的ul部分作为一个组件, //Vue.component创建的是全局组件 Vue.component('todo-item',{ props:['content',"index"],//2.接收参数content template:'<li @click="handleClick">{{content}}</li>', //3.设置显示模板(其中的HTML代码) methods:{ handleClick:function(){ //调用$emit,调用自定义的事件,传入接收的下标值 this.$emit('delete-a',this.index) } } }) //局部组件 //var TodoItem={ // template:'<li>item</li>' //} new Vue({ el:"#root", // components:{//做组件声明 // 'todo-item':TodoItem // }, data:{ inputValue:'', list:[] }, methods:{ handleSubmit:function(){ //点击提交的时候,将input的值放到list中 this.list.push(this.inputValue) this.inputValue=''//将inputValue设置W为空,这样输入框就会自动为空了 }, handleDelete:function (index) { //删除list中对应下标的内容,即可删除页面中的数据 //从下标位置,删除一项 this.list.splice(index,1) } } }) </script> </html> |
1.3vue事件和表单
1.3.1全局api
实例对象创建完之后,还可以进行操作
实例对象有一个对象名root
var root=new Vue({
	el: '#app',
	data: {
		content: 'Hello'
	}
})
7
7
1
实例对象有一个对象名root2
var root=new Vue({3
el: '#app',4
data: {5
content: 'Hello'6
}7
})| root.$data | 可以获取data数据 |
| root.$on('emit',function () {}) | 可以绑定方法 |
1.3.1事件绑定
除了click之外,还常用的方法是keydown方法,一般监听的键盘是enter
| 当按键为回车的时候,进行的操作: <input @keydown.enter="tokeydown" /> 也可以指定其他的按键,比如: @keydown.13 |
1.3.2多选框/单选框,数据绑定
将多选框中的数据绑定到数组中
(1)单选框数据绑定
<input v-model="myBox" type="radio" value="111" />
<input v-model="myBox" type="radio" value="222" />
<input v-model="myBox" type="radio" value="333" />
{{myBox}}
--------------
myBox:[]
6
6
1
<input v-model="myBox" type="radio" value="111" />2
<input v-model="myBox" type="radio" value="222" />3
<input v-model="myBox" type="radio" value="333" />4
{{myBox}}5
--------------6
myBox:[]
(2)多选框数据绑定
<input v-model="myBox" type="checkbox" value="111" />
<input v-model="myBox" type="checkbox" value="222" />
<input v-model="myBox" type="checkbox" value="333" />
3
3
1
<input v-model="myBox" type="checkbox" value="111" />2
<input v-model="myBox" type="checkbox" value="222" />3
<input v-model="myBox" type="checkbox" value="333" />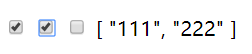
(3)select下拉框绑定
<select v-model="sel">
	<option value="1">11</option>
	<option value="2">22</option>
	<option value="3">33</option>
</select>
{{sel}}
------------
sel:null
8
8
1
<select v-model="sel">2
<option value="1">11</option>3
<option value="2">22</option>4
<option value="3">33</option>5
</select>6
{{sel}}7
------------8
sel:null
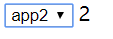
(4)v-for 遍历下拉绑定
<select v-model="sel">
	<option v-for="item in seloption" :value="item.value">{{item.text}}</option>
</select>
{{sel}}
------------
sel:null,
seloption:[
    {text:'app1',value:1},
    {text:'app2',value:2},
    {text:'app3',value:3},
]
11
11
1
<select v-model="sel">2
<option v-for="item in seloption" :value="item.value">{{item.text}}</option>3
</select>4
{{sel}}5
------------6
sel:null,7
seloption:[8
{text:'app1',value:1},9
{text:'app2',value:2},10
{text:'app3',value:3},11
]
一般情况,这种下拉会创建一个组件,直接调用组件:
<vSelect @onSelect='' :list="seloption"></vSelect>1
1
1
<vSelect @onSelect='' :list="seloption"></vSelect>1.4 vue高级功能
1.4.1过渡(动画效果)
要与v-show,v-if 动态组件结合
1.给需要过渡的元素外层加transition ,并用name命名
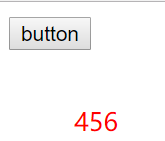
| show:true, --------------------- <button @click="show=!show">button</button> <transition name='fade'> <p v-show="show">456</p> </transition> |
(1)css过渡
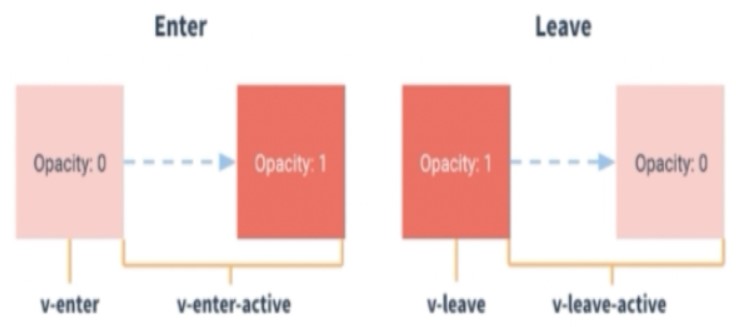
- 淡入淡出
| show:true, --------------------- <button @click="show=!show">button</button> <transition name='fade'> <p v-show="show">456</p> </transition> -------------------- 在style中定义样式 <style> .fade-enter-active,.fade-leave-active{ transition:/*opacity*/ all .5s ;/*属性,时长,还可以加上ease-out,代表变化的曲线*/ /*指定当前样式有过渡效果,opacity代表透明度*/ } .fade-enter,.fade-leave-active{ opacity:0; /*进入和出去的时候透明度是0*/ } </style> |
- 上下左右滑入滑出
/*激活阶段,动画控制,*/ .my-trans-enter-active,.my-trans-leave-active{ transition: all .5s ease-out;/*属性,时长,还可以加上,代表变化的曲线*/ } /*控制动画具体怎么变*/ /*进入动画控制*/ .my-trans-enter{ /*进入从上方滑入*/ transform: translateY(-500px); opacity: 0; } .my-trans-leave-active{ /*出去,向下滑出*/ transform: translateY(500px); opacity:0; /*进入和出去的时候透明度是0*/ /*指定当前样式有过渡效果,opacity代表透明度*/ } |
组件设置过渡
<transition name='my-trans'>
	<div :is='getTodo'></div>
</transition>
<button @click="getTodoFun">button</button>
---------------
getTodo:'todo-irem'
------------
getTodoFun:function(){
    if(this.getTodo==='todo-irem'){
        this.getTodo='todo-irem2'
    }else{
        this.getTodo='todo-irem'
    }
}
14
14
1
<transition name='my-trans'>2
<div :is='getTodo'></div>3
</transition>4
<button @click="getTodoFun">button</button>5
---------------6
getTodo:'todo-irem'7
------------8
getTodoFun:function(){9
if(this.getTodo==='todo-irem'){10
this.getTodo='todo-irem2'11
}else{12
this.getTodo='todo-irem'13
}14
}多元素过渡
多个元素切换,是将新的在下方显示,在将旧的隐藏,有同时出现的机会,默认是in-out
使用out-in,会先将就的去掉,再显示新的 <transition name='my-trans' mode='out-in'> <p v-show="show">456</p> </transition> |
注意,多个元素的时候,过渡动画会消失,需要定义key区分每一个元素
<button @click="show=!show">button</button> <transition name='fade' mode='out-in'> <p v-if="show" key='1'>456</p> <p v-else key='2'>11178911</p> </transition> |
(2)JS过渡
- js控制动画,是通过v-on事件控制的.
- 使用js过渡的时候,要在transition中绑定 v-bind:css='false' 防止css样式的影响
<!--进入前,进入过程中,离开--> <transition @before-enter='beforeEnter' @enter='enter' @leave='leave' :css='false'> <p class='js-class' v-show="show" >456</p> </transition> |
.js-class{ position: absolute; top: 50px; left: 50px; color: red; } |
使用js操作动画: beforeEnter:function(el){ $(el).css({ left:'-500px', opacity:0 }) }, enter:function(el,done){ $(el).animate({ left:'50px',/*进入的时候,跑到left到50位置*/ opacity:1 },{ duration:1500,/*执行的ms数*/ complete:done /*完成的之后*/ }); }, leave:function(el,done){ $(el).animate({ left:'500px',/*离开的时候,向右移动500px后消失*/ opacity:0 },{ duration:1500,/*离开时间*/ complete:done }) } |
 动画会在左右动作,没有定义的top不会有影响 动画会在左右动作,没有定义的top不会有影响 |
1.4.2 自定义指令
使用的v-if等是内置的指令,
(1)局部自定义指令
在一个组件中定义的,只能在这一个组件中使用
定义自定义指令,使用
directives:{ //自定义指令color,binding是传入的值 color:function(el,binding){ el.style.color=binding.value } } |
使用自定义指令:
| <p v-color="'red'">hello123</p> 传入的值使用"' '"包裹着 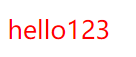 |
(2)全局自定义指令
只需要把自定义的指令放到根节点的组件中定义即可
(3)更细致定义
一个自定义对象可以定义几个钩子函数,
没有声明的时候,默认是bind和update
| bind: | 只调用一次,指令第一次绑定到元素时调用。在这里可以进行一次性的初始化设置。 |
| inserted | 被绑定元素插入父节点时调用 (仅保证父节点存在,但不一定已被插入文档中)。 |
| update | 所在组件的 VNode 更新时调用,但是可能发生在其子 VNode 更新之前。指令的值可能发生了改变,也可能没有。但是你可以通过比较更新前后的值来忽略不必要的模板更新 (详细的钩子函数参数见下)。 |
| componentUpdated | 指令所在组件的 VNode 及其子 VNode 全部更新后调用 |
| unbind | 只调用一次,指令与元素解绑时调用。 |
//自定义指令color color:{ bind:function(el,binding){ el.style.color=binding.value }, inserted:function(el){ } } |
(4)案例:input获取光标
focus:{ inserted:function(el,binding){ el.focus() } } |
| <input type="text" v-focus /> |
1.4.3插件
在vue项目的package.json文件中,就可以看到项目的依赖
- 安装插件
- 使用node.js,进入项目包,输入: cnpm install vue-router --save
- 再次打开package.json可以看到这插件
- 引用插件
- 在要调用的vue文件中进行引用,若是所有的页面都会用到的,可以在main.js中引用
- import VueRouter from 'VueRouter '
- 也可以 import VueRouter from ' vue-router'
- 也可以 var VueRouter =require( ' vue-router' )
- 注册使用
- Vue.use(VueRouter )
- 正式引入
- 方法1:
- 定义: let router=new VueRouter ()
- 在组建中引入router,
- 方法2: 若是已经引入了vueresource,可以直接在组建中定义
- this.$http.get('')
2.vue-cli
2.1vue-cli概述
Vue-cli-vue 官方提供的脚手架工具
- 作用:初始化一个Vue项目
- 优势:
- 成熟的vue项目架构设计
- 本地测试服务器
- 集成打包上线方案
- 要求:
- Node.js(>=4.x)
- Git
- 一个能使用node的命令行终端
启动项目:
npm run start1
1
1
npm run start一个template中只能有一个根元素,
定义参数data要用function

style可以加上scoped使样式局部
2.1.1es6语法
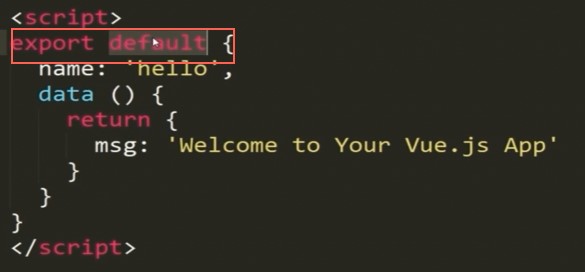
- 导出:
- 将Hello.vue导出
- 方法1:
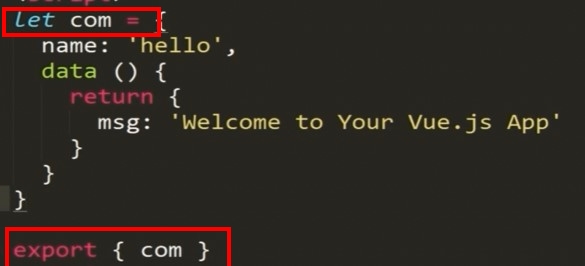
- 方法2:
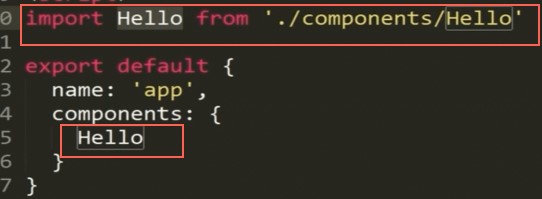
- 导入:
- 声明变量
- 在当前作用域下:let
- 本文件都可以取到var
- 常量:const router=new VueRouter
- 引入数据
在组建中使用data,要使用return的方式
<script> export default { name: 'HelloWorld', data () { return { msg: 'Welcome to Your Vue.js App' } } } </script> |
2.1.2 vue-rouer 路由
(1)安装/配置:
进入项目目录:(在搭建项目的时候安装了)
cnpm install vue-router --save
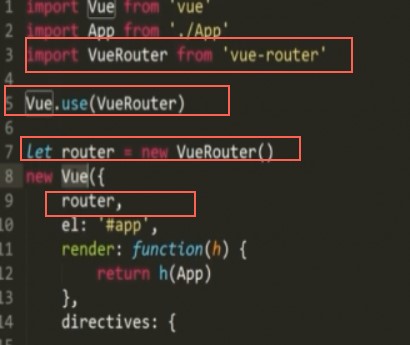
项目中载入,一般在main.js中载入:
import VueRouter from 'vue-router'
Vue.use(VueRouter)
let router = new VueRouter({}) //其中配置路径和地址
在Vue中引入:
new Vue({
el: '#app',
router,
template: '<APP/>',
components: { APP }
})14
14
1
进入项目目录:(在搭建项目的时候安装了)2
cnpm install vue-router --save3
4
项目中载入,一般在main.js中载入:5
import VueRouter from 'vue-router'6
Vue.use(VueRouter)7
let router = new VueRouter({}) //其中配置路径和地址8
在Vue中引入:9
new Vue({10
el: '#app',11
router,12
template: '<APP/>',13
components: { APP }14
})(2)基础案例:路径访问(映射表)
路径:http://localhost:8080/apple/ ,访问一个页面
- 定义一个vue页面Apple:
<template> <div class="apple">213124</div> </template> <script> export default { name: 'Apple' } </script> <style scoped> </style> |
- 在new VueRouter({})所在页面引入:
| import Apple from '@/components/Apple' |
- 在new VueRouter({}) 中引入:
routes: [ mode:'history', { path:'/apple', component:Apple }, { path:'/apple2', component:Apple2 } |
- 在APP.vue中引入(会在这里显示)
<router-view></router-view> |
(3)页面内跳转
要在 mode:'history', 之下
<router-link :to="{path:'apple'}">to apple</router-link> <router-link :to="{path:'apple2'}">to apple2</router-link> |
(4)路由参数

路由参数在映射表中进行
设置参数:
    path:'/apple/:color',
页面:
    http://localhost:8080/apple/red
获取参数:
    在Apple.vue获取:
        <div >{{$route.params}}</div>    { "color": "red" }
		<div >{{$route.params.color}}</div>    red
    在Apple.vue方法中获取:this.$route.params
9
9
1
设置参数:2
path:'/apple/:color',3
页面:4
http://localhost:8080/apple/red5
获取参数:6
在Apple.vue获取:7
<div >{{$route.params}}</div> { "color": "red" }8
<div >{{$route.params.color}}</div> red9
在Apple.vue方法中获取:this.$route.params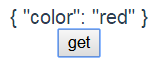 点击按钮,显示参数:{ "color": "red" }
这种情况下,路径上若是没有参数,将会不能进入这个页面
多个参数:
  path:'/apple/:color/deee/:aa',
其中:color和:aa是用户可以自定义的参数,可以是任何内容;
deee是路径,不能修改
可以的访问路径为:http://localhost:8080/apple/red/deee/asas
只有带:  的参数才会在$route.params中
5
5
1
path:'/apple/:color/deee/:aa',2
其中:color和:aa是用户可以自定义的参数,可以是任何内容;3
deee是路径,不能修改4
可以的访问路径为:http://localhost:8080/apple/red/deee/asas5
只有带: 的参数才会在$route.params中(5)路由嵌套(子路由)
{ path:'/apple', component:Apple, childdren:[ { path:'/childapple/', component:ChildApple } ] }, |
| 在这个页面import引入 |
内容要在Apple.vue中添加
| <router-view></router-view> |
页面跳转:

(6)router-link,页面内跳转,声明试导航
普通页面跳转
<router-link :to="{path:'apple'}">to apple</router-link>
基于当前路径跳转
    <router-link :to="'apple'">to apple</router-link>
根目录:
    <router-link :to="'/apple'">to apple</router-link>
动态设置:
    <router-link :to="apple">to apple</router-link>
    在data中:
      data(){
      	reurn{
      		apple:'apple'
      	}
      }
传递参数:
    <router-link :to="{path:'apple',param:{color:'red'}}">to apple</router-link>
    可以访问 apple/red(参数)
改变router-link显示样式:
    <router-link :to="'apple'" tag="li">to apple</router-link>
18
18
1
<router-link :to="{path:'apple'}">to apple</router-link>2
基于当前路径跳转3
<router-link :to="'apple'">to apple</router-link>4
根目录:5
<router-link :to="'/apple'">to apple</router-link>6
动态设置:7
<router-link :to="apple">to apple</router-link>8
在data中:9
data(){10
reurn{11
apple:'apple'12
}13
}14
传递参数:15
<router-link :to="{path:'apple',param:{color:'red'}}">to apple</router-link>16
可以访问 apple/red(参数)17
改变router-link显示样式:18
<router-link :to="'apple'" tag="li">to apple</router-link>(7)js中定义导航,跳转
router.push('apple') //或 {path:'apple'}
或
this.$router.push('/login');
3
3
1
router.push('apple') //或 {path:'apple'}2
或3
this.$router.push('/login');(8)路由命名
    {
    	path:'/apple',
    	component:Apple,
    	name:'applePage'

    }
访问:
    <router-link :to="{name:'applePage'}">to apple</router-link>
8
8
1
{2
path:'/apple',3
component:Apple,4
name:'applePage'5
6
}7
访问:8
<router-link :to="{name:'applePage'}">to apple</router-link>- 命名路由视图
在router-view 上添加name
<router-view name='viewA '></router-view>1
1
1
<router-view name='viewA '></router-view>路由表中可以根据name定义页面
    {
    	path:'/apple',
    	component:{
    		viewA:Apple,
    		viewB:OtherApple,
    	},
    	name:'applePage'
    }
8
8
1
{2
path:'/apple',3
component:{4
viewA:Apple,5
viewB:OtherApple,6
},7
name:'applePage'8
}(9)路由重定向
比如默认页面是具体的某一个页面,比如访问根目录,会自动跳转到Apple.vue目录
{ path:"/", redirect:'/apple' }, |
(10)页面跳转--过渡
    <transition name='fff'>
    	<keep-alive><!--缓存-->
    		<router-view></router-view>
    	</keep-alive>
    </transition>
5
5
1
<transition name='fff'>2
<keep-alive><!--缓存-->3
<router-view></router-view>4
</keep-alive>5
</transition>2.2vuex 状态管理
2.2.1引入
在全局中引用:(在main.js中的vue中引用)
Vue.use(Vuex) /*使用*/
let store=new Vuex.Store({ /*调用*/
state:{/*数据中心的数据*/
totalPrice:0
},
mutations: {/*动作*/
increment(state, price) {/*增加*/
state.totalPrice += price
},
decrement(state, price) {/*减*/
state.totalPrice -= price
}
}
})
new Vue({ |
其他文件调用:
在上面引用之后,每个组件都可以使用:
this.$store.state.totalPrice |
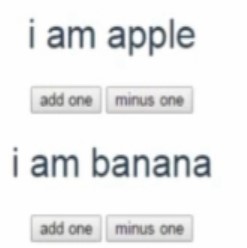
(1)案例:全局加减
创建Apple和Banana两个vue文件,在APP.vue中引入
方法1:
<template> |
每一个vue组件都有一个+1和-1的按钮
<template> |
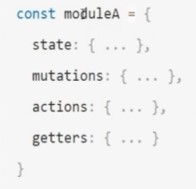
方法2:
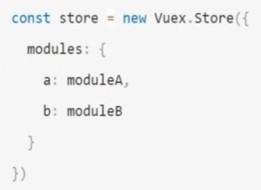
let store=new Vuex.Store({ /*调用*/ |
addOne(){ |
- 在Store中还可以设置getters获取数据
getters:{/*获取数据*/ |
可以定义多个状态集,最后汇总
2.3 vue-resource:整合ajax
在main.js中
import VueResource from 'vue-resource'
Vue.use(VueResource)
每一个页面都可以使用this.$http
4
4
1
在main.js中2
import VueResource from 'vue-resource'3
Vue.use(VueResource)4
每一个页面都可以使用this.$http 2.3.1 ajax案例
- get:
    /*ajax请求 */
    this.$http.get('api/getNewsList')
    .then((res) => {/*成功回调*/
      this.newsList = res.data //赋值
    }, (err) => {/*失败回调*/
      console.log(err)
    })
7
7
1
/*ajax请求 */2
this.$http.get('api/getNewsList')3
.then((res) => {/*成功回调*/4
this.newsList = res.data //赋值5
}, (err) => {/*失败回调*/6
console.log(err)7
})- post
this.$http.post(this.GLOBAL.urlHead+'manager/login',{managerUserName:this.ruleForm.username,managerPass:this.ruleForm.password},{emulateJSON:true})
                .then((res) => {/*成功回调*/
                  if (res.data.state==1) {
                    alert(res.data.msg)
 localStorage.setItem('managerName',res.data.data.managerName);//ms_username
 localStorage.setItem('managerId',res.data.data.managerId);//ms_username
                    this.$router.push('/index');
                  }else {
                    alert(res.data.msg)
                  }
                }, (err) => {/*失败回调*/
                  console.log(err)
                  alert("登录失败!")
                });
14
14
1
this.$http.post(this.GLOBAL.urlHead+'manager/login',{managerUserName:this.ruleForm.username,managerPass:this.ruleForm.password},{emulateJSON:true})2
.then((res) => {/*成功回调*/3
if (res.data.state==1) {4
alert(res.data.msg)5
localStorage.setItem('managerName',res.data.data.managerName);//ms_username6
localStorage.setItem('managerId',res.data.data.managerId);//ms_username7
this.$router.push('/index');8
}else {9
alert(res.data.msg)10
}11
}, (err) => {/*失败回调*/12
console.log(err)13
alert("登录失败!")14
});2.3.2 页面加载
  /*在组建创建完之后加载:页面加载*/
  created: function () {
    /*ajax请求 */
    this.$http.get('api/getNewsList')
    //post参数:.post('api/getNewsList',{userId:123,aa:44})
    .then((res) => {/*成功回调*/
      this.newsList = res.data //赋值
    }, (err) => {/*失败回调*/
      console.log(err)
    })
  },
11
11
1
/*在组建创建完之后加载:页面加载*/2
created: function () {3
/*ajax请求 */4
this.$http.get('api/getNewsList')5
//post参数:.post('api/getNewsList',{userId:123,aa:44})6
.then((res) => {/*成功回调*/7
this.newsList = res.data //赋值8
}, (err) => {/*失败回调*/9
console.log(err)10
})11
},2.3.3页面初次加载判断
使用一个没有定义的参数进行判断,默认为false,只需要判断完设置为true即可
      if (!this.userFlag) {
        errorText = ''
        this.userFlag = true
      }
4
4
1
if (!this.userFlag) {2
errorText = ''3
this.userFlag = true4
}2.4 vue的UI组件
- GitHub地址:https://github.com/vuejs/awesome-vue
2.3.3 轮播图组件
2.3.4显示项目图片
使用js设置的图片
数据:src: require('../assets/slideShow/pic1.jpg')
3
3
1
使用js设置的图片2
数据:src: require('../assets/slideShow/pic1.jpg')3
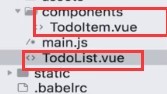
3.vue具体组件
使用vue搭建项目的时候,一般的目结构为:
3.1 侧边栏
<template>
  <div class="left-nav">
    <ul>
        <li>
            <i class="icon iconfont icon-wodezichan"></i>
            <div>收银</div>
        </li>

        <li>
            <i class="icon iconfont icon-dianpu"></i>
            <div>店铺</div>
        </li>

        <li>
            <i class="icon iconfont icon-hanbao"></i>
            <div>商品</div>
        </li>

         <li>
            <i class="icon iconfont icon-huiyuanqia"></i>
            <div>会员</div>
        </li>

         <li>
            <i class="icon iconfont icon-shijian"></i>
            <div>抢购</div>
        </li>

        <li>
            <i class="icon iconfont icon-tongji"></i>
            <div>统计</div>
        </li>

·
    </ul>
  </div>
</template>

<script>
export default {
  name: 'Main',
  data () {
    return {

    }
  }
}
</script>

<!-- Add "scoped" attribute to limit CSS to this component only -->
<style>
    .left-nav{
       color:#fff;
       font-size:10px;
       height:100%;
       background-color: #1D8ce0;
       float:left;
       width:5%;
    }
    .iconfont{/*设置图标大小*/
       font-size:24px;
    }
    .left-nav ul{
        padding:0px;
        margin: 0px;
    }
    .left-nav li{
        list-style: none;
        text-align: center;
        border-bottom:1px solid #20a0ff;
        padding:10px;
    }
</style>
73
73
1
<template>2
<div class="left-nav">3
<ul>4
<li>5
<i class="icon iconfont icon-wodezichan"></i>6
<div>收银</div>7
</li>8
9
<li>10
<i class="icon iconfont icon-dianpu"></i>11
<div>店铺</div>12
</li>13
14
<li>15
<i class="icon iconfont icon-hanbao"></i>16
<div>商品</div>17
</li>18
19
<li>20
<i class="icon iconfont icon-huiyuanqia"></i>21
<div>会员</div>22
</li>23
24
<li>25
<i class="icon iconfont icon-shijian"></i>26
<div>抢购</div>27
</li>28
29
<li>30
<i class="icon iconfont icon-tongji"></i>31
<div>统计</div>32
</li>33
34
·35
</ul>36
</div>37
</template>38
39
<script>40
export default {41
name: 'Main',42
data () {43
return {44
45
}46
}47
}48
</script>49
50
<!-- Add "scoped" attribute to limit CSS to this component only -->51
<style>52
.left-nav{53
color:#fff;54
font-size:10px;55
height:100%;56
background-color: #1D8ce0;57
float:left;58
width:5%;59
}60
.iconfont{/*设置图标大小*/61
font-size:24px;62
}63
.left-nav ul{64
padding:0px;65
margin: 0px;66
}67
.left-nav li{68
list-style: none;69
text-align: center;70
border-bottom:1px solid #20a0ff;71
padding:10px;72
}73
</style>- APP.vue中引用:
 <leftNav></leftNav>
import leftNav from '@/components/common/leftNav'
components:{
    leftNav
  }
同时要调整APP的样式(比如#APP的margin-top)
6
6
1
<leftNav></leftNav>2
import leftNav from '@/components/common/leftNav'3
components:{4
leftNav5
}6
同时要调整APP的样式(比如#APP的margin-top)复制,赋值不绑定
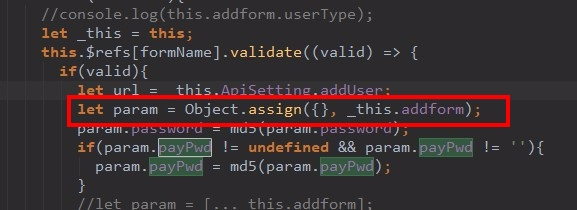
vue表单校验
vue.js校验
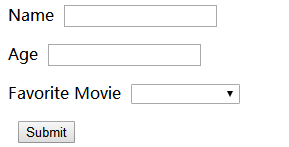
给定一个表单,包含三个字段,其中两个是必填项
<form
  id="app"
  @submit="checkForm"
  action="https://vuejs.org/"
  method="post"
>
解释:
    id 确认vue的
    submit 处理函数
    action 跳转路径
10
10
1
<form2
id="app"3
@submit="checkForm"4
action="https://vuejs.org/"5
method="post"6
>7
解释:8
id 确认vue的9
submit 处理函数10
action 跳转路径<form
id="app"
@submit="checkForm"
action="https://vuejs.org/"
method="post"
>
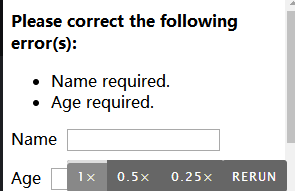
<p v-if="errors.length">
<b>Please correct the following error(s):</b>
<ul>
<li v-for="error in errors">{{ error }}</li>
</ul>
</p>
<p>
<label for="name">Name</label>
<input
id="name"
v-model="name"
type="text"
name="name"
>
</p>
<p>
<label for="age">Age</label>
<input
id="age"
v-model="age"
type="number"
name="age"
min="0">
</p>
<p>
<label for="movie">Favorite Movie</label>
<select
id="movie"
v-model="movie"
name="movie"
>
<option>Star Wars</option>
<option>Vanilla Sky</option>
<option>Atomic Blonde</option>
</select>
</p>
<p>
<input type="submit" value="Submit">
</p>
</form>52
52
1
<form2
id="app"3
@submit="checkForm"4
action="https://vuejs.org/"5
method="post"6
>7
8
<p v-if="errors.length">9
<b>Please correct the following error(s):</b>10
<ul>11
<li v-for="error in errors">{{ error }}</li>12
</ul>13
</p>14
15
<p>16
<label for="name">Name</label>17
<input18
id="name"19
v-model="name"20
type="text"21
name="name"22
>23
</p>24
25
<p>26
<label for="age">Age</label>27
<input28
id="age"29
v-model="age"30
type="number"31
name="age"32
min="0">33
</p>34
35
<p>36
<label for="movie">Favorite Movie</label>37
<select38
id="movie"39
v-model="movie"40
name="movie"41
>42
<option>Star Wars</option>43
<option>Vanilla Sky</option>44
<option>Atomic Blonde</option>45
</select>46
</p>47
48
<p>49
<input type="submit" value="Submit">50
</p>51
52
</form>const app = new Vue({
el: '#app',
data: {
errors: [],
name: null,
age: null,
movie: null
},
methods:{
checkForm: function (e) {
if (this.name && this.age) {
return true;
}
this.errors = [];
if (!this.name) {
this.errors.push('Name required.');
}
if (!this.age) {
this.errors.push('Age required.');
}
e.preventDefault();
}
}
})27
27
1
const app = new Vue({2
el: '#app',3
data: {4
errors: [],5
name: null,6
age: null,7
movie: null8
},9
methods:{10
checkForm: function (e) {11
if (this.name && this.age) {12
return true;13
}14
15
this.errors = [];16
17
if (!this.name) {18
this.errors.push('Name required.');19
}20
if (!this.age) {21
this.errors.push('Age required.');22
}23
24
e.preventDefault();25
}26
}27
})
vue.js自定义校验
<form
  id="app"
  @submit="checkForm"
  action="https://vuejs.org/"
  method="post"
  novalidate="true"
>

 <p>
    <label for="email">Email</label>
    <input
      id="email"
      v-model="email"
      type="email"
      name="email"
    >
  </p>
19
19
1
<form2
id="app"3
@submit="checkForm"4
action="https://vuejs.org/"5
method="post"6
novalidate="true"7
>8
9
<p>10
<label for="email">Email</label>11
<input12
id="email"13
v-model="email"14
type="email"15
name="email"16
>17
</p> 18
19
注意顶端的 novalidate="true"
浏览器会尝试在 type="email" 的字端校验邮件地址
const app = new Vue({
  el: '#app',
  data: {
    errors: [],
    name: null,
    email: null,
    movie: null
  },
  methods: {
    checkForm: function (e) {
      this.errors = [];

      if (!this.name) {
        this.errors.push("Name required.");
      }
      if (!this.email) {
        this.errors.push('Email required.');
      } else if (!this.validEmail(this.email)) {
        this.errors.push('Valid email required.');
      }

      if (!this.errors.length) {
        return true;
      }

      e.preventDefault();
    },
    validEmail: function (email) {//自定义校验规则
      var re = /^(([^<>()\[\]\\.,;:\s@"]+(\.[^<>()\[\]\\.,;:\s@"]+)*)|(".+"))@((\[[0-9]{1,3}\.[0-9]{1,3}\.[0-9]{1,3}\.[0-9]{1,3}\])|(([a-zA-Z\-0-9]+\.)+[a-zA-Z]{2,}))$/;
      return re.test(email);
    }
  }
})
x
33
1
const app = new Vue({2
el: '#app',3
data: {4
errors: [],5
name: null,6
email: null,7
movie: null8
},9
methods: {10
checkForm: function (e) {11
this.errors = [];12
13
if (!this.name) {14
this.errors.push("Name required.");15
}16
if (!this.email) {17
this.errors.push('Email required.');18
} else if (!this.validEmail(this.email)) {19
this.errors.push('Valid email required.');20
}21
22
if (!this.errors.length) {23
return true;24
}25
26
e.preventDefault();27
},28
validEmail: function (email) {//自定义校验规则29
var re = /^(([^<>()\[\]\\.,;:\s@"]+(\.[^<>()\[\]\\.,;:\s@"]+)*)|(".+"))@((\[[0-9]{1,3}\.[0-9]{1,3}\.[0-9]{1,3}\.[0-9]{1,3}\])|(([a-zA-Z\-0-9]+\.)+[a-zA-Z]{2,}))$/;30
return re.test(email);31
}32
}33
})
 浙公网安备 33010602011771号