

Android 直接修改dex破解
直接修改dex破解
一.编写一个简单的验证程序
(1)MainActivity:
 protected void onCreate(BundlesavedInstanceState) {
               super.onCreate(savedInstanceState);
               setContentView(R.layout.activity_main);
               Buttonbutton ;
               finalEditText text1,text2;
               button=(Button)findViewById(R.id.button1);
               //获取两个输入框的数据
               text1= (EditText)findViewById(R.id.editText1);
               text2=(EditText)findViewById(R.id.editText2);
               button.setOnClickListener(newOnClickListener() {
               @Override
               public void onClick(View v) {
               //TODO Auto-generated method stub
               //对输入框的书进行判断
                 if(text1.getText().toString().equals("CHINA")&&text2.getText().toString().equals("302")){
                         StringcontentToShow = "Hi,"+text1.getText().toString();
                         Toast.makeText(MainActivity.this,contentToShow,Toast.LENGTH_LONG).show();
                 }else{
                      StringcontentToShow = "NO."+text1.getText().toString()+"it isincorrect";
                      Toast.makeText(MainActivity.this,contentToShow,Toast.LENGTH_LONG).show();
              }
       }
   });
 }
(2)activity_main.xml
<RelativeLayoutxmlns:android="http://schemas.android.com/apk/res/android"

   xmlns:tools="http://schemas.android.com/tools"

   android:layout_width="match_parent"

   android:layout_height="match_parent"

   android:paddingBottom="@dimen/activity_vertical_margin"

   android:paddingLeft="@dimen/activity_horizontal_margin"

   android:paddingRight="@dimen/activity_horizontal_margin"

   android:paddingTop="@dimen/activity_vertical_margin"

   tools:context="com.example.toast.MainActivity" >


   <Button

        android:id="@+id/button1"

       android:layout_width="wrap_content"

       android:layout_height="wrap_content"

       android:layout_alignLeft="@+id/editText1"

       android:layout_alignParentTop="true"

        android:layout_marginLeft="63dp"

       android:layout_marginTop="204dp"

        android:text="点击" />


   <TextView

        android:id="@+id/textView2"

       android:layout_width="wrap_content"

       android:layout_height="wrap_content"

        android:layout_alignParentTop="true"

       android:layout_marginRight="22dp"

       android:layout_marginTop="44dp"

       android:layout_toLeftOf="@+id/editText1"

        android:text="请输入:" />

   <EditText
        android:id="@+id/editText1"
        android:layout_width="wrap_content"
        android:layout_height="wrap_content"
        android:layout_alignParentRight="true"
        android:layout_alignTop="@+id/textView2"
        android:layout_marginRight="61dp"
        android:ems="10" />

   <TextView
        android:id="@+id/textView1"
        android:layout_width="wrap_content"
        android:layout_height="wrap_content"
        android:layout_alignParentLeft="true"
        android:layout_below="@+id/editText1"
        android:layout_marginTop="65dp"
        android:text="数字密码:" />

   <EditText
          android:id="@+id/editText2"
          android:layout_width="wrap_content"
          android:layout_height="wrap_content"
          android:layout_alignLeft="@+id/editText1"
          android:layout_alignTop="@+id/textView1"
          android:ems="10"
          android:inputType="numberPassword" >
        <requestFocus />
   </EditText>
</RelativeLayout>
二.利用IDAPro及Winhex进行破解
1.解压得到classesdex文件
(1)打开IDAPro,将classes.dex拖放到IDAPro的主窗口,会弹出加载新文件的对话框,IDAPro解析出了该文件属于“Android DEX File”,保持默认的选项

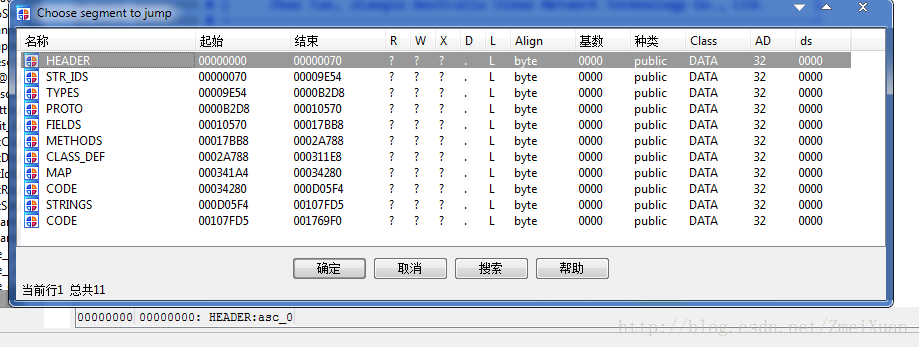
(2)跳转到区段
通过第三种方法来判断方法的功能,我们知道low.apk的主类为MainActivity,于是在Export选项卡输入Main,代码会自动重新定位到以Main头所在行。

(3)找到变量
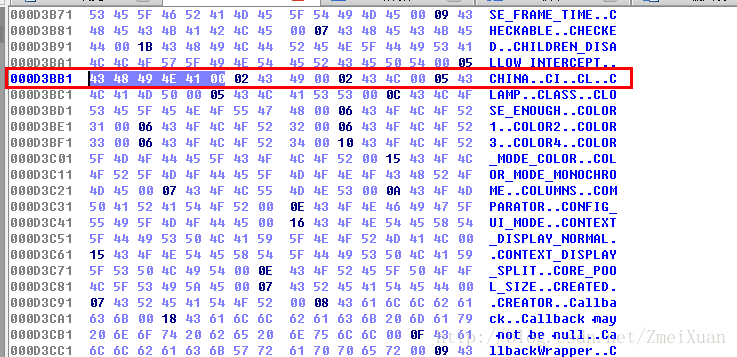
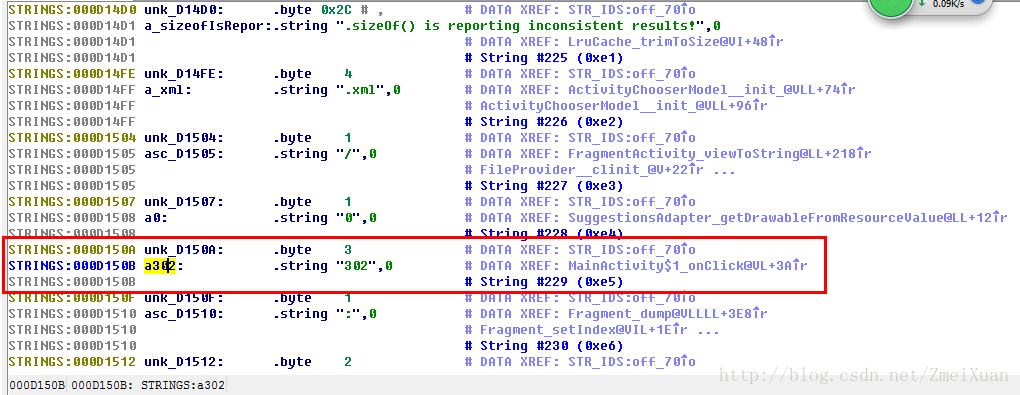
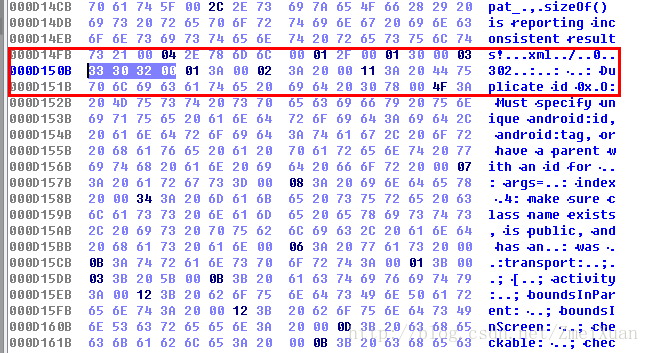
三、修改变量。
使用Winhe打开classes.dex文件
(1) 将CHINA变量改为DIJOB

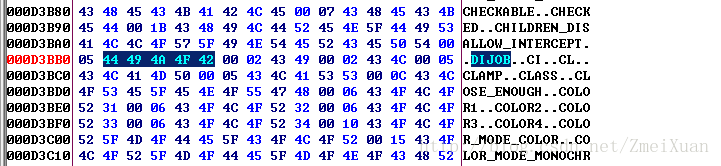
(2) 将密码302改为524

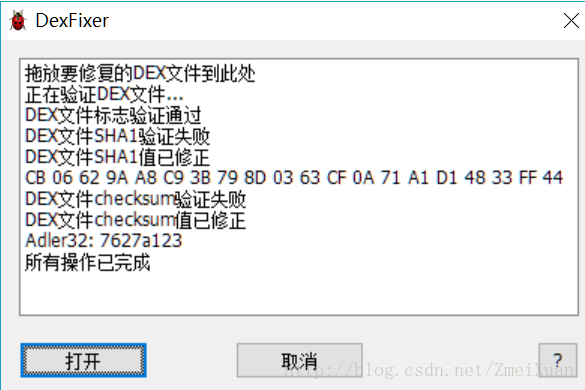
四.修复classes.dex文件
用Dexfixer将classes.dex文件checksum值修复
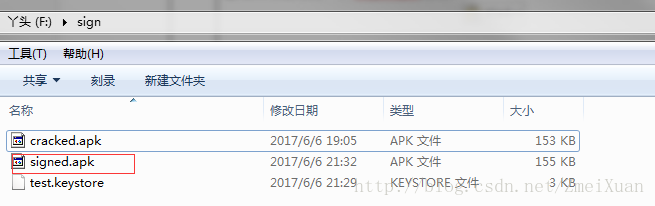
五、重新打包为cracked.apk,删除META-INT,并重新签名apk
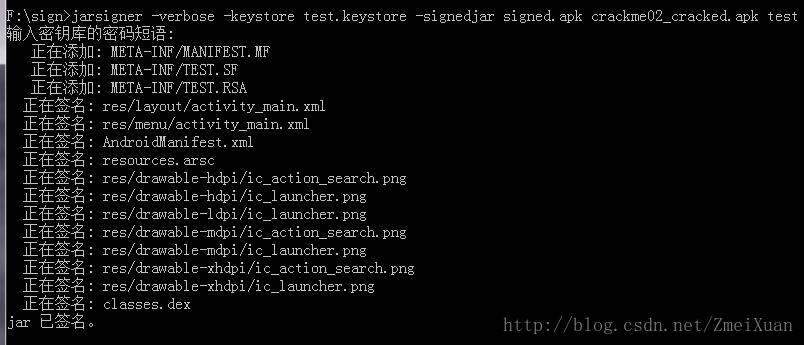
签名成功后得到一个singed.apk的文件
六、adb 进行安装测试
安装命令:

七、测试
输入用户名:DIJOB
输入密码:524
成功弹出


 浙公网安备 33010602011771号