

maven nexus deploy方式以及相关注意事项(增加eclipse执行maven deploy)
注:就日常开发而言,如果依赖的都是开源jar,最好配置个外部源,否则权限管理体系复杂的时候,很容易动不动Not authorized , ReasonPhrase:Unauthorized,行政可不知道jar根本不值钱。不同的工程使用不同的setting.xml就尤为重要了。
以前公司都是配管负责管理jar的,现在没有专职配管了,得自己部署到deploy上供使用。总的来说,jar部署到nexus上有两种方式:
1、直接登录nexus控制台进行上传,如下:
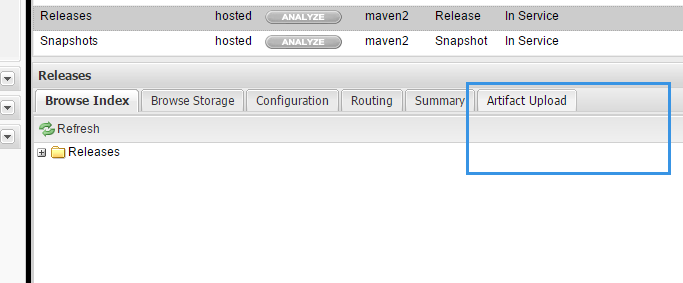
但是,某些仓库可能被设置了禁止控制台上传,如下:
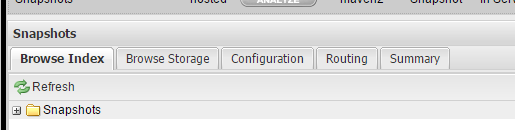
这种情况下,只能通过mvn:deploy进行部署了。
2、命令行方式上传。使用mvn:deploy部署前需要在settings.xml中配置server节点,指定仓库编号和用户名密码,如下所示:
<server>
<id>snapshots</id>
<username>admin</username>
<password>admin123</password>
</server>
这里的id应该需要和命令行中的repositoryId相同,否则会报401没有权限。
mvn deploy:deploy-file -DgroupId=com.ld.net.spider -DartifactId=com.ld.net.spider.ext -Dversion=1.0.0-SNAPSHOT -Dpackaging=jar -Dfile=C:\新建文件夹\com.ld.net.spider.ext-1.0.0-SNAPSHOT.jar -Durl=http://172.18.30.181:8081/nexus/content/repositories/snapshots -DrepositoryId=snapshots
[INFO] Scanning for projects...
[INFO]
[INFO] ------------------------------------------------------------------------
[INFO] Building com.ld.net.spider.parent 1.0.0-SNAPSHOT
[INFO] ------------------------------------------------------------------------
[INFO]
[INFO] --- maven-deploy-plugin:2.7:deploy-file (default-cli) @ com.ld.net.spider.parent ---
Downloading: http://xxx:8081/nexus/content/repositories/snapshots/com/ld/net/spider/com.ld.net.spider.ext/maven-metadata.xml
Uploading: http://xxx:8081/nexus/content/repositories/snapshots/com/ld/net/spider/com.ld.net.spider.ext/1.0.0-SNAPSHOT/maven-metadata.xml
Uploaded: http://xxx:8081/nexus/content/repositories/snapshots/com/ld/net/spider/com.ld.net.spider.ext/1.0.0-SNAPSHOT/maven-metadata.xml (788 B at 26.5 KB/sec)
Uploading: http://xxx:8081/nexus/content/repositories/snapshots/com/ld/net/spider/com.ld.net.spider.ext/maven-metadata.xml
Uploaded: http://xxx:8081/nexus/content/repositories/snapshots/com/ld/net/spider/com.ld.net.spider.ext/maven-metadata.xml (298 B at 10.8 KB/sec)
[INFO] ------------------------------------------------------------------------
[INFO] BUILD SUCCESS
[INFO] ------------------------------------------------------------------------
[INFO] Total time: 1.028 s
[INFO] Finished at: 2016-09-27T18:32:32+08:00
[INFO] Final Memory: 6M/16M
[INFO] ------------------------------------------------------------------------
还需要一点注意的就是要部署的jar/pom不能位于本地仓库所在的目录:否则会出错,如下所示:
[ERROR] Failed to execute goal org.apache.maven.plugins:maven-deploy-plugin:2.7:deploy-file (default-cli) on project com.ld.net.spider.parent: Cannot deploy artifact from the local repository: C:\apache-maven-3.3.9\repo\com\ld\net\spider\com.ld.net.spider.parent\1.0.0-SNAPSHOT\com.ld.net.spider.parent-1.0.0-SNAPSHOT.pom -> [Help 1]
注意上述事项后,应该是没有问题的。
完整的mvn deploy使用指南见http://maven.apache.org/plugins/maven-deploy-plugin/usage.html。
常见错误
[ERROR] Failed to execute goal org.apache.maven.plugins:maven-deploy-plugin:2.7:deploy-file (default-cli) on project standalone-pom: Failed to deploy artifacts: Could not find artifact com.ld.net.spider:com.ld.net.spider:jar:1.0.1-20161008.032827-1 in snapshots (http://172.18.30.181:8081/nexus/content/groups/snapshots) -> [Help 1]
仓库http://172.18.30.181:8081/nexus/content/groups/snapshots所指向的地址不存在。
maven settings.xml的完整配置可参考http://maven.apache.org/settings.html,pom.xml的完整配置可参考https://maven.apache.org/pom.html。
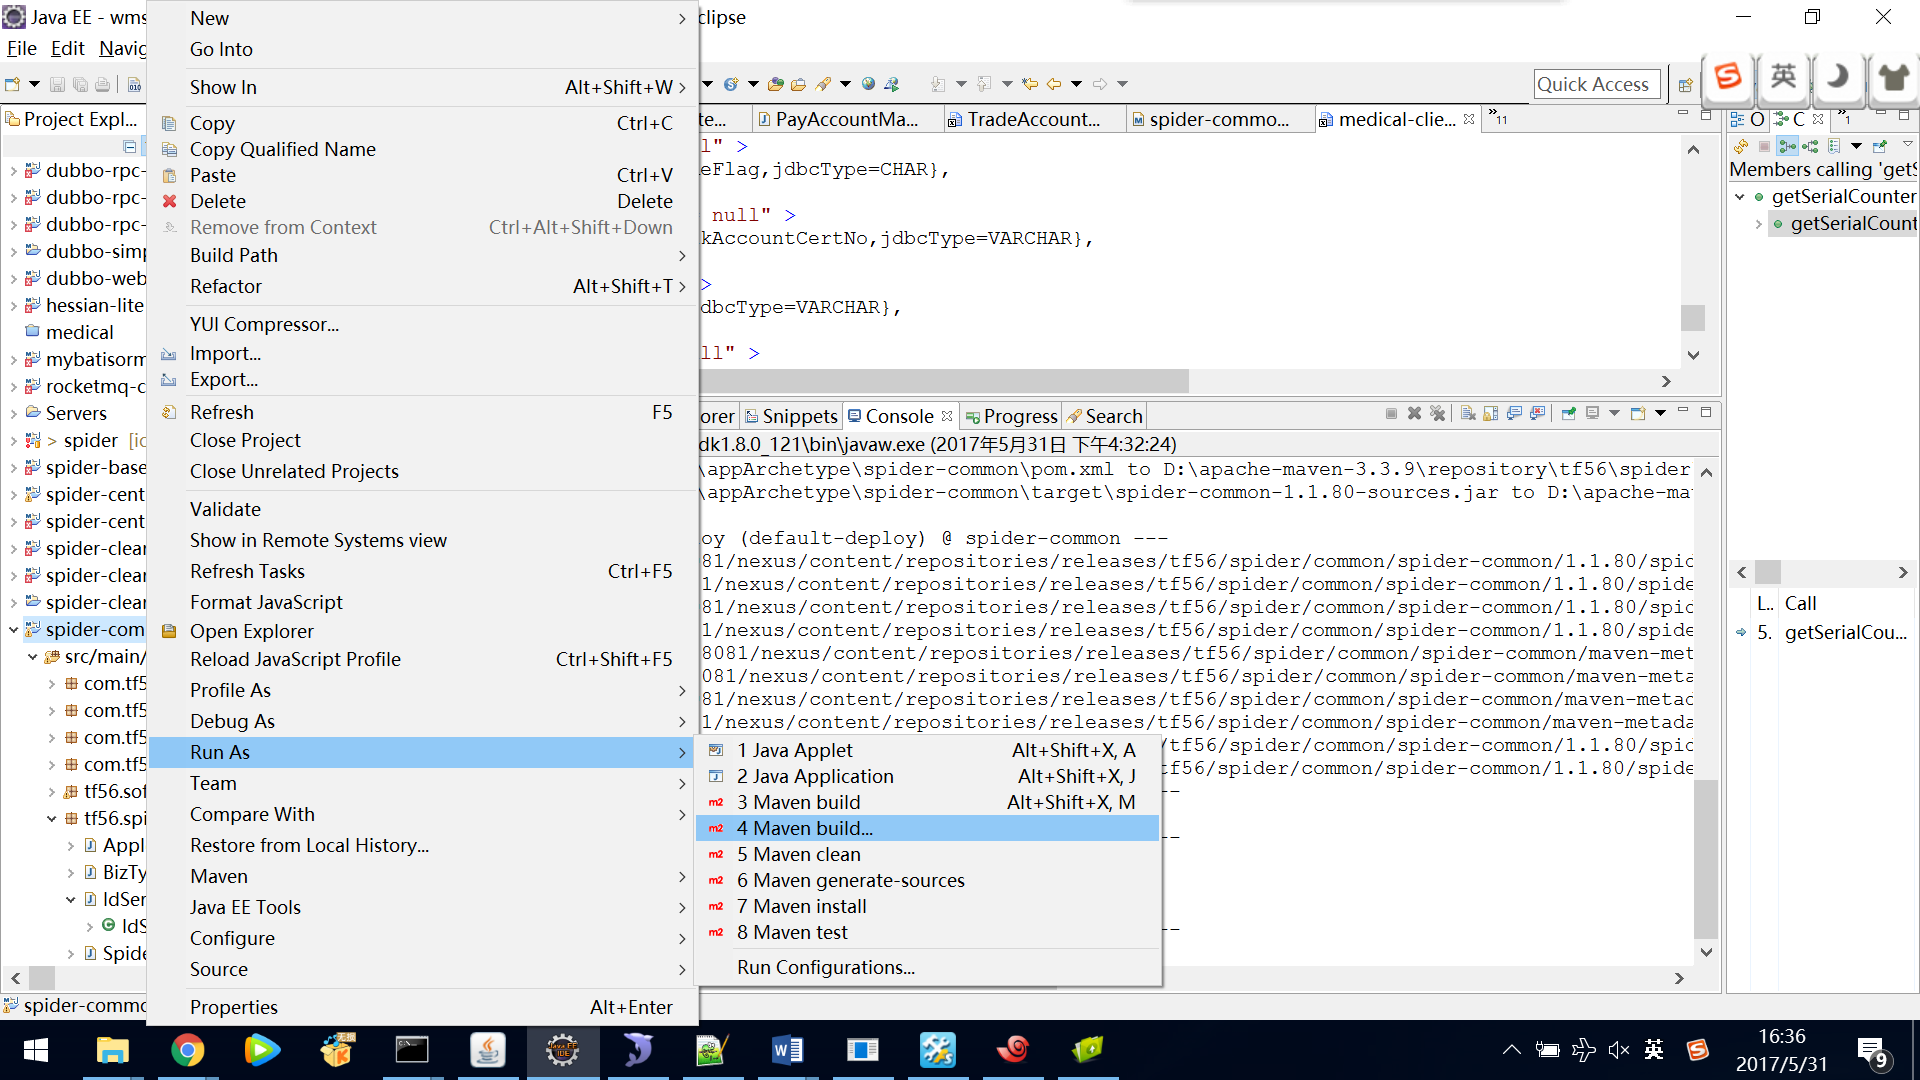
eclispe执行maven deploy部署到远程仓库
m2eclipse默认没有提供maven deploy选项,需要自己build...,如下:
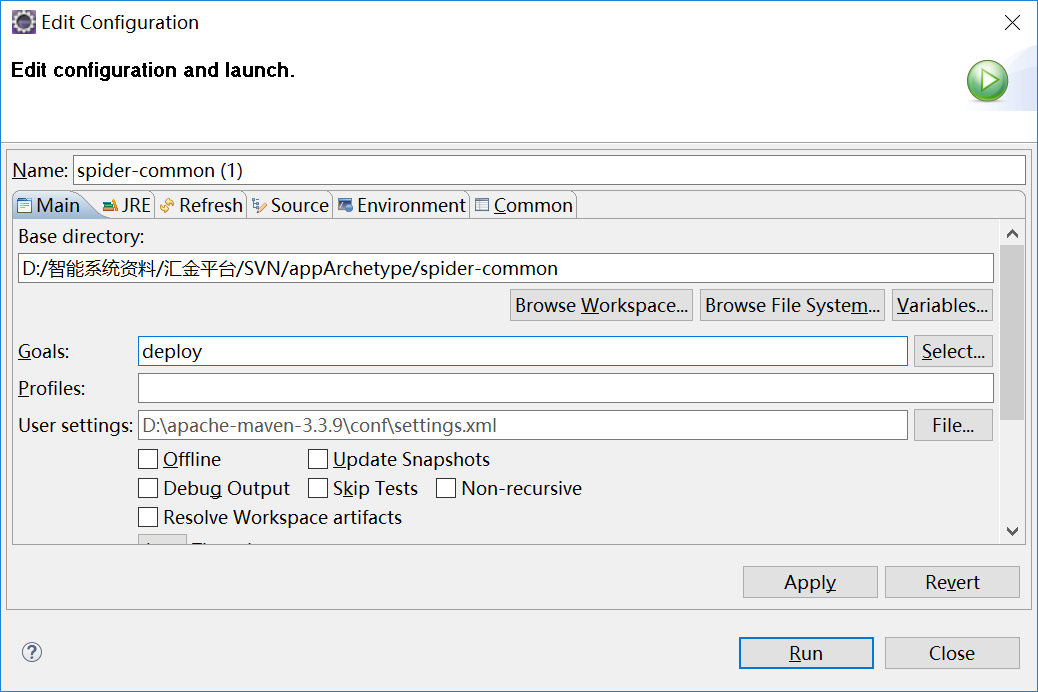
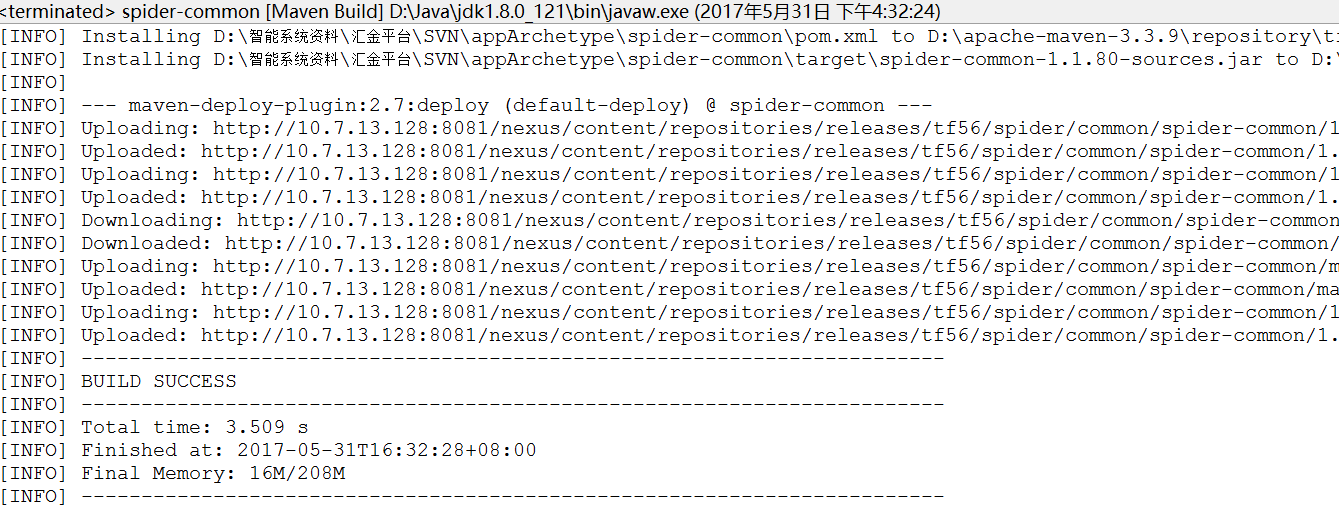
这样的话,source/jar/pom就都更新上去了。
[ERROR] Failed to execute goal org.apache.maven.plugins:maven-deploy-plugin:2.7:deploy (default-deploy) on project *: Failed to deploy artifacts: Could not transfer artifact *:jar:1.0 from/to releases (http://10.1.81.199:8081/nexus/content/repositories/releases/): Failed to transfer file: http://10.1.81.199:8081/nexus/content/repositories/releases/com/cs2c/security-management-client* /1.0/*-1.0.jar. Return code is: 401, ReasonPhrase:Unauthorized.
原因是没有配置认证,比如缺少snapshots。maven目录conf的setting.xml里,
- <server>
- <id>releases</id>
- <username>admin</username>
- <password>admin123</password>
- </server>
- <server>
- <id>snapshots</id>
- <username>admin</username>
- <password>admin123</password>
- </server>
- </servers>
用户名和密码都是nexus的。再次deploy即可。
注意这里的id要和pom.xml里远程deploy的地址对应一致,我的pom.xml里配置:
- <!-- 配置远程发布到私服,mvn deploy -->
- <distributionManagement>
- <repository>
- <id>releases</id>
- <name>Nexus Release Repository</name>
- <url>http://10.1.81.199:8081/nexus/content/repositories/releases/</url>
- </repository>
- <snapshotRepository>
- <id>snapshots</id>
- <name>Nexus Snapshot Repository</name>
- <url>http://10.1.81.199:8081/nexus/content/repositories/snapshots/</url>
- </snapshotRepository>
- </distributionManagement>

 浙公网安备 33010602011771号