如何在 VS Code 中搭建 Qt 开发环境
前言
VS Code 高大上的界面、强大的智能联想和庞大的插件市场,着实让人对他爱不释手。虽然可以更改 Qt Creator 的主题,但是 Qt Creator 的代码体验实在差劲。下面就来看看如何在 VS Code 中搭建 Qt 开发环境。
安装拓展
工欲善其事,必先利其器。在开干之前,先来安装一些拓展,他们将提供函数提示、语法高亮等功能。
C/C++ 拓展
提供智能联想功能、语法高亮、Debug 等功能,确实很好用。设置 "C_Cpp.autocompleteAddParentheses": true,可以把函数名后面的括号也给补全了。

Qt 拓展
提供在 VS Code 中打开 Qt Designer、预览 ui 文件、编译 ui 文件和 qrc 文件为 python 源代码、 qss 和 pro 文件语法高亮的功能(之前这两个拓展评分还都是 5 分,VS Code 更新到 1.57 之后突然变成 0 分了,有点奇怪)。


使用之前,需要去设置里面配置下 Qt Designer 可执行文件的路径,如果想要编译 ui 和 qrc 文件为 python 源代码的话,还需要配置 pyuic.exe 和 pyqrc.exe 的路径,示例如下:
{
    "qtForPython.designer.path": "D:/Qt/6.1.0/mingw81_64/bin/designer.exe",
    "pyqt-integration.qtdesigner.path": "D:/Qt/6.1.0/mingw81_64/bin/designer.exe",
    "pyqt-integration.pyuic.cmd": "D:/Python38/Scripts/pyuic5.exe",
    "qtForPython.rcc.path": "D:/Python38/Scripts/pyrcc5.exe",
    "qtForPython.lupdate.path": "D:/Python38/Scripts/pylupdate5.exe",
    "qtForPython.rcc.liveExecution": false,
    "qtForPython.uic.liveExecution": false
}
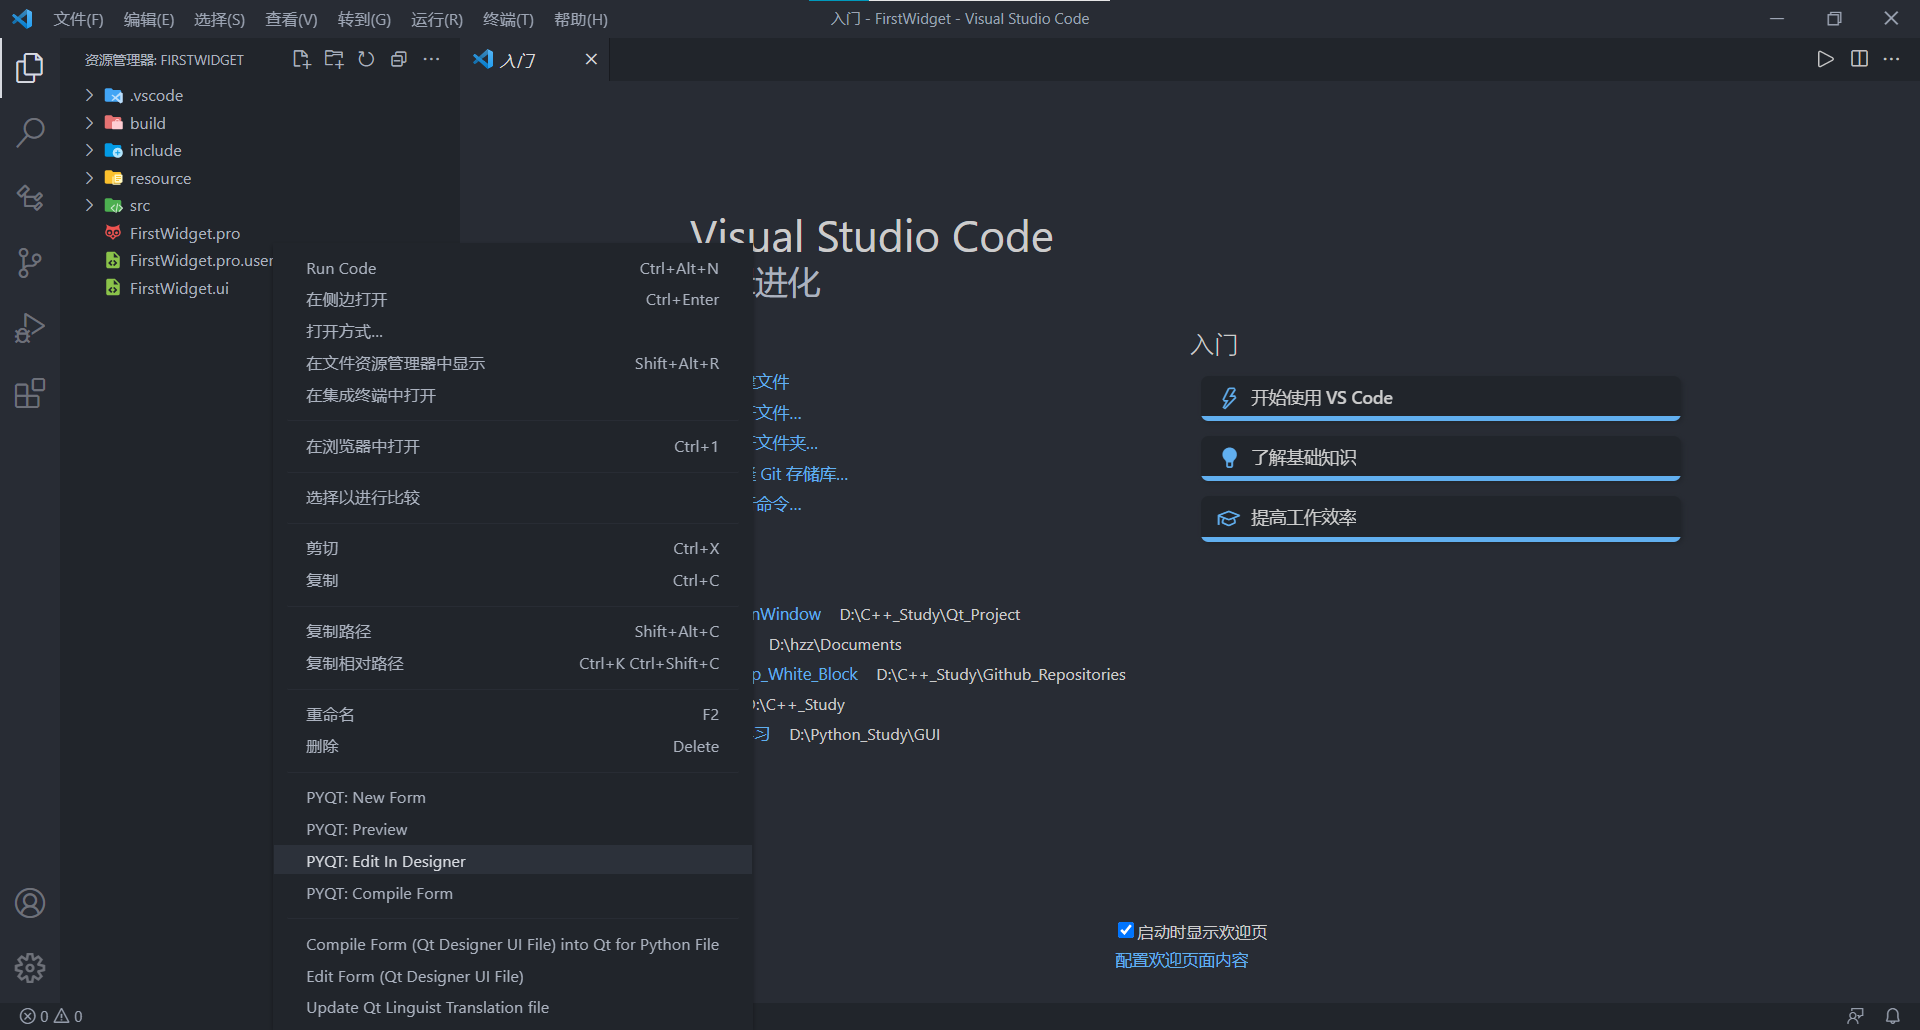
这些配置都是根据最新的拓展版本来设置的,像 Qt for Python 拓展更新之后的那些配置项的键就和上个版本不一样了,所以推荐使用最新版本。配置好之后右击资源管理器中的 ui 文件,可以在右击菜单中看到和 Qt 相关的菜单项,点击 Edit in Designer 就可以打开 Qt Designer。
创建项目
假设我们的项目结构如上图资源管理器中所示(点击这里下载源代码和 VSCode 配置文件),下面看下如何在脱离 Qt Creator 的情况下创建一个项目。
创建 pro 文件
在终端输入 qmake -project 就可以在顶层目录下生成一个和顶层目录同名的 pro 文件,在这里为 FirstWidget.pro。写完代码之后在终端输入 qmake,就会在顶层目录下生成 Makefile、debug 文件夹和 release 文件夹,一下子就让整个文件夹变得混乱。所以这里我们让 qmake 生成的文件移到 build 文件夹下,方法是在 pro 文件中加入如下代码,然后在终端输入 qmake -o .\build\Makefile:
release: DESTDIR = ./release
debug:   DESTDIR = ./debug

OBJECTS_DIR = $$DESTDIR/.obj
MOC_DIR = $$DESTDIR/.moc
RCC_DIR = $$DESTDIR/.qrc
UI_DIR = $$DESTDIR/.ui
但是每次创建项目都写上这么一段太麻烦了,这时候 VS Code 的 Snippets 功能就派上用场了。在 VS Code 中 Ctrl + Shift + P -> 首选项:配置用户代码片段 -> qmake,将打开的 qmake.json 的内容替换为如下代码,关于用户片段的写法参见 《[VS Code]跟我一起在Visual Studio Code 添加自定义snippet(代码段),附详细配置》:
{
	// Place your snippets for qmake here. Each snippet is defined under a snippet name and has a prefix, body and
	// description. The prefix is what is used to trigger the snippet and the body will be expanded and inserted. Possible variables are:
	// $1, $2 for tab stops, $0 for the final cursor position, and ${1:label}, ${2:another} for placeholders. Placeholders with the
	// same ids are connected.
	// Example:
	"config build dir": {
		"prefix": "build",
		"body": [
			"release: DESTDIR = ./release",
			"debug:   DESTDIR = ./debug",
			"",
			"OBJECTS_DIR = $$$DESTDIR/.obj",
			"MOC_DIR = $$$DESTDIR/.moc",
			"RCC_DIR = $$$DESTDIR/.qrc",
			"UI_DIR = $$$DESTDIR/.ui"
		],
		"description": "配置输出文件路径"
	},
	"initialize project": {
		"prefix": "init",
		"body": [
			"QT       += core gui",
			"",
			"greaterThan(QT_MAJOR_VERSION, 4): QT += widgets",
			"",
			"CONFIG += c++11",
			"",
			"# You can make your code fail to compile if it uses deprecated APIs.",
			"# In order to do so, uncomment the following line.",
			"#DEFINES += QT_DISABLE_DEPRECATED_BEFORE=0x060000    # disables all the APIs deprecated before Qt 6.0.0",
			"",
			"INCLUDEPATH += ${1:include}",
			"",
			"SOURCES += \\",
			"    ${2:src/main.cpp} \\",
			"    ${3:src/$WORKSPACE_NAME.cpp}",
			"",
			"HEADERS += \\",
			"    ${1:include}/$WORKSPACE_NAME.h",
			"",
			"FORMS += \\",
			"    $WORKSPACE_NAME.ui",
			"",
			"release: DESTDIR = ./release",
			"debug:   DESTDIR = ./debug",
			"",
			"OBJECTS_DIR = \\$\\$DESTDIR/.obj",
			"MOC_DIR = \\$\\$DESTDIR/.moc",
			"RCC_DIR = \\$\\$DESTDIR/.qrc",
			"UI_DIR = \\$\\$DESTDIR/.ui",
			"",
			"# Default rules for deployment.",
			"qnx: target.path = /tmp/\\$\\$TARGET/bin",
			"else: unix:!android: target.path = /opt/\\$\\$TARGET/bin",
			"!isEmpty(target.path): INSTALLS += target",
			"$0"
		],
		"description": "初始化工程文件"
	},
}
使用起来如下所示,真的太香了:

创建 tasks.json
在 VS Code 中按下 Ctrl + Shift + P,在命令面板中输入 task,选择配置任务,具体操作如下:

将 tasks.json 的内容替换成如下代码:
{
    "tasks": [
        {
            "type": "shell",
            "label": "qmake build makefile (debug)",
            "command": "qmake",
            "args": [
                "-o",
                "./build/Makefile",
                "CONFIG += debug",
                "CONFIG += console",
            ],
            "options": {
                "cwd": "${workspaceFolder}"
            },
            "problemMatcher": [],
            "group": "build",
            "detail": "生成 Makefile (debug)"
        },
        {
            "type": "shell",
            "label": "qmake build makefile (release)",
            "command": "qmake",
            "args": [
                "-o",
                "./build/Makefile"
            ],
            "options": {
                "cwd": "${workspaceFolder}"
            },
            "problemMatcher": [],
            "group": "build",
            "detail": "生成 Makefile (release)"
        },
        {
            "type": "shell",
            "label": "Qt build debug",
            "command": "make",
            "args": [
                "debug"
            ],
            "options": {
                "cwd": "${workspaceFolder}/build"
            },
            "problemMatcher": [],
            "group": "build",
            "detail": "Qt 生成可调试文件",
            "dependsOn": [
                "qmake build makefile (debug)"
            ]
        },
        {
            "type": "shell",
            "label": "Qt build release",
            "command": "make",
            "args": [
                "release"
            ],
            "options": {
                "cwd": "${workspaceFolder}/build"
            },
            "problemMatcher": [],
            "group": "build",
            "detail": "Qt 生成可执行文件",
            "dependsOn": [
                "qmake build makefile (release)"
            ]
        },
        {
            "type": "shell",
            "label": "Qt build and run release",
            "command": "${workspaceFolder}/build/release/${workspaceRootFolderName}.exe",
            "args": [],
            "problemMatcher": [],
            "group": "build",
            "detail": "Qt 生成并运行可执行文件",
            "dependsOn": [
                "Qt build release"
            ],
            // close 键在 VS Code 1.57 引入
            "presentation": {
                "close": true
            }
        },
        {
            "type": "shell",
            "label": "Qt build and run debug",
            "command": "${workspaceFolder}/build/debug/${workspaceRootFolderName}.exe",
            "args": [],
            "problemMatcher": [],
            "group": "build",
            "detail": "Qt 生成并运行可调试文件",
            "dependsOn": [
                "Qt build debug"
            ]
        },
    ],
    "version": "2.0.0"
}
tasks.json 是 VS Code 的一大亮点,可以在里面配置多个任务,每个任务其实就是帮你在终端输入指令。虽然每个任务的 command 键只能输入一条指令,但是你可以配合 dependsOn 的值,这样在输入这个 command 之前就会依次输入 dependsOn 中各个任务的 command,相当于一个任务在终端输入了多条指令。如果知道 Qt Creator 的编译过程的话就很容易看懂上面 tasks.json 中的每条指令在干些什么。
比如现在我想要在 build 目录下生成 Makefile,那么只要 Alt + T + R,在任务菜单中选择 qmake build makefile (release) 任务,具体过程如下:

再比如我们现在想要编译生成 exe 并运行之,那么只要选择 Qt build and run release,具体过程如下:

运行任务之后就可以在 ./build/release 目录下看到可执行文件。如果编译 makefile 的时候报错很有可能是因为你没有把 D:\Qt\6.2.1\mingw81_64\bin(这个是我的 Qt6.2.1 MinGW 套件目录) 添加到环境变量里,这个路径最好放的前面一点,如果电脑里面装了 Anaconda 还配置了 Anaconda 的路径的话 qmake 可能会发生冲突然后报错。
配置 C++ 智能联想
要想让 C/C++ 拓展解析 Qt 源文件,提供智能联想功能,就需要告诉他 Qt 的源文件在哪。只要打开了C/C++文件,就能在 VS Code 的状态栏看到 C/C++ 的配置按钮,我这里的配置按钮的文字是 Win32,因为我选了 Win32 配置集。下面看下怎么配置智能联想功能:

如动图中所示,我们只要在包含路径中填入需要解析的 Qt 源文件所在的文件夹即可,一种偷懒的方法是直接填入 D:/Qt/6.1.0/mingw81_64/include/** (这是我的 Qt 路径),但是这样会让 C/C++ 拓展递归解析 include 文件夹下的所有文件,会很慢,所以只需填入要用的那些头文件所在文件夹即可,比如:
D:/Qt/6.1.0/mingw81_64/include
D:/Qt/6.1.0/mingw81_64/include/QtGui
D:/Qt/6.1.0/mingw81_64/include/QtCore
D:/Qt/6.1.0/mingw81_64/include/QtWidgets
填好之后会在 .vscode 文件夹下面看到一个 c_cpp_properties.json,里面记录了用户的配置,之后就可以直接修改这个文件中的键的值来配置拓展。配置好之后就可以看到语法高亮和函数提示了,比如下图所示:

后记
至此在 VS Code 中搭建 Qt 开发环境的步骤全部介绍完毕了,但是 VS Code 的强大之处不止如此,可以在官网的文档和每个月的发行文档中了解更多正确的打开方式,而且VS Code 每个月都会更新,带来更多好用的特性,赶紧用起来吧!以上~~

 浙公网安备 33010602011771号