
Windows anaconda 运行yolov3
1 创建yolo环境
conda creat -n yolo python=3.6
更换conda源,下载软件的时候会快些
conda config --add channels https://mirrors.tuna.tsinghua.edu.cn/anaconda/pkgs/free/
conda config --add channels https://mirrors.tuna.tsinghua.edu.cn/anaconda/pkgs/main/
conda config --set show_channel_urls yes
创建后进入yolo环境,并安装Keras和tensorflow,我这块安装的是gpu版本的tensorflow
source activate yolo
pip install keras==2.1.5
pip install tensorflow-gpu==1.6.0 #如果是gpu版本
pip install tensorflow==1.6.0 #如果是cpu版本
注意,这两个是二选一
2 安装依赖
在训练的过程中,会有很多依赖,所以提前安装一遍
pip install Pillow
pip install matplotlib
conda install ffmpeg
pip install opencv-contrib-python
pip install opencv-python
pip install h5py
1、下载yolov3代码:https://github.com/qqwweee/keras-yolo3 ,并解压缩之后用pycharm打开。
2、下载权重:https://pjreddie.com/media/files/yolov3.weights并将权重放在keras-yolo3的文件夹下。如下图所示:
3、执行如下命令将darknet下的yolov3配置文件转换成keras适用的h5文件。
python convert.py yolov3.cfg yolov3.weights model_data/yolo.h5
运行:
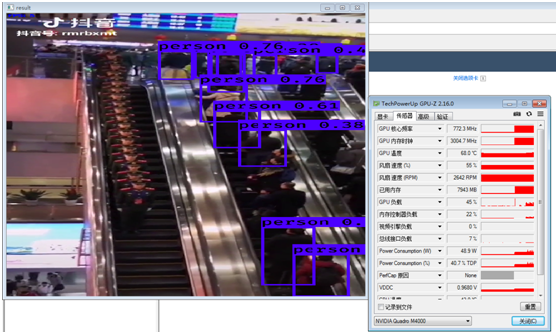
python yolo_video.py --gpu_num=1 –input=test.mp4 --output=2.mp4
如果出现Failed to load the native TensorFlow runtime.
则,
解决办法就是:pip install --upgrade --ignore-installed tensorflow
更新一下tensorflow就好了

 浙公网安备 33010602011771号