


ElasticSearch学习笔记-尚硅谷
学习视频链接:https://www.bilibili.com/video/BV1hh411D7sb
参考:https://blog.csdn.net/u011863024/article/details/115721328
一、Elasticsearch入门
官方地址:https://www.elastic.co/cn/
官方文档:https://www.elastic.co/guide/index.html
ElasticSearch7.8下载界面:https://www.elastic.co/cn/downloads/past-releases/elasticsearch-7-8-0
Windows 版的 Elasticsearch 压缩包,解压即安装完毕,解压后的 Elasticsearch 的目录结构如下 :
| 目录 | 含义 |
| bin | 可执行脚本目录 |
| config | 配置目录 |
| jdk | 内置JDK目录 |
| lib | 类库 |
| logs | 日志目录 |
| modules | 模块目录 |
| plugins | 插件目录 |
解压后,进入 bin 文件目录,点击 elasticsearch.bat 文件启动 ES 服务 。
注意: 9300 端口为 Elasticsearch 集群间组件的通信端口, 9200 端口为浏览器访问的 http协议 RESTful 端口。
打开浏览器,输入地址: http://localhost:9200,测试返回结果,返回结果如下:
{
    "name": "ZHIXI",
    "cluster_name": "elasticsearch",
    "cluster_uuid": "jMVQWiD7RZeoyghlUYF5MQ",
    "version": {
        "number": "7.6.1",
        "build_flavor": "default",
        "build_type": "zip",
        "build_hash": "aa751e09be0a5072e8570670309b1f12348f023b",
        "build_date": "2020-02-29T00:15:25.529771Z",
        "build_snapshot": false,
        "lucene_version": "8.4.0",
        "minimum_wire_compatibility_version": "6.8.0",
        "minimum_index_compatibility_version": "6.0.0-beta1"
    },
    "tagline": "You Know, for Search"
}
1、索引的创建&查询&删除
创建
对比关系型数据库,创建索引就等同于创建数据库。
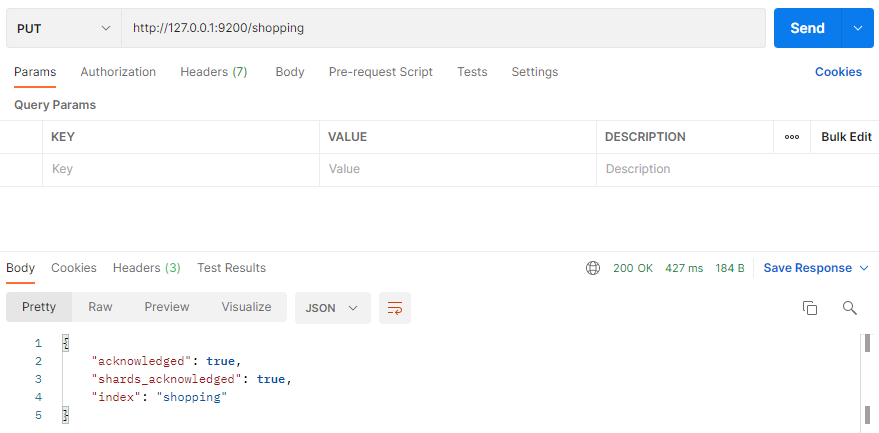
在 Postman 中,向 ES 服务器发 PUT 请求 : http://127.0.0.1:9200/shopping
请求后,服务器返回响应:
查询所有的索引
在 Postman 中,向 ES 服务器发 GET 请求 : http://127.0.0.1:9200/_cat/indices?v
这里请求路径中的_cat 表示查看的意思, indices 表示索引,所以整体含义就是查看当前 ES服务器中的所有索引,就好像 MySQL 中的 show tables 的感觉,服务器响应结果如下 :
health status index    uuid                   pri rep docs.count docs.deleted store.size pri.store.size
yellow open   shopping u9hibY2NTjuhAiYeY24y4A   1   1          0            0       230b           230b
| 表头 | 含义 |
| health | 当前服务器健康状态: green(集群完整) yellow(单点正常、集群不完整) red(单点不正常) |
| status | 索引打开、关闭状态 |
| index | 索引名 |
| uuid | 索引统一编号 |
| pri | 主分片数量 |
| rep | 副本数量 |
| docs.count | 可用文档数量 |
| docs.delete | 文档删除状态(逻辑删除) |
| store.size | 主分片和副分片整体占空间大小 |
| pri.store.size | 主分片占空间大小 |
查看单个索引
{
    "shopping": {//索引名
        "aliases": {},//别名
        "mappings": {},//映射
        "settings": {//设置
            "index": {//设置 - 索引
                "creation_date": "1617861426847",//设置 - 索引 - 创建时间
                "number_of_shards": "1",//设置 - 索引 - 主分片数量
                "number_of_replicas": "1",//设置 - 索引 - 主分片数量
                "uuid": "J0WlEhh4R7aDrfIc3AkwWQ",//设置 - 索引 - 主分片数量
                "version": {//设置 - 索引 - 主分片数量
                    "created": "7080099"
                },
                "provided_name": "shopping"//设置 - 索引 - 主分片数量
            }
        }
    }
}
删除索引
在 Postman 中,向 ES 服务器发 DELETE 请求 : http://127.0.0.1:9200/shopping
返回结果如下:
{
    "acknowledged": true
}
再次查看所有索引,GET http://127.0.0.1:9200/_cat/indices?v,返回结果如下:
health status index uuid pri rep docs.count docs.deleted store.size pri.store.size
2、文档的创建
假设索引已经创建好了,接下来我们来创建文档,并添加数据。这里的文档可以类比为关系型数据库中的表数据,添加的数据格式为 JSON 格式
在 Postman 中,向 ES 服务器发 POST 请求 : http://127.0.0.1:9200/shopping/_doc,请求体JSON内容为: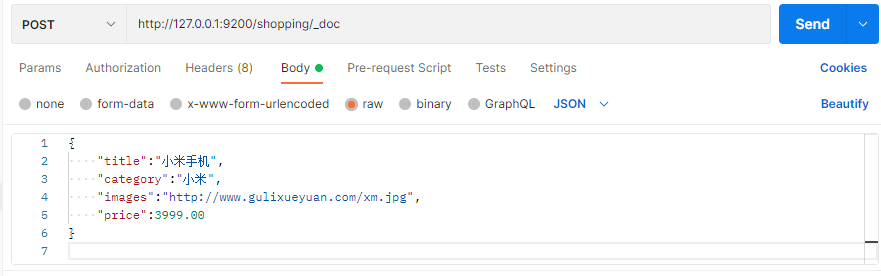
注意,此处发送请求的方式必须为 POST,不能是 PUT,否则会发生错误 。
返回结果:
{
    "_index": "shopping",//索引
    "_type": "_doc",//类型-文档
    "_id": "ANQqsHgBaKNfVnMbhZYU",//唯一标识,可以类比为 MySQL 中的主键,随机生成
    "_version": 1,//版本
    "result": "created",//结果,这里的 create 表示创建成功
    "_shards": {//
        "total": 2,//分片 - 总数
        "successful": 1,//分片 - 总数
        "failed": 0//分片 - 总数
    },
    "_seq_no": 0,
    "_primary_term": 1
}
上面的数据创建后,由于没有指定数据唯一性标识(ID),默认情况下, ES 服务器会随机生成一个。
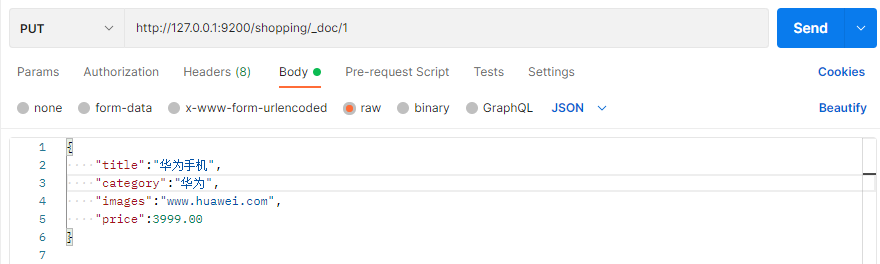
如果想要自定义唯一性标识,需要在创建时指定: http://127.0.0.1:9200/shopping/_doc/1,请求体JSON内容为:
{
    "_index": "shopping",
    "_type": "_doc",
    "_id": "1",//<------------------自定义唯一性标识
    "_version": 1,
    "result": "created",
    "_shards": {
        "total": 2,
        "successful": 1,
        "failed": 0
    },
    "_seq_no": 1,
    "_primary_term": 1
}
此处需要注意:如果增加数据时明确数据主键,那么请求方式也可以为 PUT。
3、主键查询&全查询
主键查询
查看文档时,需要指明文档的唯一性标识,类似于 MySQL 中数据的主键查询
在 Postman 中,向 ES 服务器发 GET 请求 : http://127.0.0.1:9200/shopping/_doc/1
返回结果如下:
{
    "_index": "shopping",
    "_type": "_doc",
    "_id": "1",
    "_version": 1,
    "_seq_no": 1,
    "_primary_term": 1,
    "found": true,
    "_source": {
        "title": "小米手机",
        "category": "小米",
        "images": "http://www.gulixueyuan.com/xm.jpg",
        "price": 3999
    }
}
全查询
查看索引下所有数据,向 ES 服务器发 GET 请求 : http://127.0.0.1:9200/shopping/_search
返回结果如下:
{
    "took": 65,
    "timed_out": false,
    "_shards": {
        "total": 1,
        "successful": 1,
        "skipped": 0,
        "failed": 0
    },
    "hits": {
        "total": {
            "value": 3,
            "relation": "eq"
        },
        "max_score": 1.0,
        "hits": [
            {
                "_index": "shopping",
                "_type": "_doc",
                "_id": "QbWRHH8Bmr0OZbMUK5Qv",
                "_score": 1.0,
                "_source": {
                    "title": "小米手机",
                    "category": "小米",
                    "images": "http://www.gulixueyuan.com/xm.jpg",
                    "price": 3999.00
                }
            },
            {
                "_index": "shopping",
                "_type": "_doc",
                "_id": "2",
                "_score": 1.0,
                "_source": {
                    "title": "华为手机",
                    "category": "华为",
                    "images": "www.huawei.com",
                    "price": 3999.00
                }
            },
            {
                "_index": "shopping",
                "_type": "_doc",
                "_id": "1",
                "_score": 1.0,
                "_source": {
                    "title": "小米手机",
                    "category": "小米",
                    "images": "http://www.gulixueyuan.com/xm.jpg",
                    "price": 3999.00
                }
            }
        ]
    }
}
4、文档的全量修改 & 局部修改 & 删除
全量修改
和新增文档一样,输入相同的 URL 地址请求,如果请求体变化,会将原有的数据内容覆盖
在 Postman 中,向 ES 服务器发 POST 请求 : http://127.0.0.1:9200/shopping/_doc/1
请求体JSON内容为:
{
    "title":"一加手机",
    "category":"一加",
    "images":"https://www.oneplus.com/cn",
    "price":1999.00
}
修改成功后,服务器响应结果:
{
    "_index": "shopping",
    "_type": "_doc",
    "_id": "1",
    "_version": 2,
    "result": "updated",//<-----------updated 表示数据被更新
    "_shards": {
        "total": 2,
        "successful": 1,
        "failed": 0
    },
    "_seq_no": 2,
    "_primary_term": 1
}
局部修改
修改数据时,也可以只修改某一给条数据的局部信息
在 Postman 中,向 ES 服务器发 POST 请求 : http://127.0.0.1:9200/shopping/_update/1
请求体JSON内容为:
{
    "title":"一加手机",
    "category":"OnePlus",
    "images":"https://www.oneplus.com/cn",
    "price":5999.00
}
返回结果如下:
{
    "_index": "shopping",
    "_type": "_doc",
    "_id": "1",
    "_version": 4,
    "result": "updated", ---->表示数据被更新
    "_shards": {
        "total": 2,
        "successful": 1,
        "failed": 0
    },
    "_seq_no": 5,
    "_primary_term": 2
}
在 Postman 中,向 ES 服务器发 GET请求 : http://127.0.0.1:9200/shopping/_doc/1,查看修改内容:
{
    "_index": "shopping",
    "_type": "_doc",
    "_id": "1",
    "_version": 4,
    "_seq_no": 5,
    "_primary_term": 2,
    "found": true,
    "_source": {
        "title": "一加手机",
        "category": "OnePlus",
        "images": "https://www.oneplus.com/cn",
        "price": 5999.00
    }
}
删除
删除一个文档不会立即从磁盘上移除,它只是被标记成已删除(逻辑删除)。
在 Postman 中,向 ES 服务器发 DELETE 请求 : http://127.0.0.1:9200/shopping/_doc/1
返回结果:
{
    "_index": "shopping",
    "_type": "_doc",
    "_id": "2",
    "_version": 2,
    "result": "deleted",
    "_shards": {
        "total": 2,
        "successful": 1,
        "failed": 0
    },
    "_seq_no": 6,
    "_primary_term": 2
}
在 Postman 中,向 ES 服务器发 GET请求 : http://127.0.0.1:9200/shopping/_doc/1,查看是否删除成功:
{
    "_index": "shopping",
    "_type": "_doc",
    "_id": "2",
    "found": false
}
5、条件查询 & 分页查询 & 查询排序
条件查询
假设有以下文档内容,(在 Postman 中,向 ES 服务器发 GET请求 : http://127.0.0.1:9200/shopping/_search
{
    "took": 851,
    "timed_out": false,
    "_shards": {
        "total": 1,
        "successful": 1,
        "skipped": 0,
        "failed": 0
    },
    "hits": {
        "total": {
            "value": 3,
            "relation": "eq"
        },
        "max_score": 1.0,
        "hits": [
            {
                "_index": "shopping",
                "_type": "_doc",
                "_id": "1",
                "_score": 1.0,
                "_source": {
                    "title": "小米手机",
                    "category": "小米",
                    "images": "http://www.gulixueyuan.com/xm.jpg",
                    "price": 3999.00
                }
            },
            {
                "_index": "shopping",
                "_type": "_doc",
                "_id": "3",
                "_score": 1.0,
                "_source": {
                    "title": "红米手机",
                    "category": "小米",
                    "images": "http://www.gulixueyuan.com/xm.jpg",
                    "price": 3999.00
                }
            },
            {
                "_index": "shopping",
                "_type": "_doc",
                "_id": "2",
                "_score": 1.0,
                "_source": {
                    "title": "华为手机",
                    "category": "华为",
                    "images": "http://www.huawei.com",
                    "price": 5999.00
                }
            }
        ]
    }
}
带参查询
查找category为小米的文档,在 Postman 中,向 ES 服务器发 GET请求 : http://127.0.0.1:9200/shopping/_search?q=category:小米
返回结果如下:
{
    "took": 1,
    "timed_out": false,
    "_shards": {
        "total": 1,
        "successful": 1,
        "skipped": 0,
        "failed": 0
    },
    "hits": {
        "total": {
            "value": 2,
            "relation": "eq"
        },
        "max_score": 0.5753642,
        "hits": [
            {
                "_index": "shopping",
                "_type": "_doc",
                "_id": "1",
                "_score": 0.5753642,
                "_source": {
                    "title": "小米手机",
                    "category": "小米",
                    "images": "http://www.gulixueyuan.com/xm.jpg",
                    "price": 3999.00
                }
            },
            {
                "_index": "shopping",
                "_type": "_doc",
                "_id": "3",
                "_score": 0.5753642,
                "_source": {
                    "title": "红米手机",
                    "category": "小米",
                    "images": "http://www.gulixueyuan.com/xm.jpg",
                    "price": 3999.00
                }
            }
        ]
    }
}
上述为URL带参数形式查询,这很容易让不善者心怀恶意,或者参数值出现中文会出现乱码情况。为了避免这些情况,我们可用使用带JSON请求体请求进行查询。
请求体带参查询
接下带JSON请求体,还是查找category为小米的文档,在 Postman 中,向 ES 服务器发 GET请求 : http://127.0.0.1:9200/shopping/_search
附带JSON体如下:
{
	"query":{
		"match":{
			"category":"小米"
		}
	}
}

查找所有文档的内容:GET http://127.0.0.1:9200/shopping/_search,附带JSON参数如下
{
	"query":{
		"match_all":{}
	}
}
查询指定字段: 在 Postman 中,向 ES 服务器发 GET请求 : http://127.0.0.1:9200/shopping/_search,附带JSON体如下:
{
	"query":{
		"match_all":{}
	},
	"_source":["title"]
}
分页查询
在 Postman 中,向 ES 服务器发 GET请求 : http://127.0.0.1:9200/shopping/_search,附带JSON体如下:
表示查询所有,从0开始,每页显示2条数据
{
	"query":{
		"match_all":{}
	},
	"from":0,
	"size":2
}
查询排序
如果你想通过排序查出价格最高的手机(降序),在 Postman 中,向 ES 服务器发 GET请求 : http://127.0.0.1:9200/shopping/_search,附带JSON体如下:
{
	"query":{
		"match_all":{}
	},
	"sort":{
		"price":{
			"order":"desc"
		}
	}
}
6、多条件查询 & 范围查询
多条件查询
假设想找出小米牌子,价格为3999元的。(must相当于数据库的&&)
在 Postman 中,向 ES 服务器发 GET请求 : http://127.0.0.1:9200/shopping/_search,附带JSON体如下:
{
	"query":{
		"bool":{
			"must":[{
				"match":{
					"category":"小米"
				}
			},{
				"match":{
					"price":3999.00
				}
			}]
		}
	}
}
假设想找出小米和华为的牌子。(should相当于数据库的||)
在 Postman 中,向 ES 服务器发 GET请求 : http://127.0.0.1:9200/shopping/_search,附带JSON体如下:
并且价格大于3999
{
	"query":{
		"bool":{
			"should":[{
				"match":{
					"category":"小米"
				}
			},{
				"match":{
					"category":"华为"
				}
			}],
            "filter":{
                "range":{
                    "price":{
                        "gt":3999
                    }
                }
            }
		}
	}
}
范围查询
假设想找出小米和华为的牌子,价格大于2000元的手机。
在 Postman 中,向 ES 服务器发 GET请求 : http://127.0.0.1:9200/shopping/_search,附带JSON体如下:
{
	"query":{
		"bool":{
			"should":[{
				"match":{
					"category":"小米"
				}
			},{
				"match":{
					"category":"华为"
				}
			}],
            "filter":{
            	"range":{
                	"price":{
                    	"gt":2000
                	}
	            }
    	    }
		}
	}
}
7、全文检索 & 完全匹配 & 高亮查询
全文检索
这功能像搜索引擎那样,如品牌输入“小华”,返回结果带回品牌有“小米”和华为的。
在 Postman 中,向 ES 服务器发 GET请求 : http://127.0.0.1:9200/shopping/_search,附带JSON体如下:
{
	"query":{
		"match":{
			"category" : "小华"
		}
	}
}
完全匹配
在 Postman 中,向 ES 服务器发 GET请求 : http://127.0.0.1:9200/shopping/_search,附带JSON体如下:
{
	"query":{
		"match_phrase":{
			"category" : "为"
		}
	}
}
高亮匹配
在 Postman 中,向 ES 服务器发 GET请求 : http://127.0.0.1:9200/shopping/_search,附带JSON体如下:
{
	"query":{
		"match_phrase":{
			"category" : "为"
		}
	},
    "highlight":{
        "fields":{
            "category":{}//<----高亮这字段
        }
    }
}
8、聚合查询
聚合允许使用者对 es 文档进行统计分析,类似与关系型数据库中的 group by,当然还有很多其他的聚合,例如取最大值max、平均值avg等等。
接下来按price字段进行分组:
在 Postman 中,向 ES 服务器发 GET请求 : http://127.0.0.1:9200/shopping/_search,附带JSON体如下:
{
	"aggs":{//聚合操作
		"price_group":{//名称,随意起名
			"terms":{//分组
				"field":"price"//分组字段
			}
		}
	}
}
若想对所有手机价格求平均值。
在 Postman 中,向 ES 服务器发 GET请求 : http://127.0.0.1:9200/shopping/_search,附带JSON体如下:
{
	"aggs":{
		"price_avg":{//名称,随意起名
			"avg":{//求平均
				"field":"price"
			}
		}
	},
    "size":0
}
9、映射关系
有了索引库,等于有了数据库中的 database。
接下来就需要建索引库(index)中的映射了,类似于数据库(database)中的表结构(table)。
创建数据库表需要设置字段名称,类型,长度,约束等;索引库也一样,需要知道这个类型下有哪些字段,每个字段有哪些约束信息,这就叫做映射(mapping)。
先创建一个索引
PUT http://127.0.0.1:9200/user
返回结果:
{
    "acknowledged": true,
    "shards_acknowledged": true,
    "index": "user"
}
创建映射
PUT http://127.0.0.1:9200/user/_mapping,附带JSON信息如下:
{
    "properties": {
        "name":{
        	"type": "text",
        	"index": true
        },
        "sex":{
        	"type": "keyword",
        	"index": true
        },
        "tel":{
        	"type": "keyword",
        	"index": false
        }
    }
}
返回结果:
{
    "acknowledged": true
}
查询映射
GET http://127.0.0.1:9200/user/_mapping
返回结果如下:
{
    "user": {
        "mappings": {
            "properties": {
                "name": {
                    "type": "text"
                },
                "sex": {
                    "type": "keyword"
                },
                "tel": {
                    "type": "keyword",
                    "index": false
                }
            }
        }
    }
}
添加数据
PUT http://127.0.0.1:9200/user/_create/1001,附带JSON如下:
{
	"name":"小米",
	"sex":"男的",
	"tel":"1111"
}
返回结果如下:
{
    "_index": "user",
    "_type": "_doc",
    "_id": "1001",
    "_version": 1,
    "result": "created",
    "_shards": {
        "total": 2,
        "successful": 1,
        "failed": 0
    },
    "_seq_no": 0,
    "_primary_term": 1
}
查询数据
查找name含有‘小’的数据:
GET http://127.0.0.1:9200/user/_search
{
	"query":{
		"match":{
			"name":"小"
		}
	}
}
返回结果如下:
{
    "took": 354,
    "timed_out": false,
    "_shards": {
        "total": 1,
        "successful": 1,
        "skipped": 0,
        "failed": 0
    },
    "hits": {
        "total": {
            "value": 1,
            "relation": "eq"
        },
        "max_score": 0.2876821,
        "hits": [
            {
                "_index": "user",
                "_type": "_doc",
                "_id": "1001",
                "_score": 0.2876821,
                "_source": {
                    "name": "小米",
                    "sex": "男的",
                    "tel": "1111"
                }
            }
        ]
    }
}
查询sex含有‘男’的数据:
GET http://127.0.0.1:9200/user/_search
{
	"query":{
		"match":{
			"sex":"男"
		}
	}
}
返回结果如下:
{
    "took": 1,
    "timed_out": false,
    "_shards": {
        "total": 1,
        "successful": 1,
        "skipped": 0,
        "failed": 0
    },
    "hits": {
        "total": {
            "value": 0,
            "relation": "eq"
        },
        "max_score": null,
        "hits": []
    }
}
找不想要的结果,只因创建映射时"sex"的类型为"keyword"。
"sex"只能完全为”男的“,才能得出原数据。
#GET http://127.0.0.1:9200/user/_search
{
	"query":{
		"match":{
			"sex":"男的"
		}
	}
}
查询电话:
GET http://127.0.0.1:9200/user/_search

{
	"query":{
		"match":{
			"tel":"11"
		}
	}
}
返回结果如下:
{
    "error": {
        "root_cause": [
            {
                "type": "query_shard_exception",
                "reason": "failed to create query: {\n  \"match\" : {\n    \"tel\" : {\n      \"query\" : \"11\",\n      \"operator\" : \"OR\",\n      \"prefix_length\" : 0,\n      \"max_expansions\" : 50,\n      \"fuzzy_transpositions\" : true,\n      \"lenient\" : false,\n      \"zero_terms_query\" : \"NONE\",\n      \"auto_generate_synonyms_phrase_query\" : true,\n      \"boost\" : 1.0\n    }\n  }\n}",
                "index_uuid": "lvGmyIx6RbSG_bV9wnZGfg",
                "index": "user"
            }
        ],
        "type": "search_phase_execution_exception",
        "reason": "all shards failed",
        "phase": "query",
        "grouped": true,
        "failed_shards": [
            {
                "shard": 0,
                "index": "user",
                "node": "F77uDwlKTdS-TMoG7U_8SA",
                "reason": {
                    "type": "query_shard_exception",
                    "reason": "failed to create query: {\n  \"match\" : {\n    \"tel\" : {\n      \"query\" : \"11\",\n      \"operator\" : \"OR\",\n      \"prefix_length\" : 0,\n      \"max_expansions\" : 50,\n      \"fuzzy_transpositions\" : true,\n      \"lenient\" : false,\n      \"zero_terms_query\" : \"NONE\",\n      \"auto_generate_synonyms_phrase_query\" : true,\n      \"boost\" : 1.0\n    }\n  }\n}",
                    "index_uuid": "lvGmyIx6RbSG_bV9wnZGfg",
                    "index": "user",
                    "caused_by": {
                        "type": "illegal_argument_exception",
                        "reason": "Cannot search on field [tel] since it is not indexed."
                    }
                }
            }
        ]
    },
    "status": 400
}
报错只因创建映射时"tel"的"index"为false。
二、ES-JavaAPI的使用
新建Maven项目,添加依赖:
<dependencies>
    <dependency>
        <groupId>org.elasticsearch</groupId>
        <artifactId>elasticsearch</artifactId>
        <version>7.6.1</version>
    </dependency>
    <!-- elasticsearch 的客户端 -->
    <dependency>
        <groupId>org.elasticsearch.client</groupId>
        <artifactId>elasticsearch-rest-high-level-client</artifactId>
        <version>7.6.1</version>
    </dependency>
    <!-- elasticsearch 依赖 2.x 的 log4j -->
    <dependency>
        <groupId>org.apache.logging.log4j</groupId>
        <artifactId>log4j-api</artifactId>
        <version>2.8.2</version>
    </dependency>
    <dependency>
        <groupId>org.apache.logging.log4j</groupId>
        <artifactId>log4j-core</artifactId>
        <version>2.8.2</version>
    </dependency>
    <dependency>
        <groupId>com.fasterxml.jackson.core</groupId>
        <artifactId>jackson-databind</artifactId>
        <version>2.9.9</version>
    </dependency>
    <!-- junit 单元测试 -->
    <dependency>
        <groupId>junit</groupId>
        <artifactId>junit</artifactId>
        <version>4.12</version>
    </dependency>
</dependencies>
public class Elastic01HelloWorld {
    public static void main(String[] args) throws IOException {
        /*1、创建客户端对象*/
        RestHighLevelClient restHighLevelClient = new RestHighLevelClient(RestClient.builder(new HttpHost("localhost", 9200, "http")));
        System.out.println(restHighLevelClient);
        /*2、关闭客户端连接*/
        restHighLevelClient.close();
    }
}
1、索引的创建
public class Elastic02CreateIndex {
    public static void main(String[] args) throws IOException {
        /*1、创建客户端对象*/
        RestHighLevelClient restHighLevelClient = new RestHighLevelClient(RestClient.builder(new HttpHost("localhost", 9200, "http")));
        /*2、创建索引请求对象*/
        CreateIndexRequest indexRequest = new CreateIndexRequest("user2");
        /*3、发送请求,获取相应*/
        CreateIndexResponse indexResponse = restHighLevelClient.indices().create(indexRequest, RequestOptions.DEFAULT);
        System.out.println("响应状态:" + indexResponse.isAcknowledged());

        restHighLevelClient.close();
    }
}
打印结果:
响应状态:true
2、索引的查询与删除
查询:
/**
     * 索引的查询
     *
     * @throws IOException 异常
     */
    @Test
    public void elasticQuery() throws IOException {
        // 创建客户端对象
        RestHighLevelClient client = new RestHighLevelClient(
                RestClient.builder(new HttpHost("localhost", 9200, "http")));

        // 查询索引 - 请求对象
        GetIndexRequest request = new GetIndexRequest("user2");
        // 发送请求,获取响应
        GetIndexResponse response = client.indices().get(request, RequestOptions.DEFAULT);

        System.out.println("aliases:" + response.getAliases());
        System.out.println("mappings:" + response.getMappings());
        System.out.println("settings:" + response.getSettings());
        client.close();
    }
打印结果;
aliases:{user2=[]}
mappings:{user2=org.elasticsearch.cluster.metadata.MappingMetaData@bcdd66e5}
settings:{user2={"index.creation_date":"1646661799262","index.number_of_replicas":"1","index.number_of_shards":"1","index.provided_name":"user2","index.uuid":"rbV9xwryTi2fYhg_Q7RjVw","index.version.created":"7060199"}}
删除索引
    /**
     * 删除索引
     */
    @Test
    public void delIndex() throws IOException {
        RestHighLevelClient client = new RestHighLevelClient(RestClient.builder(new HttpHost("localhost", 9200, "http")));
        // 删除索引 - 请求对象
        DeleteIndexRequest request = new DeleteIndexRequest("user2");
        // 发送请求,获取响应
        AcknowledgedResponse response = client.indices().delete(request, RequestOptions.DEFAULT);
        // 操作结果
        System.out.println("操作结果 : " + response.isAcknowledged());
        client.close();
    }
打印结果:
操作结果 : true
3、封装创建客户端的操作
public interface ElasticsearchTask {
    void doSomething(RestHighLevelClient client);
}
public class ConnectElasticsearch {
    /**
     * 简化客户端的创建过程
     * @param task es客户端对象
     */
    public static void connect(ElasticsearchTask task){
        // 创建客户端对象
        RestHighLevelClient client = new RestHighLevelClient(RestClient.builder(new HttpHost("localhost", 9200, "http")));
        try {
            task.doSomething(client);
            // 关闭客户端连接
            client.close();
        } catch (Exception e) {
            e.printStackTrace();
        }
    }
}
4、文档的新增与修改
新增:
import com.fasterxml.jackson.databind.ObjectMapper;
import org.elasticsearch.action.index.IndexRequest;
import org.elasticsearch.action.index.IndexResponse;
import org.elasticsearch.client.RequestOptions;
import org.elasticsearch.common.xcontent.XContentType;
import org.junit.Test;

/**
 * @ClassName ElasticDocCreateUpdate
 * @Author zhangzhixi
 * @Description
 * @Date 2022-3-7 22:19
 * @Version 1.0
 */
public class Elastic04DocCreateUpdate {
    /**
     * 文档数据的添加
     */
    @Test
    public void documentCreate() {
        ConnectElasticsearch.connect(client -> {
            // 新增文档 - 请求对象
            IndexRequest request = new IndexRequest();
            // 设置索引及唯一性标识
            request.index("user").id("1001");

            // 创建数据对象
            User user = new User();
            user.setName("zhangsan");
            user.setAge(30);
            user.setSex("男");

            ObjectMapper objectMapper = new ObjectMapper();
            String productJson = objectMapper.writeValueAsString(user);
            // 添加文档数据,数据格式为 JSON 格式
            request.source(productJson, XContentType.JSON);
            // 客户端发送请求,获取响应对象
            IndexResponse response = client.index(request, RequestOptions.DEFAULT);
            // 打印结果信息
            System.out.println("_index:" + response.getIndex());
            System.out.println("_id:" + response.getId());
            System.out.println("_result:" + response.getResult());
        });
    }
}

class User {
    private String name;
    private Integer age;
    private String sex;

    public String getName() {
        return name;
    }

    public void setName(String name) {
        this.name = name;
    }

    public Integer getAge() {
        return age;
    }

    public void setAge(Integer age) {
        this.age = age;
    }

    public String getSex() {
        return sex;
    }

    public void setSex(String sex) {
        this.sex = sex;
    }
}
打印结果:
_index:user
_id:1001
_result:UPDATED
数据的查看:GET http://127.0.0.1:9200/user/_search
索引的更新
 /**
     * 索引的修改
     */
    @Test
    public void documentUpdate() {
        ConnectElasticsearch.connect(client -> {
            // 修改文档 - 请求对象
            UpdateRequest request = new UpdateRequest();
            // 配置修改参数
            request.index("user").id("1001");
            // 设置请求体,对数据进行修改
            request.doc(XContentType.JSON, "sex", "女");
            // 客户端发送请求,获取响应对象
            UpdateResponse response = client.update(request, RequestOptions.DEFAULT);
            System.out.println("_index:" + response.getIndex());
            System.out.println("_id:" + response.getId());
            System.out.println("_result:" + response.getResult());
        });
    }
返回结果:
_index:user
_id:1001
_result:UPDATED
数据的查看:GET http://127.0.0.1:9200/user/_search
{
    "took": 6,
    "timed_out": false,
    "_shards": {
        "total": 1,
        "successful": 1,
        "skipped": 0,
        "failed": 0
    },
    "hits": {
        "total": {
            "value": 1,
            "relation": "eq"
        },
        "max_score": 1.0,
        "hits": [
            {
                "_index": "user",
                "_type": "_doc",
                "_id": "1001",
                "_score": 1.0,
                "_source": {
                    "name": "zhangsan",
                    "age": 30,
                    "sex": "女"
                }
            }
        ]
    }
}
5、文档的查询与删除
文档的查询
/**
 * 文档的查询
 */
@Test
public void elasticQuery() {
    ConnectElasticsearch.connect(client -> {
        //1.创建请求对象
        GetRequest request = new GetRequest().index("user").id("1001");
        //2.客户端发送请求,获取响应对象
        GetResponse response = client.get(request, RequestOptions.DEFAULT);
        //3.打印结果信息
        System.out.println("_index:" + response.getIndex());
        System.out.println("_type:" + response.getType());
        System.out.println("_id:" + response.getId());
        System.out.println("source:" + response.getSourceAsString());
    });
}
返回结果:
_index:user
_type:_doc
_id:1001
source:{"name":"zhangsan","age":30,"sex":"女"}
文档的删除
/**
 * 文档的删除
 */
@Test
public void documentDel() {
    ConnectElasticsearch.connect(client -> {
        //创建请求对象
        DeleteRequest request = new DeleteRequest().index("user").id("1001");
        //客户端发送请求,获取响应对象
        DeleteResponse response = client.delete(request, RequestOptions.DEFAULT);
        //打印信息
        System.out.println(response.toString());
    });
}
返回结果:
DeleteResponse[index=user,type=_doc,id=1001,version=4,result=deleted,shards=ShardInfo{total=2, successful=1, failures=[]}]
6、文档的批量添加与删除
批量添加
/**
     * 文档的批量添加
     */
    @Test
    public void documentCreateAll() {
        ConnectElasticsearch.connect(client -> {
            //创建批量新增请求对象
            BulkRequest request = new BulkRequest();
            request.add(new
                    IndexRequest().index("user").id("1001").source(XContentType.JSON, "name", "zhangsan"));
            request.add(new IndexRequest().index("user").id("1002").source(XContentType.JSON, "name", "lisi"));
            request.add(new IndexRequest().index("user").id("1003").source(XContentType.JSON, "name", "wangwu"));
            //客户端发送请求,获取响应对象
            BulkResponse responses = client.bulk(request, RequestOptions.DEFAULT);
            //打印结果信息
            System.out.println("took:" + responses.getTook());
            System.out.println("items:" + Arrays.toString(responses.getItems()));
        });
    }
返回结果:
took:9ms
items:[org.elasticsearch.action.bulk.BulkItemResponse@662b4c69, org.elasticsearch.action.bulk.BulkItemResponse@fa49800, org.elasticsearch.action.bulk.BulkItemResponse@71238fc2]
批量删除
/**
 * 文档的批量删除
 */
@Test
public void documentDelAll() {
    ConnectElasticsearch.connect(client -> {
        //创建批量删除请求对象
        BulkRequest request = new BulkRequest();
        request.add(new DeleteRequest().index("user").id("1001"));
        request.add(new DeleteRequest().index("user").id("1002"));
        request.add(new DeleteRequest().index("user").id("1003"));
        //客户端发送请求,获取响应对象
        BulkResponse responses = client.bulk(request, RequestOptions.DEFAULT);
        //打印结果信息
        System.out.println("took:" + responses.getTook());
        System.out.println("items:" + responses.getItems());
    });
}
返回结果:
took:11ms
items:[Lorg.elasticsearch.action.bulk.BulkItemResponse;@79da8dc5
7、文档的全量查询
批量添加数据
/**
 * 先批量添加数据
 */
@Test
public void docInsertAll() {
    ConnectElasticsearch.connect(client -> {
        //创建批量新增请求对象
        BulkRequest request = new BulkRequest();
        request.add(new IndexRequest().index("user").id("1001").source(XContentType.JSON, "name", "zhangsan", "age", "10", "sex", "女"));
        request.add(new IndexRequest().index("user").id("1002").source(XContentType.JSON, "name", "lisi", "age", "30", "sex", "女"));
        request.add(new IndexRequest().index("user").id("1003").source(XContentType.JSON, "name", "wangwu1", "age", "40", "sex", "男"));
        request.add(new IndexRequest().index("user").id("1004").source(XContentType.JSON, "name", "wangwu2", "age", "20", "sex", "女"));
        request.add(new IndexRequest().index("user").id("1005").source(XContentType.JSON, "name", "wangwu3", "age", "50", "sex", "男"));
        request.add(new IndexRequest().index("user").id("1006").source(XContentType.JSON, "name", "wangwu4", "age", "20", "sex", "男"));
        //客户端发送请求,获取响应对象
        BulkResponse responses = client.bulk(request, RequestOptions.DEFAULT);
        //打印结果信息
        System.out.println("took:" + responses.getTook());
        System.out.println("items:" + Arrays.toString(responses.getItems()));
    });
}
查询所有索引数据
/**
 * 批量查询数据
 */
@Test
public void docQueryAll() {
    ConnectElasticsearch.connect(client -> {
        // 创建搜索请求对象
        SearchRequest request = new SearchRequest();
        request.indices("user");
        // 构建查询的请求体
        SearchSourceBuilder sourceBuilder = new SearchSourceBuilder();
        // 查询所有数据
        sourceBuilder.query(QueryBuilders.matchAllQuery());
        request.source(sourceBuilder);
        SearchResponse response = client.search(request, RequestOptions.DEFAULT);
        // 查询匹配
        SearchHits hits = response.getHits();
        System.out.println("took:" + response.getTook());
        System.out.println("timeout:" + response.isTimedOut());
        System.out.println("total:" + hits.getTotalHits());
        System.out.println("MaxScore:" + hits.getMaxScore());
        System.out.println("hits========>>");
        for (SearchHit hit : hits) {
            //输出每条查询的结果信息
            System.out.println(hit.getSourceAsString());
        }
        System.out.println("<<========");
    });
}
打印结果:
took:823ms
timeout:false
total:6 hits
MaxScore:1.0
hits========>>
{"name":"zhangsan","age":"10","sex":"女"}
{"name":"lisi","age":"30","sex":"女"}
{"name":"wangwu1","age":"40","sex":"男"}
{"name":"wangwu2","age":"20","sex":"女"}
{"name":"wangwu3","age":"50","sex":"男"}
{"name":"wangwu4","age":"20","sex":"男"}
<<========

进程已结束,退出代码为 0
8、分页查询 & 条件查询 & 查询排序
条件查询
/**
 * 条件查询
 */
@Test
public void conditionQuery() {
    ConnectElasticsearch.connect(client -> {
        // 创建搜索请求对象
        SearchRequest request = new SearchRequest();
        request.indices("user");
        // 构建查询的请求体
        SearchSourceBuilder sourceBuilder = new SearchSourceBuilder();
        sourceBuilder.query(QueryBuilders.termQuery("age", "30"));
        request.source(sourceBuilder);
        SearchResponse response = client.search(request, RequestOptions.DEFAULT);
        // 查询匹配
        SearchHits hits = response.getHits();
        System.out.println("took:" + response.getTook());
        System.out.println("timeout:" + response.isTimedOut());
        System.out.println("total:" + hits.getTotalHits());
        System.out.println("MaxScore:" + hits.getMaxScore());
        System.out.println("hits========>>");
        for (SearchHit hit : hits) {
            //输出每条查询的结果信息
            System.out.println(hit.getSourceAsString());
        }
        System.out.println("<<========");
    });
}
查询结果:
took:4ms
timeout:false
total:1 hits
MaxScore:1.0
hits========>>
{"name":"lisi","age":"30","sex":"女"}
<<========
分页查询
/**
 * 分页查询
 */
@Test
public void pagingQuery() {
    ConnectElasticsearch.connect(client -> {
        // 创建搜索请求对象
        SearchRequest request = new SearchRequest();
        request.indices("user");
        // 构建查询的请求体
        SearchSourceBuilder sourceBuilder = new SearchSourceBuilder();
        sourceBuilder.query(QueryBuilders.matchAllQuery());
        // 分页查询
        // 当前页其实索引(第一条数据的顺序号), from
        sourceBuilder.from(0);
        // 每页显示多少条 size
        sourceBuilder.size(2);
        request.source(sourceBuilder);
        SearchResponse response = client.search(request, RequestOptions.DEFAULT);
        // 查询匹配
        SearchHits hits = response.getHits();
        System.out.println("took:" + response.getTook());
        System.out.println("timeout:" + response.isTimedOut());
        System.out.println("total:" + hits.getTotalHits());
        System.out.println("MaxScore:" + hits.getMaxScore());
        System.out.println("hits========>>");
        for (SearchHit hit : hits) {
            //输出每条查询的结果信息
            System.out.println(hit.getSourceAsString());
        }
        System.out.println("<<========");
    });
}
查询结果:
took:3ms
timeout:false
total:6 hits
MaxScore:1.0
hits========>>
{"name":"zhangsan","age":"10","sex":"女"}
{"name":"lisi","age":"30","sex":"女"}
<<========
查询排序
/**
 * 查询排序
 */
@Test
public void querySorting(){
    ConnectElasticsearch.connect(client -> {
        // 创建搜索请求对象
        SearchRequest request = new SearchRequest();
        request.indices("user");
        // 构建查询的请求体
        SearchSourceBuilder sourceBuilder = new SearchSourceBuilder();
        sourceBuilder.query(QueryBuilders.matchAllQuery());
        // 排序(升序)
        sourceBuilder.sort("age", SortOrder.ASC);
        request.source(sourceBuilder);
        SearchResponse response = client.search(request, RequestOptions.DEFAULT);
        // 查询匹配
        SearchHits hits = response.getHits();
        System.out.println("took:" + response.getTook());
        System.out.println("timeout:" + response.isTimedOut());
        System.out.println("total:" + hits.getTotalHits());
        System.out.println("MaxScore:" + hits.getMaxScore());
        System.out.println("hits========>>");
        for (SearchHit hit : hits) {
            //输出每条查询的结果信息
            System.out.println(hit.getSourceAsString());
        }
        System.out.println("<<========");
    });
}
查询结果:
took:129ms
timeout:false
total:6 hits
MaxScore:NaN
hits========>>
{"name":"zhangsan","age":"10","sex":"女"}
{"name":"wangwu2","age":"20","sex":"女"}
{"name":"wangwu4","age":"20","sex":"男"}
{"name":"lisi","age":"30","sex":"女"}
{"name":"wangwu1","age":"40","sex":"男"}
{"name":"wangwu3","age":"50","sex":"男"}
<<========
9、组合查询 & 范围查询
组合查询
/**
 * 组合查询
 */
@Test
public void combinedQuery() {
    ConnectElasticsearch.connect(client -> {
        // 创建搜索请求对象
        SearchRequest request = new SearchRequest();
        request.indices("user");
        // 构建查询的请求体
        SearchSourceBuilder sourceBuilder = new SearchSourceBuilder();
        BoolQueryBuilder boolQueryBuilder = QueryBuilders.boolQuery();
        // 必须包含
        boolQueryBuilder.must(QueryBuilders.matchQuery("age", "30"));
        // 一定不含
        boolQueryBuilder.mustNot(QueryBuilders.matchQuery("name", "zhangsan"));
        // 可能包含
        boolQueryBuilder.should(QueryBuilders.matchQuery("sex", "男"));
        sourceBuilder.query(boolQueryBuilder);
        request.source(sourceBuilder);
        SearchResponse response = client.search(request, RequestOptions.DEFAULT);
        // 查询匹配
        SearchHits hits = response.getHits();
        System.out.println("took:" + response.getTook());
        System.out.println("timeout:" + response.isTimedOut());
        System.out.println("total:" + hits.getTotalHits());
        System.out.println("MaxScore:" + hits.getMaxScore());
        System.out.println("hits========>>");
        for (SearchHit hit : hits) {
            //输出每条查询的结果信息
            System.out.println(hit.getSourceAsString());
        }
        System.out.println("<<========");
    });
打印结果:
took:5ms
timeout:false
total:1 hits
MaxScore:1.0
hits========>>
{"name":"lisi","age":"30","sex":"女"}
<<========
范围查询
/**
 * 范围查询
 */
@Test
public void rangeQuery() {
    ConnectElasticsearch.connect(client -> {
        // 创建搜索请求对象
        SearchRequest request = new SearchRequest();
        request.indices("user");
        // 构建查询的请求体
        SearchSourceBuilder sourceBuilder = new SearchSourceBuilder();
        /*要查询的字段*/
        RangeQueryBuilder rangeQuery = QueryBuilders.rangeQuery("age");
        /*查询条件:大于等于*/
        //rangeQuery.gte("30");
        /*查询条件:小于等于*/
        rangeQuery.lte("40");
        sourceBuilder.query(rangeQuery);
        request.source(sourceBuilder);
        SearchResponse response = client.search(request, RequestOptions.DEFAULT);
        // 查询匹配
        SearchHits hits = response.getHits();
        System.out.println("took:" + response.getTook());
        System.out.println("timeout:" + response.isTimedOut());
        System.out.println("total:" + hits.getTotalHits());
        System.out.println("MaxScore:" + hits.getMaxScore());
        System.out.println("hits========>>");
        for (SearchHit hit : hits) {
            //输出每条查询的结果信息
            System.out.println(hit.getSourceAsString());
        }
        System.out.println("<<========");
    });
}
打印结果:
took:72ms
timeout:false
total:5 hits
MaxScore:1.0
hits========>>
{"name":"zhangsan","age":"10","sex":"女"}
{"name":"lisi","age":"30","sex":"女"}
{"name":"wangwu1","age":"40","sex":"男"}
{"name":"wangwu2","age":"20","sex":"女"}
{"name":"wangwu4","age":"20","sex":"男"}
<<========
10、模糊查询 & 高亮查询
模糊查询
/**
 * 模糊查询
 */
@Test
public void fuzzyQuery() {
    ConnectElasticsearch.connect(client -> {
        // 创建搜索请求对象
        SearchRequest request = new SearchRequest();
        request.indices("user");
        // 构建查询的请求体
        SearchSourceBuilder sourceBuilder = new SearchSourceBuilder();
        /*name包含wangwu的*/
        sourceBuilder.query(QueryBuilders.fuzzyQuery("name","wangwu").fuzziness(Fuzziness.ONE));
        request.source(sourceBuilder);
        SearchResponse response = client.search(request, RequestOptions.DEFAULT);
        // 查询匹配
        SearchHits hits = response.getHits();
        System.out.println("took:" + response.getTook());
        System.out.println("timeout:" + response.isTimedOut());
        System.out.println("total:" + hits.getTotalHits());
        System.out.println("MaxScore:" + hits.getMaxScore());
        System.out.println("hits========>>");
        for (SearchHit hit : hits) {
            //输出每条查询的结果信息
            System.out.println(hit.getSourceAsString());
        }
        System.out.println("<<========");
    });
}
打印结果:
took:244ms
timeout:false
total:4 hits
MaxScore:1.2837042
hits========>>
{"name":"wangwu1","age":"40","sex":"男"}
{"name":"wangwu2","age":"20","sex":"女"}
{"name":"wangwu3","age":"50","sex":"男"}
{"name":"wangwu4","age":"20","sex":"男"}
<<========
高亮查询:
/**
 * 高亮查询
 */
@Test
public void highlightQuery() {
    ConnectElasticsearch.connect(client -> {
        // 高亮查询
        SearchRequest request = new SearchRequest().indices("user");
        //2.创建查询请求体构建器
        SearchSourceBuilder sourceBuilder = new SearchSourceBuilder();
        //构建查询方式:高亮查询
        TermsQueryBuilder termsQueryBuilder =
                QueryBuilders.termsQuery("name", "zhangsan");
        //设置查询方式
        sourceBuilder.query(termsQueryBuilder);
        //构建高亮字段
        HighlightBuilder highlightBuilder = new HighlightBuilder();
        highlightBuilder.preTags("<font color='red'>");//设置标签前缀
        highlightBuilder.postTags("</font>");//设置标签后缀
        highlightBuilder.field("name");//设置高亮字段
        //设置高亮构建对象
        sourceBuilder.highlighter(highlightBuilder);
        //设置请求体
        request.source(sourceBuilder);
        //3.客户端发送请求,获取响应对象
        SearchResponse response = client.search(request, RequestOptions.DEFAULT);
        //4.打印响应结果
        SearchHits hits = response.getHits();
        System.out.println("took::" + response.getTook());
        System.out.println("time_out::" + response.isTimedOut());
        System.out.println("total::" + hits.getTotalHits());
        System.out.println("max_score::" + hits.getMaxScore());
        System.out.println("hits::::>>");
        for (SearchHit hit : hits) {
            String sourceAsString = hit.getSourceAsString();
            System.out.println(sourceAsString);
            //打印高亮结果
            Map<String, HighlightField> highlightFields = hit.getHighlightFields();
            System.out.println(highlightFields);
        }
        System.out.println("<<::::");
    });
}
打印结果:
hits::::>>
{"name":"zhangsan","age":"10","sex":"女"}
{name=[name], fragments[[<font color='red'>zhangsan</font>]]}
<<::::
11、最大值查询 & 分组查询
最大值查询
/**
 * 最大值查询
 */
@Test
public void maxValueQuery(){
    ConnectElasticsearch.connect(client -> {
        // 高亮查询
        SearchRequest request = new SearchRequest().indices("user");
        SearchSourceBuilder sourceBuilder = new SearchSourceBuilder();
        sourceBuilder.aggregation(AggregationBuilders.max("maxAge").field("age"));
        //设置请求体
        request.source(sourceBuilder);
        //3.客户端发送请求,获取响应对象
        SearchResponse response = client.search(request, RequestOptions.DEFAULT);
        //4.打印响应结果
        SearchHits hits = response.getHits();
        System.out.println(response);
    });
}
打印结果:
{
    "took": 526,
    "timed_out": false,
    "_shards": {
        "total": 1,
        "successful": 1,
        "skipped": 0,
        "failed": 0
    },
    "hits": {
        "total": {
            "value": 6,
            "relation": "eq"
        },
        "max_score": 1,
        "hits": [
            {
                "_index": "user",
                "_type": "_doc",
                "_id": "1001",
                "_score": 1,
                "_source": {
                    "name": "zhangsan",
                    "age": "10",
                    "sex": "女"
                }
            },
            {
                "_index": "user",
                "_type": "_doc",
                "_id": "1002",
                "_score": 1,
                "_source": {
                    "name": "lisi",
                    "age": "30",
                    "sex": "女"
                }
            },
            {
                "_index": "user",
                "_type": "_doc",
                "_id": "1003",
                "_score": 1,
                "_source": {
                    "name": "wangwu1",
                    "age": "40",
                    "sex": "男"
                }
            },
            {
                "_index": "user",
                "_type": "_doc",
                "_id": "1004",
                "_score": 1,
                "_source": {
                    "name": "wangwu2",
                    "age": "20",
                    "sex": "女"
                }
            },
            {
                "_index": "user",
                "_type": "_doc",
                "_id": "1005",
                "_score": 1,
                "_source": {
                    "name": "wangwu3",
                    "age": "50",
                    "sex": "男"
                }
            },
            {
                "_index": "user",
                "_type": "_doc",
                "_id": "1006",
                "_score": 1,
                "_source": {
                    "name": "wangwu4",
                    "age": "20",
                    "sex": "男"
                }
            }
        ]
    },
    "aggregations": {
        "max#maxAge": {
            "value": 50
        }
    }
}
分组查询
/**
 * 分组查询
 */
@Test
public void groupQuery() {
   ConnectElasticsearch.connect(client -> {
       SearchRequest request = new SearchRequest().indices("user");
       SearchSourceBuilder sourceBuilder = new SearchSourceBuilder();
       sourceBuilder.aggregation(AggregationBuilders.terms("age_groupby").field("age"));
       //设置请求体
       request.source(sourceBuilder);
       //3.客户端发送请求,获取响应对象
       SearchResponse response = client.search(request, RequestOptions.DEFAULT);
       //4.打印响应结果
       SearchHits hits = response.getHits();
       System.out.println(response);
   });
}
打印结果:
{
    "took": 194,
    "timed_out": false,
    "_shards": {
        "total": 1,
        "successful": 1,
        "skipped": 0,
        "failed": 0
    },
    "hits": {
        "total": {
            "value": 6,
            "relation": "eq"
        },
        "max_score": 1,
        "hits": [
            {
                "_index": "user",
                "_type": "_doc",
                "_id": "1001",
                "_score": 1,
                "_source": {
                    "name": "zhangsan",
                    "age": "10",
                    "sex": "女"
                }
            },
            {
                "_index": "user",
                "_type": "_doc",
                "_id": "1002",
                "_score": 1,
                "_source": {
                    "name": "lisi",
                    "age": "30",
                    "sex": "女"
                }
            },
            {
                "_index": "user",
                "_type": "_doc",
                "_id": "1003",
                "_score": 1,
                "_source": {
                    "name": "wangwu1",
                    "age": "40",
                    "sex": "男"
                }
            },
            {
                "_index": "user",
                "_type": "_doc",
                "_id": "1004",
                "_score": 1,
                "_source": {
                    "name": "wangwu2",
                    "age": "20",
                    "sex": "女"
                }
            },
            {
                "_index": "user",
                "_type": "_doc",
                "_id": "1005",
                "_score": 1,
                "_source": {
                    "name": "wangwu3",
                    "age": "50",
                    "sex": "男"
                }
            },
            {
                "_index": "user",
                "_type": "_doc",
                "_id": "1006",
                "_score": 1,
                "_source": {
                    "name": "wangwu4",
                    "age": "20",
                    "sex": "男"
                }
            }
        ]
    },
    "aggregations": {
        "lterms#age_groupby": {
            "doc_count_error_upper_bound": 0,
            "sum_other_doc_count": 0,
            "buckets": [
                {
                    "key": 20,
                    "doc_count": 2
                },
                {
                    "key": 10,
                    "doc_count": 1
                },
                {
                    "key": 30,
                    "doc_count": 1
                },
                {
                    "key": 40,
                    "doc_count": 1
                },
                {
                    "key": 50,
                    "doc_count": 1
                }
            ]
        }
    }
}
三、Windows下ES单节点以及集群的部署
1、ElasticSearch环境介绍
单机 & 集群
单台 Elasticsearch 服务器提供服务,往往都有最大的负载能力,超过这个阈值,服务器
性能就会大大降低甚至不可用,所以生产环境中,一般都是运行在指定服务器集群中。
除了负载能力,单点服务器也存在其他问题:
单台机器存储容量有限
单服务器容易出现单点故障,无法实现高可用
单服务的并发处理能力有限
配置服务器集群时,集群中节点数量没有限制,大于等于 2 个节点就可以看做是集群了。
一般出于高性能及高可用方面来考虑集群中节点数量都是 3 个以上
总之,集群能提高性能,增加容错。
集群 Cluster
**一个集群就是由一个或多个服务器节点组织在一起,共同持有整个的数据,并一起提供索引和搜索功能。**一个 Elasticsearch 集群有一个唯一的名字标识,这个名字默认就是”elasticsearch”。这个名字是重要的,因为一个节点只能通过指定某个集群的名字,来加入这个集群。
节点 Node
集群中包含很多服务器, 一个节点就是其中的一个服务器。 作为集群的一部分,它存储数据,参与集群的索引和搜索功能。
一个节点也是由一个名字来标识的,默认情况下,这个名字是一个随机的漫威漫画角色的名字,这个名字会在启动的时候赋予节点。这个名字对于管理工作来说挺重要的,因为在这个管理过程中,你会去确定网络中的哪些服务器对应于 Elasticsearch 集群中的哪些节点。
一个节点可以通过配置集群名称的方式来加入一个指定的集群。默认情况下,每个节点都会被安排加入到一个叫做“elasticsearch”的集群中,这意味着,如果你在你的网络中启动了若干个节点,并假定它们能够相互发现彼此,它们将会自动地形成并加入到一个叫做“elasticsearch”的集群中。
在一个集群里,只要你想,可以拥有任意多个节点。而且,如果当前你的网络中没有运
行任何 Elasticsearch 节点,这时启动一个节点,会默认创建并加入一个叫做“elasticsearch”的
集群。
2、Windows-集群部署
1、创建一个elasticsearch-cluster文件夹
复制三份你的ElasticSearch原始文件,并改名为node-1001、node-1002、node-1003

2、修改集群文件目录中每个节点的 config/elasticsearch.yml 配置文件
node-1001:
#节点 1 的配置信息:
#集群名称,节点之间要保持一致
cluster.name: my-elasticsearch
#节点名称,集群内要唯一
node.name: node-1001
node.master: true
node.data: true
#ip 地址
network.host: localhost
#http 端口
http.port: 9300
#tcp 监听端口
transport.tcp.port: 9301
#discovery.seed_hosts: ["localhost:9302","localhost:9303"]
#discovery.zen.fd.ping_timeout: 1m
#discovery.zen.fd.ping_retries: 5
#集群内的可以被选为主节点的节点列表
#cluster.initial_master_nodes: ["node-1", "node-2","node-3"]
#跨域配置
#action.destructive_requires_name: true
http.cors.enabled: true
http.cors.allow-origin: "*"
node-1002:
#节点 2 的配置信息:
#集群名称,节点之间要保持一致
cluster.name: my-elasticsearch
#节点名称,集群内要唯一
node.name: node-1002
node.master: true
node.data: true
#ip 地址
network.host: localhost
#http 端口
http.port: 9400
#tcp 监听端口
transport.tcp.port: 9302
discovery.seed_hosts: ["localhost:9301"]
discovery.zen.fd.ping_timeout: 1m
discovery.zen.fd.ping_retries: 5
#集群内的可以被选为主节点的节点列表
#cluster.initial_master_nodes: ["node-1", "node-2","node-3"]
#跨域配置
#action.destructive_requires_name: true
http.cors.enabled: true
http.cors.allow-origin: "*"
node-1003:
#节点 3 的配置信息:
#集群名称,节点之间要保持一致
cluster.name: my-elasticsearch
#节点名称,集群内要唯一
node.name: node-1003
node.master: true
node.data: true
#ip 地址
network.host: localhost
#http 端口
http.port: 9500
#tcp 监听端口
transport.tcp.port: 9303
#候选主节点的地址,在开启服务后可以被选为主节点
discovery.seed_hosts: ["localhost:9301", "localhost:9302"]
discovery.zen.fd.ping_timeout: 1m
discovery.zen.fd.ping_retries: 5
#集群内的可以被选为主节点的节点列表
#cluster.initial_master_nodes: ["node-1", "node-2","node-3"]
#跨域配置
#action.destructive_requires_name: true
http.cors.enabled: true
http.cors.allow-origin: "*"
三、如果每个节点中有data文件夹,删除每个节点中的data文件夹,再依次启动三个ES服务
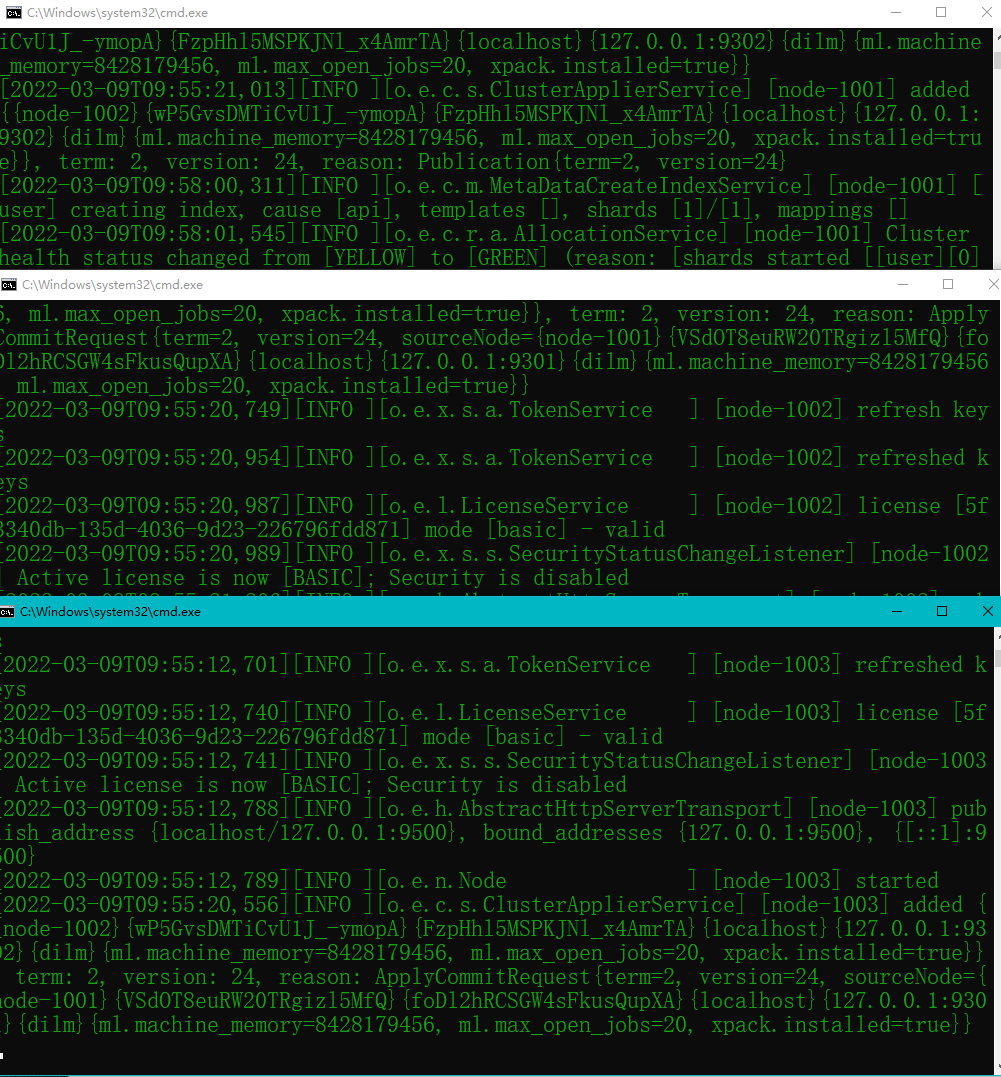
4、测试集群
一、用Postman,查看集群状态
GET http://127.0.0.1:9300/_cluster/health
GET http://127.0.0.1:9400/_cluster/health
GET http://127.0.0.1:9500/_cluster/health
返回结果皆如下所示:
{
    "cluster_name": "my-elasticsearch",
    "status": "green",
    "timed_out": false,
    "number_of_nodes": 3,
    "number_of_data_nodes": 3,
    "active_primary_shards": 1,
    "active_shards": 2,
    "relocating_shards": 0,
    "initializing_shards": 0,
    "unassigned_shards": 0,
    "delayed_unassigned_shards": 0,
    "number_of_pending_tasks": 0,
    "number_of_in_flight_fetch": 0,
    "task_max_waiting_in_queue_millis": 0,
    "active_shards_percent_as_number": 100.0
}
status字段指示着当前集群在总体上是否工作正常。它的三种颜色含义如下:
- green:所有的主分片和副本分片都正常运行。
- yellow:所有的主分片都正常运行,但不是所有的副本分片都正常运行。
- red:有主分片没能正常运行。
二、用Postman,在一节点增加索引,另一节点获取索引
向集群中的node-1001节点增加索引:GET http://127.0.0.1:9300/user
返回结果如下:
{
    "acknowledged": true,
    "shards_acknowledged": true,
    "index": "user"
}
三、测试在节点node-1002是否能够查看节点1添加的索引
GET http://127.0.0.1:9400/user
成功访问,返回结果如下:
{
    "user": {
        "aliases": {},
        "mappings": {},
        "settings": {
            "index": {
                "creation_date": "1646791080296",
                "number_of_shards": "1",
                "number_of_replicas": "1",
                "uuid": "xTVbhg1CRbSvb0j6quaM8A",
                "version": {
                    "created": "7060199"
                },
                "provided_name": "user"
            }
        }
    }
}
3、Linux下单机部署
1、软件的下载
如果服务器有网络的话,使用wget命令下载还是特别快的: wget https://artifacts.elastic.co/downloads/elasticsearch/elasticsearch-7.8.0-linux-x86_64.tar.gz 
2、解压软件
# 解压缩 -C表示要解压到指定目录
tar -zxvf elasticsearch-7.8.0-linux-x86_64.tar.gz -C /usr/local
# 改名
mv elasticsearch-7.8.0 es
3、创建用户
因为安全问题, Elasticsearch 不允许 root 用户直接运行,所以要创建新用户,在 root 用户中创建新用户。
useradd es #新增 es 用户
passwd es #为 es 用户设置密码
userdel -r es #如果错了,可以删除再加
chown -R es:es /opt/module/es #文件夹所有者
4、修改配置文件:
修改/usr/local/es/config/elasticsearch.yml文件。
# 加入如下配置
cluster.name: elasticsearch
node.name: node-1
network.host: 0.0.0.0
http.port: 9200
cluster.initial_master_nodes: ["node-1"]
修改/etc/security/limits.d/20-nproc.conf
# 在文件末尾中增加下面内容
# 每个进程可以打开的文件数的限制
es soft nofile 65536
es hard nofile 65536
# 操作系统级别对每个用户创建的进程数的限制
* hard nproc 4096
# 注: * 带表 Linux 所有用户名称
修改/etc/security/limits.d/20-nproc.conf
# 在文件末尾中增加下面内容
# 每个进程可以打开的文件数的限制
es soft nofile 65536
es hard nofile 65536
# 操作系统级别对每个用户创建的进程数的限制
* hard nproc 4096
# 注: * 带表 Linux 所有用户名称
修改/etc/sysctl.conf
# 在文件中增加下面内容
# 一个进程可以拥有的 VMA(虚拟内存区域)的数量,默认值为 65536
vm.max_map_count=655360
重新加载
sysctl -p
4、启动软件:先切换到ES用户(su es)
cd /opt/module/es/
#启动
bin/elasticsearch
#后台启动
bin/elasticsearch -d
如果遇到启动ES出现错误:
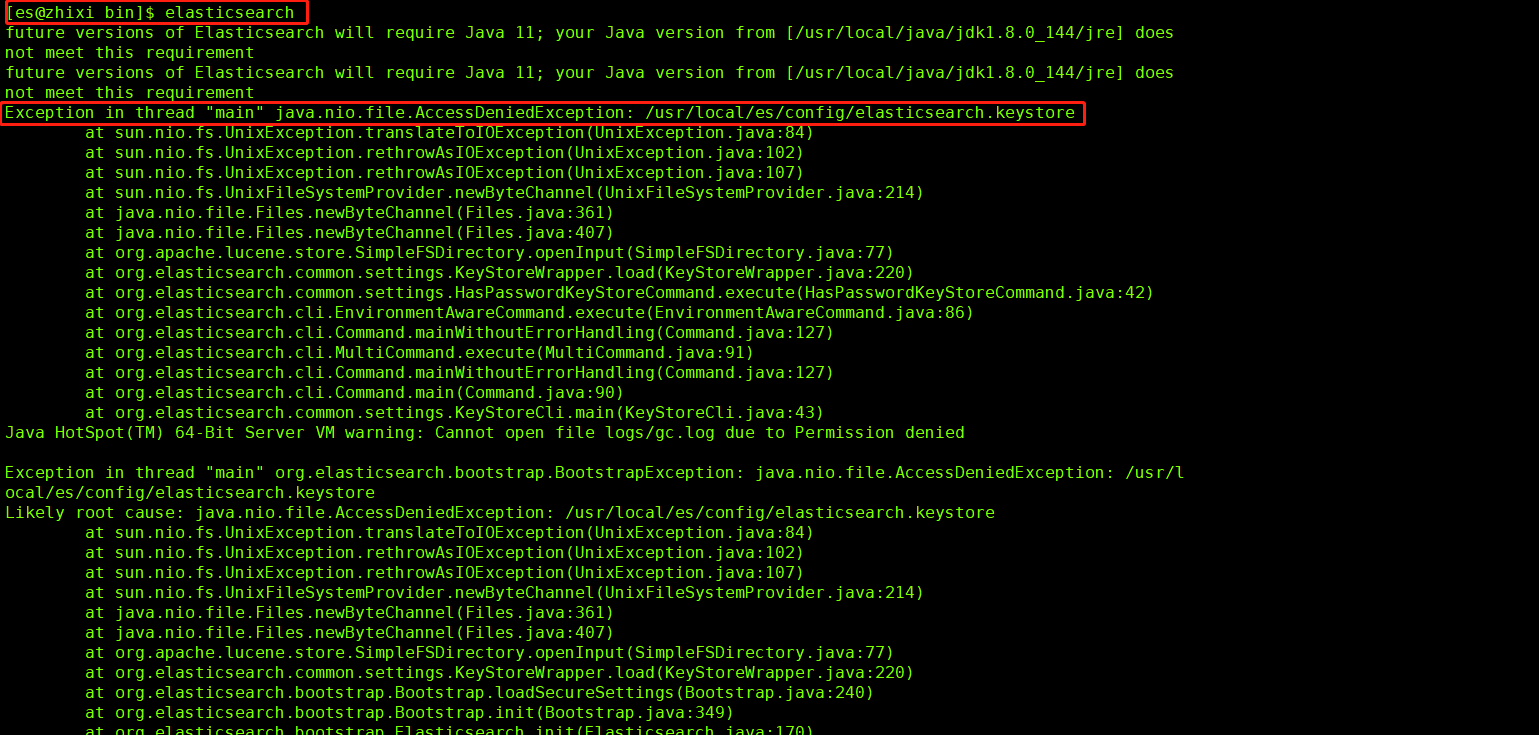
解决办法:
到root用户,重新执行一句: chown -R es:es /usr/local/es/
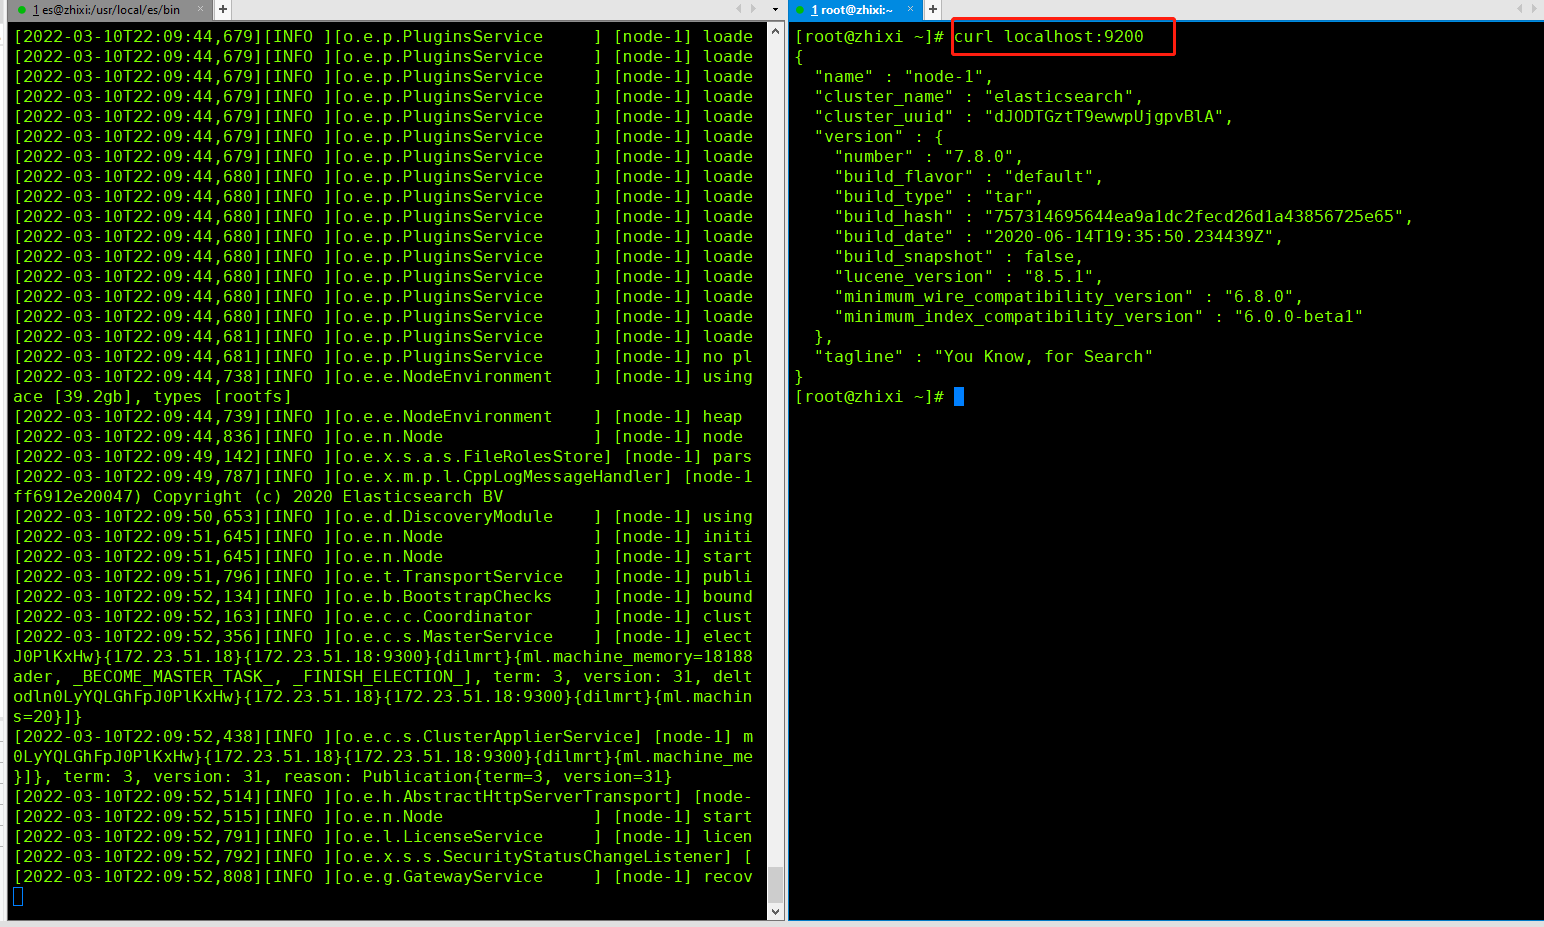
浏览器访问:IP:9200
四、ElasticSearch集成SpringData
Spring Data Elasticsearch基于Spring Data API简化 Elasticsearch 操作,将原始操作Elasticsearch 的客户端API进行封装。Spring Data为Elasticsearch 项目提供集成搜索引擎。Spring Data Elasticsearch POJO的关键功能区域为中心的模型与Elastichsearch交互文档和轻松地编写一个存储索引库数据访问层。
参考手册
演示项目GItHub地址:https://github.com/zhangzhixi0305/springboot-es.git
1、创建SpringBoot项目
2、添加pom依赖
<dependencies>
    <!--整合ES的依赖-->
    <dependency>
        <groupId>org.springframework.boot</groupId>
        <artifactId>spring-boot-starter-data-elasticsearch</artifactId>
    </dependency>
    <!--springboot-web开发-->
    <dependency>
        <groupId>org.springframework.boot</groupId>
        <artifactId>spring-boot-starter-web</artifactId>
    </dependency>
    <dependency>
        <groupId>org.springframework.boot</groupId>
        <artifactId>spring-boot-devtools</artifactId>
        <scope>runtime</scope>
        <optional>true</optional>
    </dependency>
    <dependency>
        <groupId>com.taobao.arthas</groupId>
        <artifactId>arthas-spring-boot-starter</artifactId>
        <version>3.4.8</version>
        <scope>runtime</scope>
    </dependency>
    <dependency>
        <groupId>org.projectlombok</groupId>
        <artifactId>lombok</artifactId>
        <optional>true</optional>
    </dependency>
    <!--防止在配置类中出现上方的springboot红框提示-->
    <dependency>
        <groupId>org.springframework.boot</groupId>
        <artifactId>spring-boot-configuration-processor</artifactId>
        <optional>true</optional>
    </dependency>
    <dependency>
        <groupId>org.springframework.boot</groupId>
        <artifactId>spring-boot-starter-test</artifactId>
        <scope>test</scope>
        <exclusions>
            <exclusion>
                <groupId>org.junit.vintage</groupId>
                <artifactId>junit-vintage-engine</artifactId>
            </exclusion>
        </exclusions>
    </dependency>
</dependencies>
3、修改application.properties配置文件
# 应用名称
spring.application.name=springboot-es
# 应用服务 WEB 访问端口
server.port=8080
# es 服务地址
elasticsearch.host=127.0.0.1
# es 服务端口
elasticsearch.port=9200
# 配置日志级别,开启 debug 日志
logging.level.com.atguigu.es=debug
4、数据实体类:pojo/Product
import lombok.AllArgsConstructor;
import lombok.Data;
import lombok.NoArgsConstructor;
import lombok.ToString;
import org.springframework.data.annotation.Id;
import org.springframework.data.elasticsearch.annotations.Document;
import org.springframework.data.elasticsearch.annotations.Field;
import org.springframework.data.elasticsearch.annotations.FieldType;

/**
 * @ClassName Product
 * @Author zhangzhixi
 * @Description 实体类
 * @Date 2022-2-17 16:09
 * @Version 1.0
 */
@Data
@NoArgsConstructor
@AllArgsConstructor
@ToString
@Document(indexName = "shopping", shards = 3, replicas = 1)
public class Product {
    /**
     * 必须有 id,这里的 id 是全局唯一的标识,等同于 es 中的"_id"
     * 商品唯一标识
     */
    @Id
    private Long id;

    /**
     * type : 字段数据类型
     * analyzer : 分词器类型
     * index : 是否索引(默认:true)
     * Keyword : 短语,不进行分词
     */
    @Field(type = FieldType.Text, analyzer = "ik_max_word")
    private String title;//商品名称

    @Field(type = FieldType.Keyword)
    private String category;//分类名称

    @Field(type = FieldType.Double)
    private Double price;//商品价格

    @Field(type = FieldType.Keyword, index = false)
    private String images;//图片地址
}
5、配置类:conf/ElasticsearchConfig
- ElasticsearchRestTemplate是spring-data-elasticsearch项目中的一个类,和其他spring项目中的 template类似。
- 在新版的spring-data-elasticsearch 中,ElasticsearchRestTemplate 代替了原来的ElasticsearchTemplate。
- 原因是ElasticsearchTemplate基于TransportClient,TransportClient即将在8.x 以后的版本中移除。所以,我们推荐使用ElasticsearchRestTemplate。
- ElasticsearchRestTemplate基于RestHighLevelClient客户端的。需要自定义配置类,继承AbstractElasticsearchConfiguration,并实现elasticsearchClient()抽象方法,创建RestHighLevelClient对象。
import lombok.Data;
import lombok.EqualsAndHashCode;
import org.apache.http.HttpHost;
import org.elasticsearch.client.RestClient;
import org.elasticsearch.client.RestClientBuilder;
import org.elasticsearch.client.RestHighLevelClient;
import org.springframework.boot.context.properties.ConfigurationProperties;
import org.springframework.context.annotation.Configuration;
import org.springframework.data.elasticsearch.config.AbstractElasticsearchConfiguration;


/**
 * @ClassName ElasticsearchConfig
 * @Author zhangzhixi
 * @Description
 * @Date 2022-2-17 16:13
 * @Version 1.0
 */
@EqualsAndHashCode(callSuper = true)
@ConfigurationProperties(prefix = "elasticsearch")
@Configuration
@Data
public class ElasticsearchConfig extends AbstractElasticsearchConfiguration {

    private String host;
    private Integer port;

    /**
     * 重写父类方法
     * @return es客户端对象
     */
    @Override
    public RestHighLevelClient elasticsearchClient() {
        RestClientBuilder builder = RestClient.builder(new HttpHost(host, port));
        return new RestHighLevelClient(builder);
    }
}
6、dao层数据访问对象:dao/ProductDao
import com.zhixi.pojo.Product;
import org.springframework.data.elasticsearch.repository.ElasticsearchRepository;
import org.springframework.stereotype.Repository;

/**
 * @ClassName ProductDao
 * @Author zhangzhixi
 * @Description
 * @Date 2022-2-17 16:21
 * @Version 1.0
 */
@Repository
public interface ProductDao extends ElasticsearchRepository<Product, Long> {

}
7、测试
import com.zhixi.dao.ProductDao;
import com.zhixi.pojo.Product;
import org.elasticsearch.index.query.MatchQueryBuilder;
import org.elasticsearch.index.query.QueryBuilders;
import org.junit.jupiter.api.Test;
import org.springframework.beans.factory.annotation.Autowired;
import org.springframework.boot.test.context.SpringBootTest;
import org.springframework.data.domain.Page;
import org.springframework.data.domain.PageRequest;
import org.springframework.data.domain.Sort;
import org.springframework.data.elasticsearch.core.ElasticsearchRestTemplate;

import java.util.ArrayList;
import java.util.List;

@SpringBootTest
class SpringbootEsApplicationTests {
    //注入 ElasticsearchRestTemplate
    @Autowired
    private ElasticsearchRestTemplate elasticsearchRestTemplate;

    /*注入dao层操作*/
    @Autowired
    private ProductDao productDao;

    /**
     * 新增
     */
    @Test
    public void save() {
        Product product = new Product();
        product.setId(2L);
        product.setTitle("华为手机");
        product.setCategory("手机");
        product.setPrice(2999.0);
        product.setImages("http://www.atguigu/hw.jpg");
        productDao.save(product);
    }
    //POSTMAN, GET http://localhost:9200/product/_doc/2

    /**
     * 修改
     */
    @Test
    public void update() {
        Product product = new Product();
        product.setId(2L);
        product.setTitle("小米 2 手机");
        product.setCategory("手机");
        product.setPrice(9999.0);
        product.setImages("http://www.atguigu/xm.jpg");
        productDao.save(product);
    }
    //POSTMAN, GET http://localhost:9200/product/_doc/2


    /**
     * 根据 id 查询
     */
    @Test
    public void findById() {
        Product product = productDao.findById(2L).get();
        System.out.println(product);
    }

    @Test
    public void findAll() {
        Iterable<Product> products = productDao.findAll();
        for (Product product : products) {
            System.out.println(product);
        }
    }

    /**
     * 删除
     */
    @Test
    public void delete() {
        Product product = new Product();
        product.setId(2L);
        productDao.delete(product);
    }
    //POSTMAN, GET http://localhost:9200/product/_doc/2

    /**
     * 批量新增
     */
    @Test
    public void saveAll() {
        List<Product> productList = new ArrayList<>();
        for (int i = 0; i < 10; i++) {
            Product product = new Product();
            product.setId(Long.valueOf(i));
            product.setTitle("[" + i + "]小米手机");
            product.setCategory("手机");
            product.setPrice(1999.0 + i);
            product.setImages("http://www.atguigu/xm.jpg");
            productList.add(product);
        }
        productDao.saveAll(productList);
    }

    /**
     * 分页查询
     */
    @Test
    public void findByPageable() {
        //设置排序(排序方式,排序字段)
        Sort sort = Sort.by(Sort.Direction.DESC, "price");
        int currentPage = 0;//当前页,第一页从 0 开始, 1 表示第二页
        int pageSize = 5;//每页显示多少条
        //设置查询分页
        PageRequest pageRequest = PageRequest.of(currentPage, pageSize, sort);
        //分页查询
        Page<Product> productPage = productDao.findAll(pageRequest);
        for (Product Product : productPage.getContent()) {
            System.out.println(Product);
        }
    }

    /**
     * term 查询
     * search(termQueryBuilder) 调用搜索方法,参数查询构建器对象
     */
    @Test
    public void termQuery() {
        /*  TermQueryBuilder精准匹配,
            MatchAllQueryBuilder全查询,
            MatchQueryBuilder可以模糊查询。
        */
        MatchQueryBuilder matchQueryBuilder = QueryBuilders.matchQuery("title", "小米");
        Iterable<Product> products = productDao.search(matchQueryBuilder);
        for (Product product : products) {
            System.out.println(product);
        }
    }

    /**
     * term 查询加分页
     */
    @Test
    public void termQueryByPage() {
        int currentPage = 0;
        int pageSize = 5;
        //设置查询分页
        PageRequest pageRequest = PageRequest.of(currentPage, pageSize);
        MatchQueryBuilder matchQueryBuilder = QueryBuilders.matchQuery("title", "小米");
        Iterable<Product> products = productDao.search(matchQueryBuilder, pageRequest);
        for (Product product : products) {
            System.out.println(product);
        }
    }
}

 浙公网安备 33010602011771号