
ubuntu下nginx的配置
1.下载安装包
sudo wget http://nginx.org/download/nginx-1.20.1.tar.gz 利用wget
下载wget sudo apt-get wget
2.解压文件指定目标路径
tar -xvf nginx-1.20.1.tar.gz -c /usr/local
3.进入nginx.conf配置文件 输入命令配置文件
./configure --prefix=/usr/local/nginx --pid-path=/var/run/nginx/nginx.pid --lock-path=/var/lock/nginx.lock --error-log-path=/var/log/nginx/error.log --http-log-path=/var/log/nginx/access.log --with-http_gzip_static_module --http-client-body-temp-path=/var/temp/nginx/client --http-proxy-temp-path=/var/temp/nginx/proxy --http-fastcgi-temp-path=/var/temp/nginx/fastcgi --http-uwsgi-temp-path=/var/temp/nginx/uwsgi --http-scgi-temp-path=/var/temp/nginx/scgi --with-http_stub_status_module --with-http_ssl_module --with-file-aio --with-http_realip_module
4.make编译文件 make install 下载编译文件
mkdir /var/temp/nginx -p
make
make install
5.查看进程号关于nginx:
ps -ef|grep nginx
杀死进程号
kill -quiit PID
kill -term PID
pkill -9 nginx 强制停止
6.绑定配置文件(这一步很重要):
./nginx -c /usr/local/nginx/conf/nginx.conf
7.重启nginx ./nginx -s reload
开启nginx ./nginx
也可用sudo /etc/init.d/nginx start 但是这里的配置文件不是我们修改的配置文件
8.端口占用:
fuser -k 80/tcp
9.修改权限
chmod 755 filename
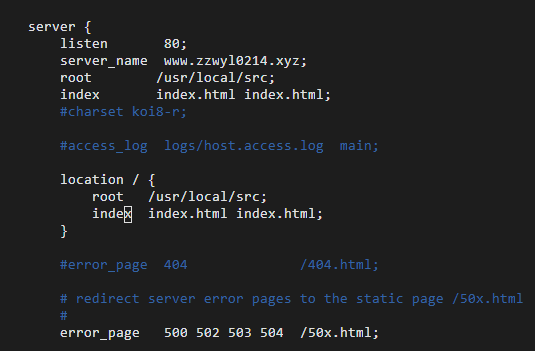
10.nginx 配置端口和根目录

 浙公网安备 33010602011771号