NodeMCU入门(2):在线构建、刷入固件,上传代码
准备工作
1.NodeMCU模块
2.ESP8266Flasher.exe
3.ESPlorer v0.2.0-rc6
构建固件
Building the firmware提供了三种构建你自己固件的方式。
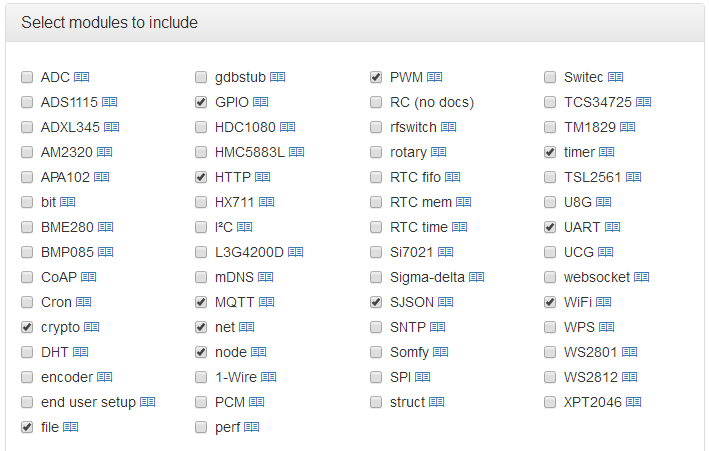
这里推荐使用简单的云构建服务NodeMCU custom builds来定制自己的固件,只需要在该网站选择你需要的库,留下邮箱,不一会就能收到编译好的固件。
我选择了这些库:cjson,crypto,file,gpio,http,mqtt,net,node,pwm,tmr,uart,wifi,
You selected the following 12 modules:
cryptofilegpiohttpmqttnetnodepwmsjsontmruartwifi.并勾选了
TLS/SSL support provided by mbed TLS: TLS 1.0 / 1.1 / 1.2 and most common cipher suites including DH/ECDH (ECDSA-based disabled by default).
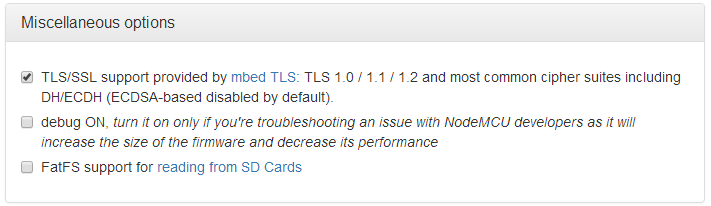
几分钟后就可以在邮箱中收到固件下载地址了,分为float和integer两个版本,请在24小时内下载。
刷入固件
下载nodemcu-flasher的Release版本,注意操作系统位数。
连接NodeMCU到电脑,运行flasher。
在Config选项卡下,配置好自己固件的路径,我选的是float版本。

然后回到Operation下,点击Flash(F),稍等片刻即可。写入过程中蓝色小灯闪烁。

上传代码
Uploading code同样提供了多种工具来上传代码与文件到NodeMCU。
推荐使用ESPlorer,需要Java环境。下载ESPlorer.zip。
解压后,运行ESPlorer.bat。
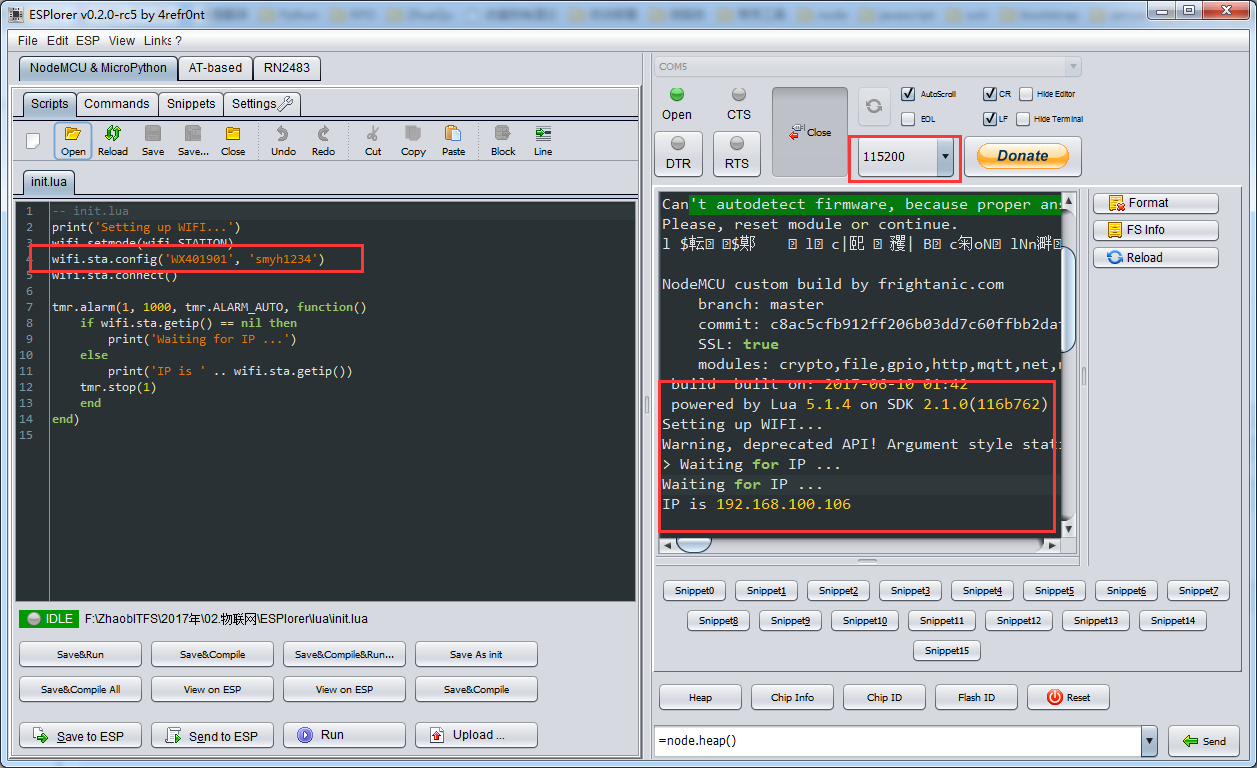
在ESPlorer窗口右上部,设置端口号。
点击Open,按下NodeMCU上的RST按钮重启。
创建一个init.lua文件,这些代码会使NodeMCU连接到一个AP(Access Point),通过修改第四行代码来配置SSID和密码。对于开放网络,使用空文本作为密码。
-- init.lua
print('Setting up WIFI...')
wifi.setmode(wifi.STATION)
wifi.sta.config('WX401901', 'smyh1234')
wifi.sta.connect()

tmr.alarm(1, 1000, tmr.ALARM_AUTO, function()
    if wifi.sta.getip() == nil then
        print('Waiting for IP ...')
    else
        print('IP is ' .. wifi.sta.getip())
    tmr.stop(1)
    end
end)
保存后,点击ESPlorer窗口左下区域的Upload ...来上传。
上传完毕后重启NodeMCU。如果一切正常,你将看到NodeMCU成功连入你的AP。
相关资源
你也可以在NodeMCU-Tutorial下载到本文的相关资源和代码。
本文是在 NodeMCU之旅(一):构建、刷入固件,上传代码 基础之上的学习过程,感谢原作者。

 浙公网安备 33010602011771号