10@lnmp架构服务环境搭建
文章目录
LNMP环境搭建
搭建一个Nginx + PHP + 数据库
一、LNMP的简述
LNMP是一套技术的组合,L=Linux、N=Nginx、M~=MySQL、P~=PHP、(ES、redis、kafka、zookeeper....)
二、LNMP工作方式
#Nginx服务是不能处理动态请求
那么当用户发起动态请求时, Nginx又是如何进行处理的。


#静态请求:请求静态文件或者html页面,服务器上存在的html文件
    静态文件:上传时什么样子,访问时还是什么样子

 #动态请求:请求的是动态内容,带参数的请求
     动态页面不存在于服务器上,他可能是取数据库或者redis等地方取值拼凑成的页面

#当用户发起http请求,请求会被Nginx处理,如果是静态资源请求Nginx则直接返回,如果是动态请求Nginx则通过fastcgi协议转交给后端的PHP程序处理
1、访问流程
1.浏览器发起请求,请求到达nginx;
2.nginx先判断请求是动态还是静态;
	#静态请求
	location / {
		root /code;
		index index.html;
	}

	#动态请求
	location ~* \.php$ {
		fastcgi_pass 127.0.0.1:9000;
	}
3.如果是静态请求,nginx直接返回
4.如果是动态请求,nginx会通过fastcgi协议去找php-fpm管理进程;
5.php-fpm管理进程会去调用或者下发工作给wrapper工作进程;
6.wrapper工作进程判断php内容是否可以直接返回内容;
7.如果只是php内容,wrapper工作进程直接解析,并返回结果;
8.如果还需要访问数据库,则wrapper会去请求数据库获取数据,再返回。
9.最后数据由, 数据库mysql->wrapper->php-fpm->nginx->http->浏览器。
三、LNMP体系架构搭建
1、nginx安装
1)#配置官方源

[root@web01 ~]# vim /etc/yum.repos.d/nginx.repo
[nginx]
name=nginx repo
baseurl=http://nginx.org/packages/centos/7/$basearch/
gpgcheck=0
enabled=1


2)#安装nginx
[root@web01 ~]# yum install -y nginx


3)#配置nginx
[root@web01 ~]# vim /etc/nginx/nginx.conf

 user www        #更改用户,用户要一致


 4)#创建用户
[root@web01 ~]# groupadd www -g 666             #创建用户,定义uid、gid统一
[root@web01 ~]# useradd www -u 666 -g 666 -s /sbin/nologin -M


5)#启动nginx
[root@web01 ~]# systemctl start nginx
[root@web01 ~]# systemctl enable nginx        #加入开机自启
Created symlink from /etc/systemd/system/multi-user.target.wants/nginx.service to /usr/lib/systemd/system/nginx.service.


6)#验证nginx状态
[root@web01 ~]# ps -ef | grep nginx
root      23769      1  0 11:26 ?        00:00:00 nginx: master process /usr/sbin/nginx -c /etc/nginx/nginx.conf
www       23770  23769  0 11:26 ?        00:00:00 nginx: worker process
root      23816   8453  0 11:27 pts/1    00:00:00 grep --color=auto nginx
2、php安装
1)#配置php官方源
[root@web01 ~]# vim /etc/yum.repos.d/php.repo
[php-webtatic]
name = PHP Repository
baseurl = http://us-east.repo.webtatic.com/yum/el7/x86_64/
gpgcheck = 0


2)#卸载已安装php
[root@web01 ~]# yum remove php-mysql-5.4 php php-fpm php-common


3)#安装php 7.1新版本
[root@web01 ~]# yum -y install php71w php71w-cli php71w-common php71w-devel php71w-embedded php71w-gd php71w-mcrypt php71w-mbstring php71w-pdo php71w-xml php71w-fpm php71w-mysqlnd php71w-opcache php71w-pecl-memcached php71w-pecl-redis php71w-pecl-mongodb


4)#安装本地php软件包
[root@web01 tmp]# tar xf php.tar.gz
[root@web01 tmp]# yum localinstall -y  *.rpm


### yum安装会有报错
1.上传压缩包(yum缓存)
[root@web01 ~]# cd /tmp/
[root@web01 tmp]# rz php.tar.gz
2.解压代码包
[root@web01 tmp]# tar xf php.tar.gz
3.安装本地rpm包
[root@web01 tmp]# yum localinstall -y *.rpm


4)#php配置文件用户更改
[root@web01 ~]# vim /etc/php-fpm.d/www.conf
user = www
group = www


5)#启动php
[root@web01 ~]# systemctl start php-fpm
[root@web01 ~]# systemctl enable php-fpm     #加入开机自启
Created symlink from /etc/systemd/system/multi-user.target.wants/php-fpm.service to /usr/lib/systemd/system/php-fpm.service.


6)#验证php启动状态
[root@web01 ~]# ps -ef | grep php
root      24062      1  0 11:45 ?        00:00:00 php-fpm: master process (/etc/php-fpm.conf)
www       24063  24062  0 11:45 ?        00:00:00 php-fpm: pool www
www       24064  24062  0 11:45 ?        00:00:00 php-fpm: pool www
www       24065  24062  0 11:45 ?        00:00:00 php-fpm: pool www
www       24066  24062  0 11:45 ?        00:00:00 php-fpm: pool www
www       24067  24062  0 11:45 ?        00:00:00 php-fpm: pool www
root      24089   8453  0 11:46 pts/1    00:00:00 grep --color=auto php
3、mariadb安装
1)#安装mariadb-server
[root@web01 ~]# yum install -y mariadb-server
[root@web01 ~]# yum install mariadb mariadb-server -y


2)#启动mariadb
[root@web01 ~]# systemctl start mariadb
[root@web01 ~]# systemctl enable mariadb    #加入开机自启
Created symlink from /etc/systemd/system/multi-user.target.wants/mariadb.service to /usr/lib/systemd/system/mariadb.service.


3)#验证msyql状态
[root@web01 ~]# mysql
Welcome to the MariaDB monitor.  Commands end with ; or \g.
Your MariaDB connection id is 2
Server version: 5.5.64-MariaDB MariaDB Server

Copyright (c) 2000, 2018, Oracle, MariaDB Corporation Ab and others.

Type 'help;' or '\h' for help. Type '\c' to clear the current input statement.

MariaDB [(none)]>    show databases;           #检查数查看据库
+--------------------+
| Database           |
+--------------------+
| information_schema |
| mysql              |
| performance_schema |
| test               |
+--------------------+
4 rows in set (0.00 sec)

MariaDB [(none)]>


4)#设置用户密码
MariaDB [(none)]>  -uroot password '123'
4、关联nginx与php
1)#配置nginx
[root@web01 conf.d]# vim php.conf
server {
    listen 80;
    server_name www.php.com;

    location / {
        root /code;
        index index.html;
    }
}


2)#创建目录
[root@web01 ~]# mkdir /code
[root@web01 ~]# cd /code
[root@web01 ~]# chown -R www.www /code


3)#上传作业代码
[root@web01 ~]# cd /code
[root@web01 code]# rz kaoshi.zip
[root@web01 code]# tar xf kaoshi.zip
[root@web01 code]# vim /code/upload_file.php
$wen="/code/upload";


#报错为413,因为上传文件过大,nginx默认上传文件大小为1m,超过1m就报413
							413 Request Entity Too Large
解决方法:
[root@web01 conf.d]# vim /etc/nginx/nginx.conf
http {
	... ...
	client_max_body_size 20m;
	... ...
}

#报错为405,因为nginx服务没有办法解析动态请求,没有跟php做关联


4)#php上传文件限制
[root@web01 ~]# vim /etc/php.ini
#默认post请求字符串内容不超过8m
post_max_size = 20M
#默认上传文件大小不超过2m
upload_max_filesize = 20M

[root@web01 ~]# systemctl restart php-fpm
5、nginx关联php的语法解析
1)# fastcgi_pass        #指定访问php协议,通过回环地址

#语法
Syntax:	fastcgi_pass address;
Default:	—
Context:	location, if in location

fastcgi_pass 127.0.0.1:9000;


2)# fastcgi_index       #指定传输协议的索引
#语法
Syntax:	fastcgi_index name;
Default:	—
Context:	http, server, location

fastcgi_index index.php


3)fastcgi_param         #选择传输协议,并地定义变量,指定要传输的内容
#语法
Syntax:	fastcgi_param parameter value [if_not_empty];
Default:	—
Context:	http, server, location


4)协议变量详解
#语法模块	  开始定义(标准格式)站点目录  php文件名字
fastcgi_param SCRIPT_FILENAME /code/$fastcgi_script_name;      #指定协议内容选择
fastcgi_param SCRIPT_FILENAME $document_root$fastcgi_script_name;   #指定协议内容定义
6.nginx关联php的模块定义
#模块定义nginx与php

server {
    listen 80;
    server_name www.php.com;                           #指定模块名称

    location / {
        root /usr/share/nginx/html/zhihu/;                              #指定模块的位置
        index index.html index.php;                                     #指定索引的文件
    }

    location ~* \.php$ {                                                          #选择并定义以php结尾的文件类型,并区分大小写内容
        root /usr/share/nginx/html/zhihu/;
        fastcgi_pass 127.0.0.1:9000;                                              #通过协议指定本地回环地
        fastcgi_param SCRIPT_FILENAME $document_root$fastcgi_script_name;         #(固定格式)指定协议内容定义

        include fastcgi_params;                                                   #指定读取包含文件的内容
     }
}
四、案例
1. 搭建数据库
#数据库切换
[root@web2 ~]# mysql
Welcome to the MariaDB monitor.  Commands end with ; or \g.
Your MariaDB connection id is 4
Server version: 5.5.68-MariaDB MariaDB Server

Copyright (c) 2000, 2018, Oracle, MariaDB Corporation Ab and others.

Type 'help;' or '\h' for help. Type '\c' to clear the current input statement.

MariaDB [(none)]>


#数据库用户创建及密码设置
[root@web01 ~]# mysqladmin -uroot password '123'


#数据库用户登录
root@web2 ~]# mysql -uroot -p123
Welcome to the MariaDB monitor.  Commands end with ; or \g.
Your MariaDB connection id is 12
Server version: 5.5.68-MariaDB MariaDB Server

Copyright (c) 2000, 2018, Oracle, MariaDB Corporation Ab and others.

Type 'help;' or '\h' for help. Type '\c' to clear the current input statement.

MariaDB [(none)]> show databases;
+--------------------+
| Database           |
+--------------------+
| information_schema |
| mysql              |
| performance_schema |
| test               |
+--------------------+
4 rows in set (0.00 sec)

MariaDB [(none)]>


#数据库检查(查看库)
MariaDB [(none)]> show databases;
+--------------------+
| Database           |
+--------------------+
| information_schema |
| mysql              |
| performance_schema |
| test               |
+--------------------+
4 rows in set (0.00 sec)

MariaDB [(none)]>


#数据库库建立
MariaDB [(none)]> create database wordpress;     #数据库创建-库生成
Query OK, 1 row affected (0.00 sec)

MariaDB [(none)]> create database zhihu;
Query OK, 1 row affected (0.00 sec)


#数据库检查
MariaDB [(none)]> show databases;      #查看库
+--------------------+
| Database           |
+--------------------+
| information_schema |
| mysql              |
| performance_schema |
| test               |
| wordpress          |    #新创建的库文件
| zhihu              |
+--------------------+
6 rows in set (0.00 sec)

MariaDB [(none)]>


#授权
#172.16.1.% 这个网段 通过 root用户 密码123456 连接之后 可以管理我得所有库所有表,所有命令
MariaDB [(none)]> grant all on *.* to root@'172.16.1.%' identified by '123456';
Query OK, 0 rows affected (0.00 sec)


#查看授权用户
MariaDB [(none)]> select user,host from mysql.user;
+------+------------+
| user | host       |
+------+------------+
| root | 127.0.0.1  |
| root | 172.16.1.% |		#如果有这一条说明授权成功
| root | ::1        |
|      | db01       |
| root | db01       |
|      | localhost  |
| root | localhost  |
+------+------------+
7 rows in set (0.00 sec)

MariaDB [(none)]>

#数据库创建用户
CREATE USER 'username'@'host' IDENTIFIED BY 'password';

#数据库创建用户并授权
MariaDB [mysql]> grant all on *.* to john@'192.168.13.34' identified by 'john';
MariaDB [mysql]> flush privileges;   #重载刷新权限


#MariaDB中如何查询所有用户
MariaDB [(none)]> select User,Host,Password from mysql.user;


#删除所有用户
delete from user where Host <> '%';
#删除单用户
MariaDB [mysql]> delete from user where user='jack';
#删除用户'steven'
MariaDB [(none)]> delete from mysql.user where user='steven' and host='%';
#删除用户'john'
MariaDB [(none)]> drop user 'john'@'192.168.13.34';


#授权后测试连接登录
[root@web01 ~]# mysql -uroot -p123456 -h172.16.1.51
Welcome to the MariaDB monitor.  Commands end with ; or \g.
Your MariaDB connection id is 8
Server version: 5.5.64-MariaDB MariaDB Server

Copyright (c) 2000, 2018, Oracle, MariaDB Corporation Ab and others.

Type 'help;' or '\h' for help. Type '\c' to clear the current input statement.

MariaDB [(none)]>


##########(MariaDB)查看当前登录用户
# 方法1
MariaDB [(none)]> select user();
# 方法2
MariaDB [(none)]> select current_user;
# 方法3
MariaDB [(none)]> select current_user();


#查看用户授权信息
MariaDB [(none)]> show grants for 'jack'@'192.168.13.34';


#删除数据库
格式: drop database <数据库名>;
MariaDB [(none)]> drop database zhihu
    -> ;
  Query OK, 0 rows affected (0.03 sec)


1)删除一个已经确定存在的数据库:
   mysql> drop database drop_database;
   Query OK, 0 rows affected (0.00 sec)

2) 删除一个不确定存在的数据库:
    mysql> drop database drop_database;
    ERROR 1008 (HY000): Can't drop database 'drop_database'; database doesn't exist
      mysql> drop database if exists drop_database;
    Query OK, 0 rows affected, 1 warning (0.00 sec)
   -------发生错误,不能删除'drop_database'数据库,该数据库不存在
   -------产生一个警告说明此数据库不存在

       mysql> create database drop_database;  // 创建一个数据库
       Query OK, 1 row affected (0.00 sec)
3)自定义删除数据库
  mysql> drop database if exists drop_database;  // if exists 判断数据库是否存    在,不存在也不产生错误
    Query OK, 0 rows affected (0.00 sec)


#数据库迁移(导出旧数据库数据)
[root@web01 ~]# mysqldump -uroot -pLin123.com -B wordpress > /tmp/wordpress.sql
[root@web01 ~]# mysqldump -uroot -pLin123.com -B zh > /tmp/zh.sql
[root@web01 ~]# mysqldump -uroot -pLin123.com -B edusoho > /tmp/edu.sql
#注意:
1.导出的文件名字与数据库名无关
2.导出的文件后缀无所谓


#数据库迁移(将导出的数据传到新数据库机器)
[root@web01 ~]# scp /tmp/wordpress.sql 172.16.1.51:/tmp/
[root@web01 ~]# scp /tmp/*.sql 172.16.1.51:/tmp


#数据库迁移(把数据导入新的数据库)
{-------
#方式一:在房子外面往里搬
[root@db01 ~]# mysql -uroot -p123456 < /tmp/wordpress.sql
[root@db01 ~]# mysql -uroot -p123456 < /tmp/zh.sql
[root@db01 ~]# mysql -uroot -p123456 < /tmp/edu.sql

#方式二:在房子里面往里搬
MariaDB [wordpress]> source /tmp/wordpress.sql;

#方式三:传送门方式
[root@web01 tmp]# mysql -uroot -p123456 -h172.16.1.51 < /tmp/wordpress.sql
[root@web01 tmp]# mysql -uroot -p123456 -h172.16.1.51
MariaDB [wordpress]> source /tmp/wordpress.sql;
---------}
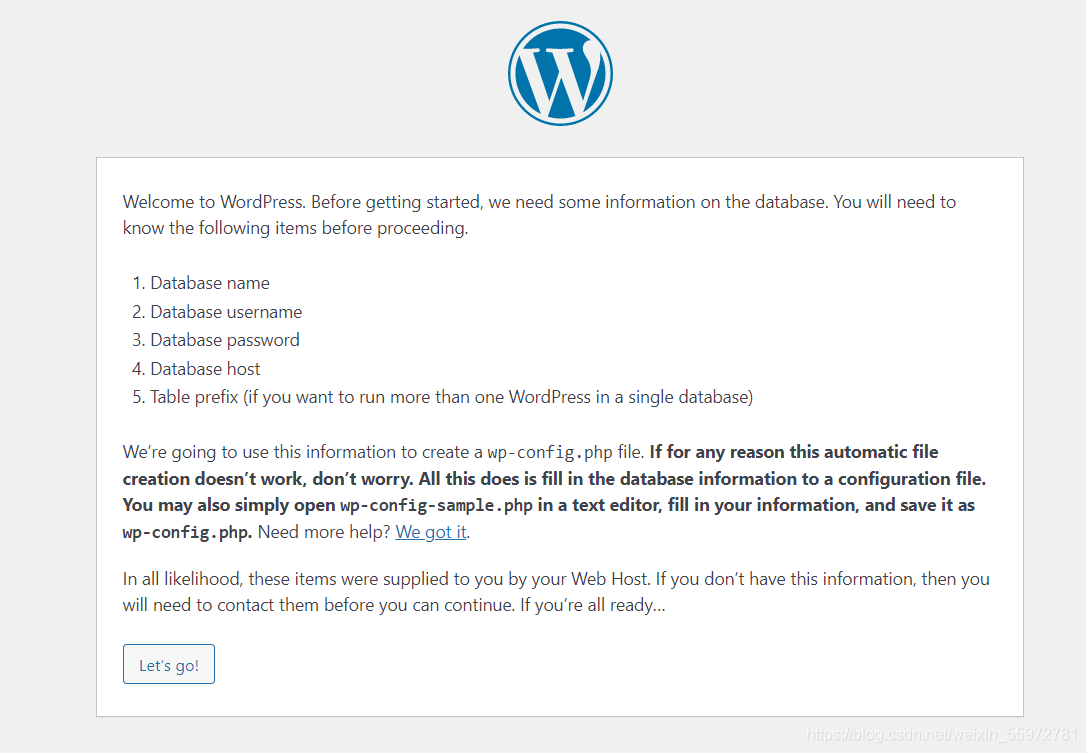
2. wordpress及"知乎"搭建
#下载安装包及文件转移生成
[root@VM-0-14-centos opt]# wget https://wordpress.org/latest.tar.gz
[root@VM-0-14-centos opt]# tar -xf latest.tar.gz
[root@VM-0-14-centos opt]# mv wordpress/* /usr/share/nginx/html/
“wordpress” 创建
“知乎” 创建

本文来自博客园,作者:ଲ小何才露煎煎饺,转载请注明原文链接:https://www.cnblogs.com/zeny/p/15121573.html

 浙公网安备 33010602011771号