

如何在github创建个人主页?
如何在github创建个人主页?
git和node.js的安装就不解释了
#查看安装是否成功
git --version
node -v
npm -v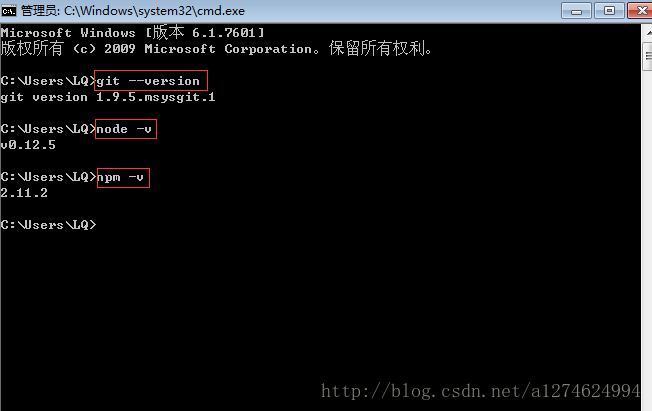
申请github账号(是程序员应该都有一个吧,不解释)
创建github仓库
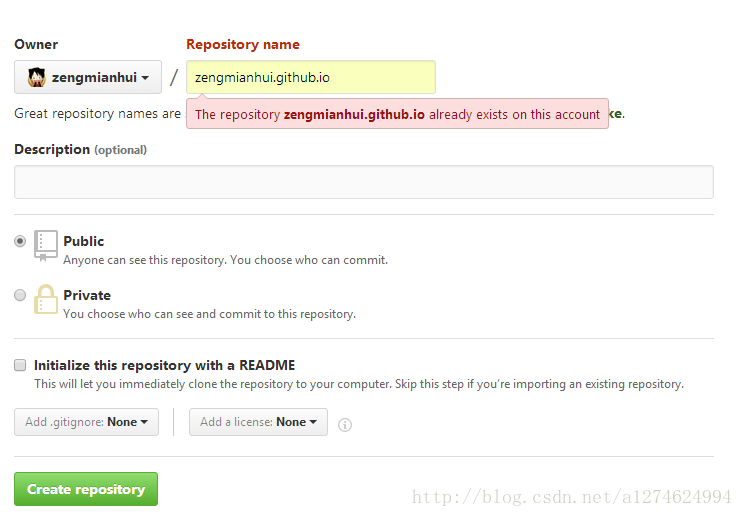
因为我已经创建过了,所以会报错,仓库命名一定要严格按“zengmianhui.github.io”来命名,”zengmianhui”是你的用户名
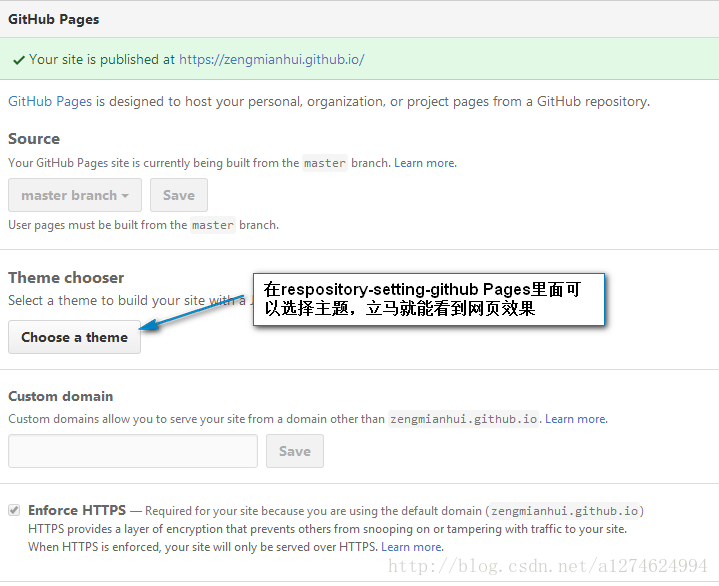
这样创建成功后就可以直接访问了
安装hexo(hexo是基于node.js的)

在hifor的博客中,在安装hexo之前,有先设置淘宝的镜像来安装hexo的,但是我实际安装是不需要的,网速还可以。
使用以下代码安装hexo
$ npm install -g hexo-cli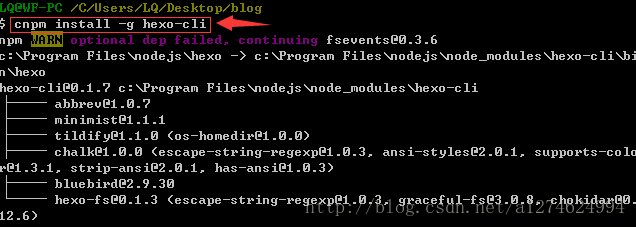
出现的WARN可以不用理会
继续使用命令
npm install hexo --save
查看hexo是否安装正确
hexo -v本地支行hexo
初始化hexo
hexo init安装生成器
npm install在本地运行hexo
hexo s -g打开浏览器,输入localhost:4000,就可以在本地看到你的个人博客了,按住Ctrl+C键即可停止
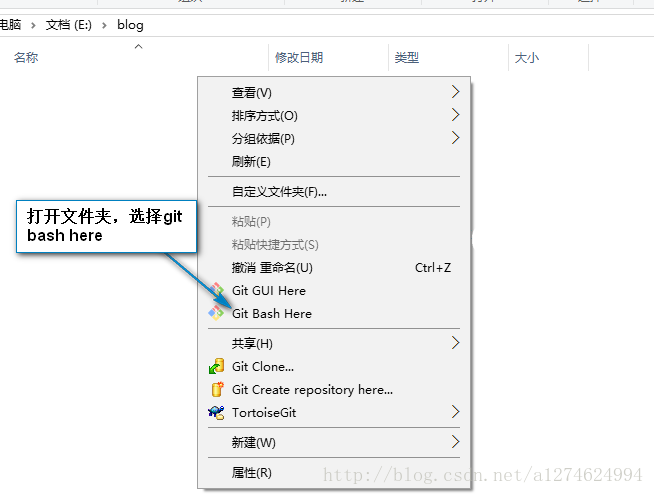
管理博客
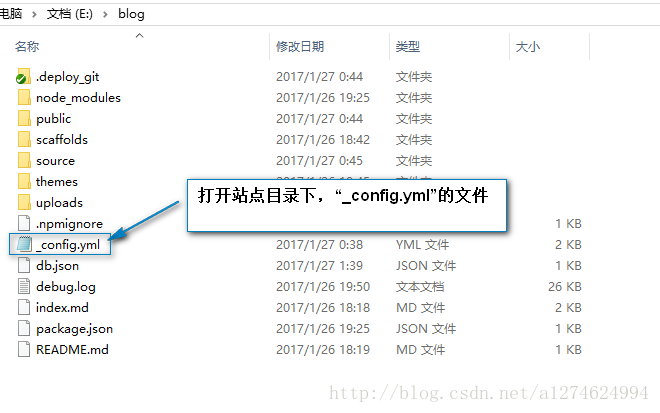
打开根目录下的_config.yml,注意:主题目录下也有 _config.yml
# Hexo Configuration
## Docs: https://hexo.io/docs/configuration.html
## Source: https://github.com/hexojs/hexo/

# Site
title: zengmianhui's personal blog
subtitle:
description: 来这里,查看更多技术的分享
author: zengmianhui
language: zh-Hans
#时区
timezone:
# URL
## If your site is put in a subdirectory, set url as 'http://yoursite.com/child' and root as '/child/'
url: https://zengmianhui.github.io
root: /
permalink: :year/:month/:day/:title/
permalink_defaults:

# Directory
source_dir: source
public_dir: public
tag_dir: tags
archive_dir: archives
category_dir: categories
code_dir: downloads/code
i18n_dir: :lang
skip_render:

# Writing
new_post_name: :title.md # File name of new posts
default_layout: post
titlecase: false # Transform title into titlecase
external_link: true # Open external links in new tab
filename_case: 0
render_drafts: false
post_asset_folder: false
relative_link: false
future: true
highlight:
  enable: true
  line_number: true
  auto_detect: false
  tab_replace:

# Category & Tag
default_category: categorized
category_map:
tag_map:

# Date / Time format
## Hexo uses Moment.js to parse and display date
## You can customize the date format as defined in
## http://momentjs.com/docs/#/displaying/format/
date_format: YYYY-MM-DD
time_format: HH:mm:ss

# Pagination
## Set per_page to 0 to disable pagination
per_page: 10
pagination_dir: page

#博客主题
# Extensions
## Plugins: https://hexo.io/plugins/
## Themes: https://hexo.io/themes/
theme: next

#发布设置
# Deployment
## Docs: https://hexo.io/docs/deployment.html
deploy:
  type: git
  repo: https://github.com/zengmianhui/zengmianhui.github.io.git
  branch: master
  message: 我的博客
#头像
avatar: zengmianhui.github.io/images/avatar.jpg
发一篇新的博客
输入命令
$ hexo new "博客名"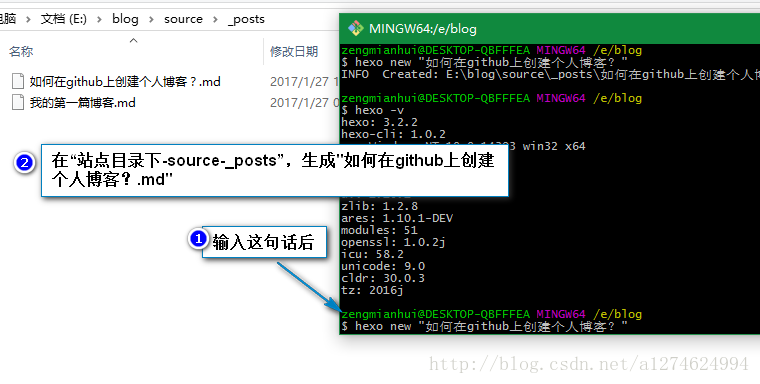
打开生成的博客,并编辑
---
title: 如何在github上创建个人博客?
date: 2017-01-27 01:13:43
categories:
  - 其他
  - github
tags:
  - 其他
---

摘要:
<!--more-->
正文:
发布博客
当然发布之前,首先要确保你本地的SSH和github上保存的SSH是一致的
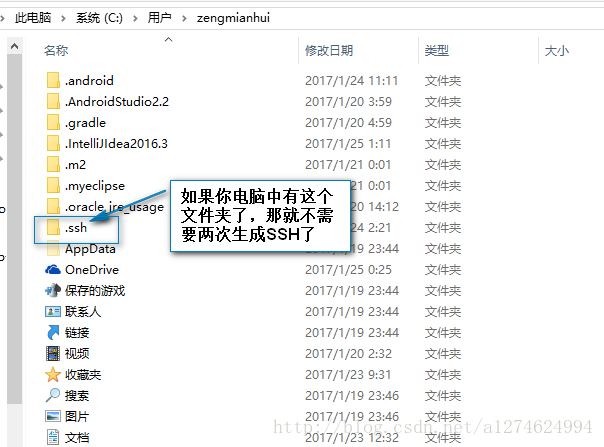
如果电脑中没有SSH,就输入以下命令生成
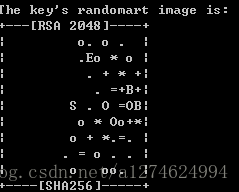
$ ssh-keygen -t rsa -C "邮件地址@youremail.com"
Generating public/private rsa key pair.
Enter file in which to save the key (/Users/your_user_directory/.ssh/id_rsa):<直接回车>
注意1: 此处的邮箱地址,你可以输入自己的邮箱地址;
注意2: 此处的「-C」的是大写的「C」
然后系统会要你输入密码:
Enter passphrase (empty for no passphrase):<输入加密串>
Enter same passphrase again:<再次输入加密串>
在回车中会提示你输入一个密码,这个密码会在你提交项目时使用,如果为空的话提交项目时则不用输入。这个设置是防止别人往你的项目里提交内容。
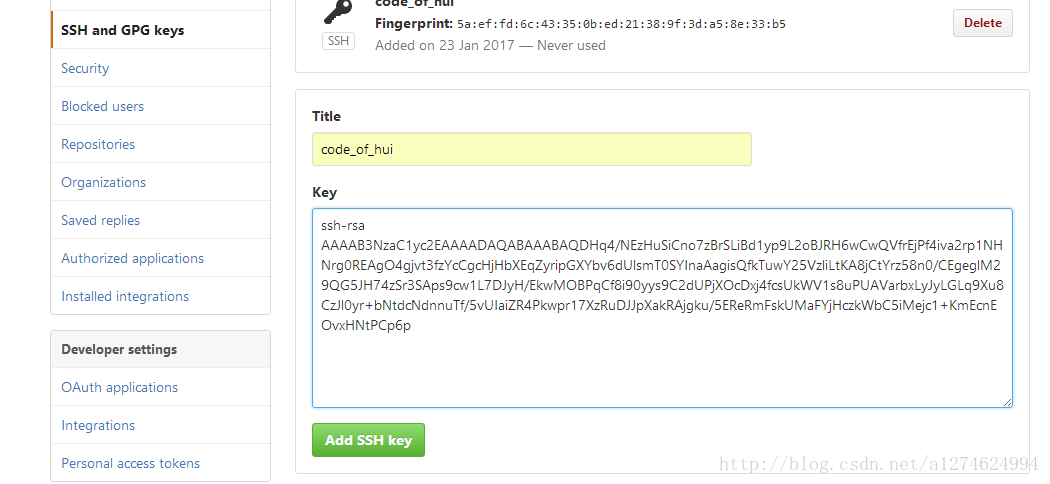
添加SSH Key到GitHub
在本机设置SSH Key之后,需要添加到GitHub上,以完成SSH链接的设置。
1、打开本地C:\Documents and Settings\Administrator.ssh\id_rsa.pub文件。此文件里面内容为刚才生成人密钥。如果看不到这个文件,你需要设置显示隐藏文件。准确的复制这个文件的内容,才能保证设置的成功。
2、登陆github系统。点击右上角的 Account Settings—>SSH Public keys —> add another public keys
3、把你本地生成的密钥复制到里面(key文本框中), 点击 add key 就ok了
设置git信息
2
$ git config --global user.name "你的用户名"
$ git config --global user.email "你的邮箱"
安装hexo git插件,这个插件会自动push到github
$ npm install hexo-deployer-git --save
使用命令,hexo会自动将博客push到github上
$ hexo d -g发布时需要输入github的帐号和密码,输入密码时是看不到自己输入的内容的
发布成功后,访问yourname.github.io看下成果
我的个人博客

 浙公网安备 33010602011771号