zabbix监控linux
目录
linux 部署agentd
zabbix客户端部署
[root@localhost ~]# systemctl disable --now firewalld
Removed /etc/systemd/system/multi-user.target.wants/firewalld.service.
Removed /etc/systemd/system/dbus-org.fedoraproject.FirewallD1.service.
[root@localhost ~]# setenforce 0
[root@localhost ~]# vim /etc/selinux/config
        SELINUX=disabled

[root@localhost ~]# vi /etc/selinux/config
[root@localhost ~]# useradd -rMs /sbin/nologin zabbix

[root@localhost ~]# dnf -y install make gcc gcc-c++ pcre-devel openssl openssl-devel

[root@localhost ~]# wget https://cdn.zabbix.com/zabbix/sources/stable/6.2/zabbix-6.2.2.tar.gz
//解压,编译安装zabbix_agentd
[root@localhost ~]# tar -xf zabbix-6.2.2.tar.gz
[root@localhost ~]# cd zabbix-6.2.2
[root@localhost zabbix-6.2.2]# ./configure --enable-agent
[root@localhost zabbix-6.2.2]# make install

[root@localhost ~]# zabbix_agentd
[root@localhost ~]# ss -anlt
State   Recv-Q  Send-Q   Local Address:Port      Peer Address:Port  Process
LISTEN  0       128            0.0.0.0:22             0.0.0.0:*
LISTEN  0       128            0.0.0.0:10050          0.0.0.0:*
LISTEN  0       128               [::]:22                [::]:*
[root@localhost ~]# vim /usr/local/etc/zabbix_agentd.conf
Server=192.168.202.138
ServerActive=192.168.202.138
Hostname=client
[root@localhost ~]# zabbix_agentd
[root@localhost ~]# ss -anlt
State   Recv-Q  Send-Q   Local Address:Port      Peer Address:Port  Process
LISTEN  0       128            0.0.0.0:22             0.0.0.0:*
LISTEN  0       128            0.0.0.0:10050          0.0.0.0:*
LISTEN  0       128               [::]:22                [::]:*
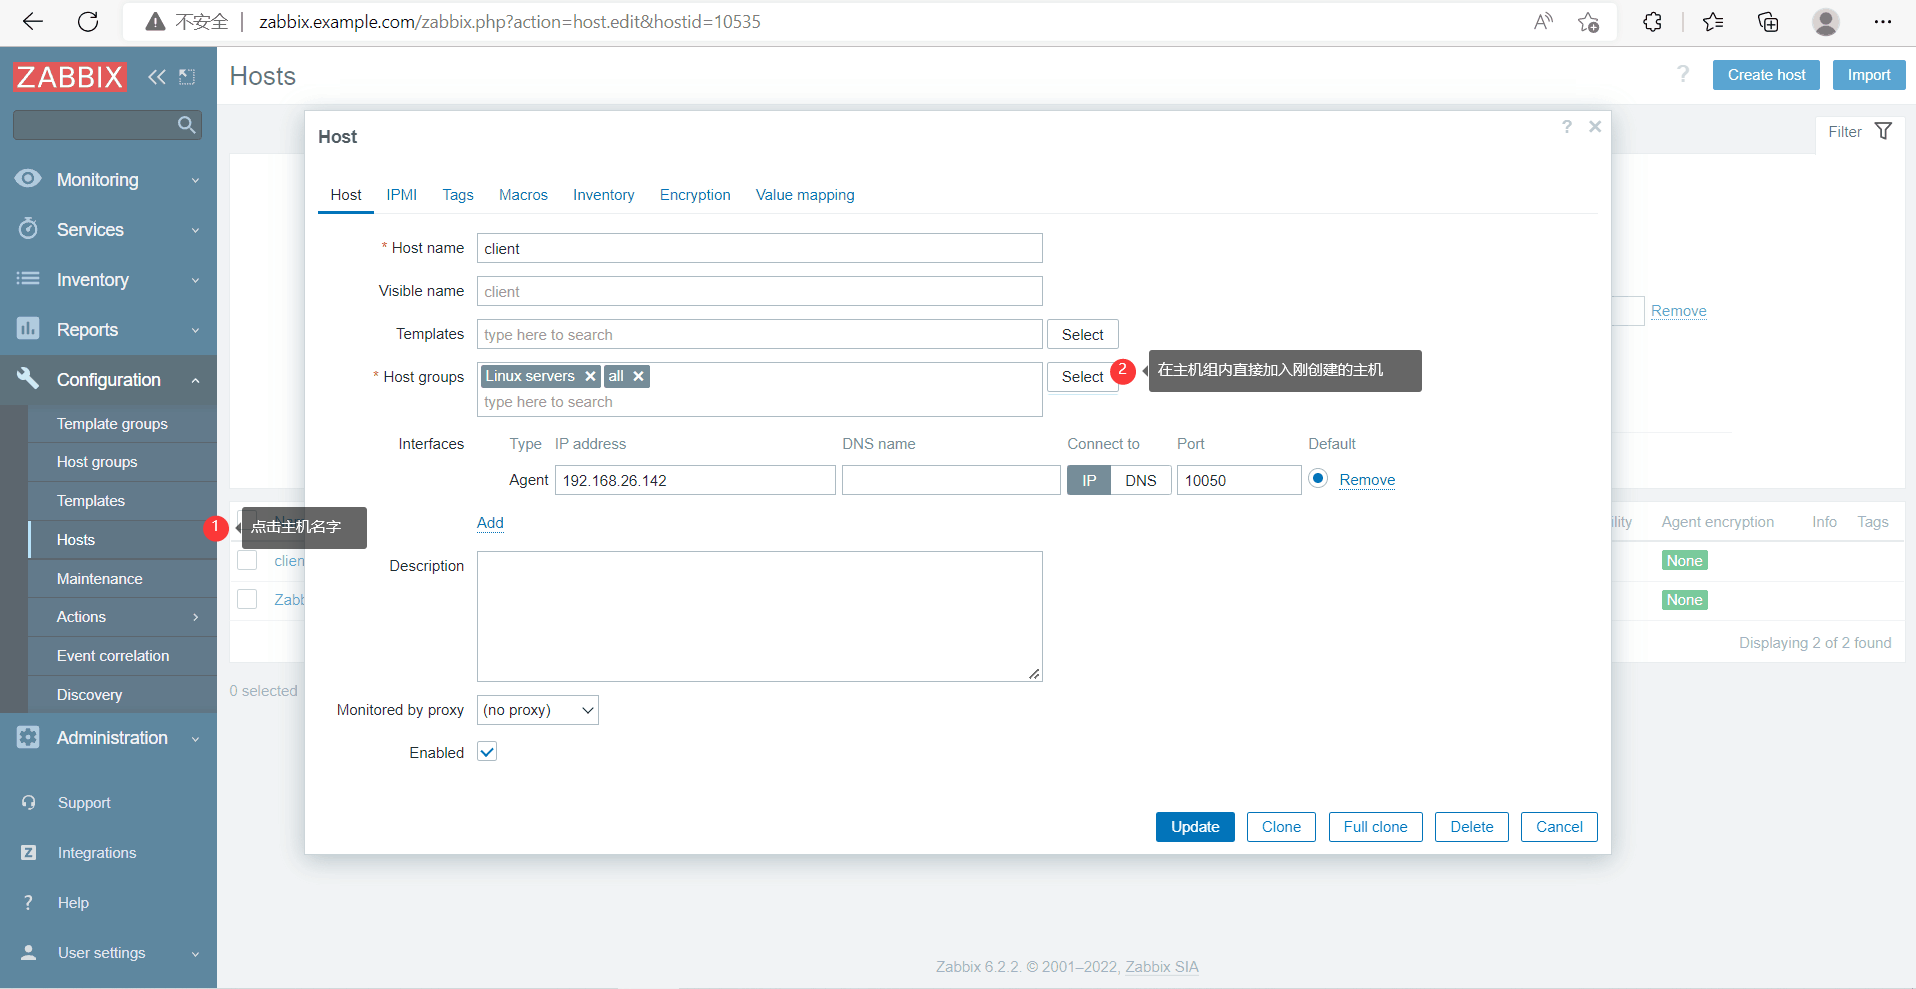
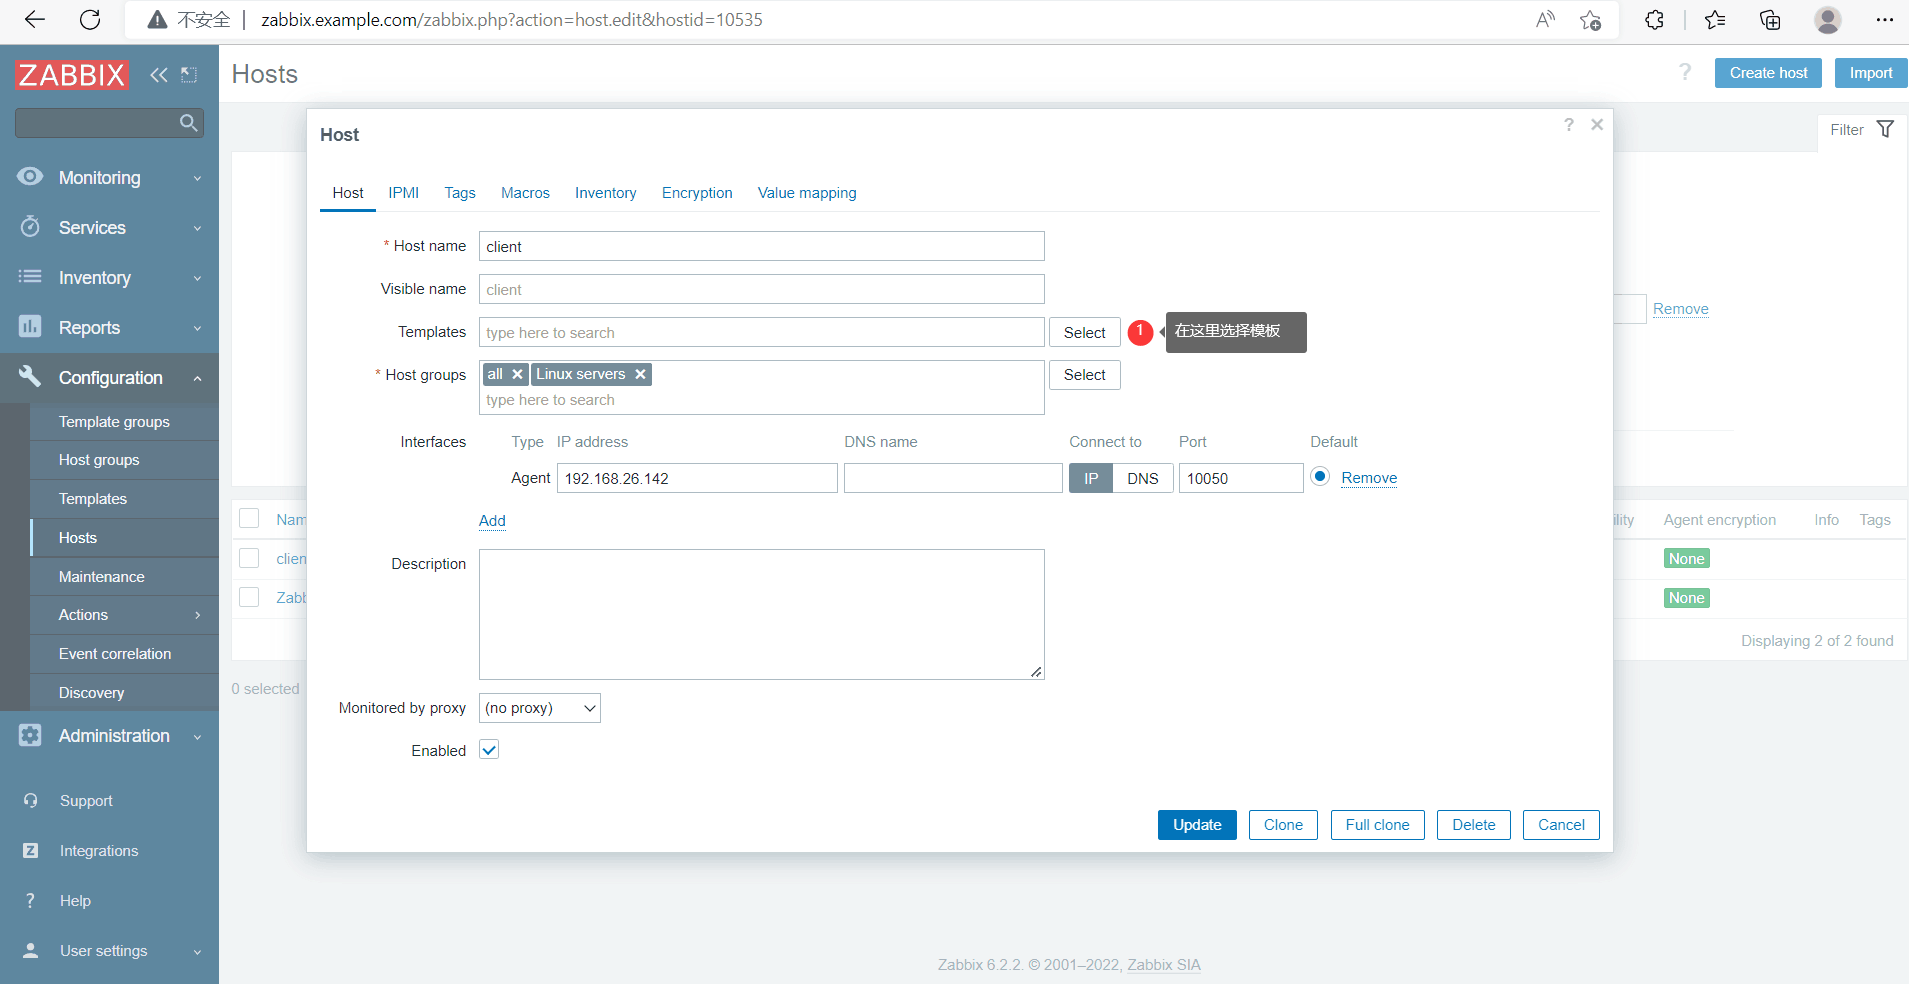
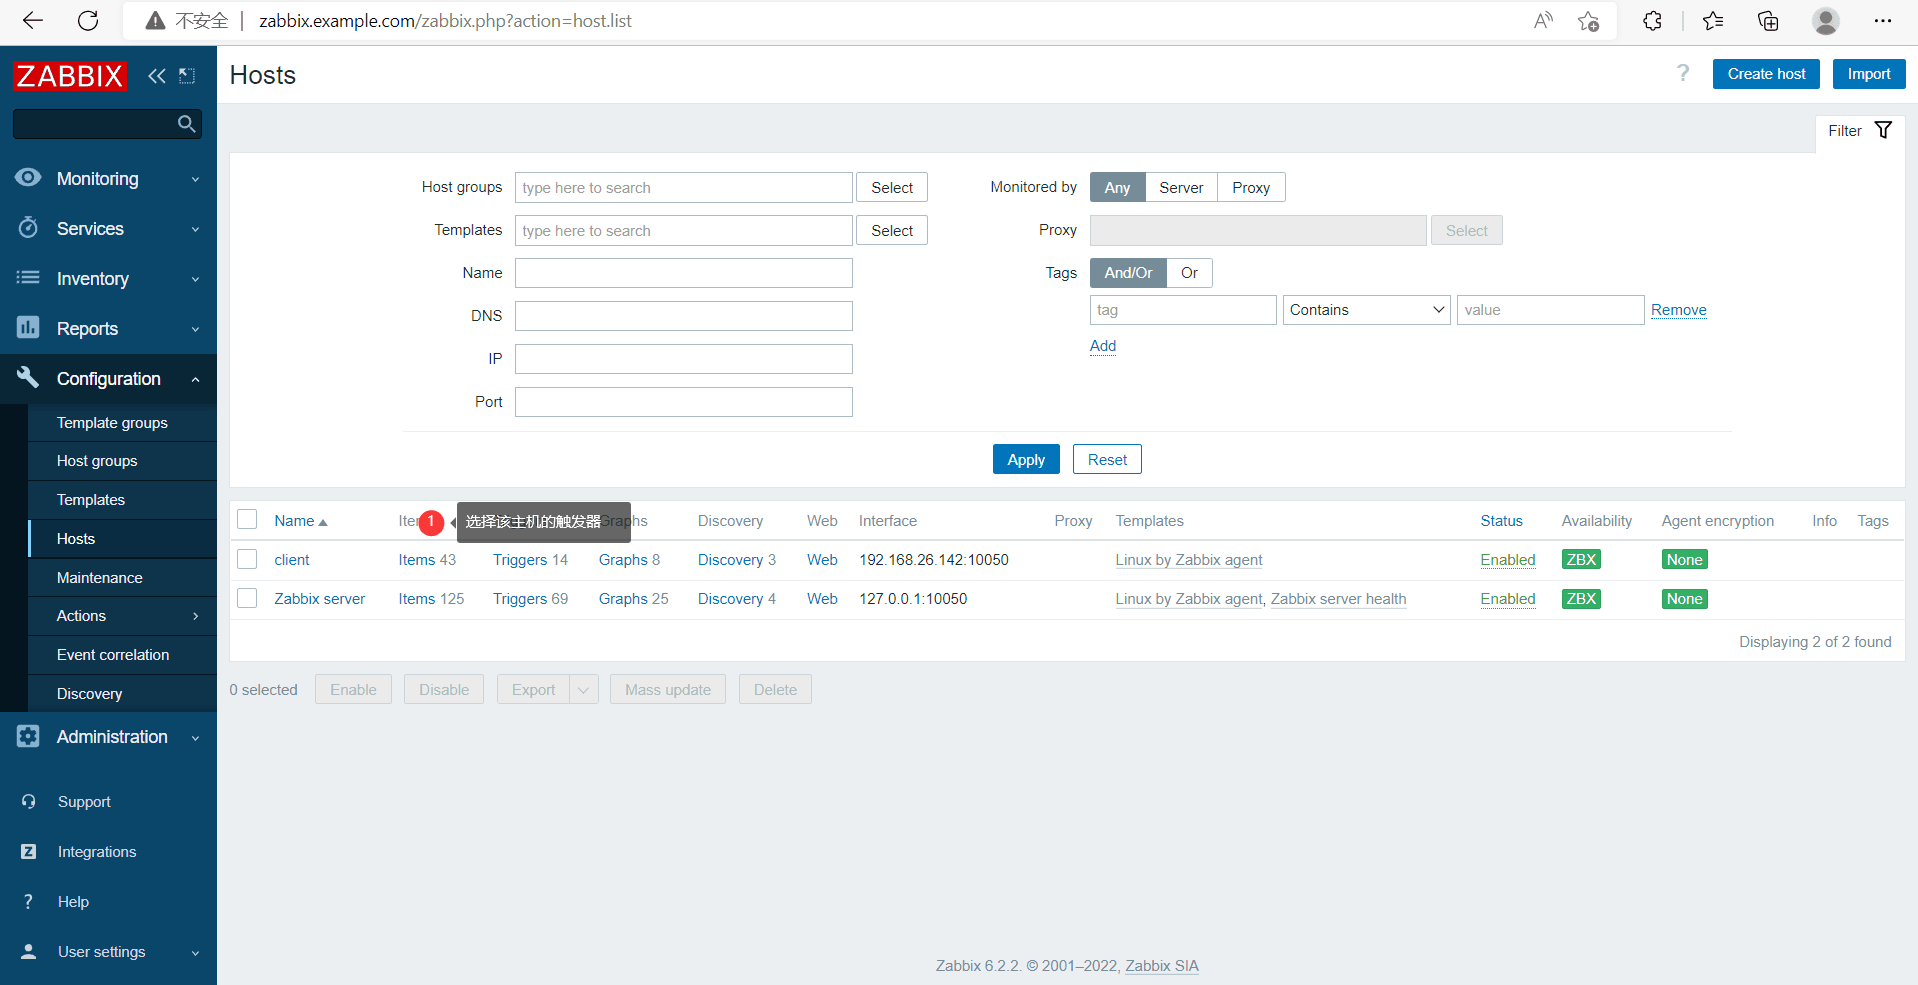
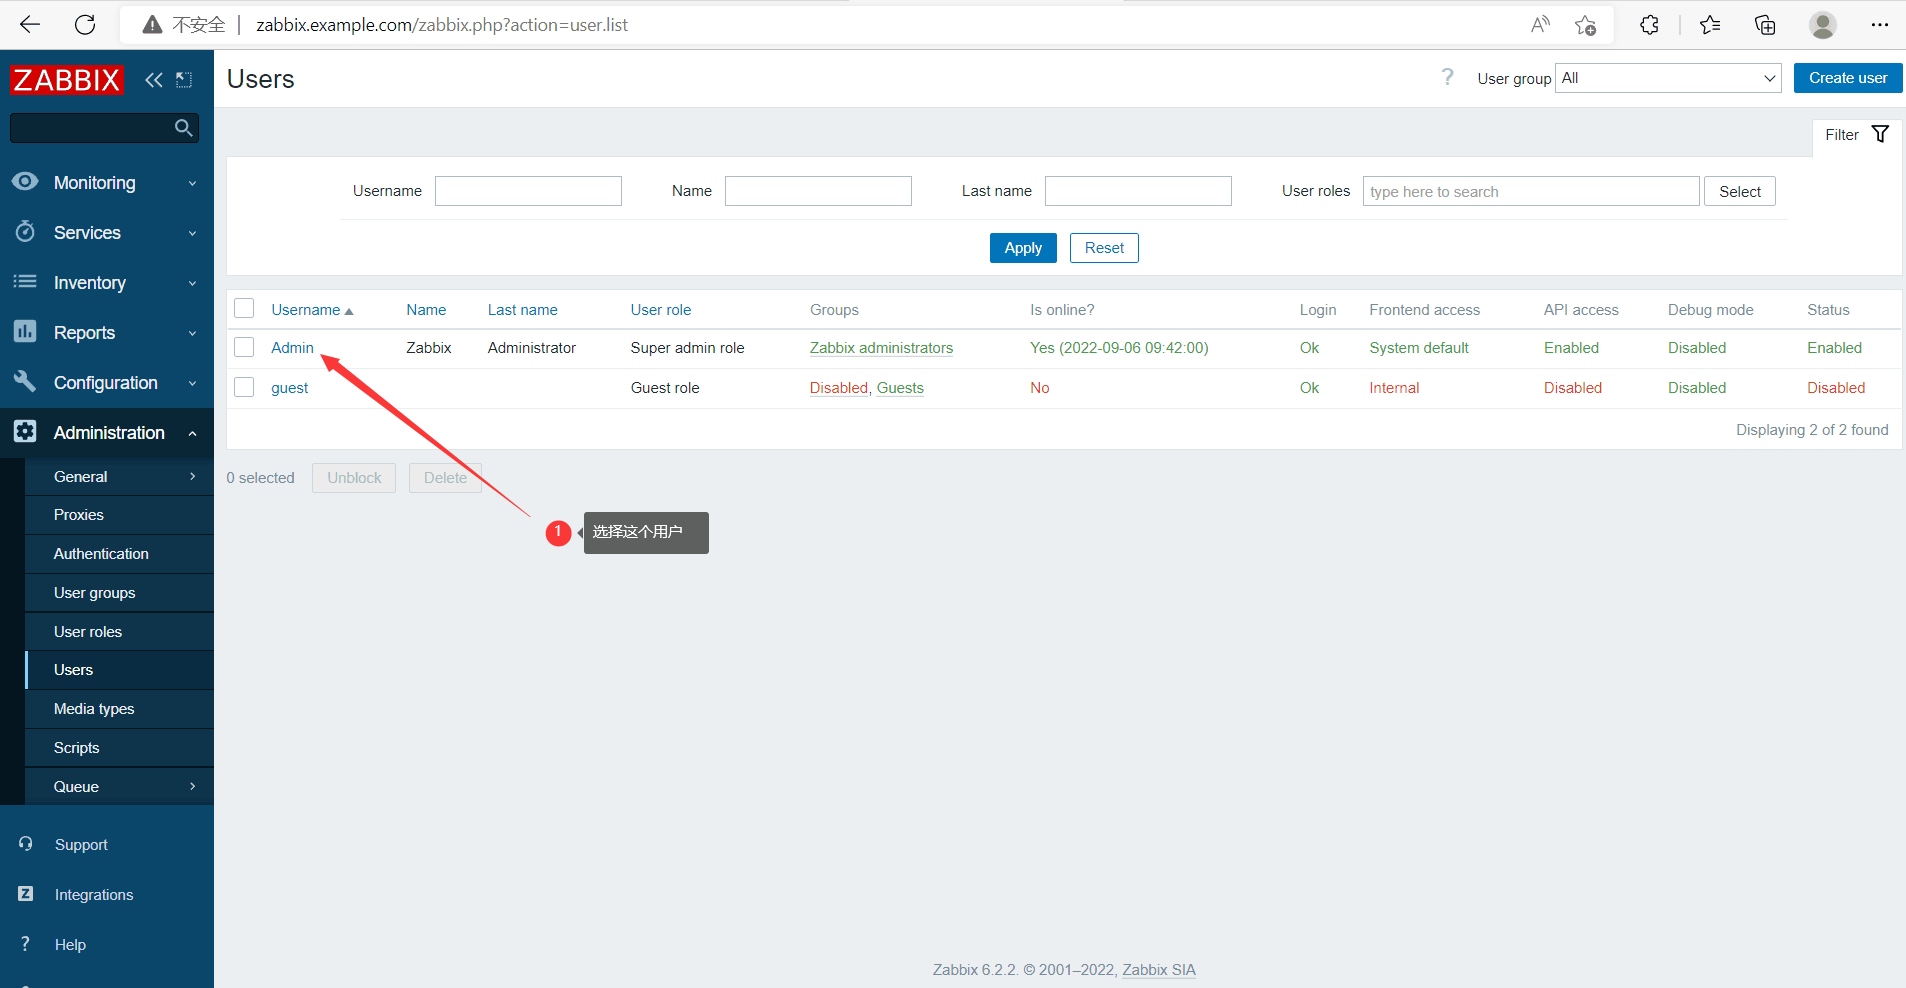
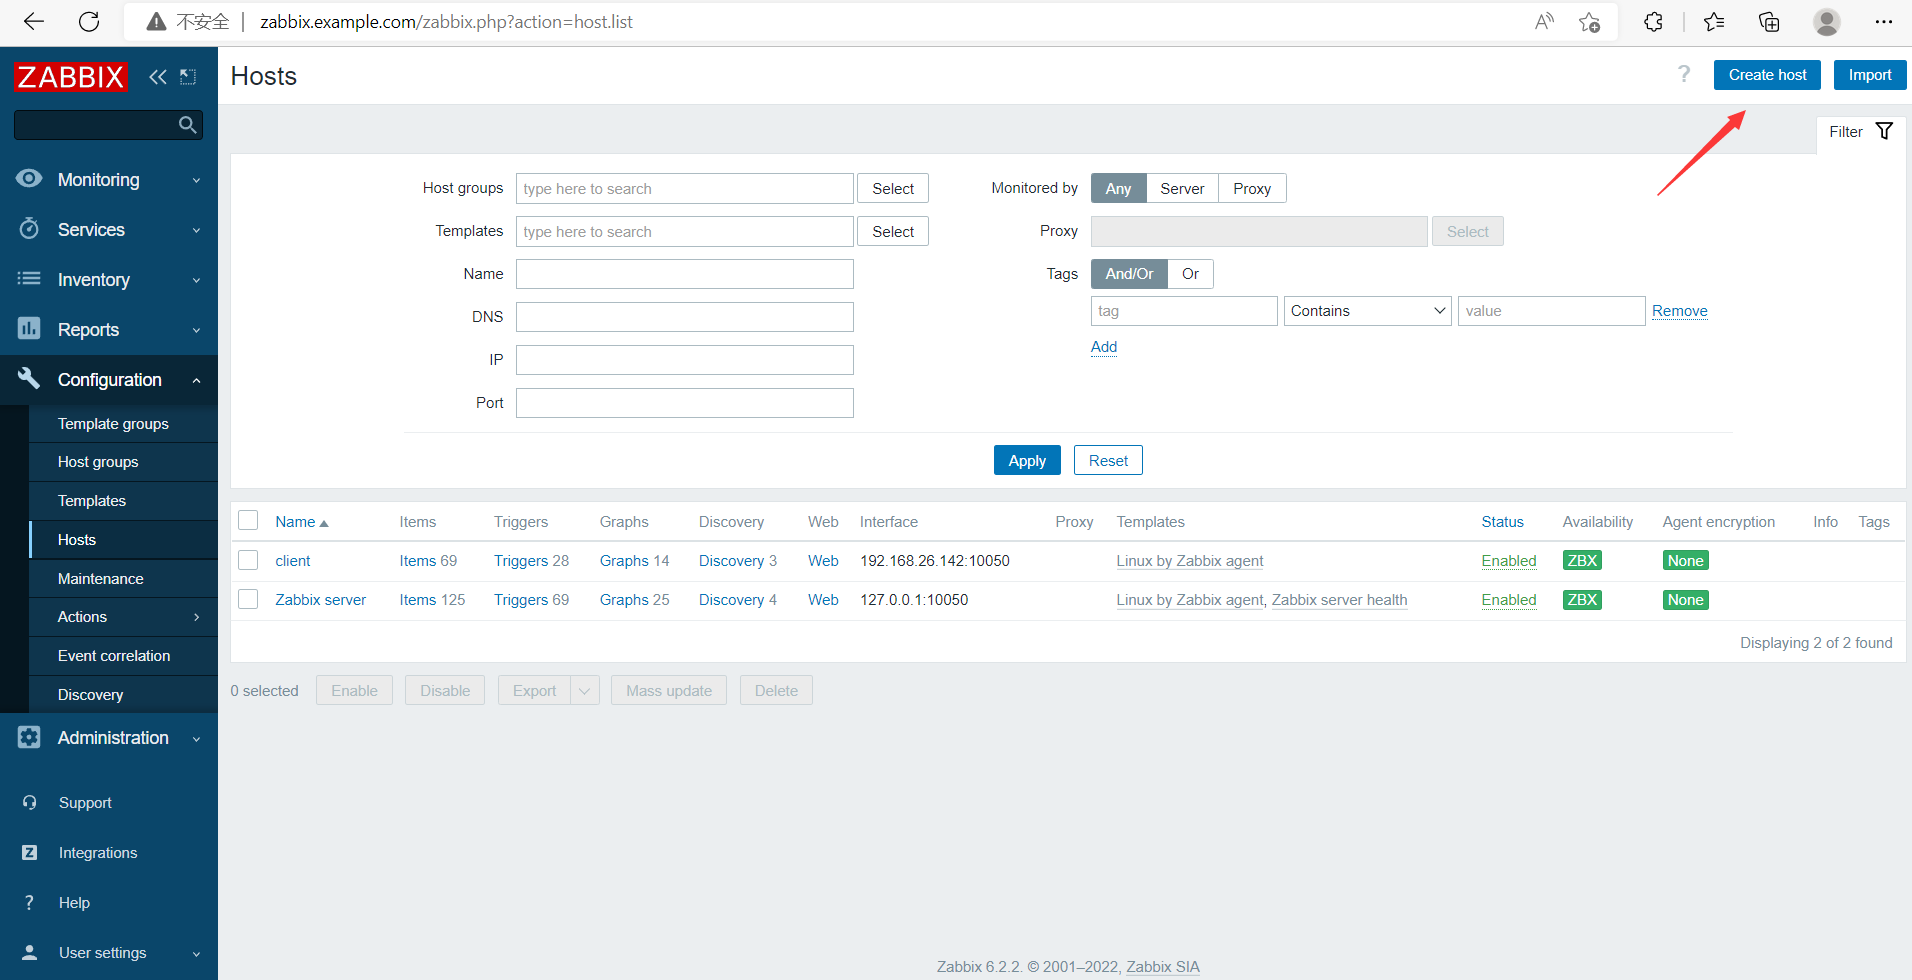
创建监控主机
点击右上角添加
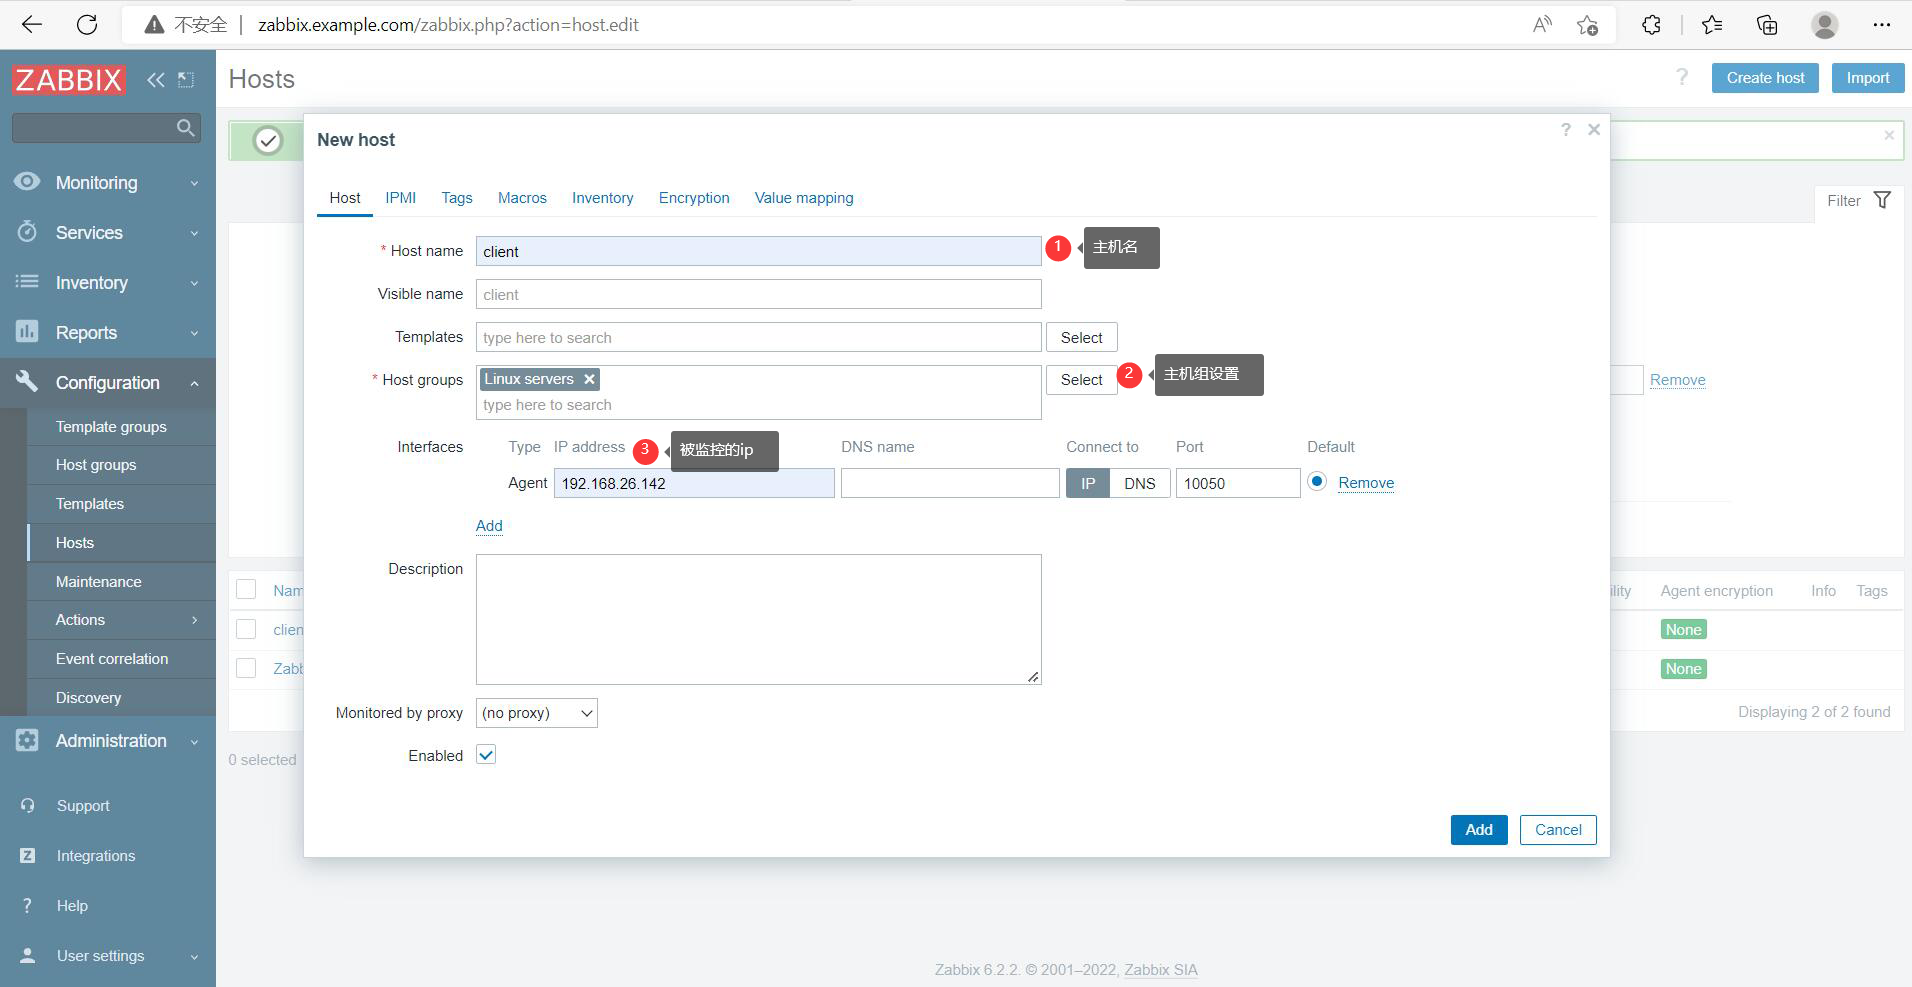
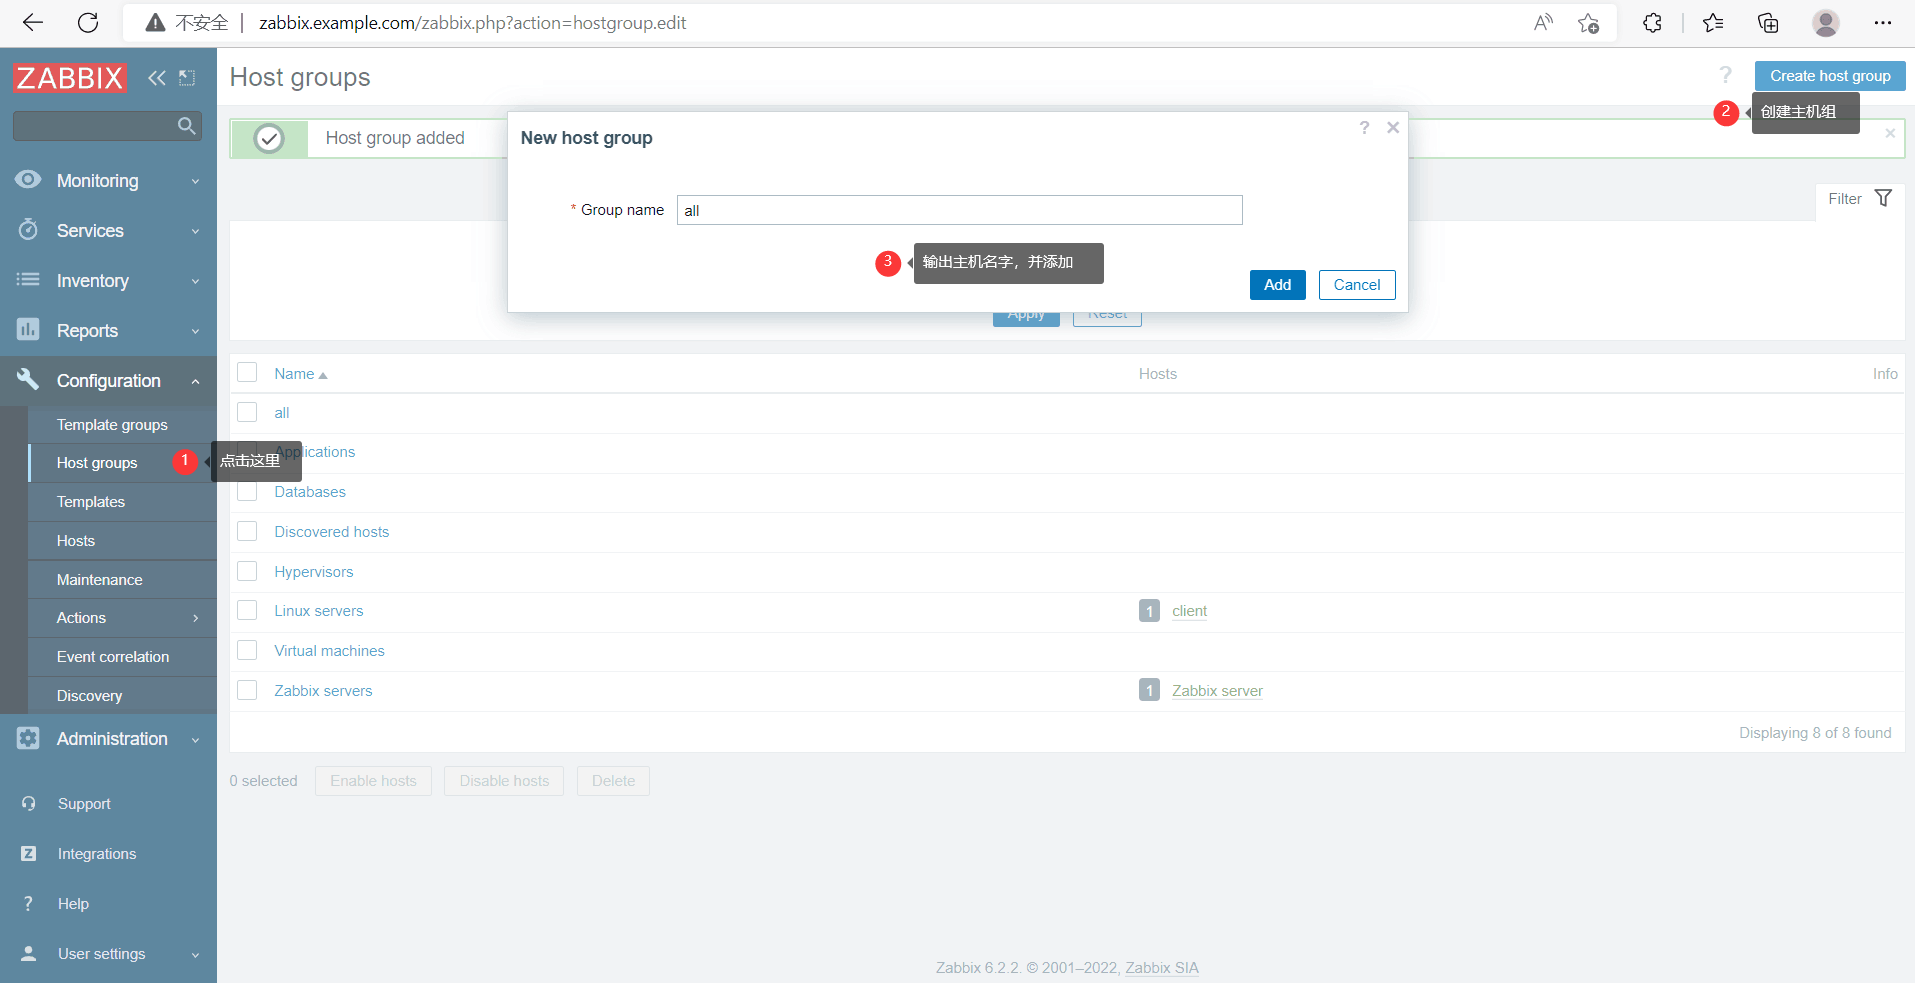
创建主机组并加入主机
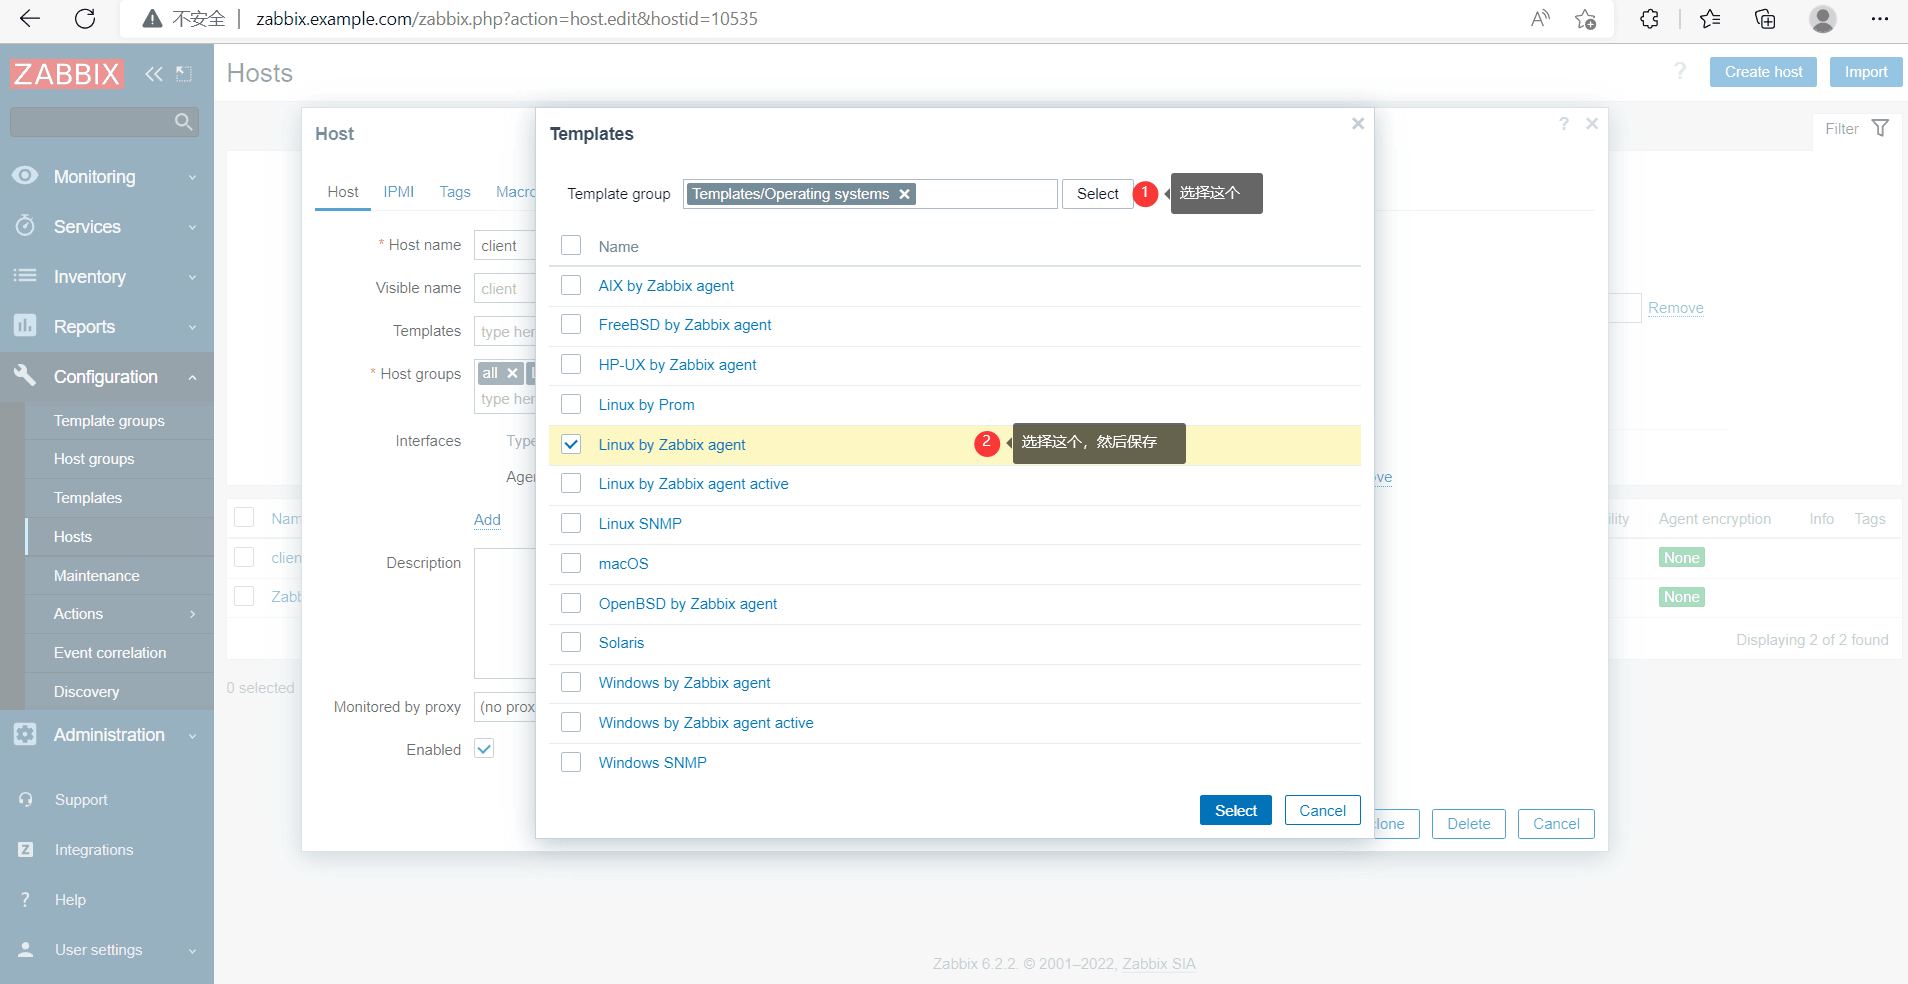
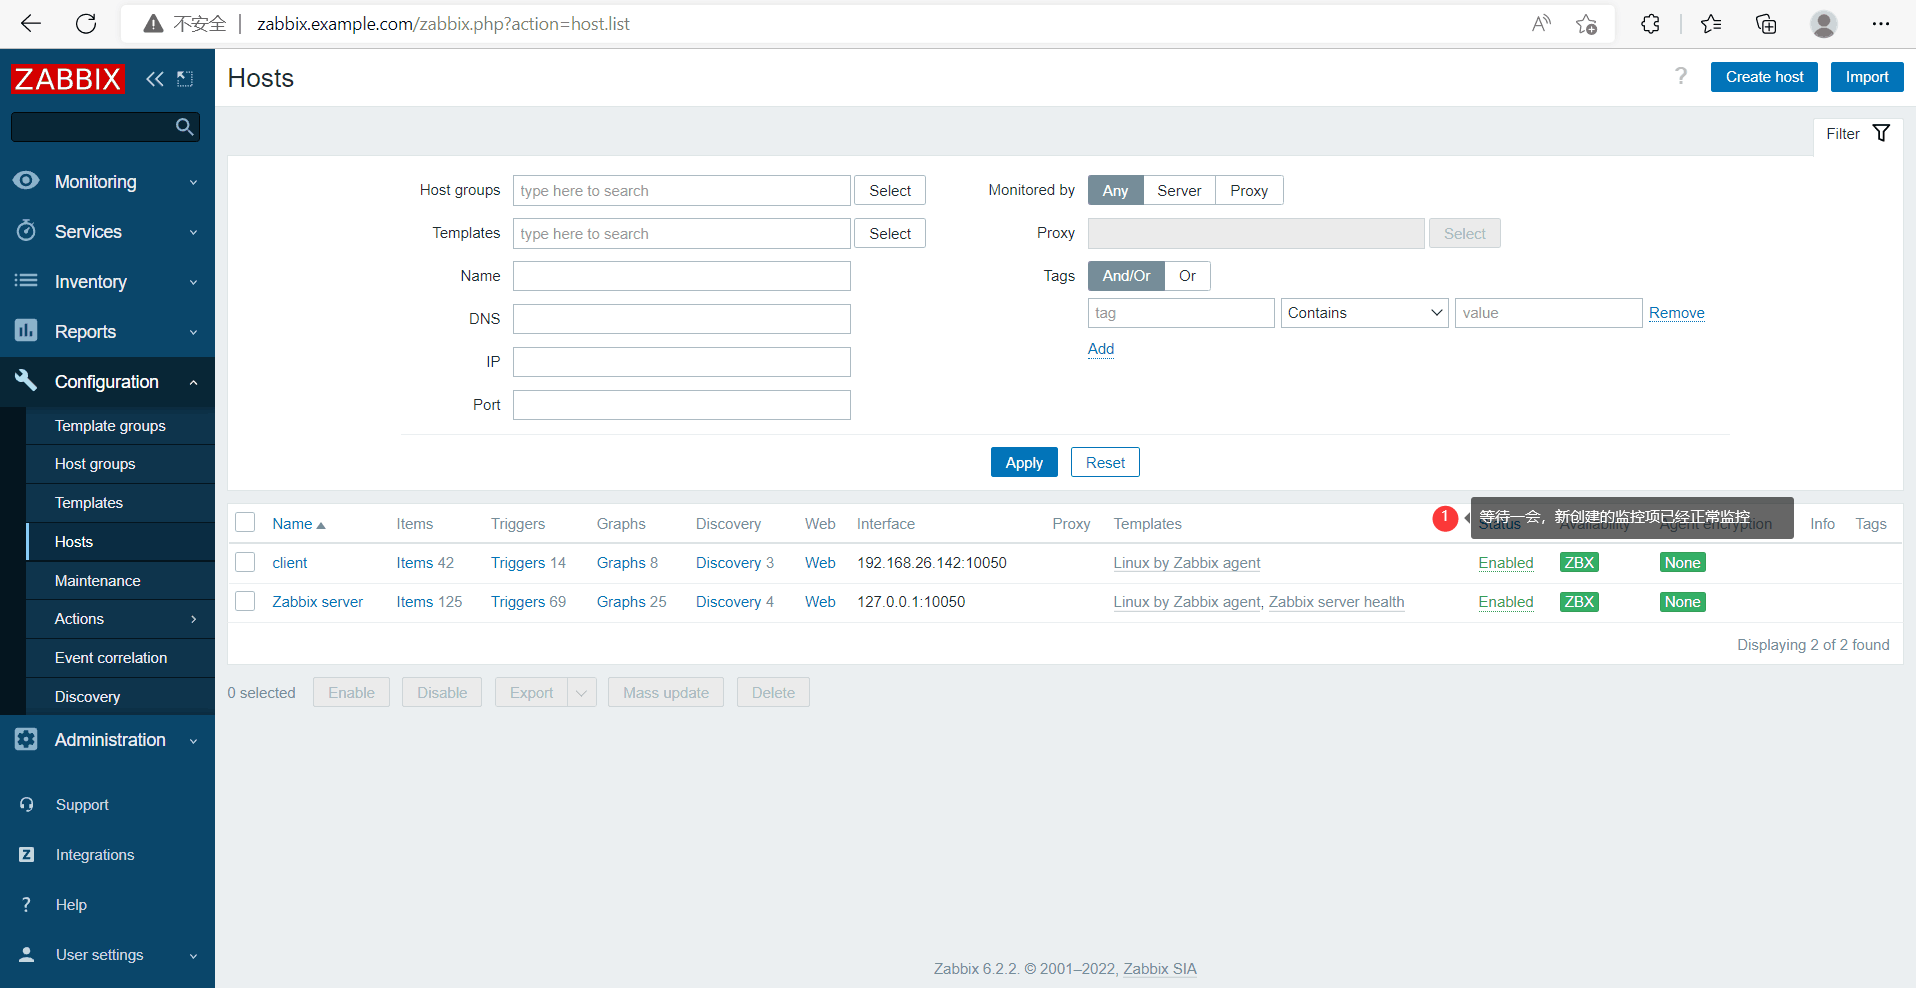
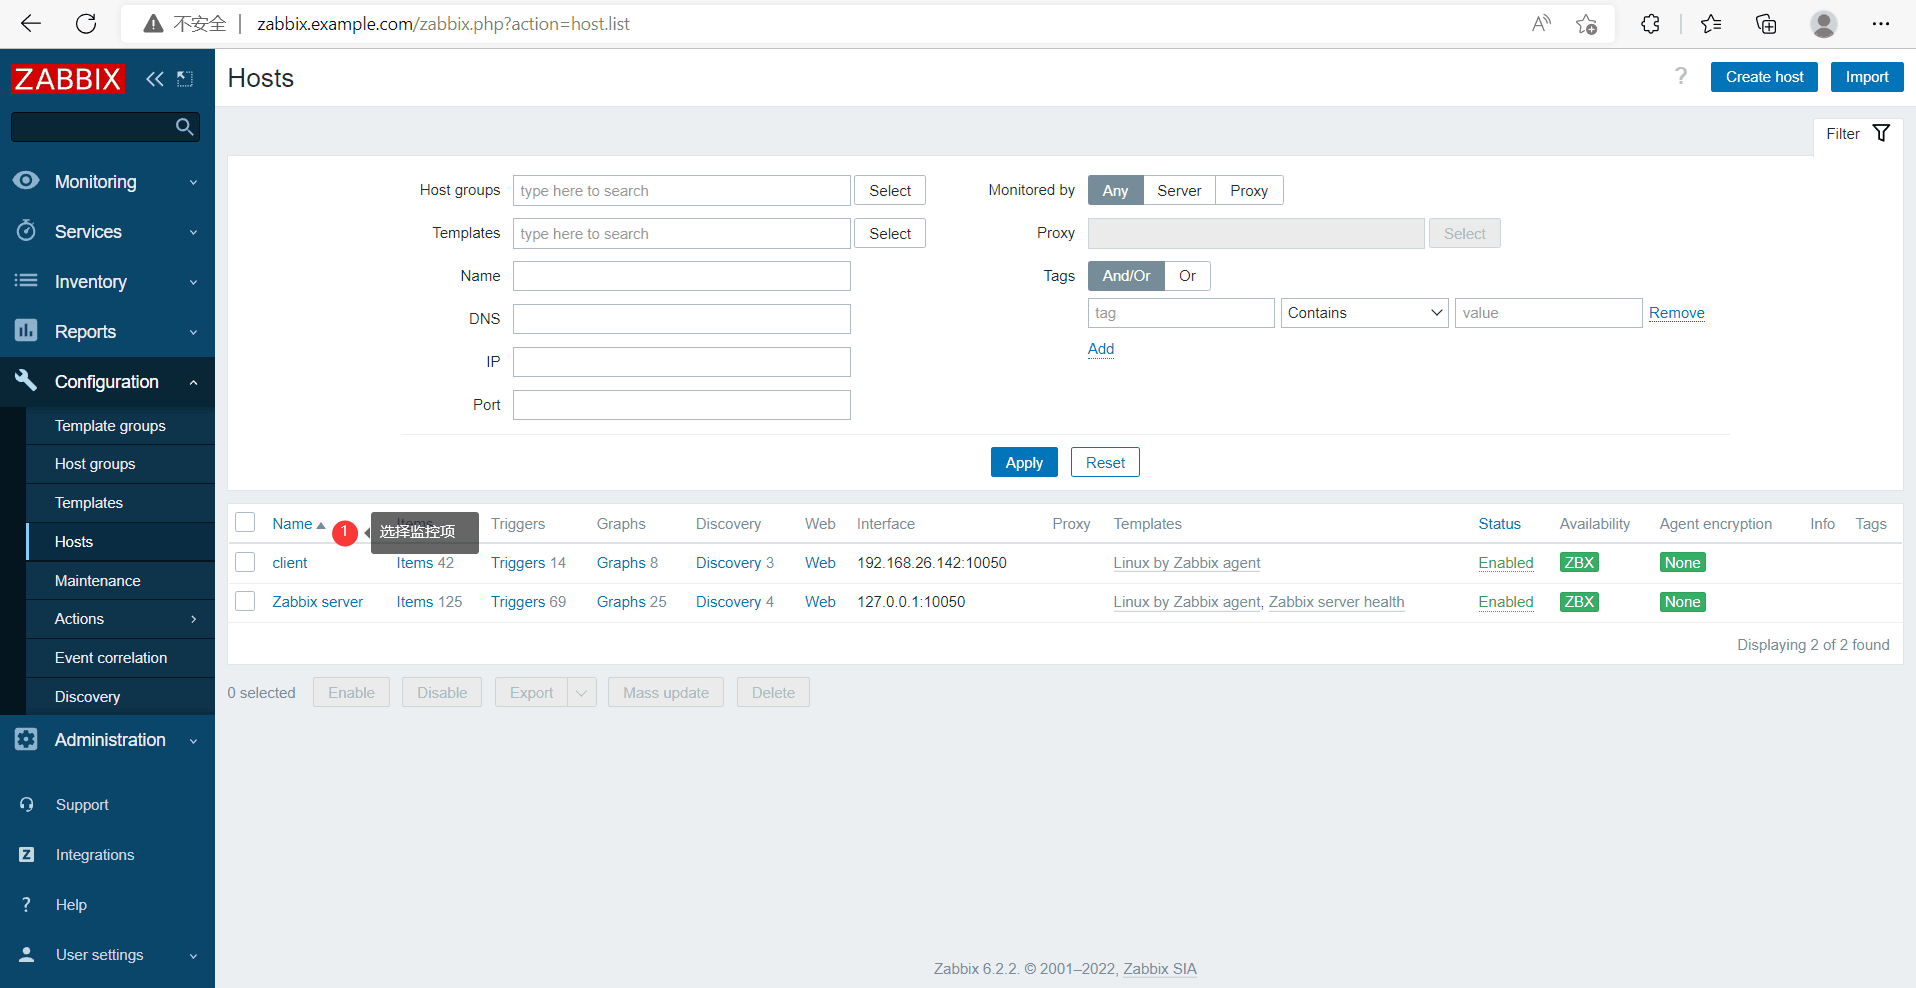
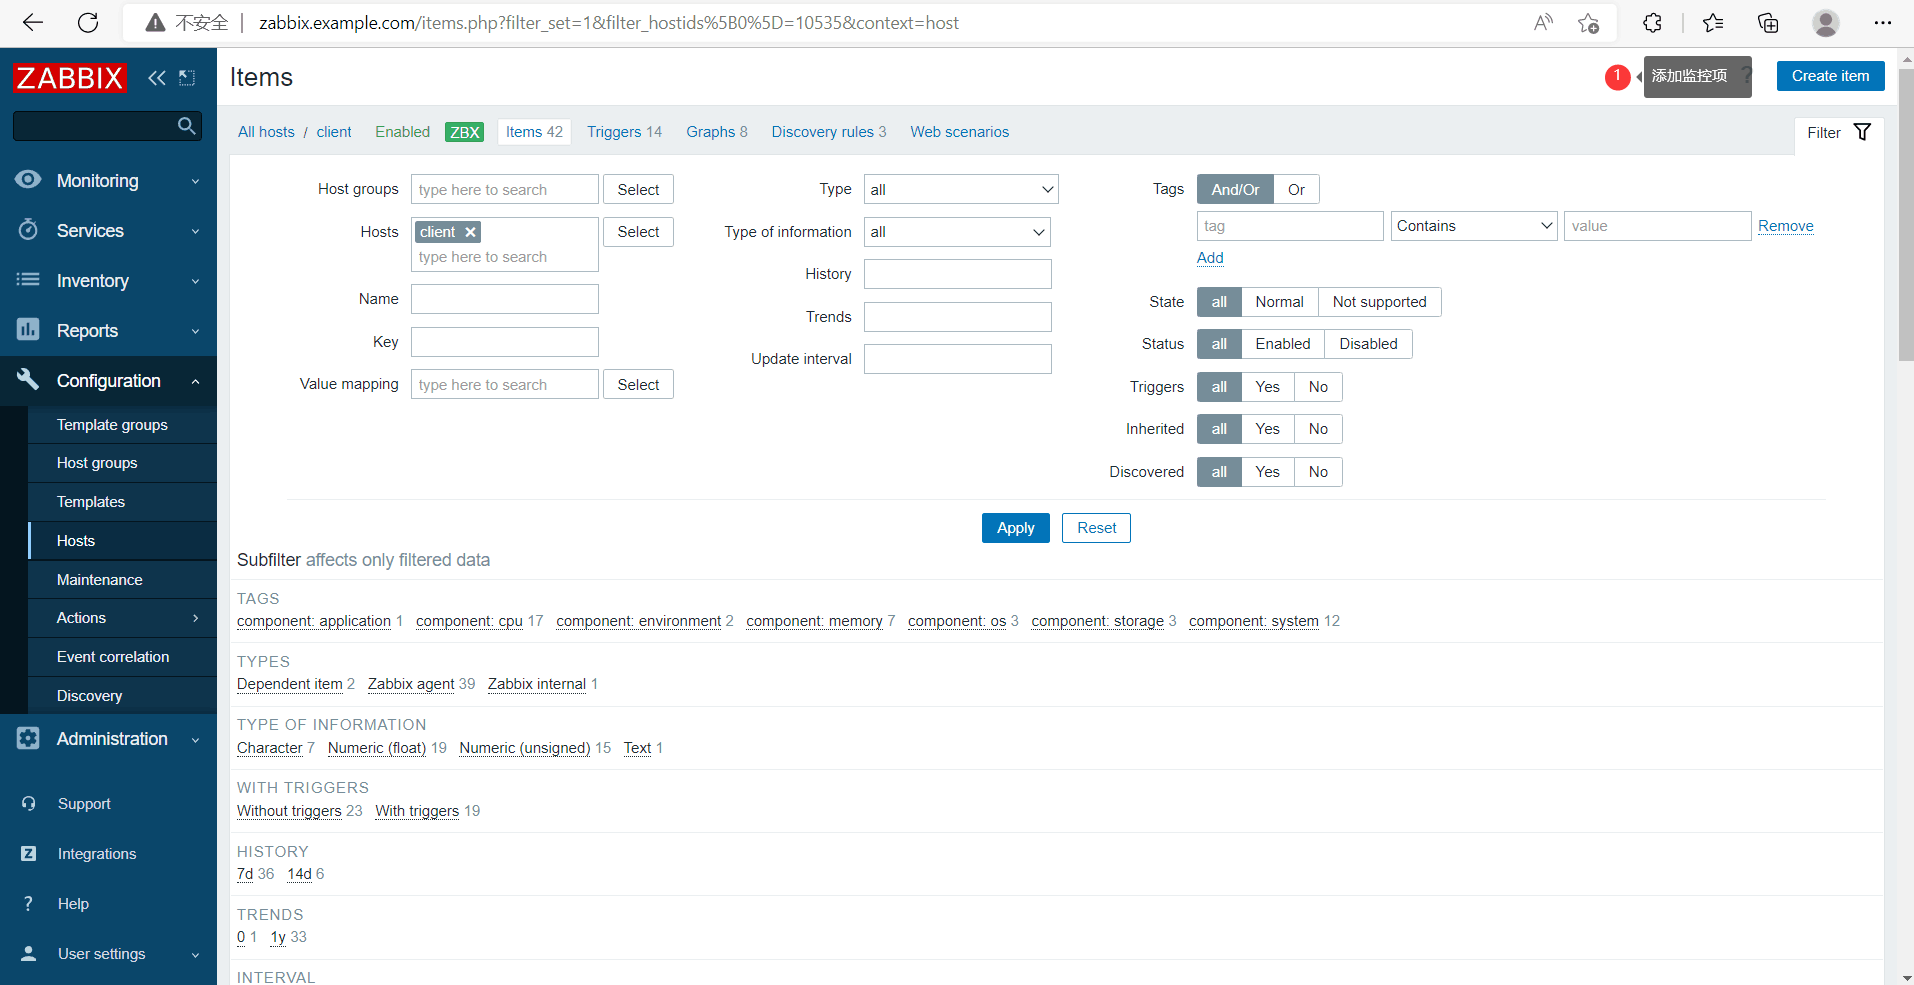
添加监控项
用模板方式添加
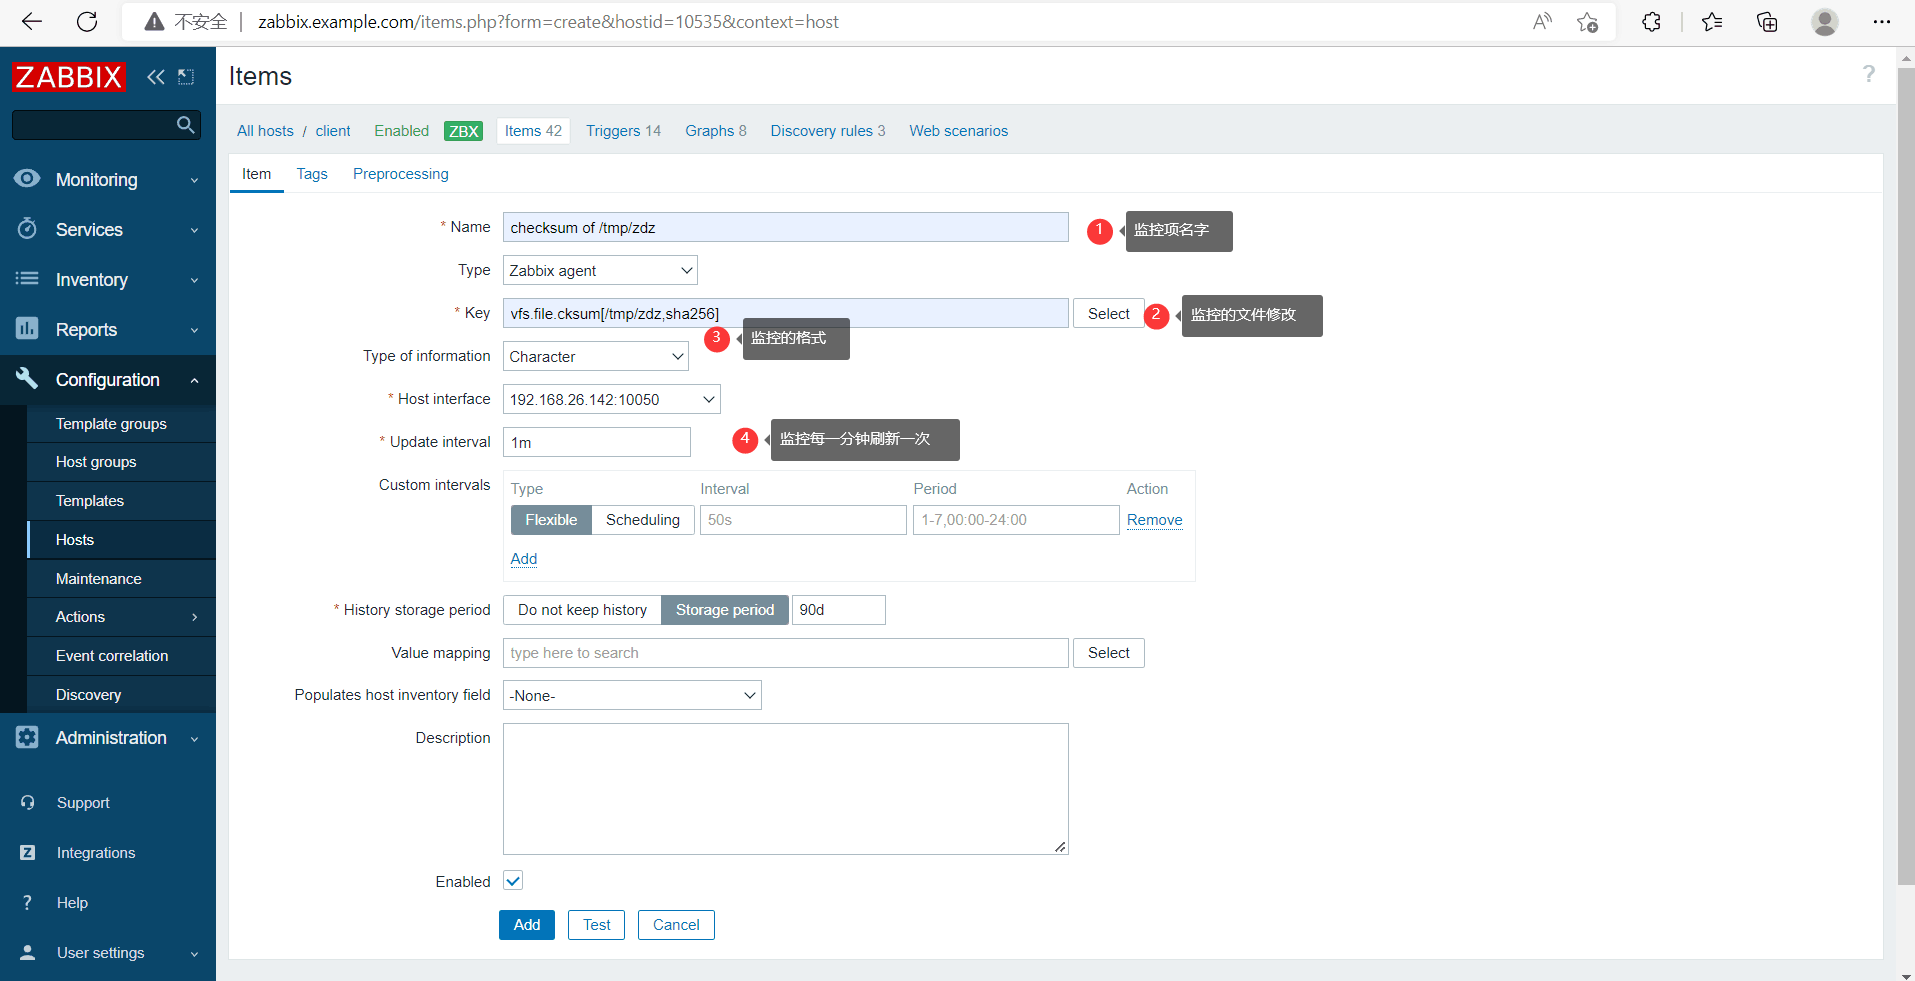
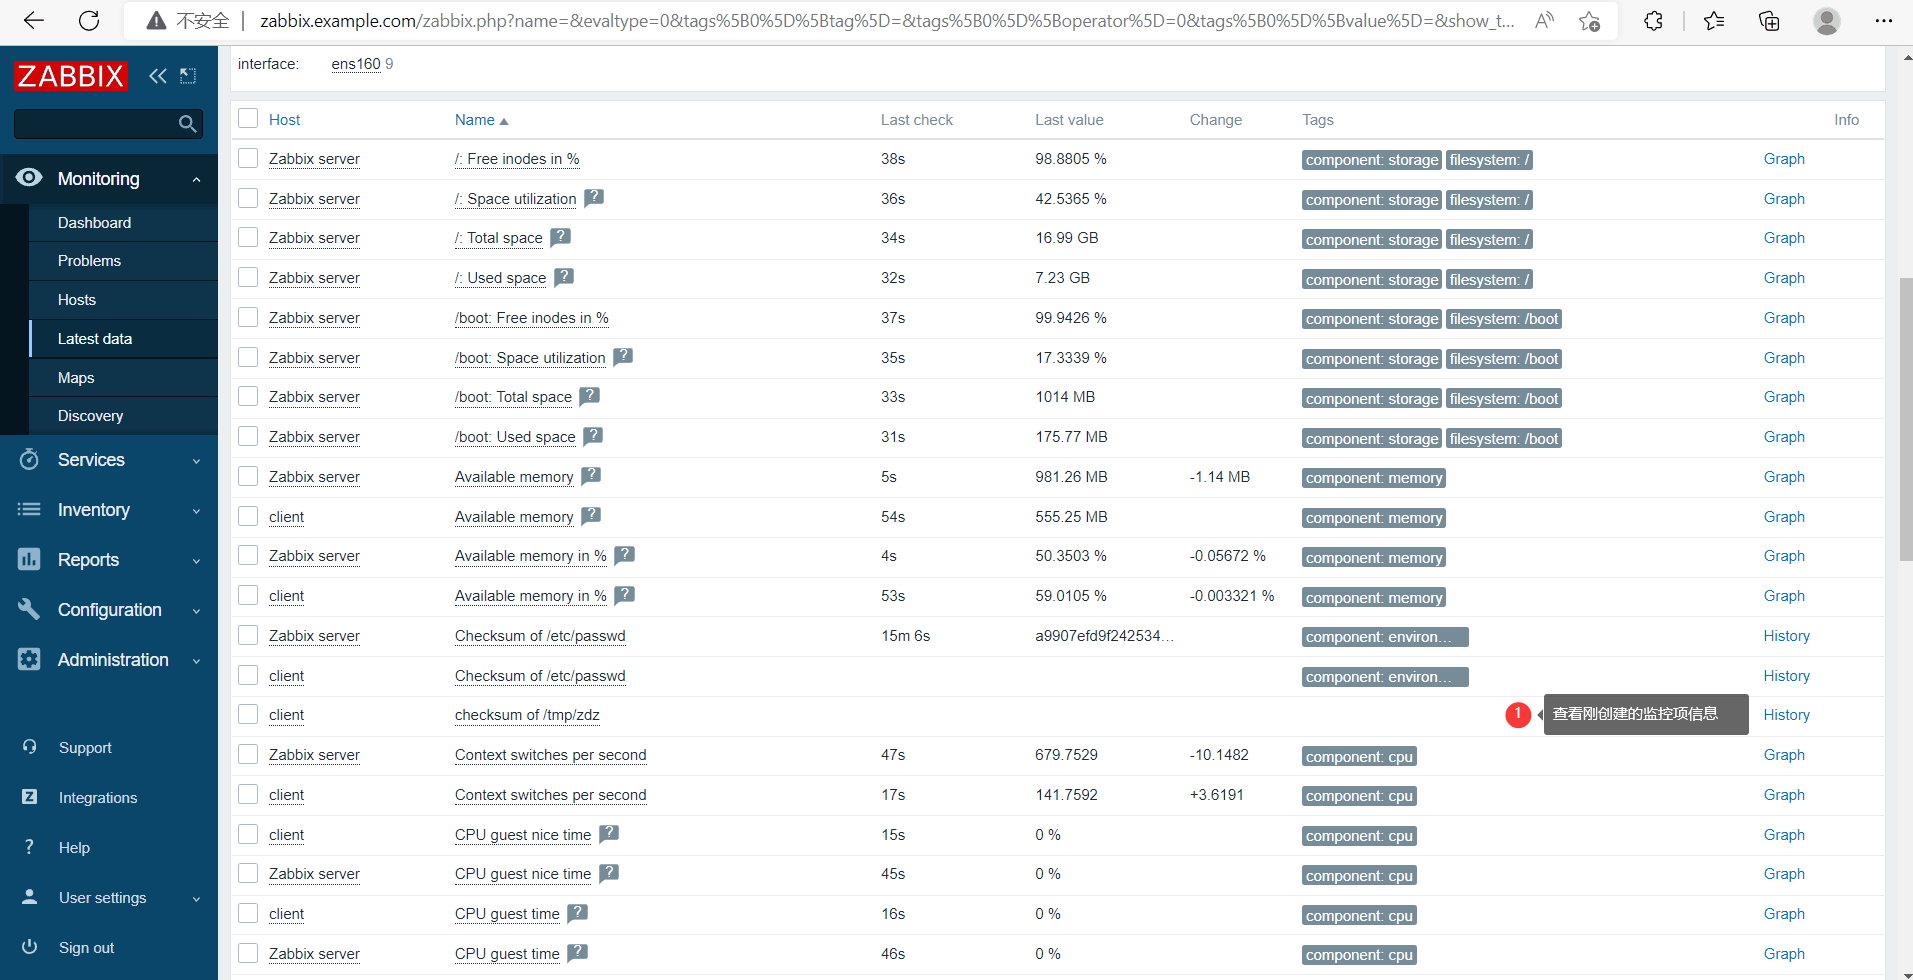
手动添加监控项
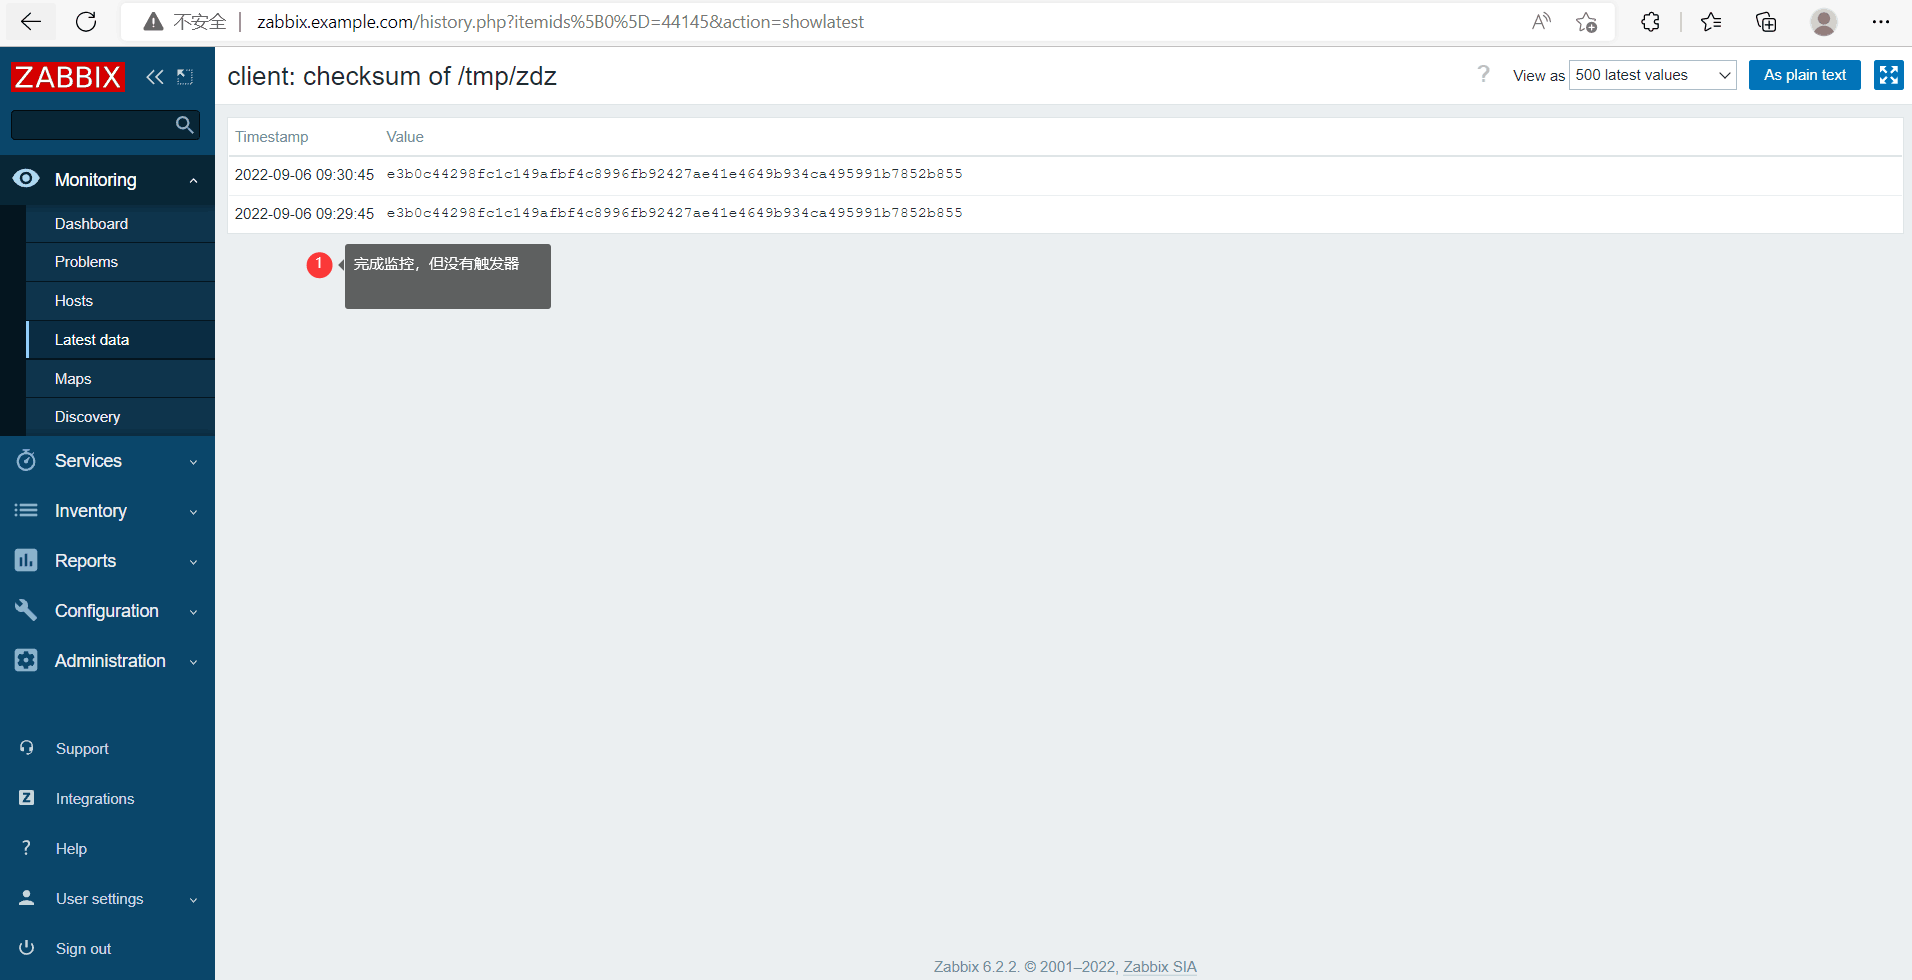
我们可以先在被监控端创建一个测试的文件
[root@localhost ~]# touch /tmp/zdz
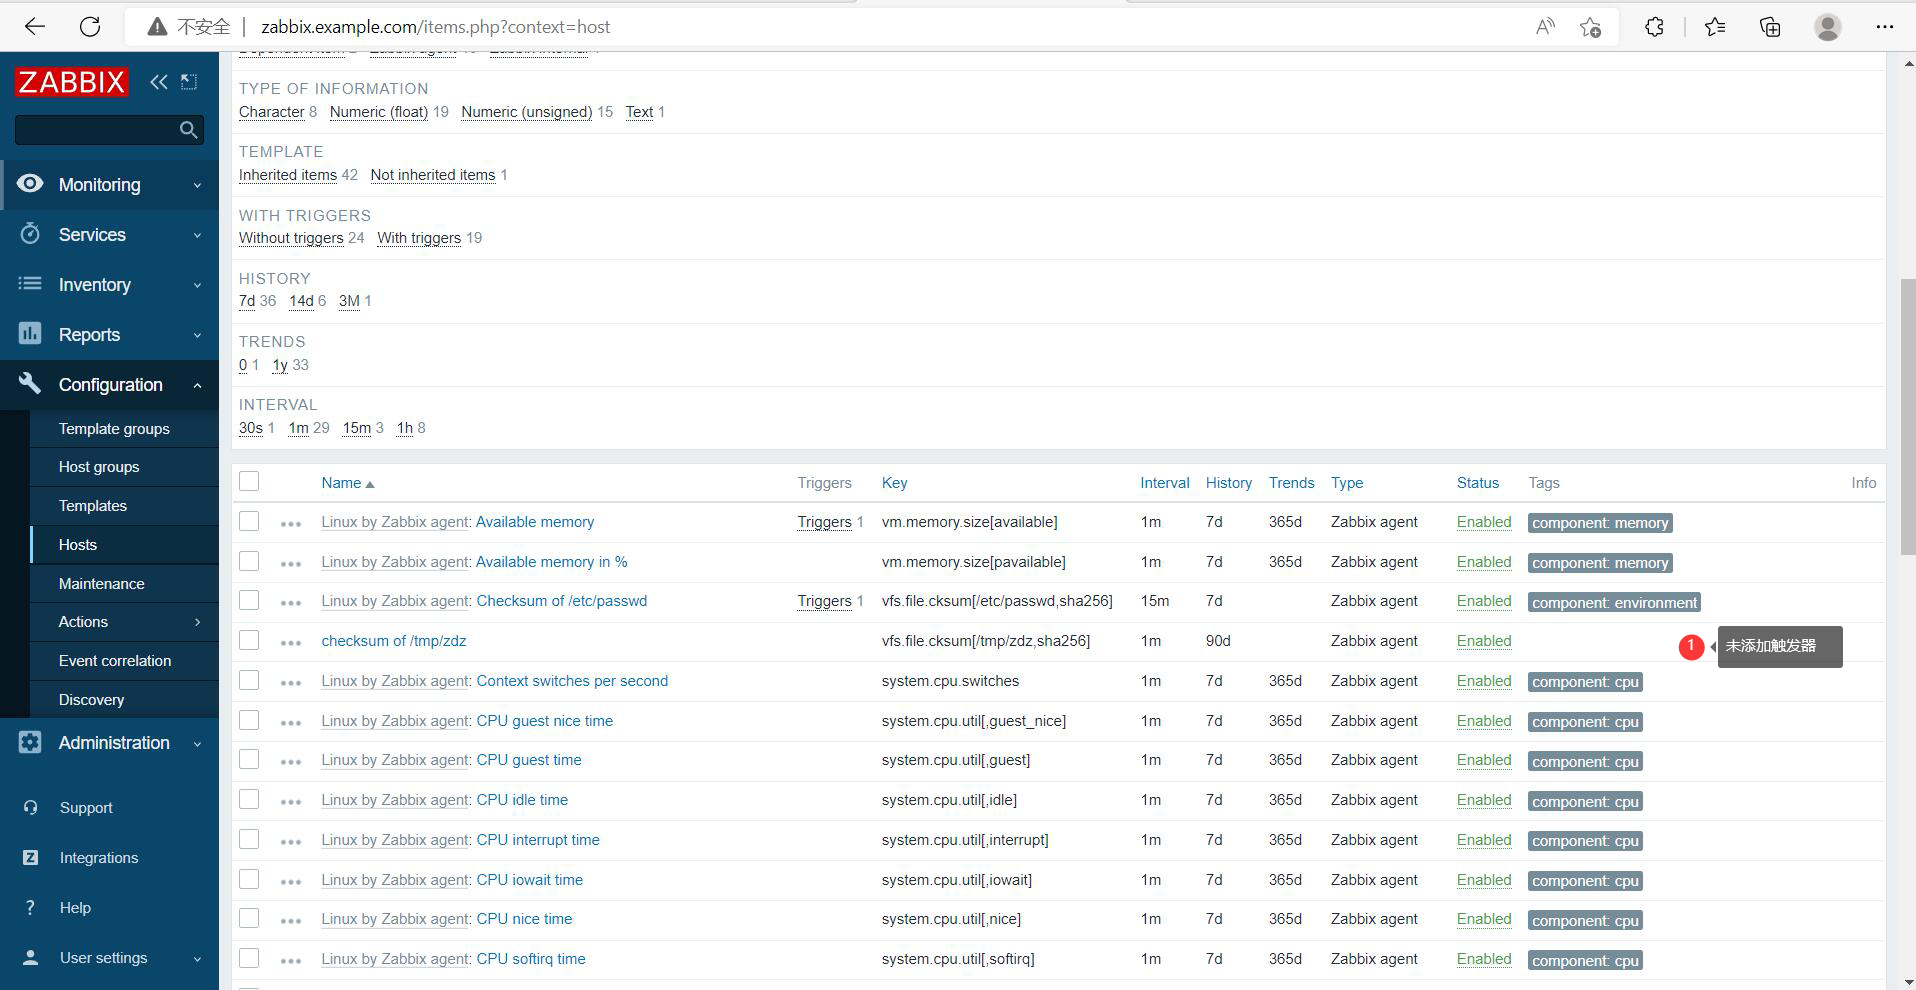
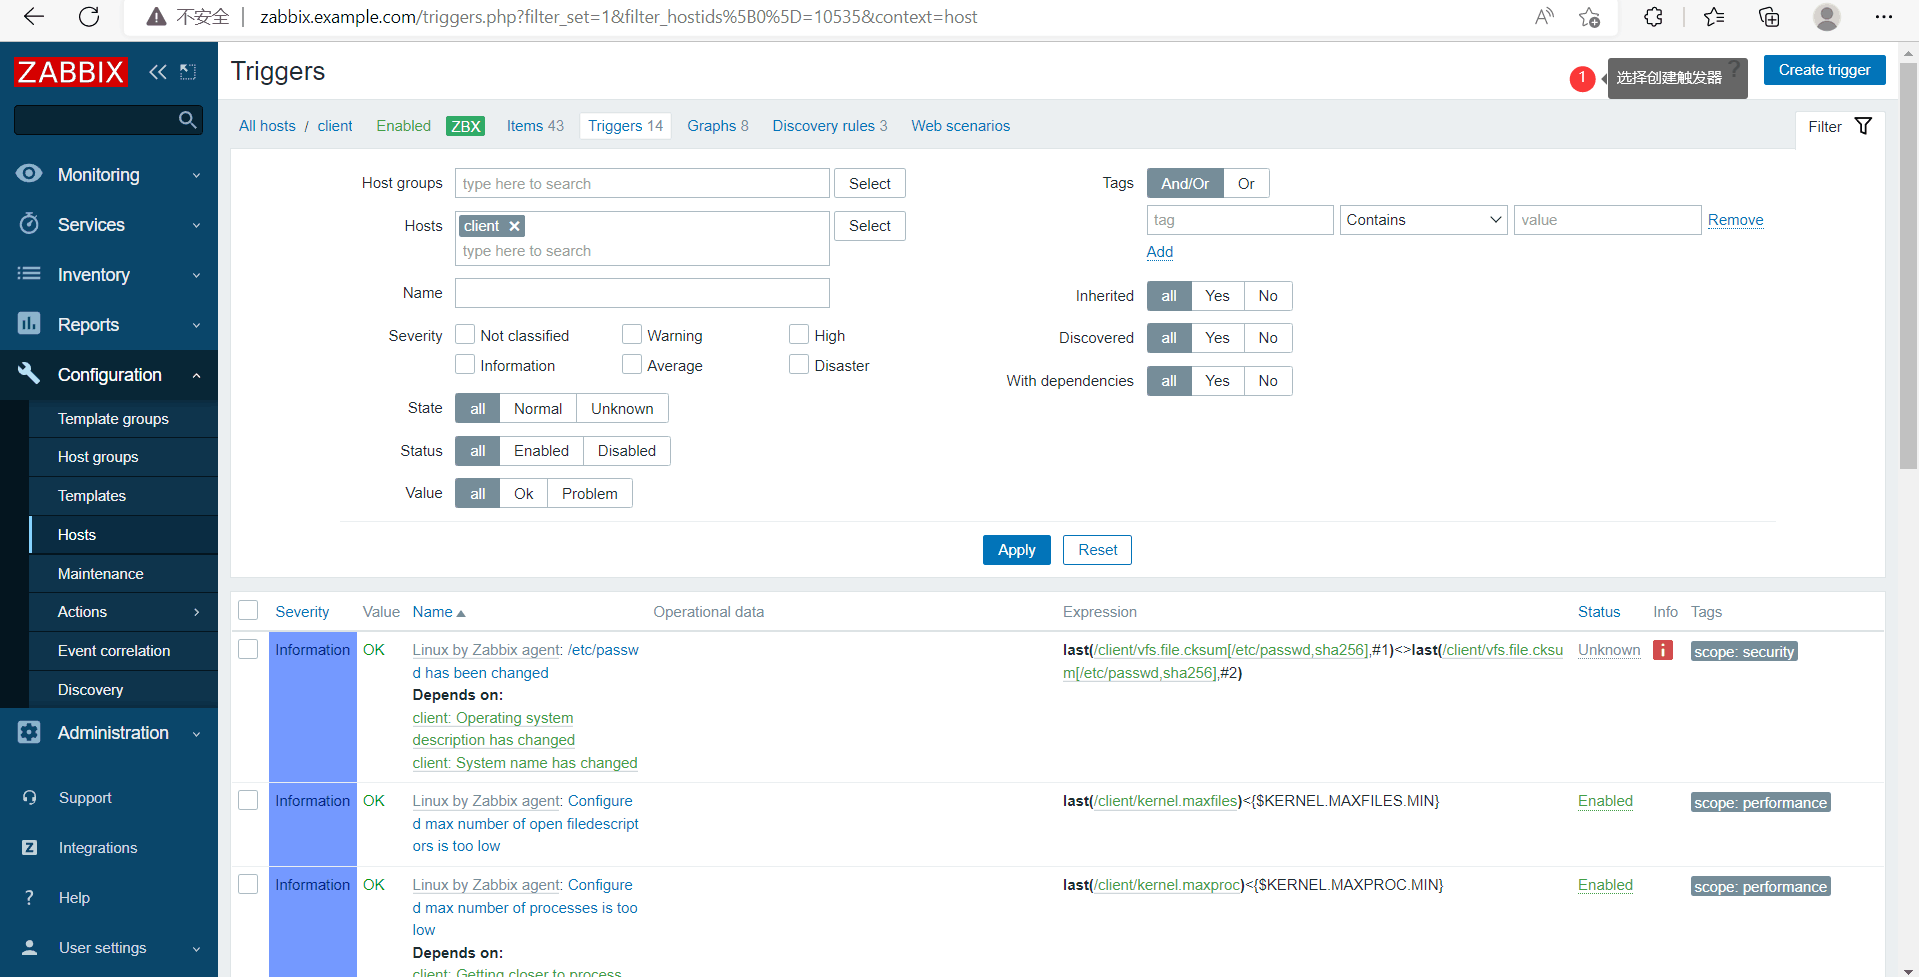
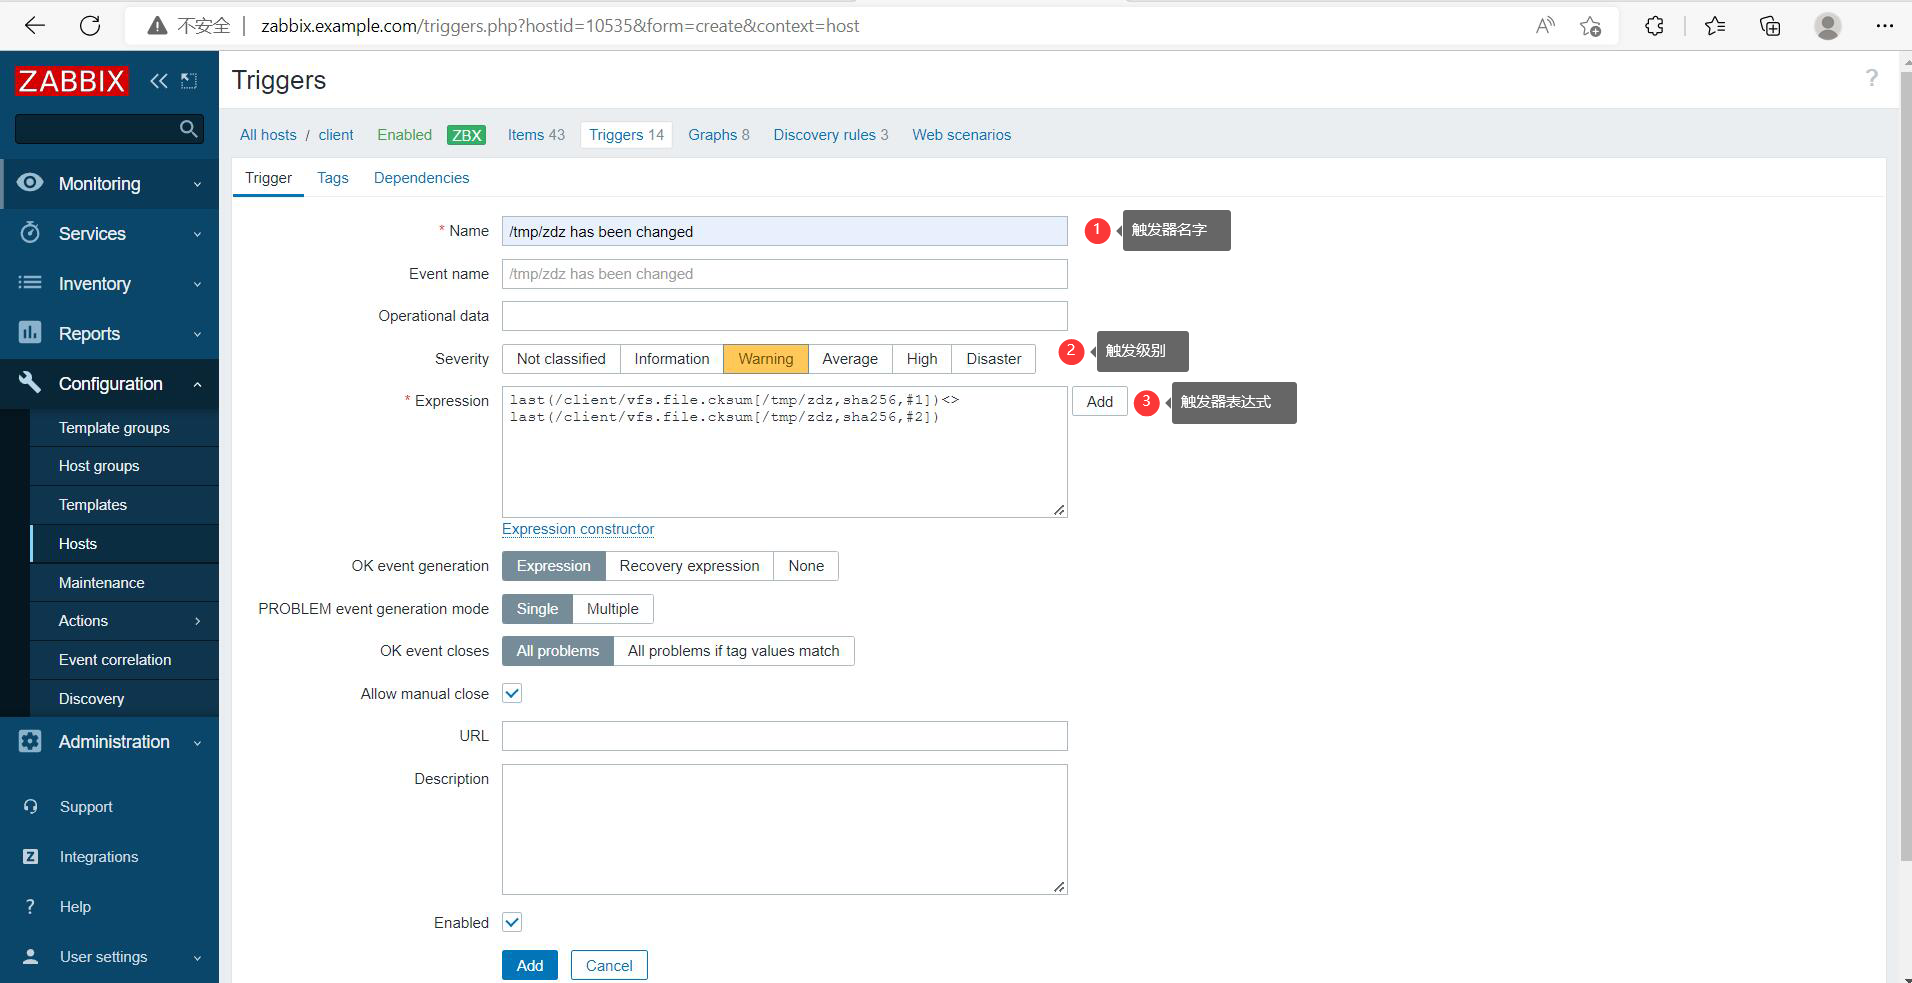
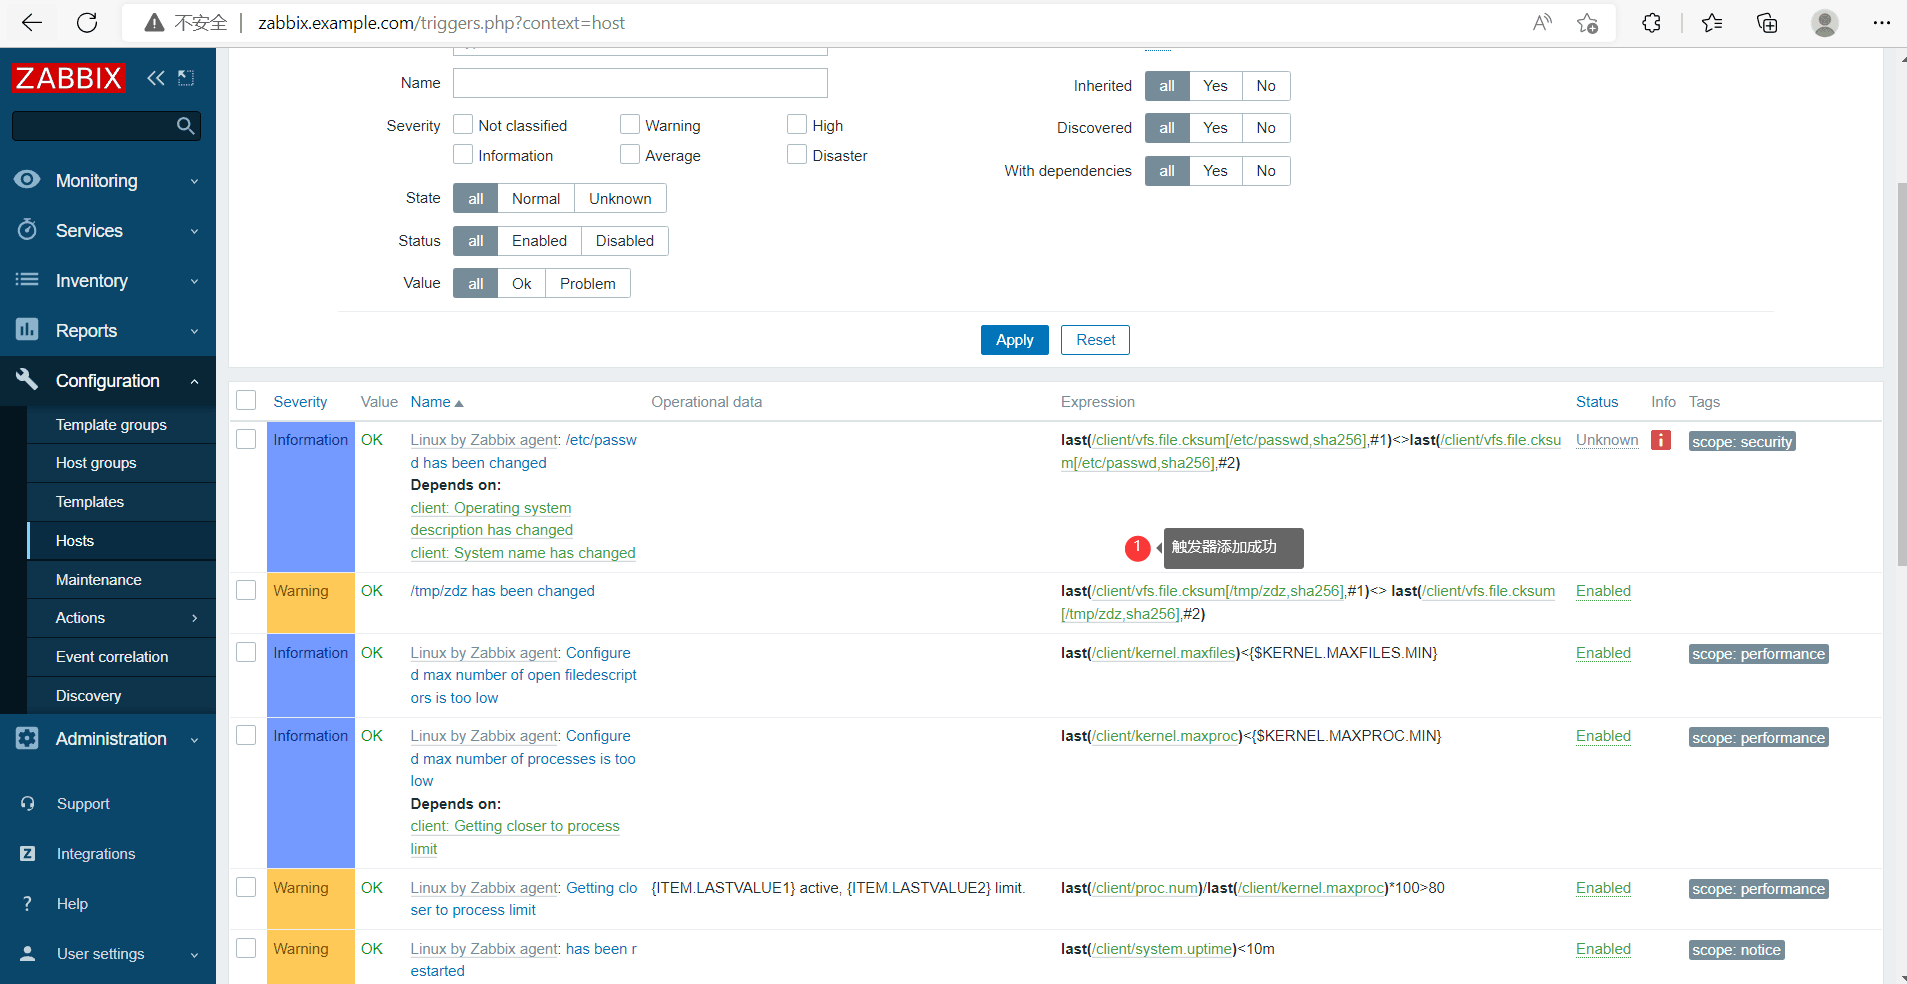
添加触发器
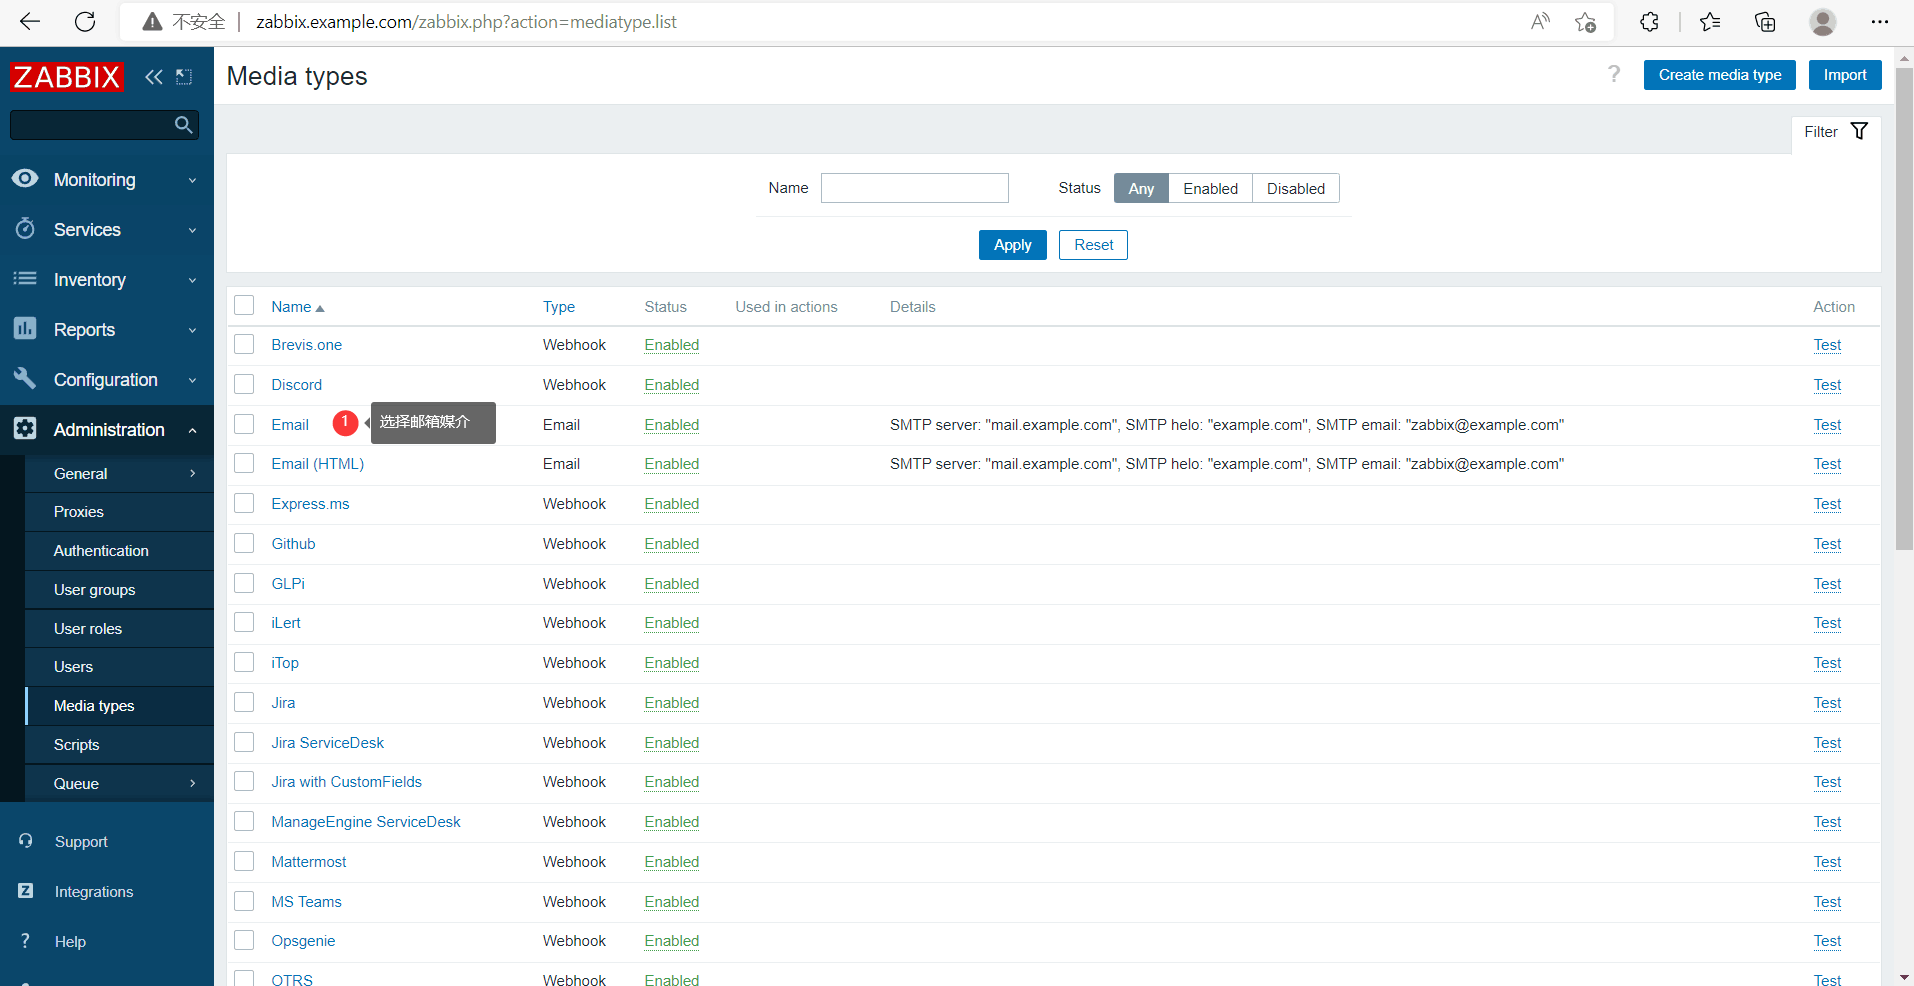
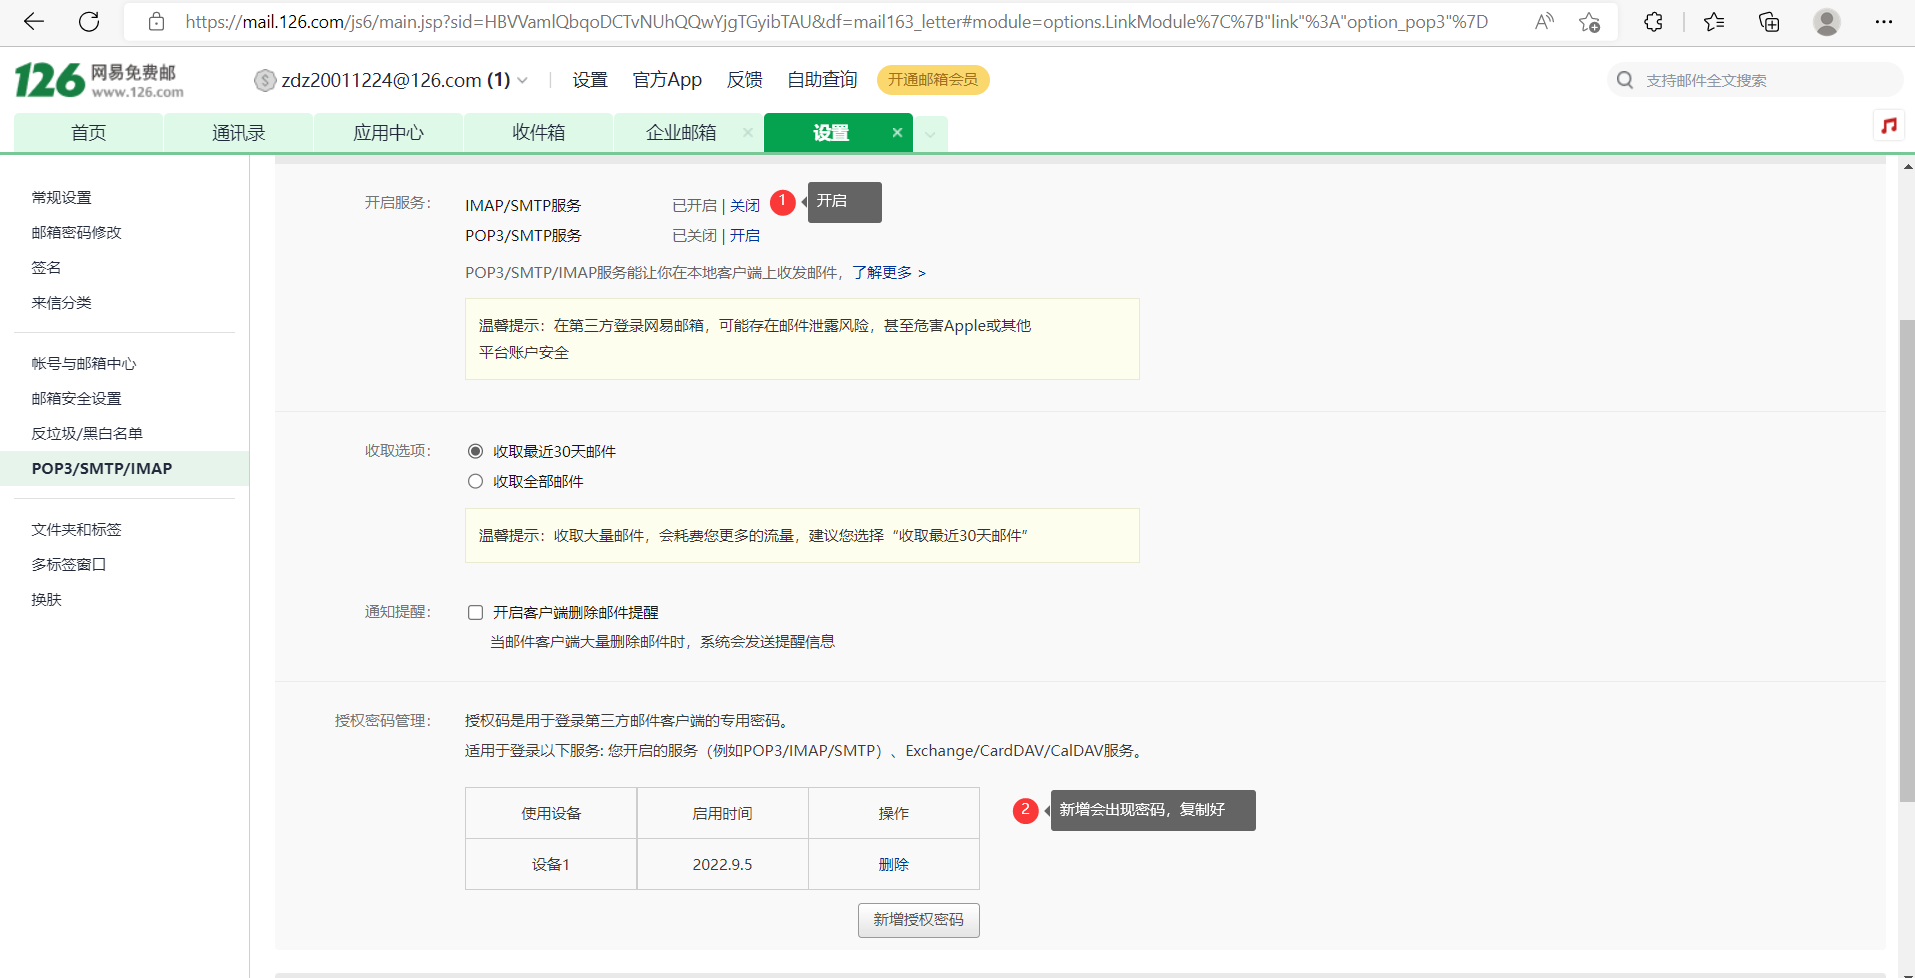
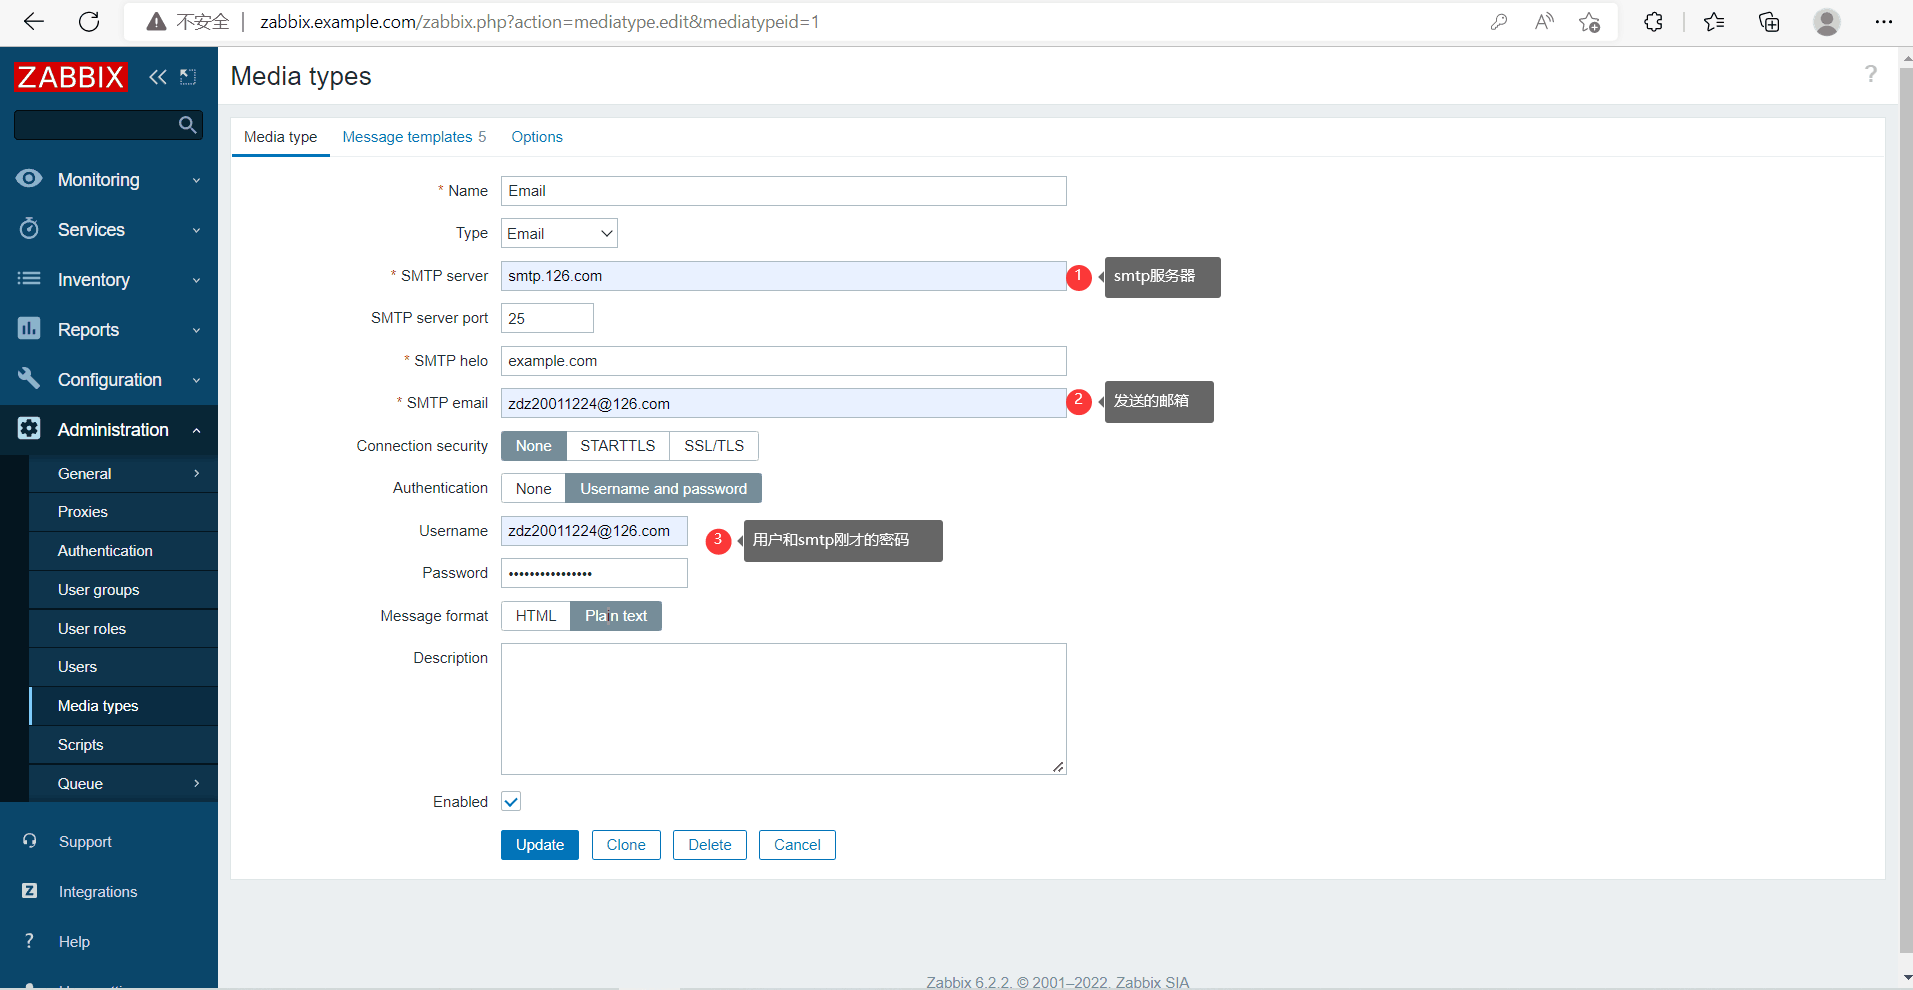
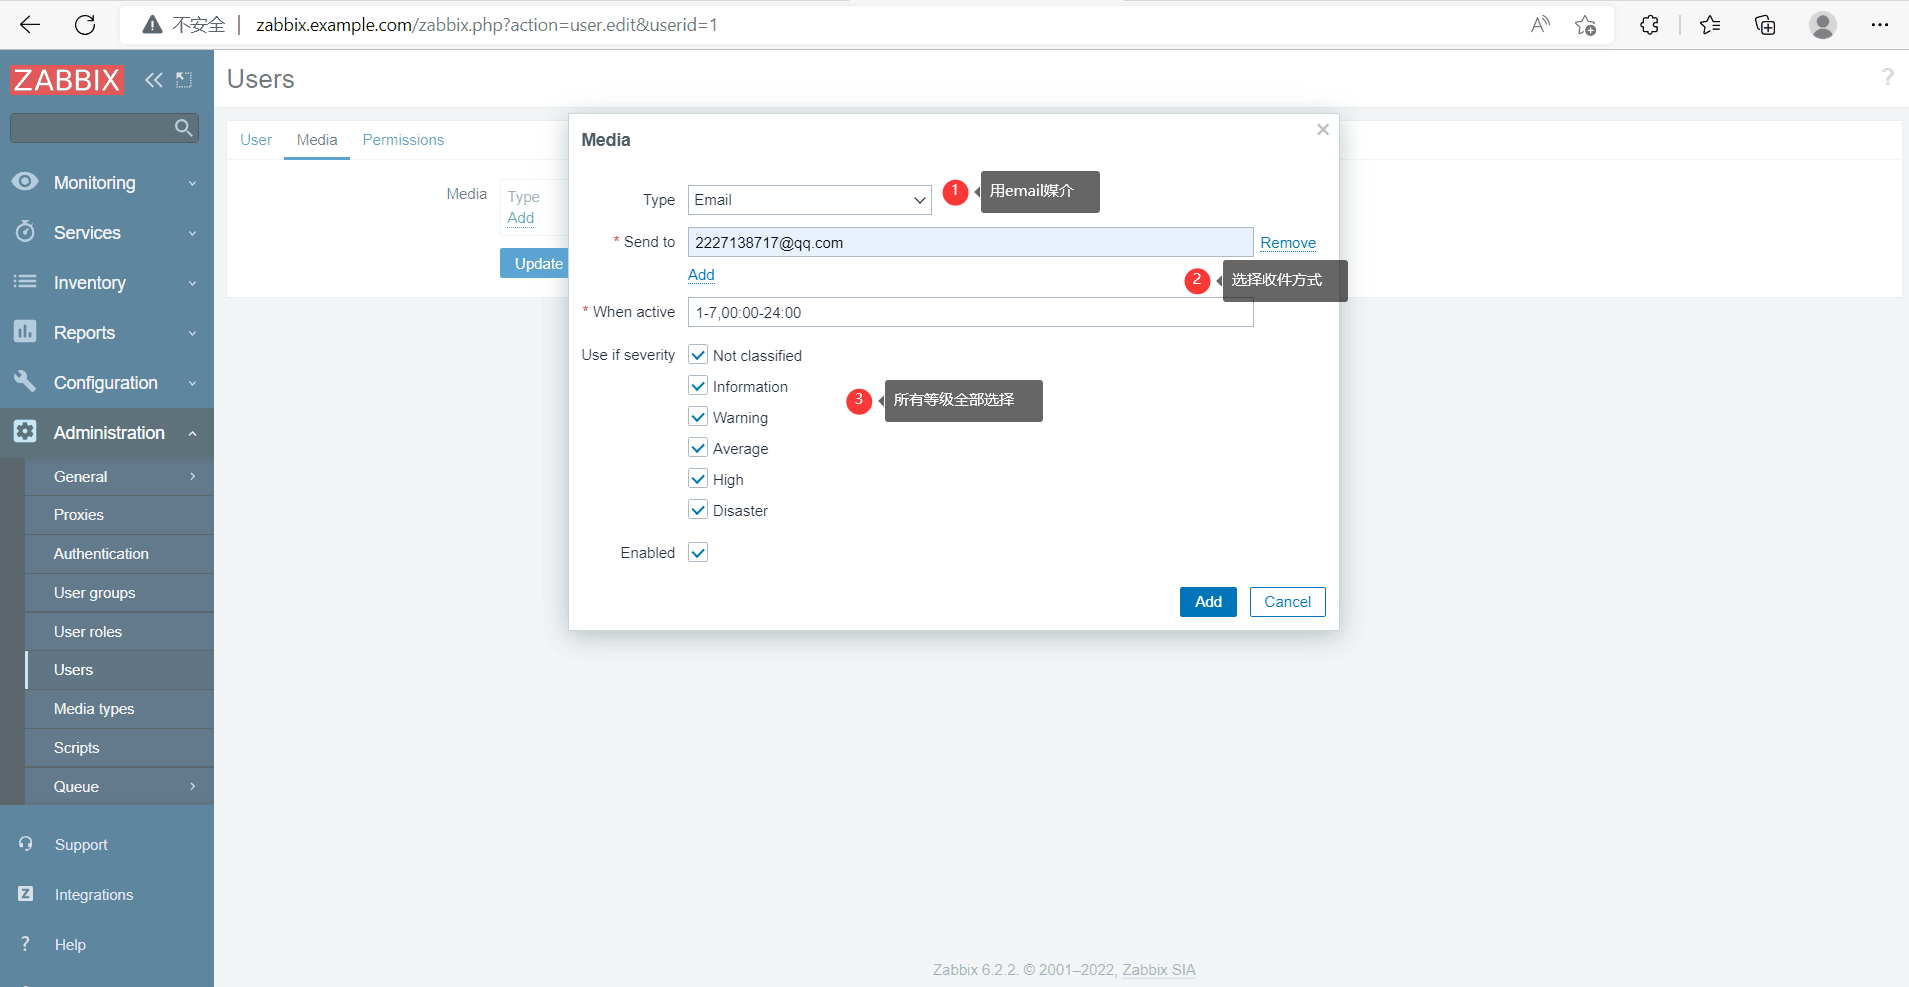
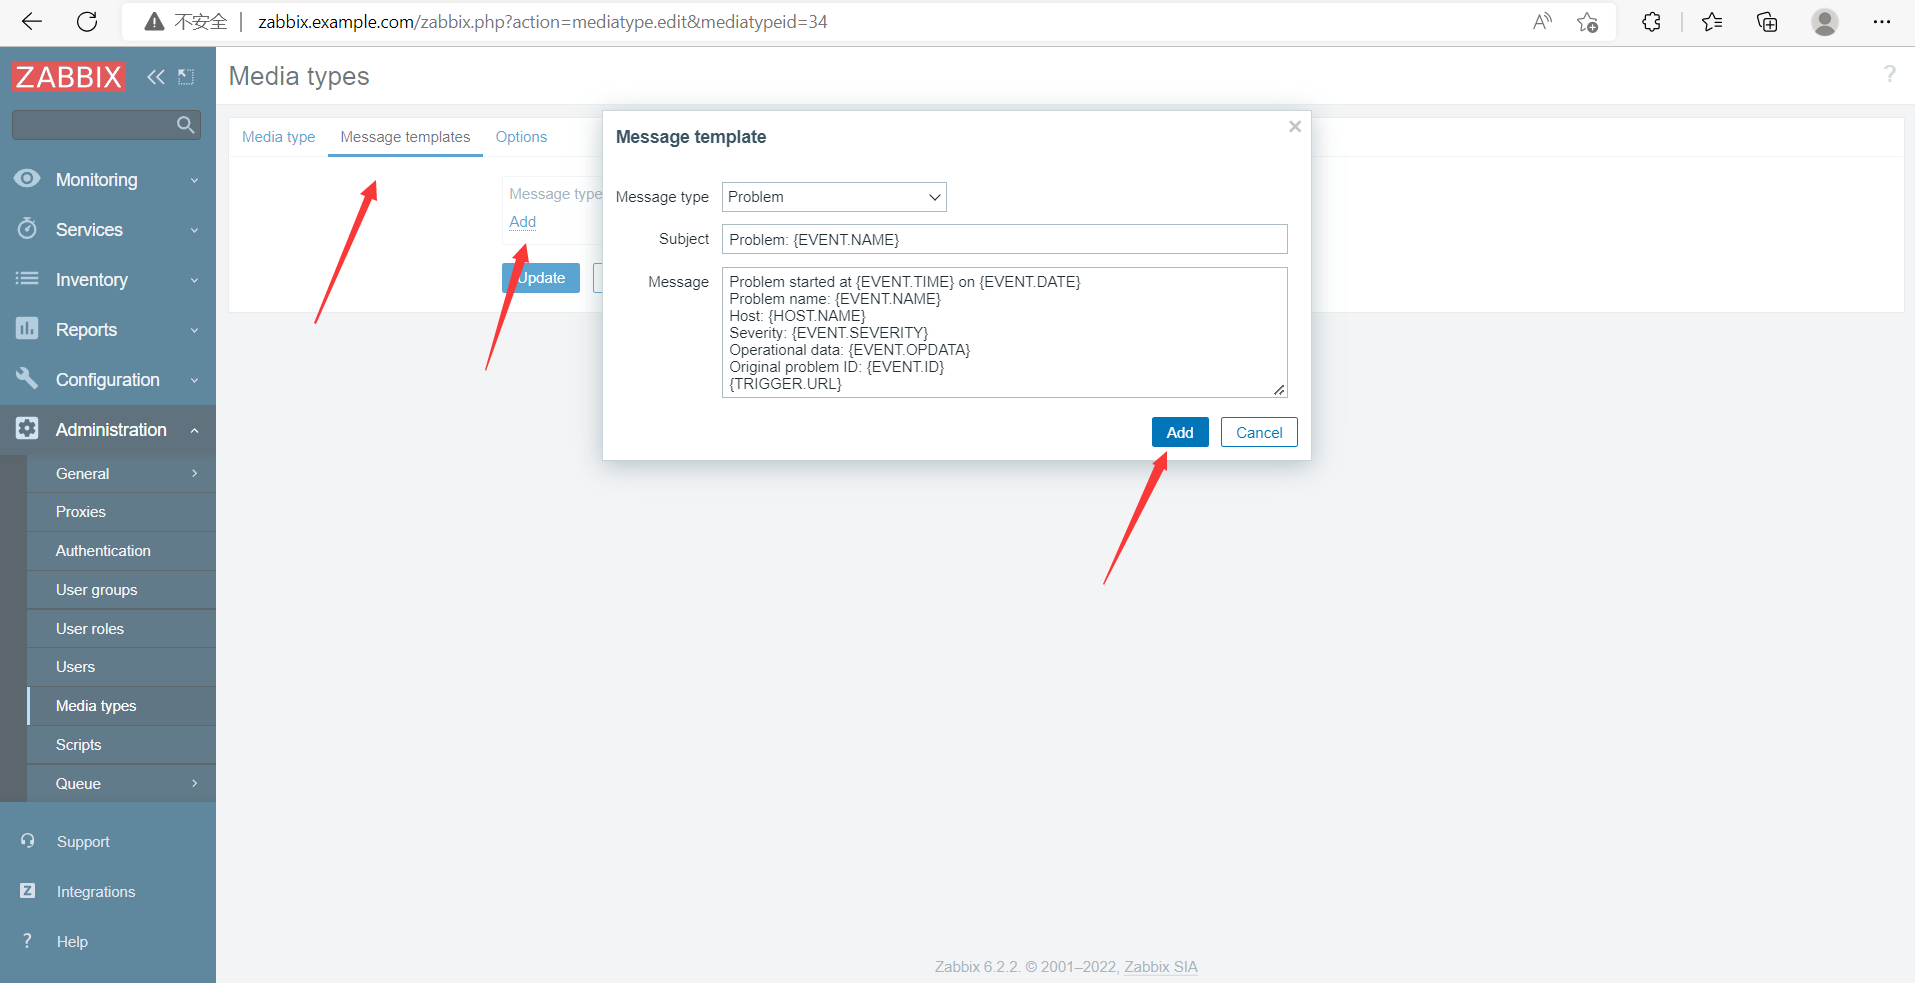
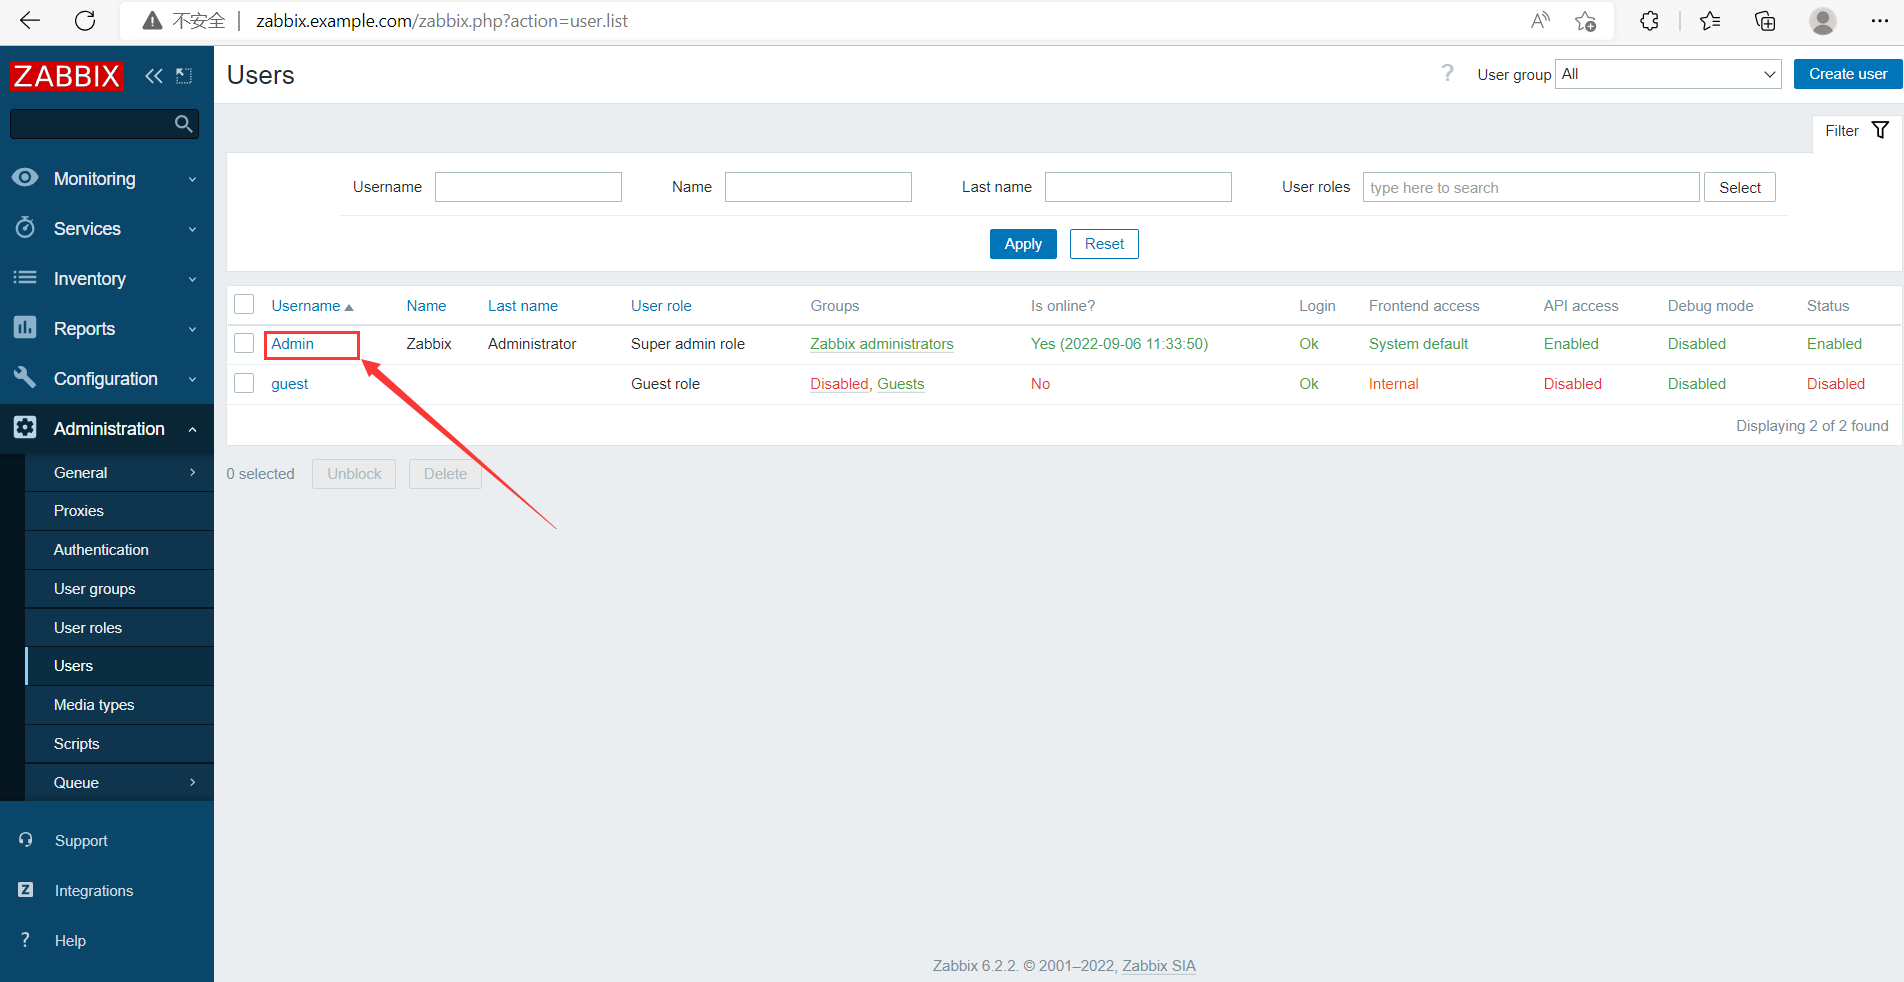
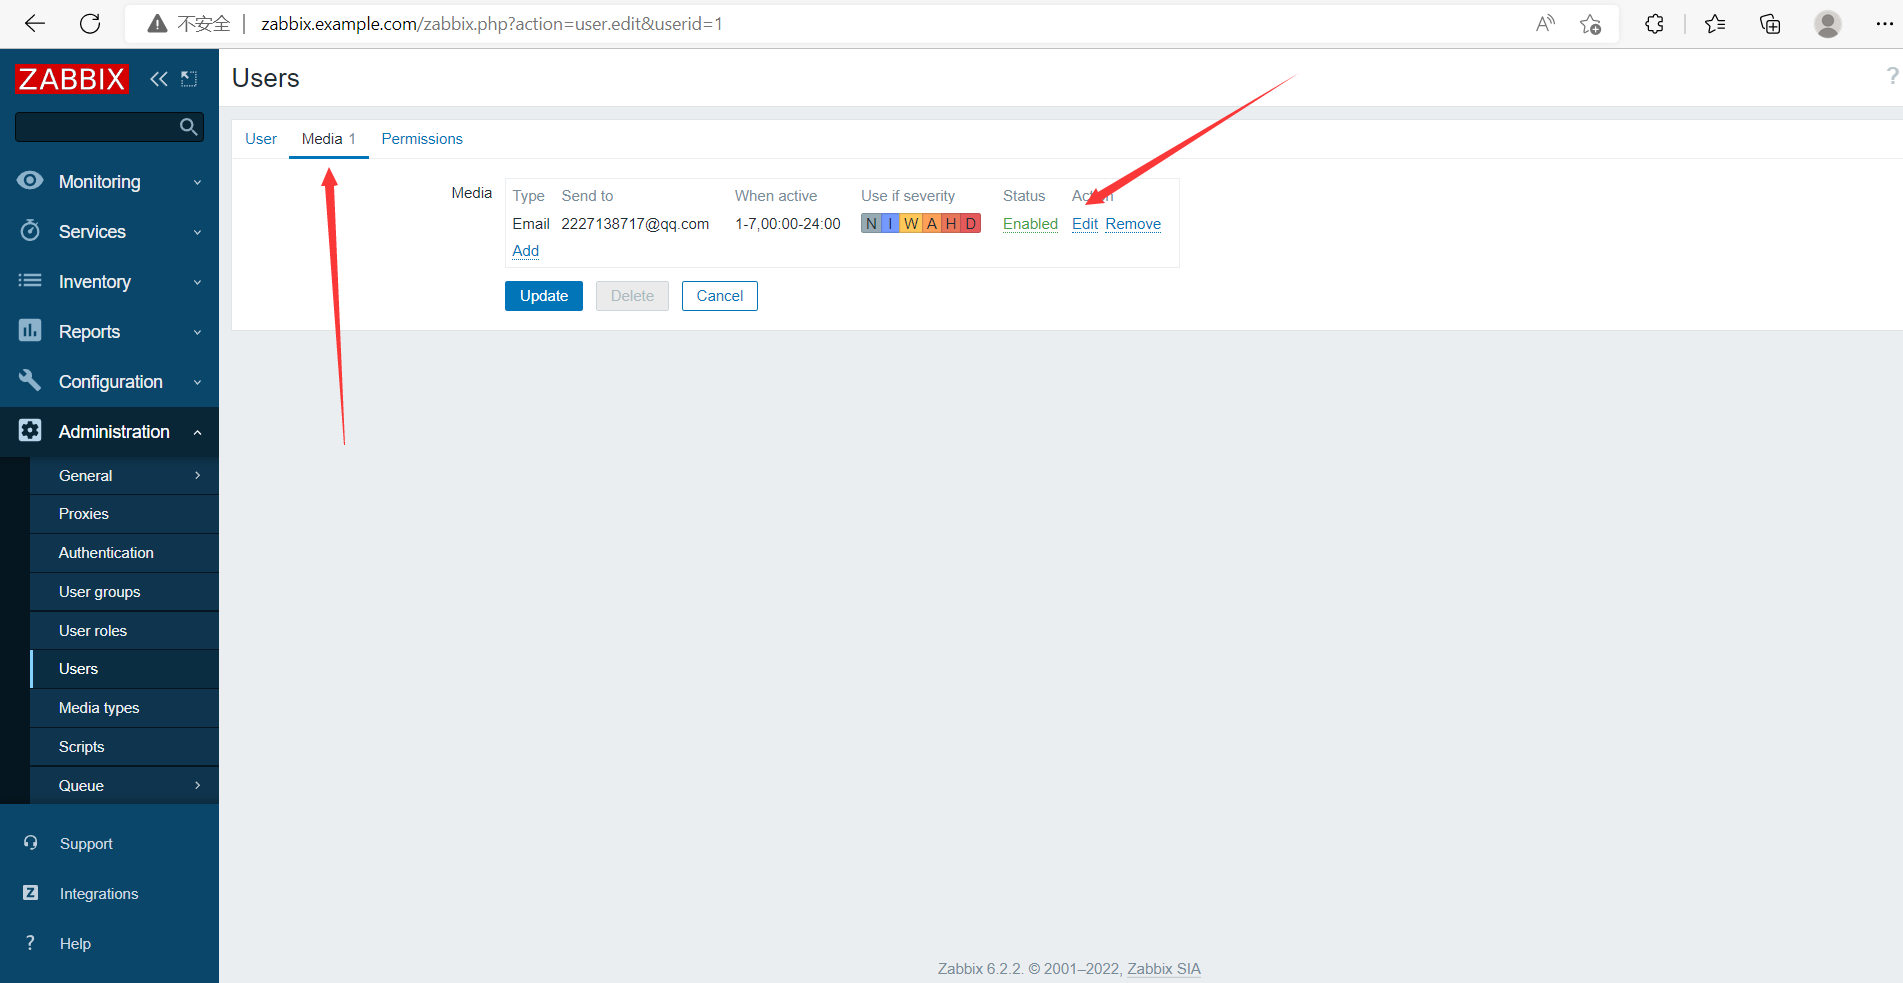
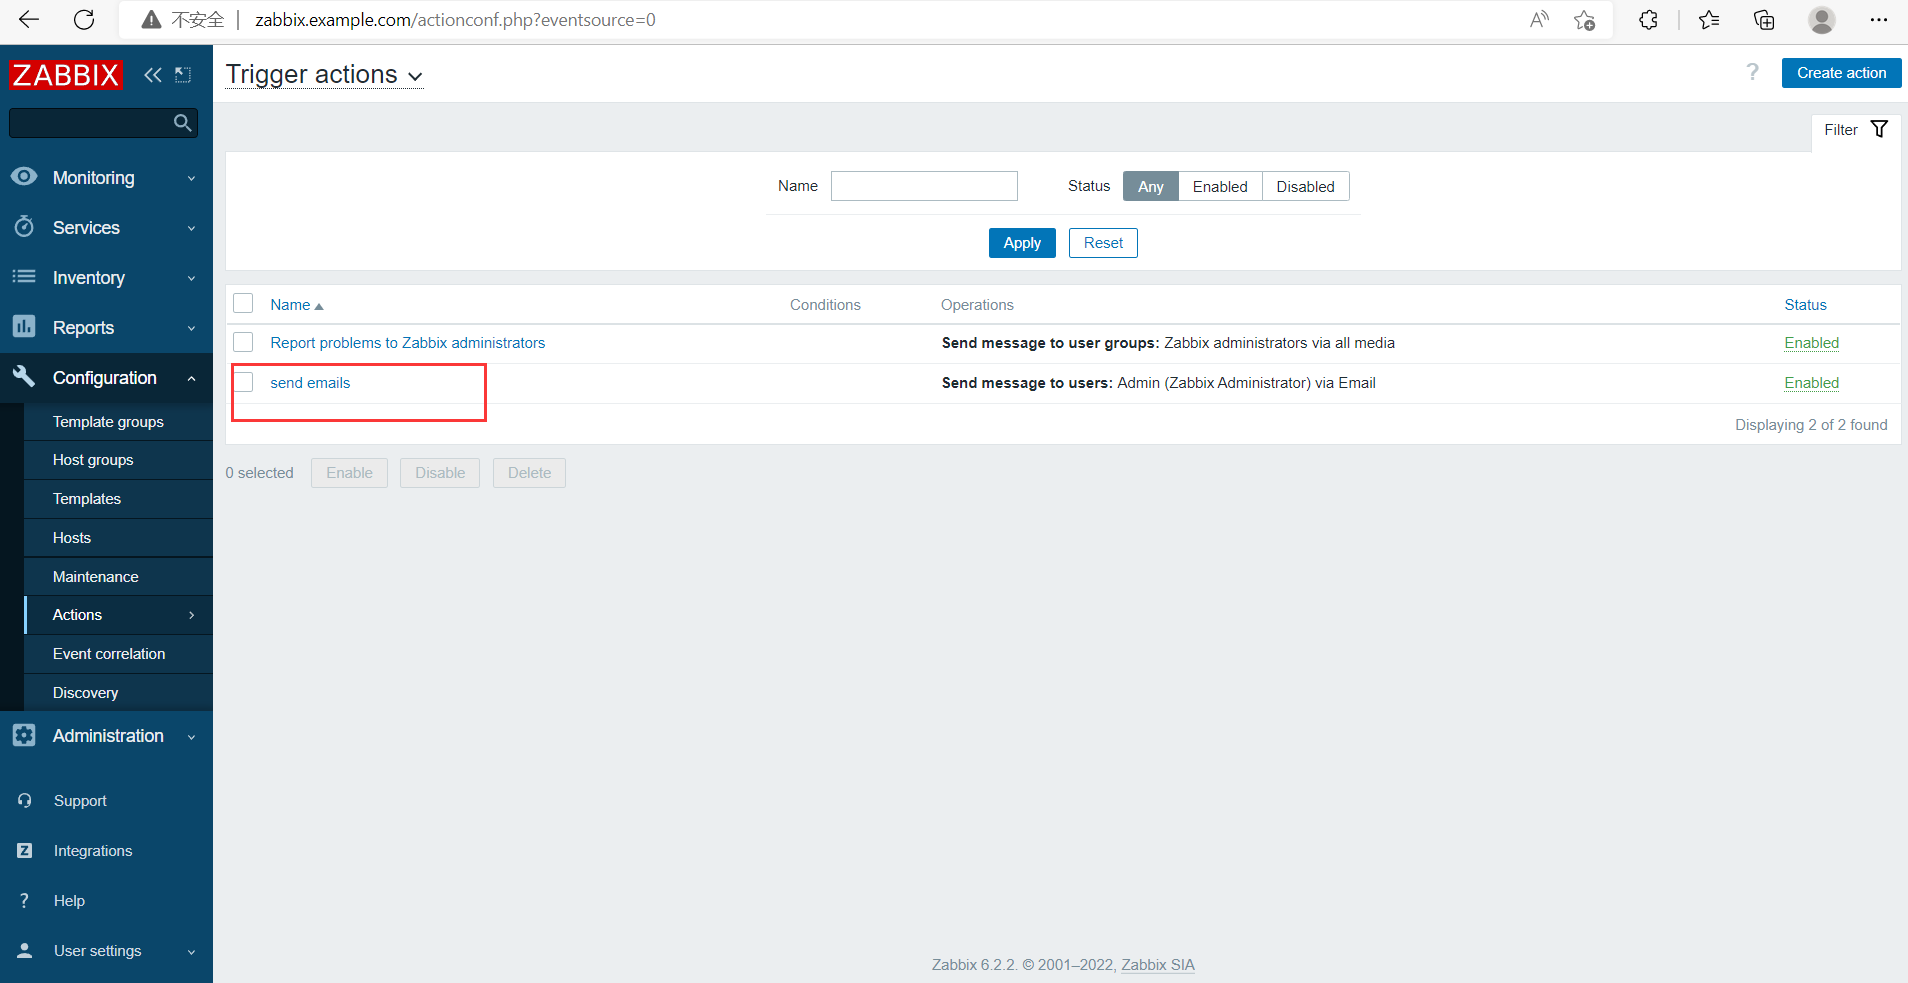
添加媒介(email方式)
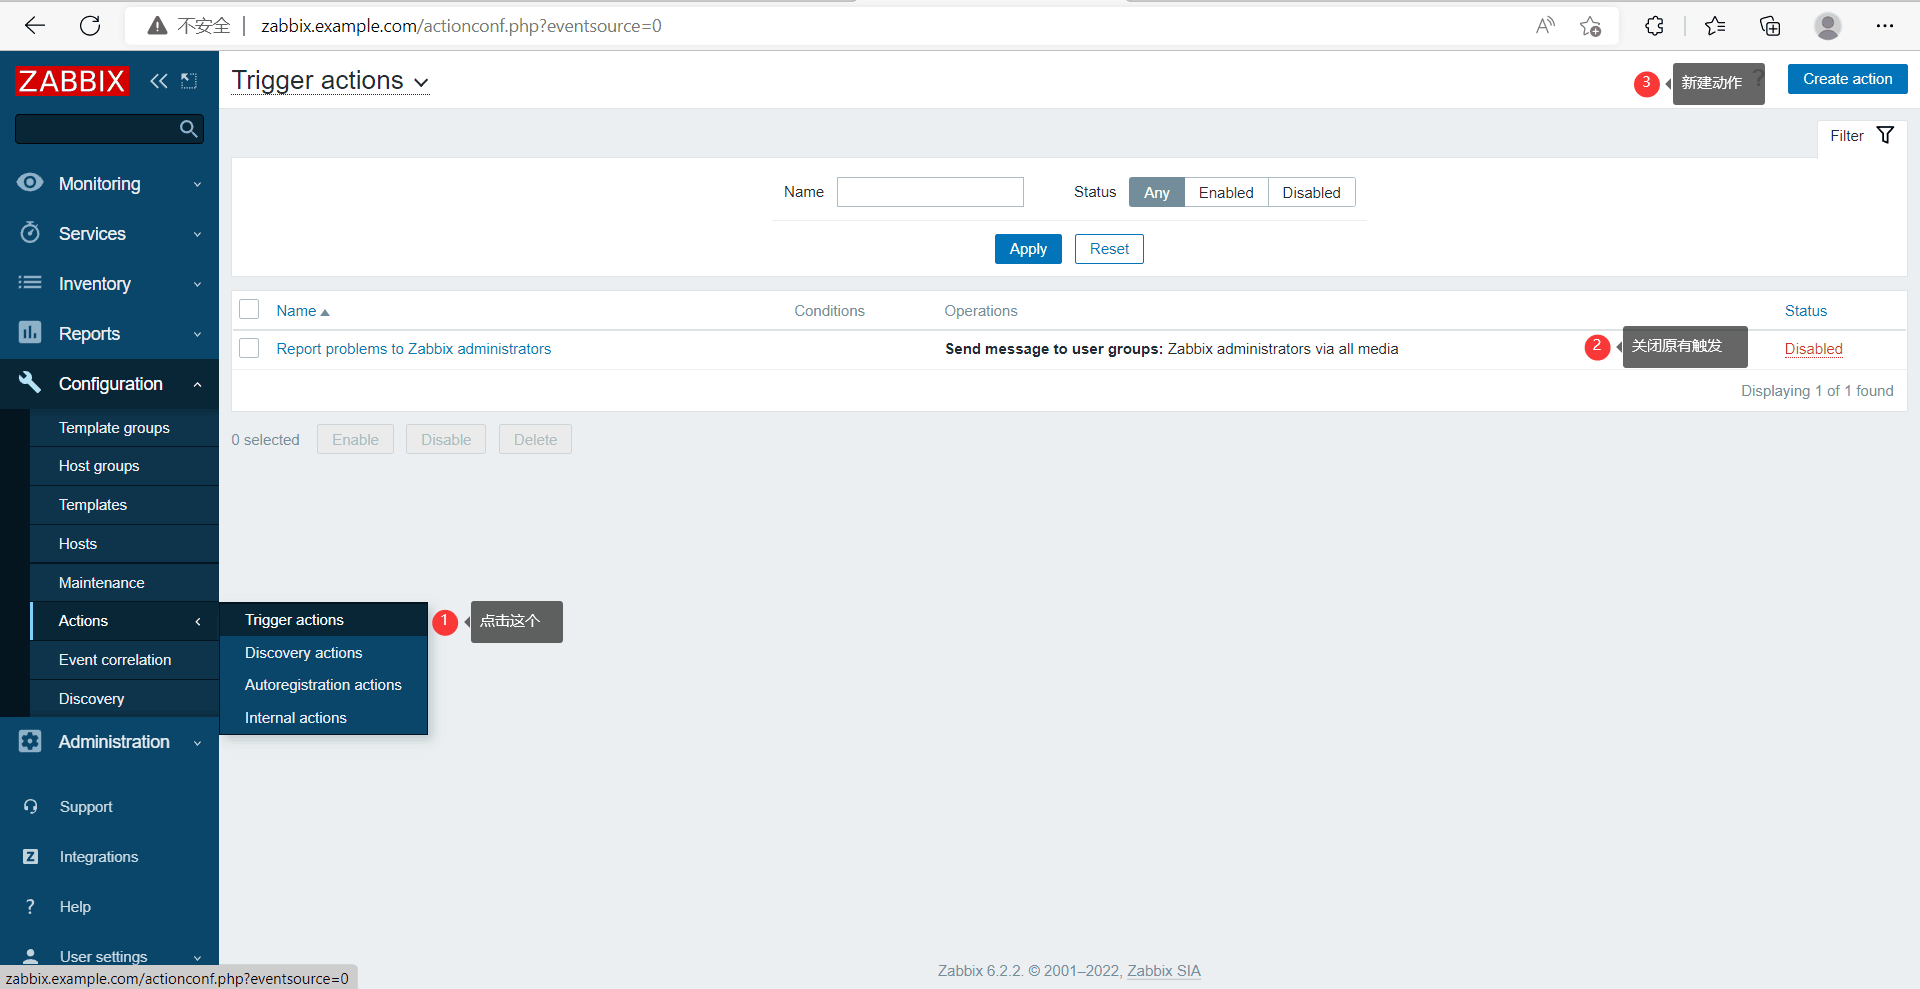
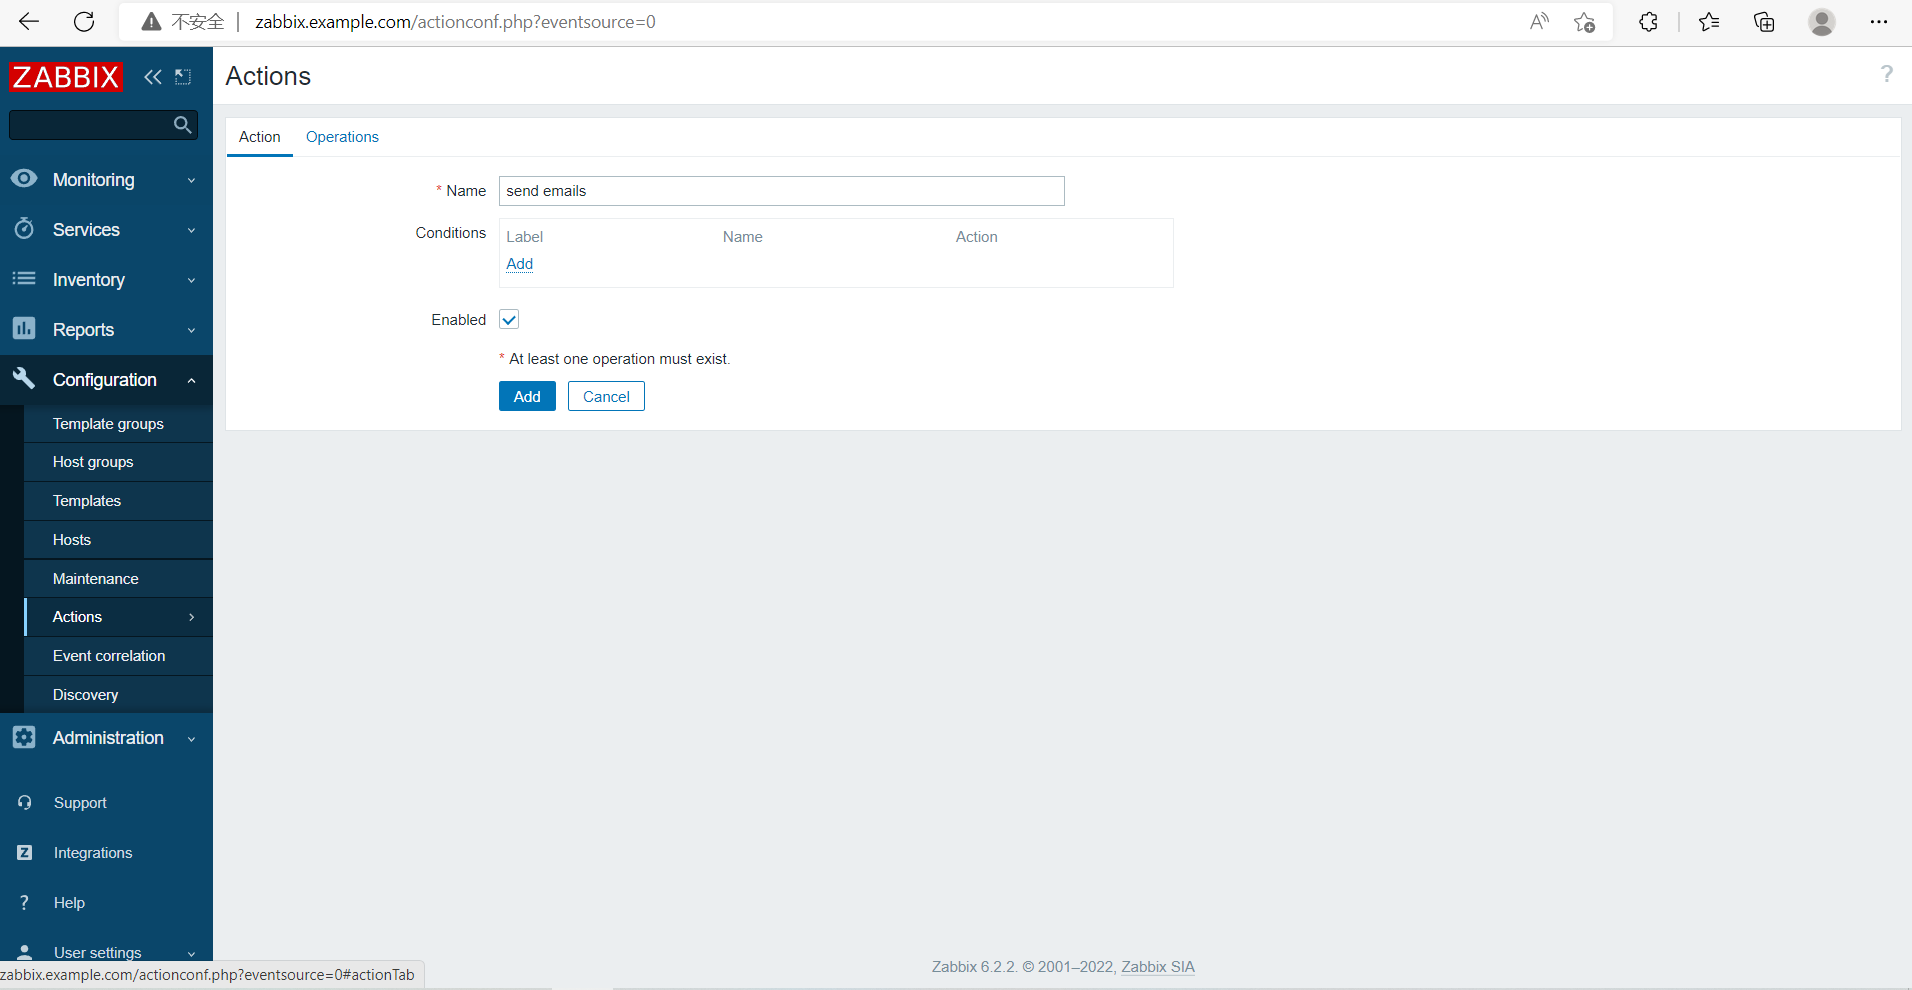
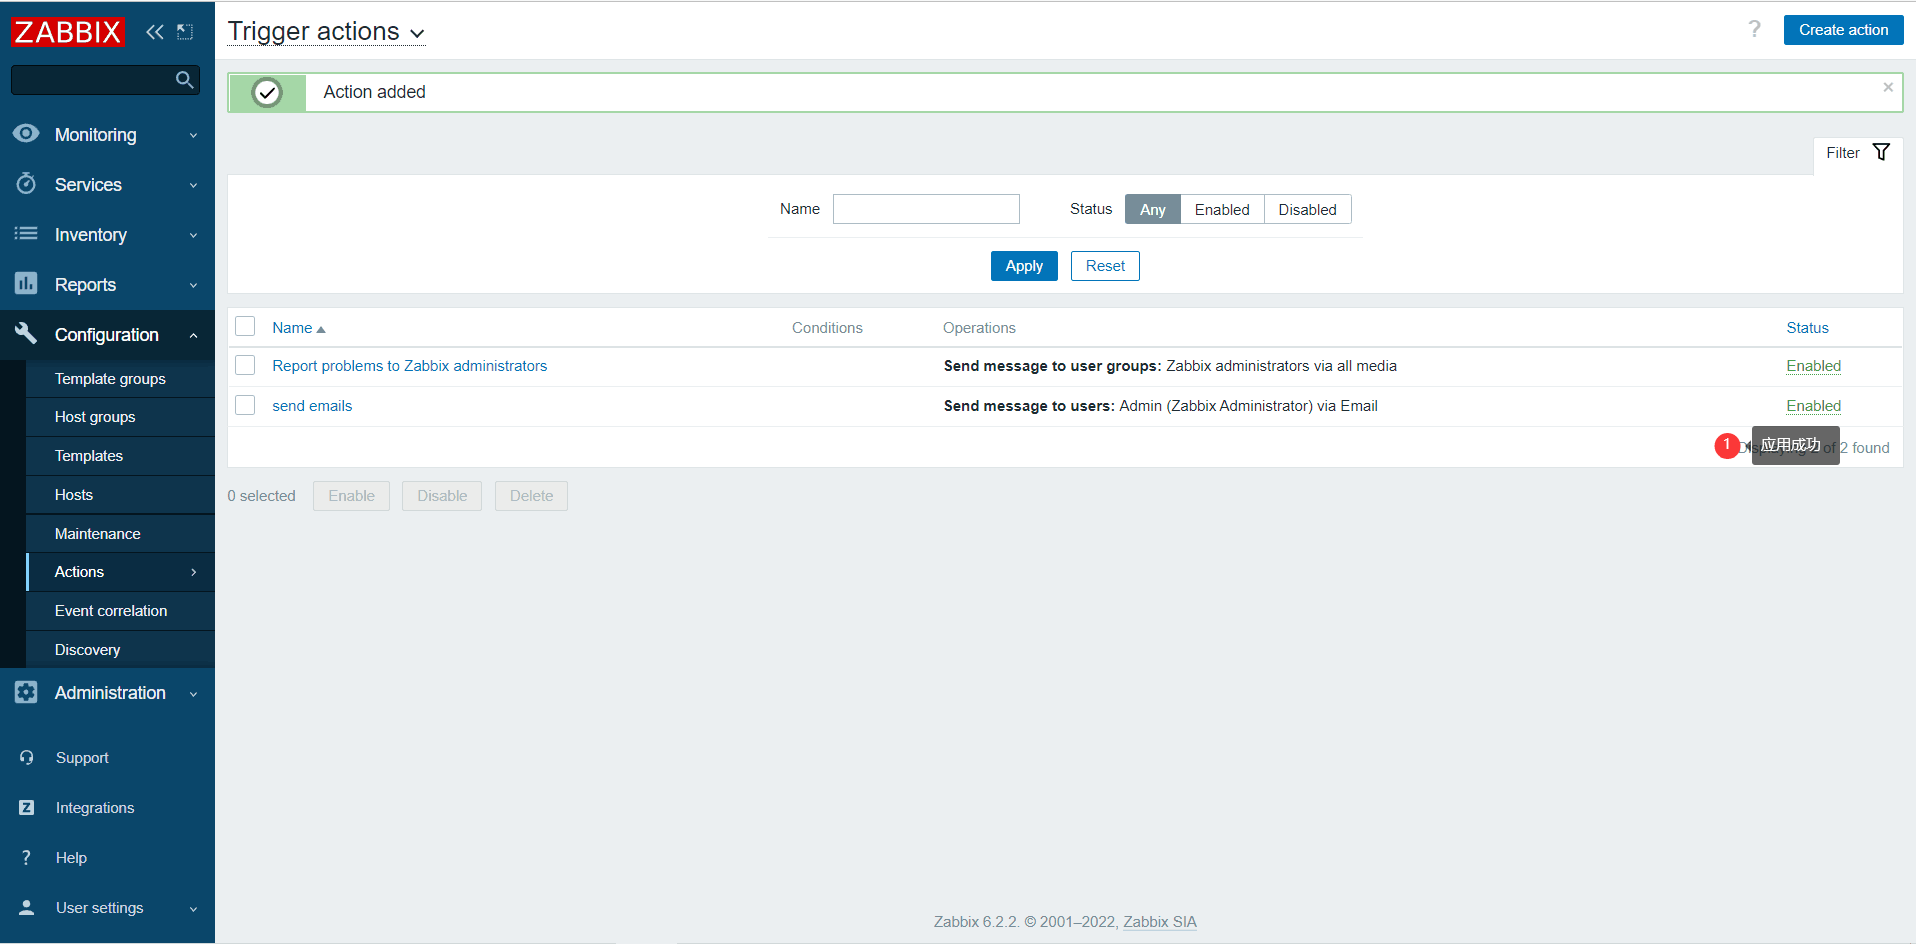
添加动作

手动触发告警
写入数据
[root@localhost ~]# echo xixi >> /tmp/zdz
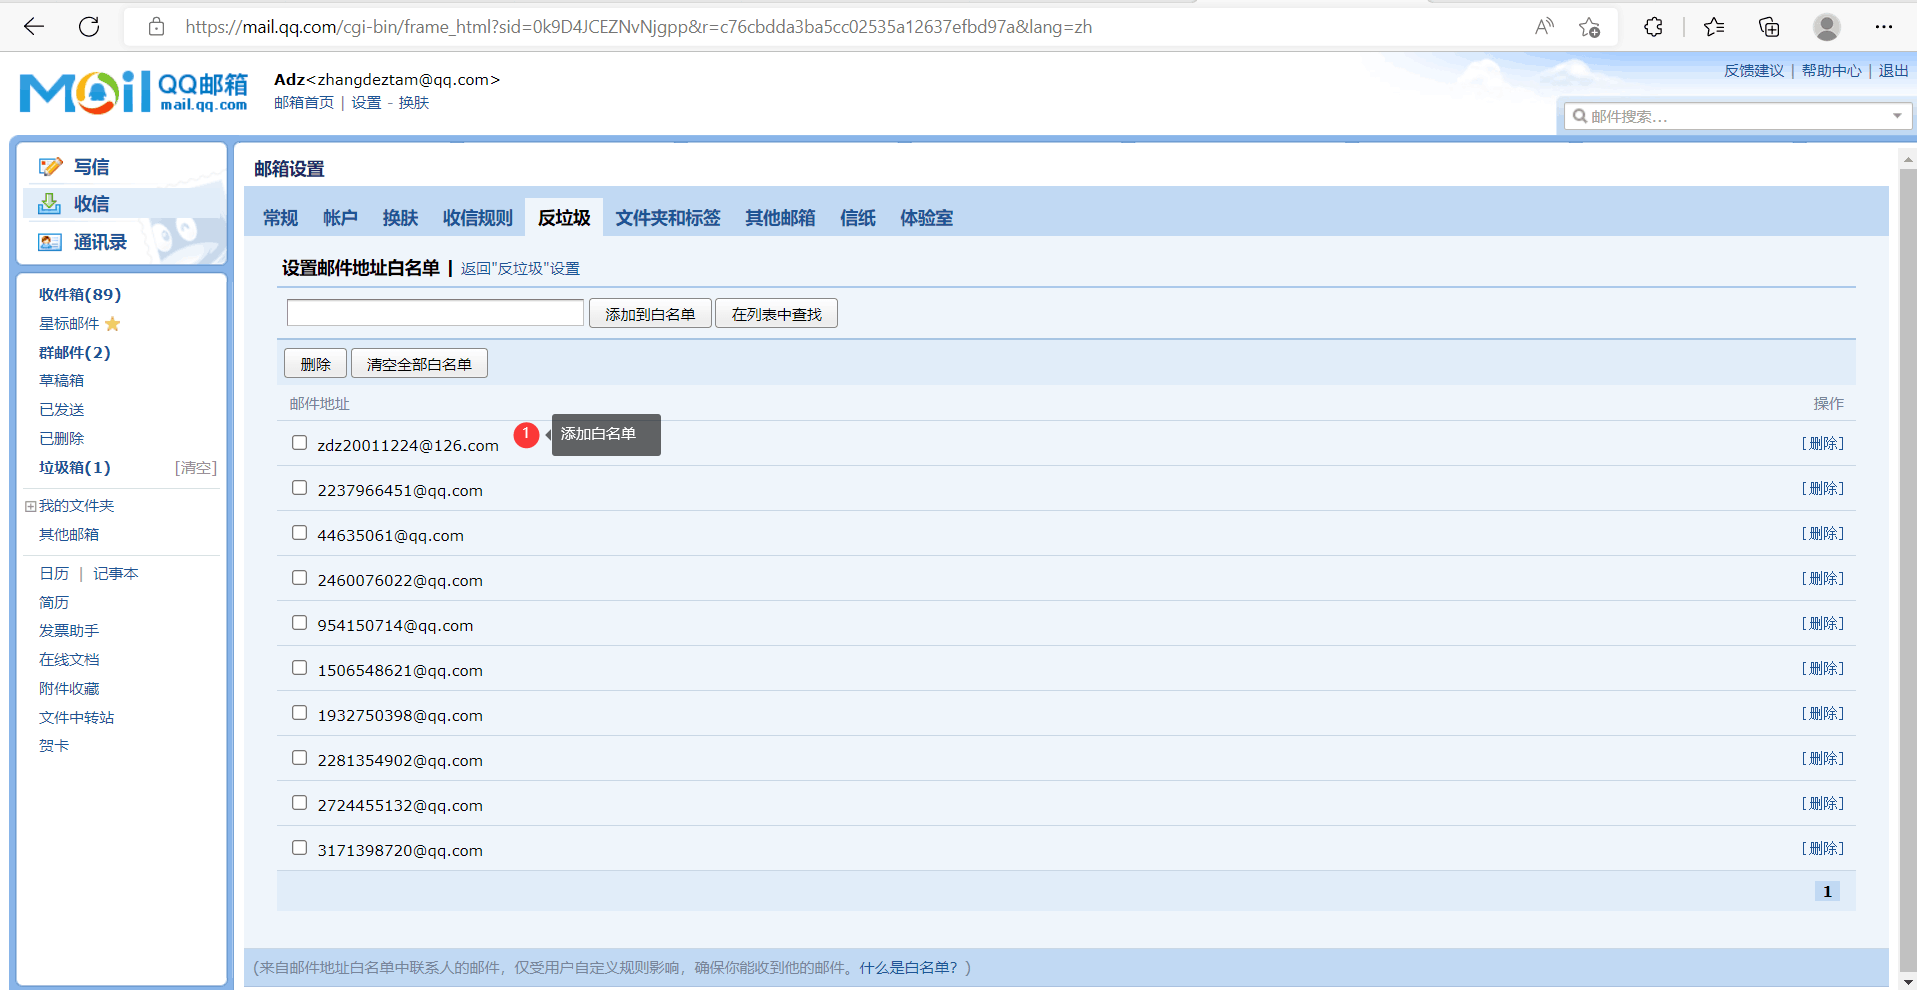
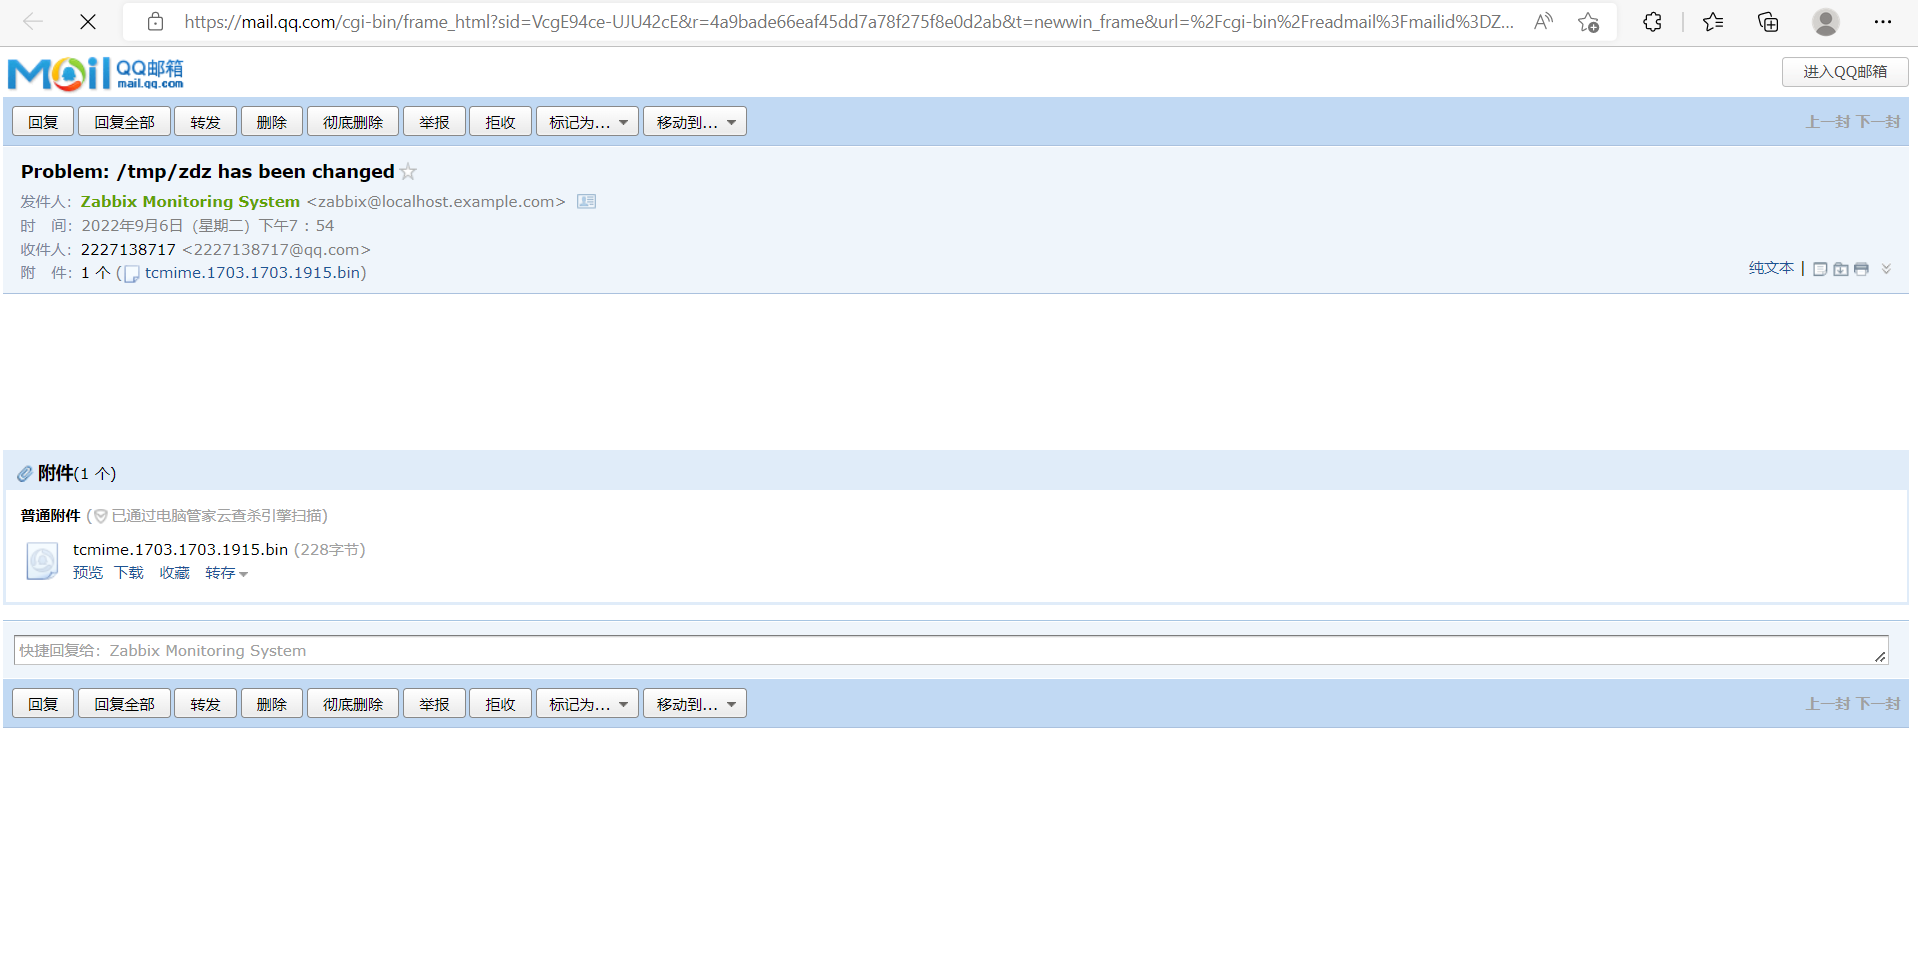
qq邮箱必须添加白名单
查看结果

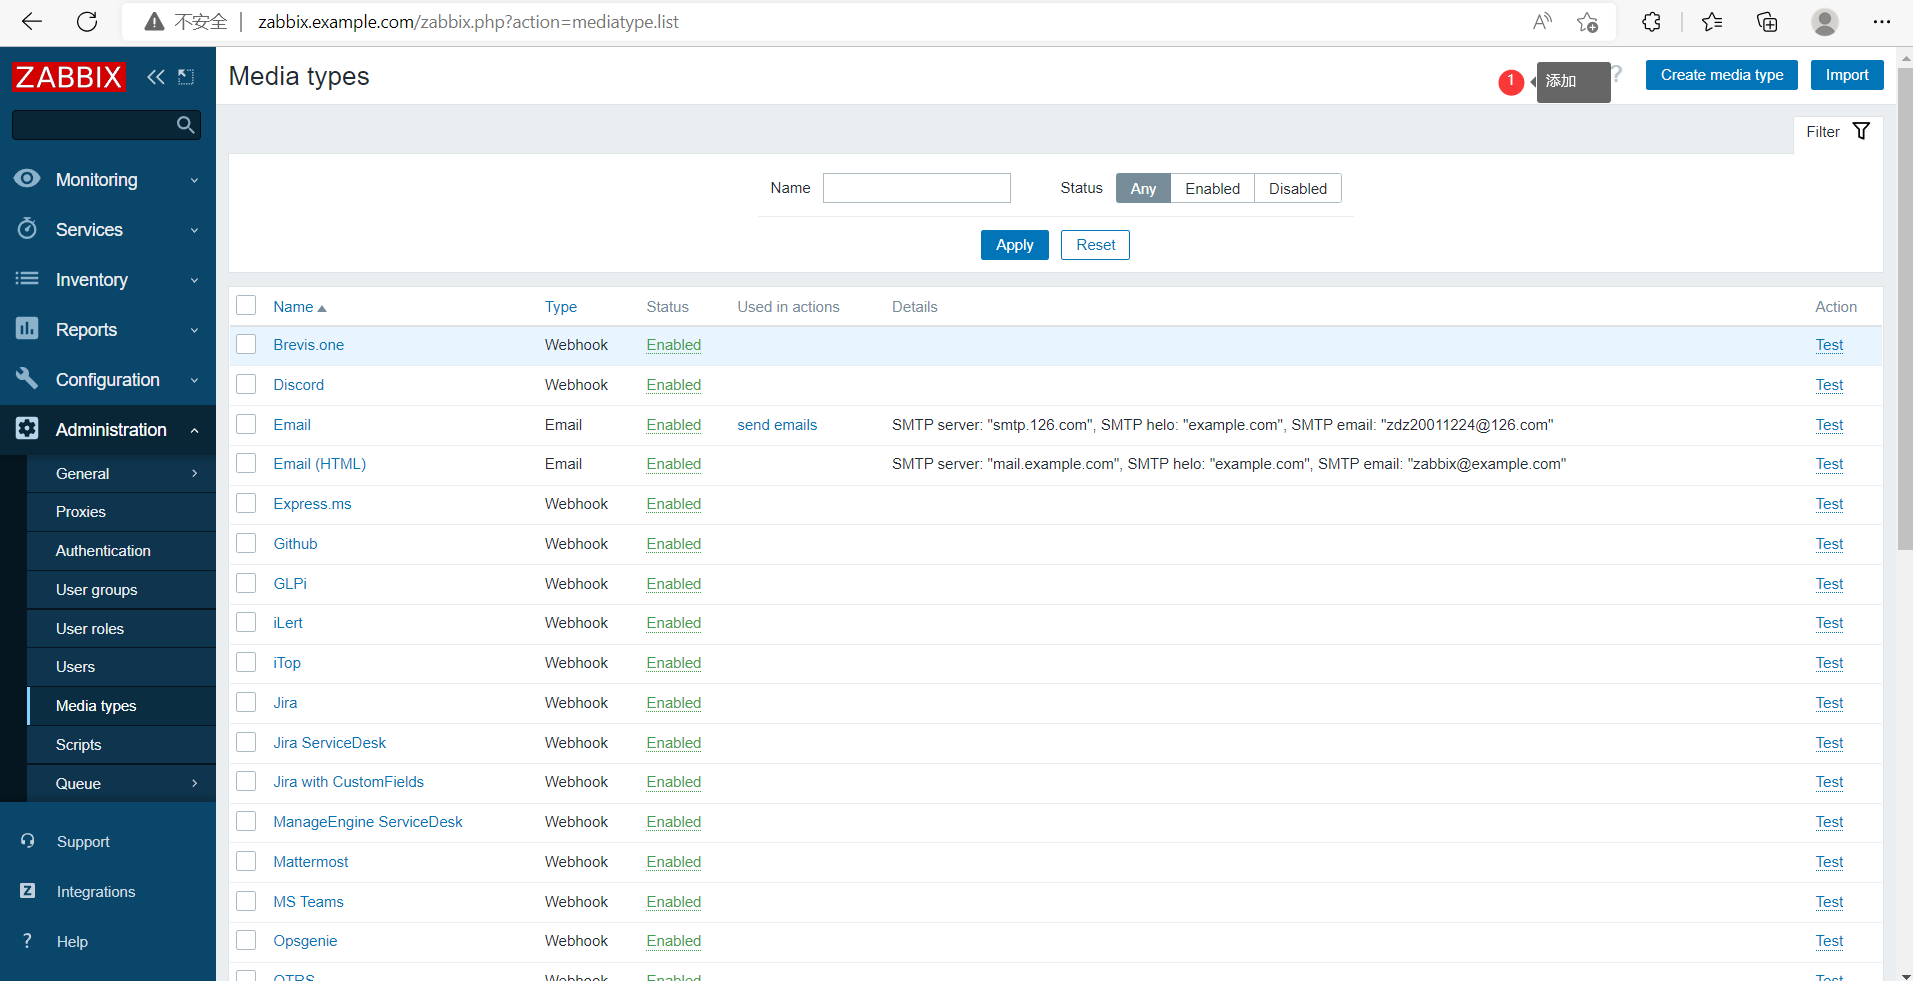
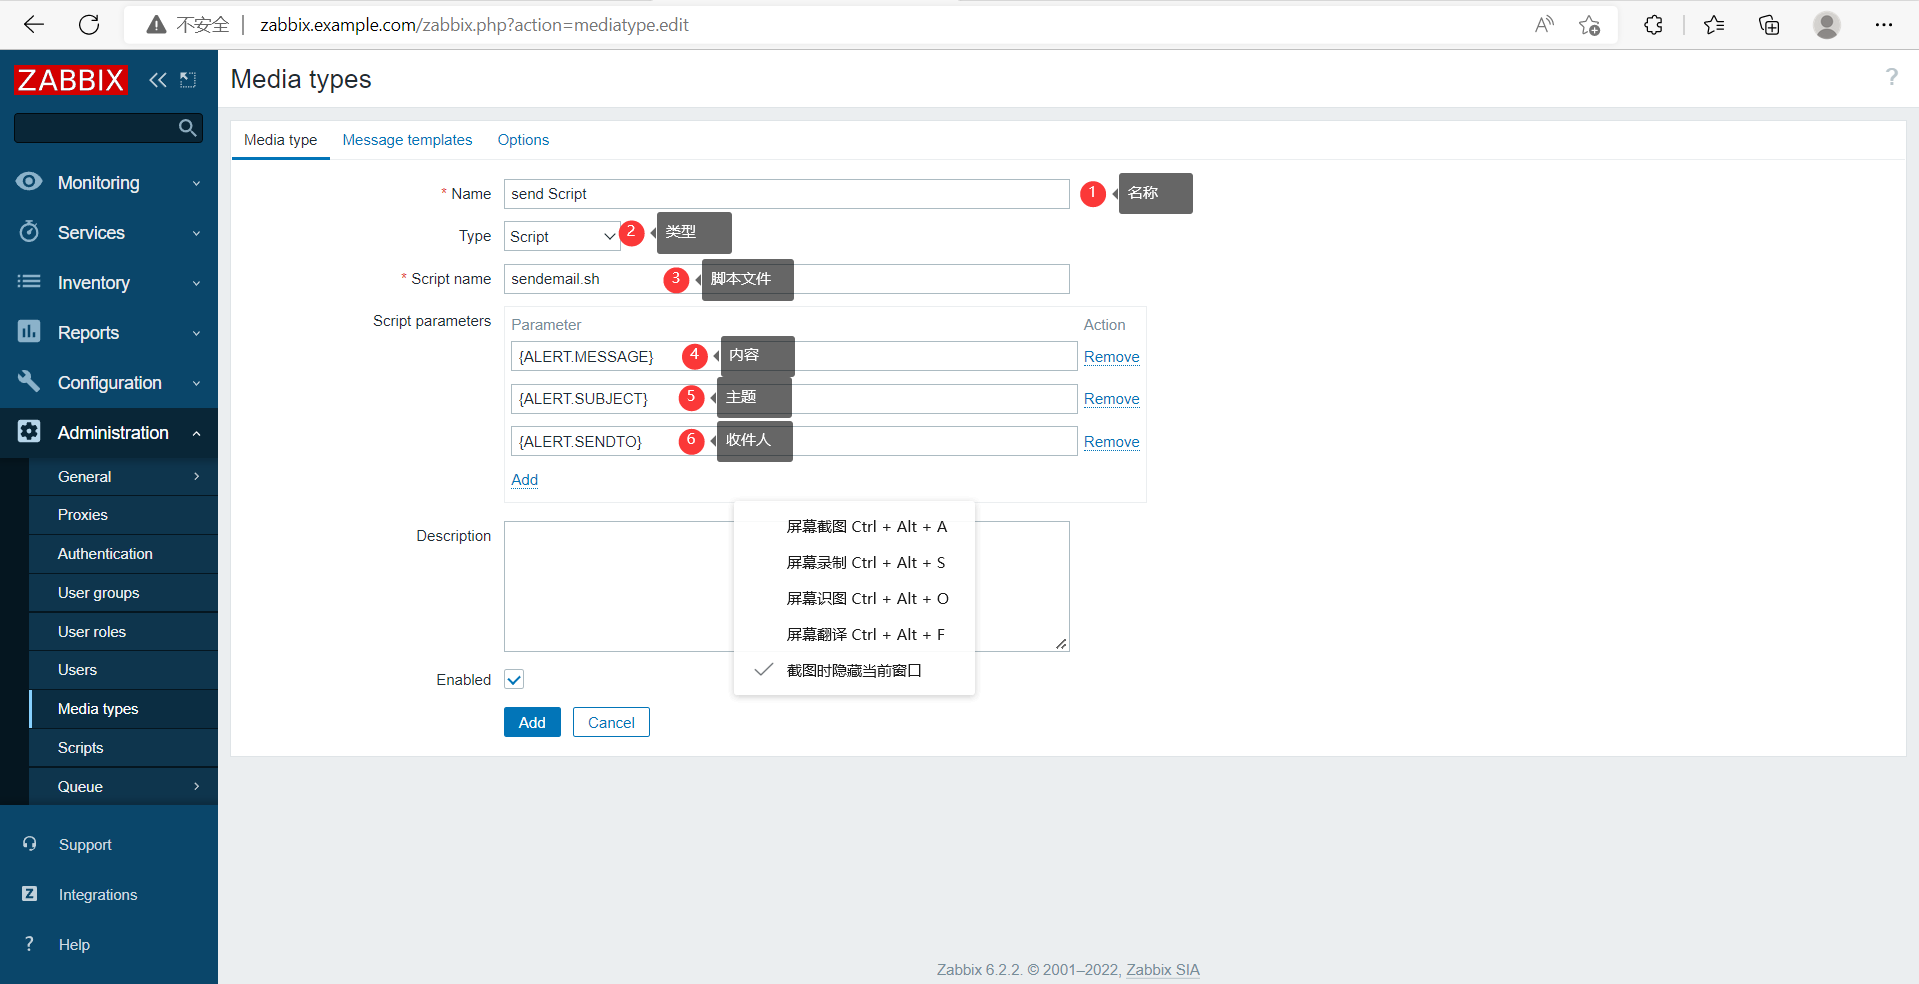
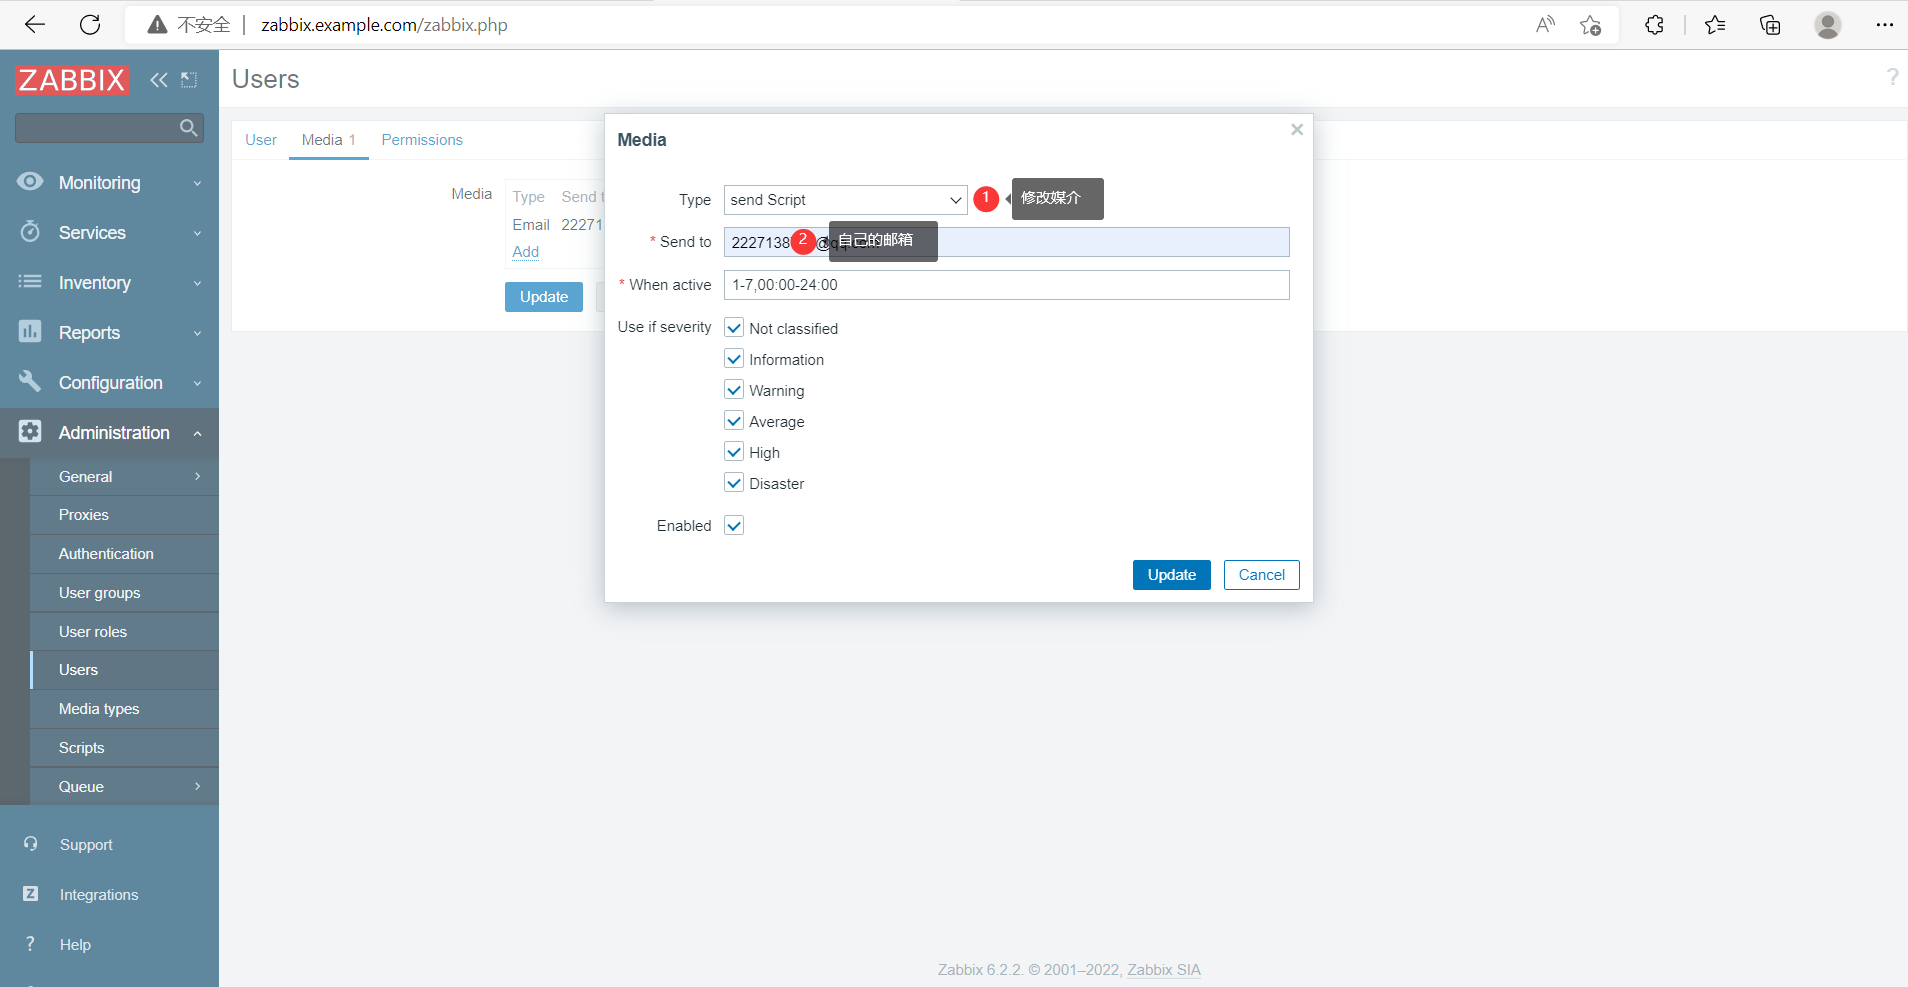
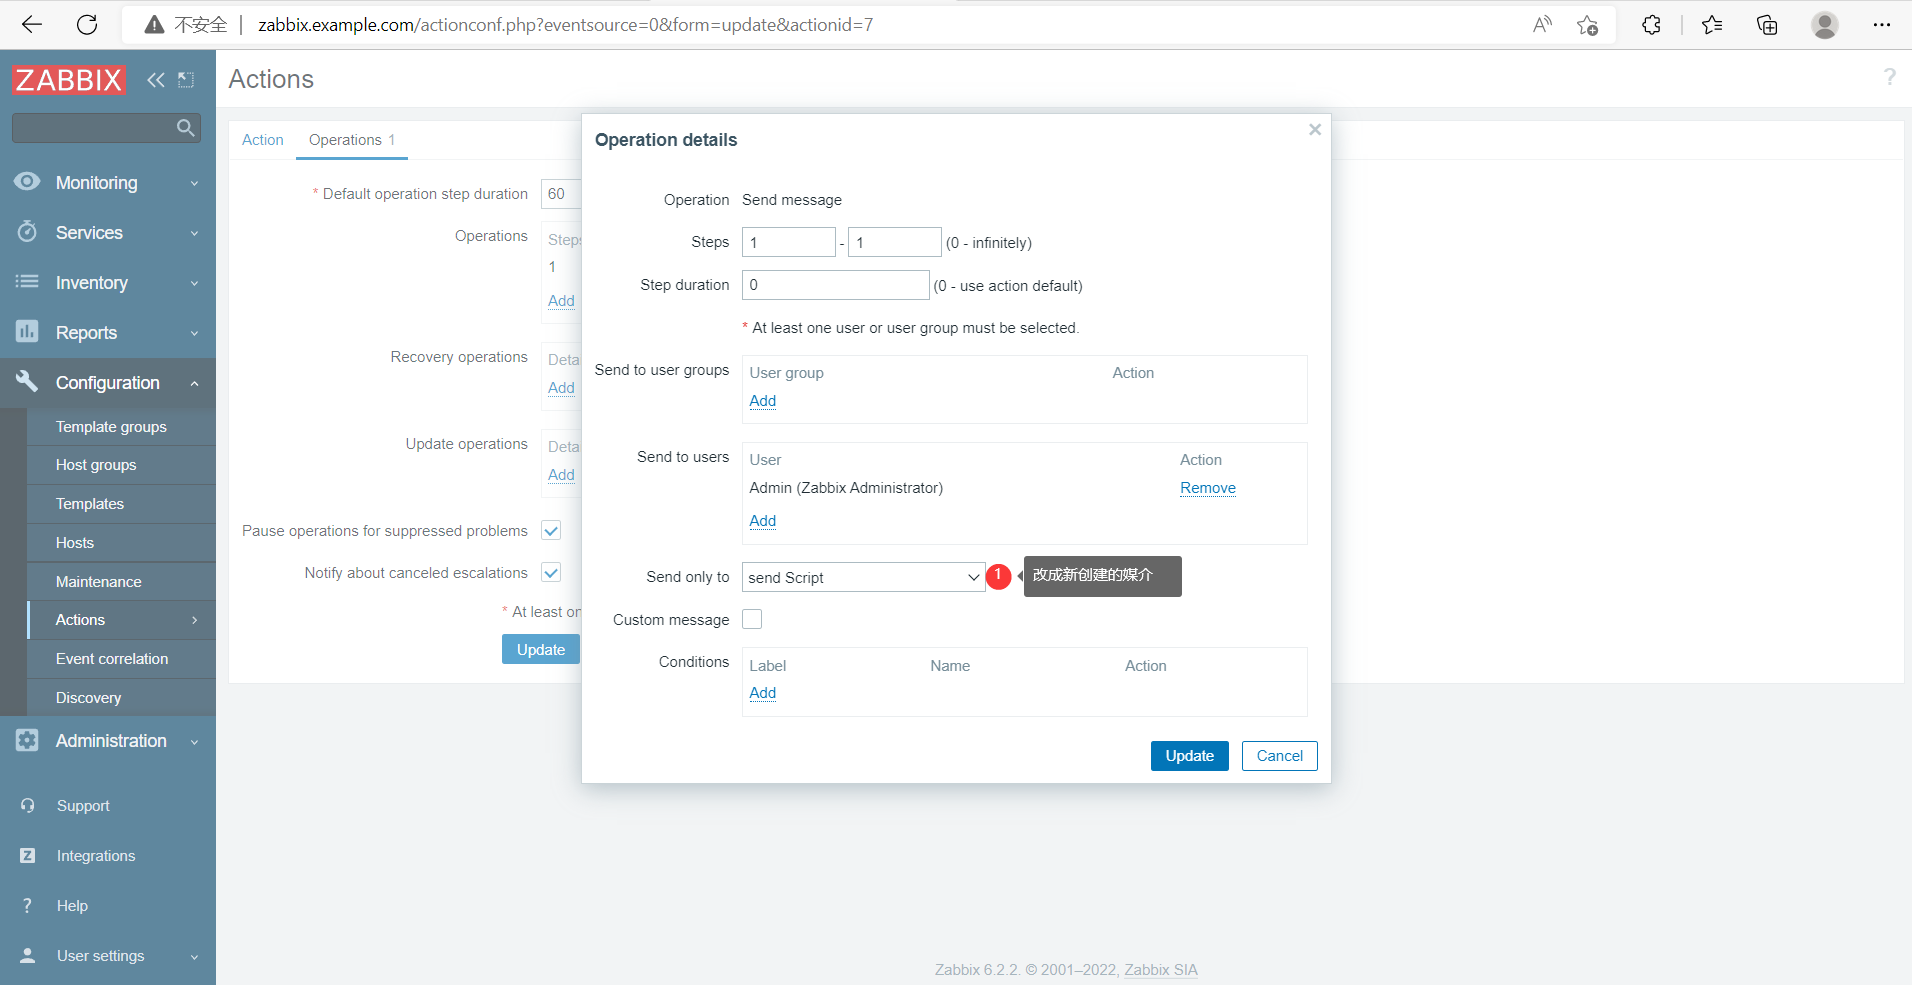
添加媒介(script方式)
在zabbix服务端进行配置
//首先要更改主机名,让收件箱可以识别
[root@localhost ~]# hostnamectl set-hostname localhost.example.com
[root@localhost ~]# bash
[root@localhost ~]# hostname
localhost.example.com

//安装eamil和postfix
[root@localhost ~]# dnf -y install mailx postfix
[root@localhost ~]# systemctl enable --now postfix.service
Created symlink /etc/systemd/system/multi-user.target.wants/postfix.service → /usr/lib/systemd/system/postfix.service.
[root@localhost ~]# ss -anlt
State   Recv-Q  Send-Q   Local Address:Port      Peer Address:Port  Process
LISTEN  0       128            0.0.0.0:10050          0.0.0.0:*
LISTEN  0       128            0.0.0.0:10051          0.0.0.0:*
LISTEN  0       128          127.0.0.1:9000           0.0.0.0:*
LISTEN  0       128            0.0.0.0:22             0.0.0.0:*
LISTEN  0       100          127.0.0.1:25             0.0.0.0:*
LISTEN  0       70                   *:33060                *:*
LISTEN  0       128                  *:3306                 *:*
LISTEN  0       128                  *:80                   *:*
LISTEN  0       128               [::]:22                [::]:*
LISTEN  0       100              [::1]:25                [::]:*

//编辑/usr/local/etc/zabbix_server.conf
[root@localhost ~]# vim /usr/local/etc/zabbix_server.conf
AlertScriptsPath=/scripts/zabbix/

//编写脚本
[root@localhost ~]# mkdir -p /scripts/zabbix/
[root@localhost ~]# cd /scripts/zabbix/
[root@localhost zabbix]# vim sendemail.sh
#!/bin/bash
echo "$1" | mail -s "$2" $3
[root@localhost zabbix]# chmod +x sendemail.sh

//重启zabbix
[root@localhost zabbix]# pkill zabbix_server
[root@localhost zabbix]# zabbix_server

手动触发告警
[root@localhost ~]# echo zzz >> /tmp/zdz
等待最新数据产生
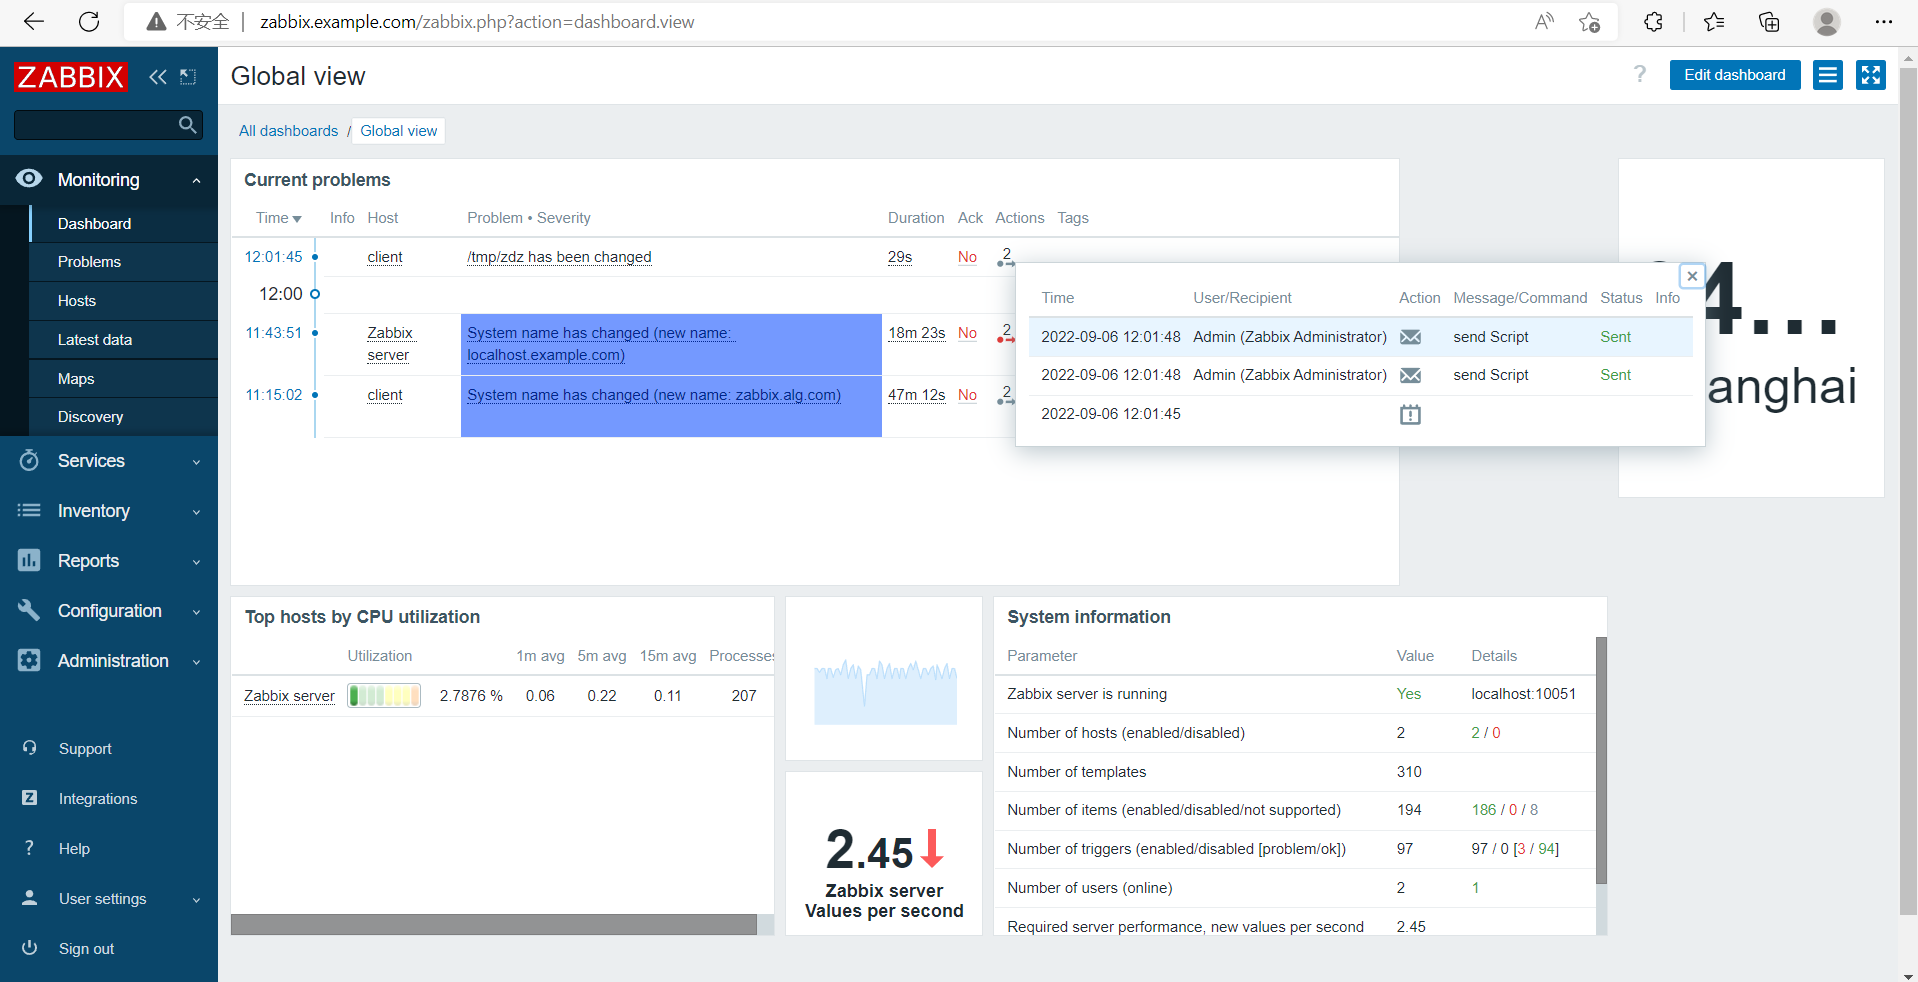
查看邮箱
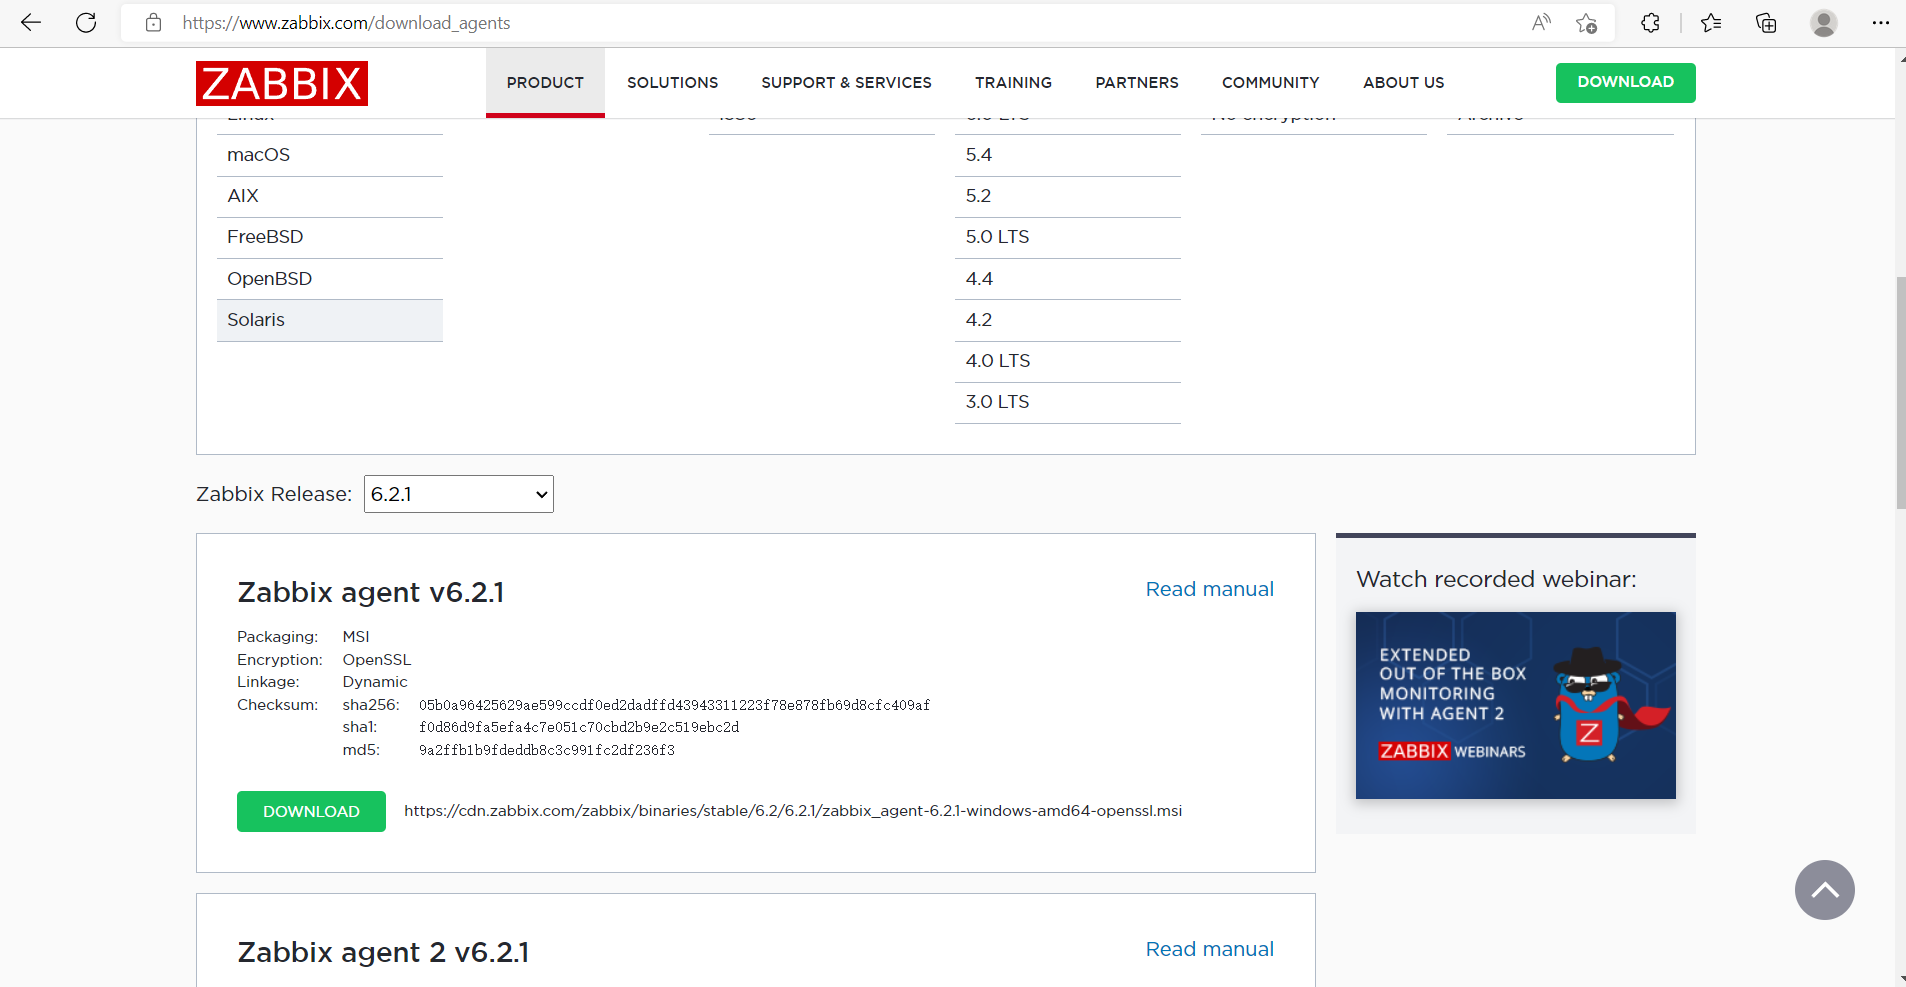
windos 部署zabbix监控
先下载zabbix_agentd包
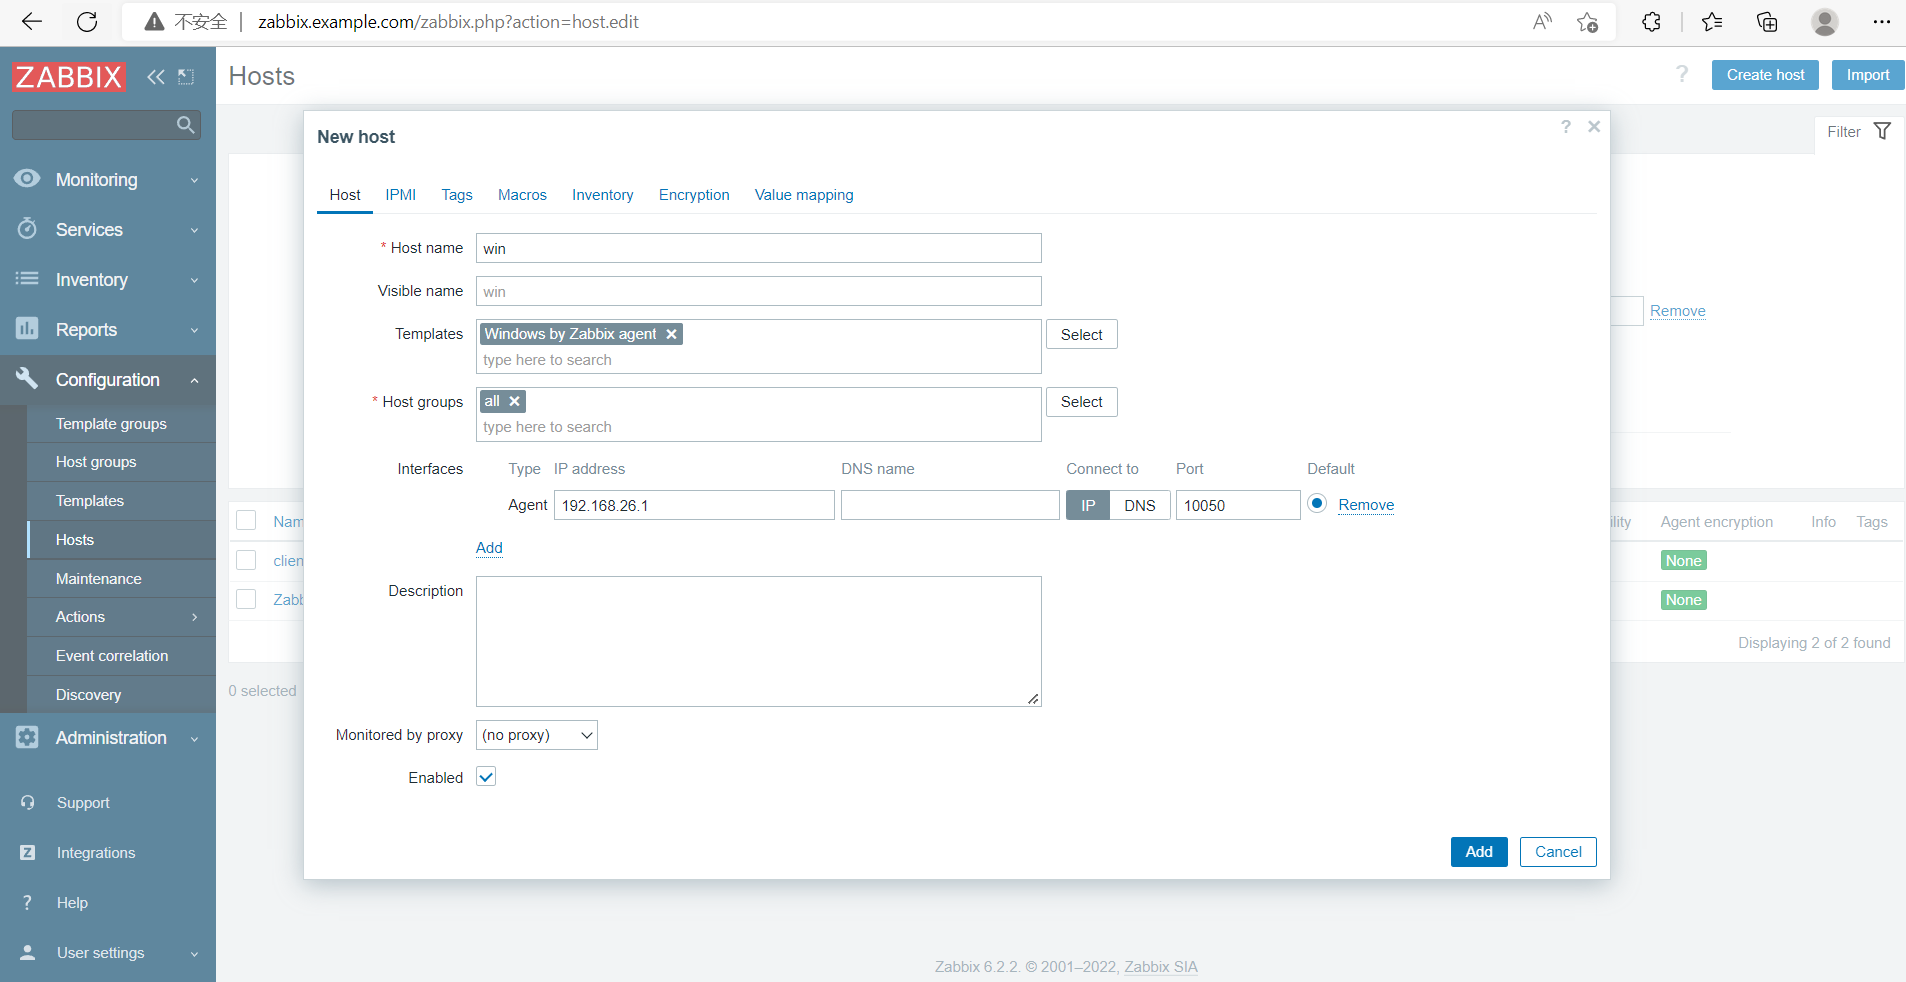
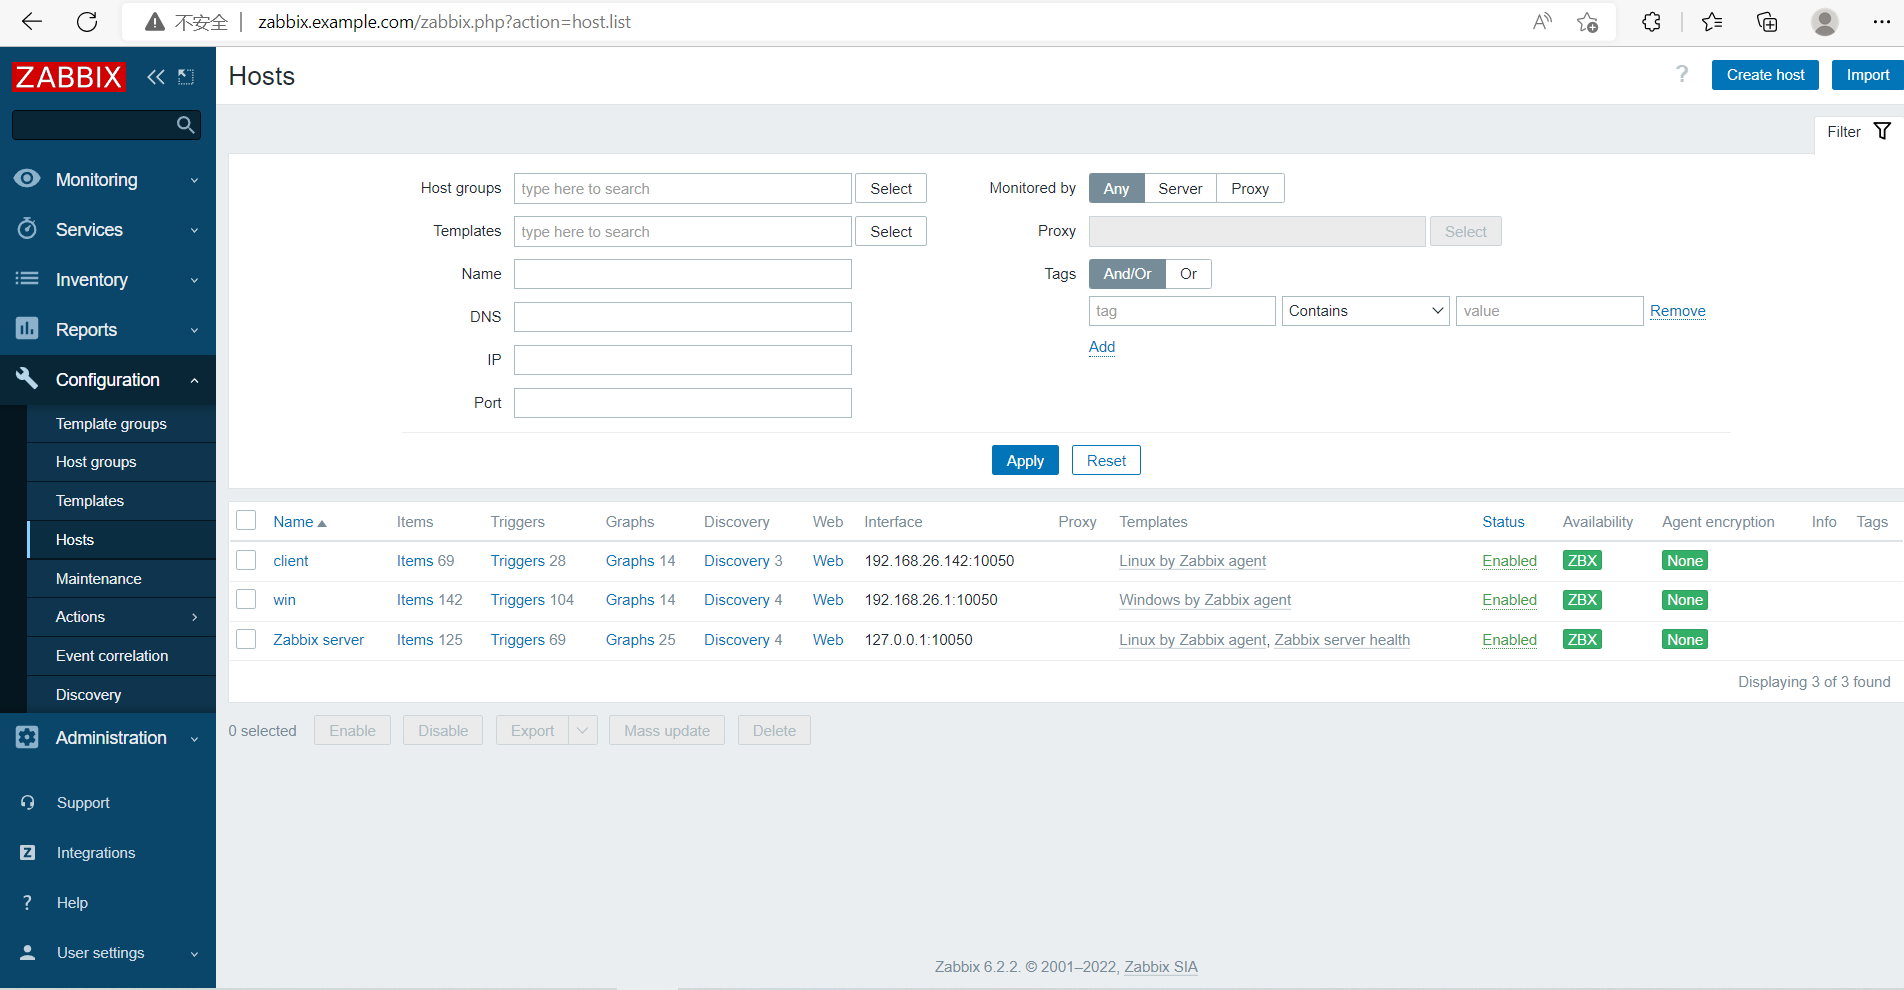
添加监控主机
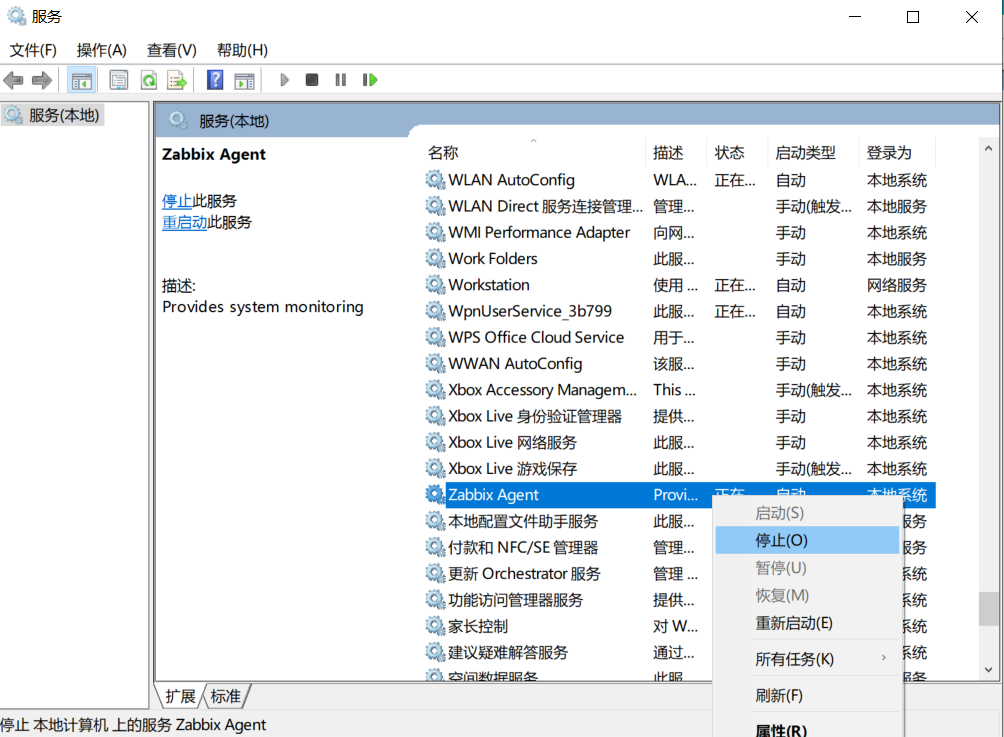
关闭服务

 浙公网安备 33010602011771号