eslint+prettier+stylelint+husky控制代码质量
配置eslint
1. 安装eslint
cnpm install eslint --save-dev
2. eslint初始化
eslint --init
(1) How would you like to use ESLint?
选择:To check syntax and find problems
(2) What type of modules does your project use?
选择:JavaScript modules (import/export)
(3) Which framework does your project use?
选择:React.js
(4) Does your project use TypeScript?
选择:Yes
(5) Where does your code run?
选择:Browser
(6) What format do you want your config file to be in?
选择:JavaScript
(7) Would you like to install them now?
选择:Yes
(8) Which package manager do you want to use?
选择:npm
以上命令执行完之后,项目中会多出以下内容
package.json
  "devDependencies": {
    "@typescript-eslint/eslint-plugin": ">=5.43.0",
    "@typescript-eslint/parser": ">=5.43.0",
    "eslint-config-xo": "^0.43.1",
    "eslint-config-xo-typescript": "^0.56.0",
    "eslint-plugin-react": "^7.32.2",
  },
.eslintrc.js
module.exports = {
    "env": {
        "browser": true,
        "commonjs": true,
        "es2021": true
    },
    "extends": [
        "eslint:recommended",
        "plugin:react/recommended",
        "plugin:@typescript-eslint/recommended",
    ],
    "overrides": [
    ],
    "parser": "@typescript-eslint/parser",
    "parserOptions": {
        "ecmaVersion": "latest"
    },
    "plugins": [
        "react",
        "@typescript-eslint"
    ],
    "rules": {
    }
}
测试eslint是否安装成功
在.eslintrc.js加入一个规则进行测试(目前测试的是react项目)
"rules": {
        'react/jsx-key': 2, //map遍历中必须加入key属性
    }
测试结果如下(说明这一步成功了)

配置prettier
1. 安装prettier
cnpm install prettier eslint-plugin-prettier prettier-eslint eslint-config-prettier --save-dev
2.项目根目录新建.prettierrc.js
module.exports = {
    // 一行的字符数,如果超过会进行换行,默认为80
    printWidth: 80,
    // 一个tab代表几个空格数,默认为80
    tabWidth: 2,
    // 是否使用tab进行缩进,默认为false,表示用空格进行缩减
    useTabs: false,
    // 字符串是否使用单引号,默认为false,使用双引号
    singleQuote: true,
    // 行位是否使用分号,默认为true
    semi: false,
    // 是否使用尾逗号,有三个可选值"<none|es5|all>"
    trailingComma: "none",
    // 对象大括号直接是否有空格,默认为true,效果:{ foo: bar }
    bracketSpacing: true
}
3. 修改.eslintrc.js内容,增加以下内容
"extends": [
    "plugin:prettier/recommended"
]
"rules": {
    'prettier/prettier': ['error'],
}
.eslintrc.js完整内容如下
module.exports = {
    "env": {
        "browser": true,
        "commonjs": true,
        "es2021": true
    },
    "extends": [
        "eslint:recommended",
        "plugin:react/recommended",
        "plugin:@typescript-eslint/recommended",
        "plugin:prettier/recommended",//prettier推荐的规则,设置了这个不会走.prettierrc.cjs自定义的规则,如果需要走自定义规则,把当前这个推荐规则删除,在下面plugins中增加”prettier“
    ],
    "overrides": [
    ],
    "parser": "@typescript-eslint/parser",
    "parserOptions": {
        "ecmaVersion": "latest"
    },
    "plugins": [
        "react",
        "@typescript-eslint"
    ],
    "rules": {
        'prettier/prettier': ['error'],
        'react/jsx-key': 2,
    }
}
关闭编辑器,打开项目,效果如下

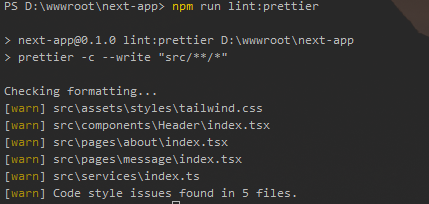
4.配置自动修复命令,在package.json加入运行命令
"scripts": {
    "lint:prettier": "prettier -c --write \"src/**/*\""
}
运行命令效果如下,已修复5个有问题的文件
配置husky(拦截不规范的提交)
1. 安装husky(其他版本配置上出现了问题,暂时目前这个版本没有问题)
cnpm install husky@7.0.4 lint-staged@10.0.0 --save-dev
2. 安装commitlint(提交信息规范管理)
cnpm install @commitlint/cli @commitlint/config-conventional --save-dev
3. 在根目录添加commitlint.config.cjs
module.exports = {
    extends: ['@commitlint/config-conventional'],
    rules: {
        'type-enum': [2, 'always', [
            'feat',
            'fix',
            'docs',
            'style',
            'refactor',
            'test',
            'chore',
            'scope',
            'subject'
        ]],
        'type-case': [0],
        'type-empty': [0],
        'scope-empty': [0],
        'scope-case': [0],
        'subject-full-stop': [0, 'never'],
        'subject-case': [0, 'never'],
        'header-max-length': [0, 'always', 72]
    }
};
4. 在package.json中增加命令
"scripts": {
  "lint-staged": "lint-staged",
  "lint-staged:js": "eslint --ext .js,.jsx,.ts,.tsx ",
  "lint": "eslint . --ext .vue,.js,.ts,.jsx,.tsx",
  "lint:fix": "eslint --cache --fix  --ext .js,.jsx,.ts,.tsx  ./src",
  "lint:js": "eslint --cache  --ext .js,.jsx,.ts,.tsx  ./src",
  "prepare": "husky install"
},
"lint-staged": {
  "**/*.{js,jsx,ts,tsx}": "npm run lint-staged:js",
    "**/*.{js,jsx,tsx,ts,less,md,json}": [
    "prettier --write"
  ]
}
package.json完整内容如下
{
  "name": "next-app",
  "version": "0.1.0",
  "private": true,
  "scripts": {
    "dev": "next dev",
    "build": "next build",
    "start": "next start",
    "lint-staged": "lint-staged",
    "lint-staged:js": "eslint --ext .js,.jsx,.ts,.tsx ",
    "lint": "eslint . --ext .vue,.js,.ts,.jsx,.tsx",
    "lint:fix": "eslint --cache --fix  --ext .js,.jsx,.ts,.tsx  ./src",
    "lint:js": "eslint --cache  --ext .js,.jsx,.ts,.tsx  ./src",
    "lint:prettier": "prettier -c --write \"src/**/*\"",
    "prepare": "husky install"
  },
  "lint-staged": {
    "**/*.{js,jsx,ts,tsx}": "npm run lint-staged:js",
    "**/*.{js,jsx,tsx,ts,less,md,json}": [
      "prettier --write"
    ]
  },
  "dependencies": {
    "@next/font": "13.1.6",
    "@types/node": "18.13.0",
    "@types/react": "18.0.27",
    "@types/react-dom": "18.0.10",
    "next": "13.1.1",
    "react": "18.2.0",
    "react-dom": "18.2.0",
    "typescript": "4.9.5"
  },
  "devDependencies": {
    "@typescript-eslint/eslint-plugin": "^5.51.0",
    "@typescript-eslint/parser": "^5.51.0",
    "autoprefixer": "^10.4.13",
    "axios": "^1.3.2",
    "eslint": "^8.33.0",
    "eslint-config-prettier": "^8.6.0",
    "eslint-plugin-prettier": "^4.2.1",
    "eslint-plugin-react": "^7.32.2",
    "husky": "^7.0.4",
    "lint-staged": "^10.0.0",
    "postcss": "^8.4.21",
    "prettier": "^2.8.4",
    "prettier-eslint": "^15.0.1",
    "sass": "^1.58.0",
    "tailwindcss": "^3.2.4"
  }
}
5. 执行husky命令
npm run prepare
此时跟目录会生成一个.husky文件夹,里面就包含提交拦截的相关bash函数
6. 在.husky中加入两个文件 commit-msg pre-commit
pre-commit(git commit -m 'xxx' 代码书写不规范时触发)
#!/bin/sh
. "$(dirname "$0")/_/husky.sh"

# Export Git hook params
export GIT_PARAMS=$*

npx --no -- commitlint --edit ${1}
commit-msg(git commit -m 'xxx' xxx书写不规范时时触发)
#!/bin/sh
. "$(dirname "$0")/_/husky.sh"

npx --no-install  lint-staged
相关配置已添加完成,提交代码测试以下效果,发现1个错误,4个警告,提交被拦截

接着我们修复当前1个错误,然后继续提交
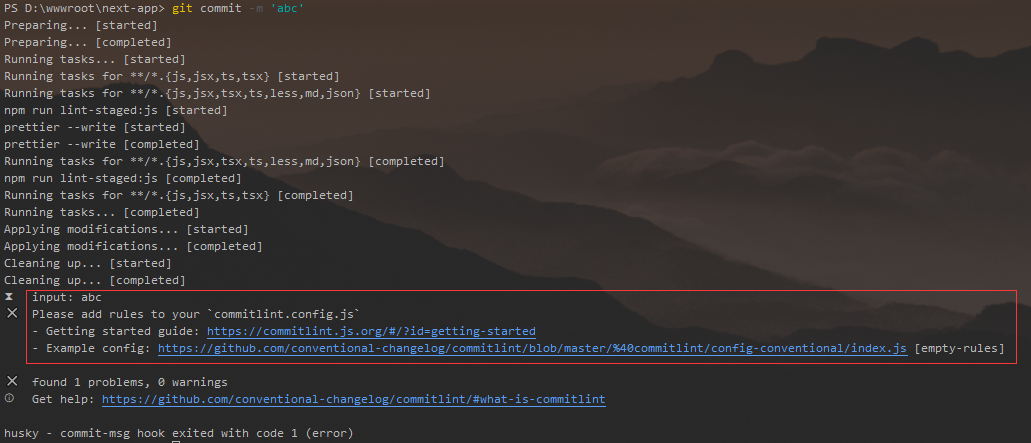
提示不符合提交规范,说明配置成功
最后把提交命令改为`git commit -m 'feat: 加入husky代码提交拦截'`,提交成功
附加一份提交规范
`feat`:新功能(feature)
`fix`:修补 bug
`docs`:文档(documentation)
`style`: 格式(不影响代码运行的变动)
`refactor`:重构(即不是新增功能,也不是修改 bug 的代码变动)
`test`:增加测试
`chore`:构建过程或辅助工具的变动
`scope`:用于说明 commit 影响的范围,比如数据层、控制层、视图层等等。
`subject`:是 commit 目的的简短描述,不超过 50 个字符
愿你走出半生,归来仍是少年

 浙公网安备 33010602011771号