
SonarQube 与 DevOps 平台集成(Azure DevOps)
 本文详细介绍了如何将SonarQube与Azure DevOps平台集成,实现代码质量自动化分析。主要内容包括:安装SonarQube扩展并配置服务连接;在Azure Pipelines中配置SonarQubePrepare、SonarQubeAnalyze和SonarQubePublish三个核心任务;针对.NET项目和其他语言项目(如JS/TS/GO)分别提供了YAML配置示例。通过此集成,开发团队可以在CI/CD流程中自动执行代码质量扫描,并将分析结果反馈到Azure DevOps。
SonarQube 与 DevOps 平台集成(Azure DevOps)
概述
SonarQube 提供与 GitHub、Bitbucket、GitLab 和 Azure DevOps 的 DevOps 集成。
本文详细介绍如何在 Azure DevOps 环境中集成 SonarQube ,实现代码质量的自动化分析。
环境信息:
- Azure DevOps Server 2022
- SonarQube 25.2.0.102705
- Windows Server 2025
Azure Pipelines 集成配置
前置准备
1. 安装 SonarQube 扩展
- 访问 Azure Marketplace - SonarQube
- 点击"获取"并选择目标 Azure DevOps 组织完成安装
- 验证:在组织设置中确认扩展安装状态
2. 创建 SonarQube 项目
-
在 SonarQube 中创建项目:登录到 SonarQube 管理界面,创建一个与你的代码库对应的项目。
![image]()
-
选择 Azure DevOps,并填写相关信息
![image]()
-
再次输入令牌后,选择要导入的项目
![image]()
-
设置新代码周期
![image]()
-
选择 Azure Pipelines , 使用 Azure DevOps 流水线分析项目
![image]()
-
创建项目分析令牌
![image]()


3. 配置服务连接
-
进入 Azure DevOps 项目 → 项目设置
-
导航到 服务连接 → 新建服务连接
![image]()
-
选择 "SonarQube" 连接类型
-
配置参数:
-
连接名称:自定义标识(如 "SonarQube-Production")
-
服务器 URL:SonarQube 服务器地址(如 https://sonar.company.com)
![image]()
-
认证令牌:在 SonarQube 中通过 [用户 → 我的账户 → 安全] 查看生成的令牌
![image]()
-


管道配置架构
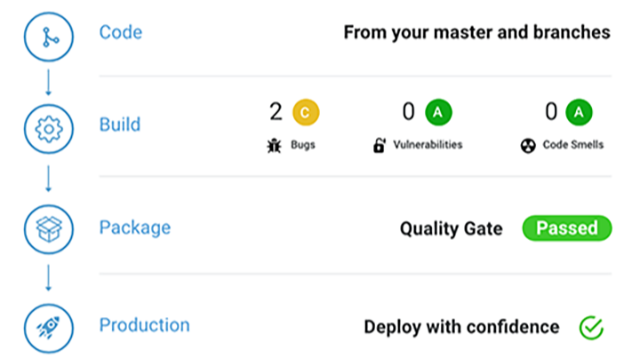
在 Azure Pipelines YAML 中按顺序配置以下核心任务:
SonarQubePrepare:初始化分析环境,配置扫描参数SonarQubeAnalyze:执行代码质量扫描与分析SonarQubePublish:发布分析结果与质量门禁状态
![image]()

管道任务详解
以下不同项目类型的配置示例。
关键配置解析
详细语法参考:Azure DevOps 官方文档
1. SonarQubePrepare@7:
准备 SonarQube 分析配置。
projectKey:项目唯一标识,对应 SonarQube 中的项目密钥projectName:在 SonarQube 界面显示的项目名称scannerMode:扫描器模式选择dotnet:适用于 .NET/C# 项目cli:适用于通用项目类型(Java、JavaScript、Python 等)other:特殊场景使用
configMode:配置模式- 手动模式:显式指定所有分析参数
- 文件模式:通过
sonar-project.properties文件读取配置
extraProperties:扩展属性配置- 用于设置自定义分析参数,如排除目录、指定版本等
- 格式:每行一个属性(例:
sonar.exclusions=**/test/**)
2. SonarQubeAnalyze@7:
运行扫描程序并将结果上传到 SonarQube 服务器。
- 对于 .NET 项目:必须在代码编译完成后执行。
- 依赖关系:自动读取
SonarQubePrepare任务的配置信息
3. SonarQubePublish@7:
在 Azure DevOps 生成结果上发布 SonarQube 的质量门结果,在实际分析后使用。
此任务为可选步骤,运行后会有一个结果页,实际使用下来没有质量门禁(拦截)效果。
-
pollingTimeoutSec:结果等待超时时间- 默认值:300秒(5分钟)
![image]()
- 默认值:300秒(5分钟)
-
如果想实现拦截效果,需启用检查注释解析、生成验证,并配合 SonarQube 分支使用。
- 设置后每次提交都会触发质量门禁,但注意社区版不支持分支功能。
![image]()
- 设置后每次提交都会触发质量门禁,但注意社区版不支持分支功能。


.NET 项目配置
    - task: DotNetCoreCLI@2
      inputs:
        command: 'build'
        projects: '$(solution)'
        arguments: '--configuration $(buildConfiguration) --no-restore --verbosity detailed'
        feedsToUse: 'select'
        includeNuGetOrg: true
        noCache: true
      displayName: "构建解决方案"

    - task: SonarQubePrepare@7
      inputs:
        SonarQube: 'my-SonarQube'
        scannerMode: 'dotnet'
        projectKey: '$(sonarqube_project_key)'
      displayName: "准备 SonarQube 分析"

    - task: DotNetCoreCLI@2
      inputs:
        command: 'build'
        projects: '$(solution)'
        arguments: '--configuration $(buildConfiguration) --no-restore --verbosity detailed'
        feedsToUse: 'select'
        includeNuGetOrg: true
        noCache: true
      displayName: "构建解决方案"

    - task: SonarQubeAnalyze@7
      displayName: "执行 SonarQube 分析"

     - task: SonarQubePublish@6
      displayName: "发布质量门禁结果"
      inputs:
        pollingTimeoutSec: '300'
其他语言项目(比如JS、TS、GO等)
	- task: SonarQubePrepare@7
	  displayName: 'Prepare SonarQube Server analysis configuration'
	  inputs:
		SonarQube: 'my-SonarQube'
		scannerMode: 'CLI'
		configMode: 'file'
		projectKey: '$(sonarqube_project_key)'

	- script: |
		npm run $(build_script)
	  displayName: 'npm run build'

	- task: SonarQubeAnalyze@7
	  displayName: 'Run scanner and upload the results to the SonarQube Server.'
	  inputs:
		jdkversion: 'JAVA_HOME'

	- task: SonarQubePublish@7
	  displayName: Publish SonarQube Server's Quality Gate result on the Azure DevOps build result, to be used after the actual analysis.
	  inputs:
		pollingTimeoutSec: '300'

 浙公网安备 33010602011771号