WPF学习之MVVM
介绍:
MVVM是(Model-View-ViewModel)的简写,分别为:Model(模型)、View(视图)和ViewModel(视图模型)。他是WPF常用的一种开发设计模型思想。将应用程序的业务和表示逻辑与用户界面 (UI) 清晰分离。
官方文档:模型-视图-视图模型 - .NET | Microsoft Learn
1、总介绍
1.1 3者关系图
如下为3个的关系图
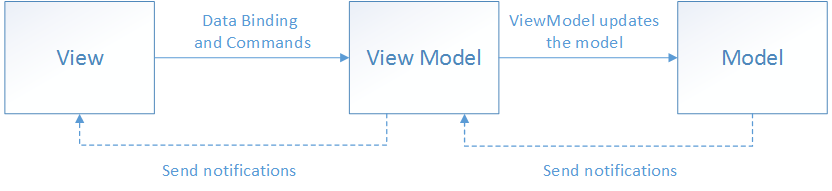
1.2 各部分介绍
1、View:负责定义用户在屏幕上看到的结构、布局和外观。
2、ViewModel:实现视图可以数据绑定到的属性和命令,并通过更改通知事件通知视图任何状态更改。
3、Model:模型是封装数据类和业务逻辑
具体的:ViewModel是View与Model的中间桥梁,当用户操作View时时,ViewModel然后通知数据做改动,而当数据发生变化,ViewModel能通知到对应的视图做自动更新。
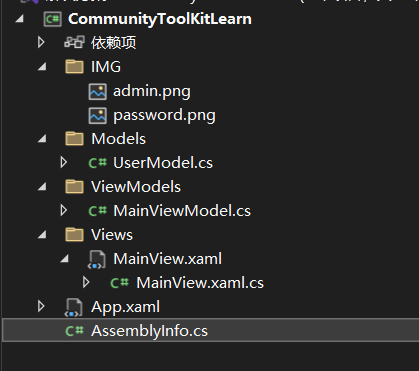
1.2 创建项目:
UserModel.cs代码


 1 using System;
 2 using System.Collections.Generic;
 3 using System.Linq;
 4 using System.Text;
 5 using System.Threading.Tasks;
 6
 7 namespace CommunityToolKitLearn.Models
 8 {
 9     public class UserModel
10     {
11         // 账户名
12         public string AccountName { get; set; }
13         // 账户密码
14         public string AccountPassword { get; set; }
15         // 账户性别
16         public string AccountSex { get; set; }
17
18     }
19 }
MainViewModel.cs代码
 1 using CommunityToolkit.Mvvm.Input;
 2 using CommunityToolKitLearn.Models;
 3 using System;
 4 using System.Collections.Generic;
 5 using System.ComponentModel;
 6 using System.Linq;
 7 using System.Text;
 8 using System.Threading.Tasks;
 9 using System.Windows;
10 using System.Windows.Input;
11 using System.Xml.Linq;
12
13 namespace CommunityToolKitLearn.ViewModels
14 {
15     public partial class MainViewModel : INotifyPropertyChanged
16     {
17
18         private UserModel _user;
19
20         public MainViewModel()
21         {
22             _user = new UserModel();
23         }
24
25         public string AccountName
26         {
27             get { return _user.AccountName; }
28             set
29             {
30                 if (_user.AccountName != value)
31                 {
32                     _user.AccountName = value;
33                     OnPropertyChanged(nameof(AccountName));
34                 }
35             }
36         }
37
38         public string AccountPassword
39         {
40             get { return _user.AccountPassword; }
41             set
42             {
43                 if (_user.AccountPassword != value)
44                 {
45                     _user.AccountPassword = value;
46                     OnPropertyChanged(nameof(AccountPassword));
47                 }
48             }
49         }
50
51         public event PropertyChangedEventHandler? PropertyChanged;
52
53         // INotifyPropertyChanged实现省略...
54
55         private void OnPropertyChanged(string propertyName)
56         {
57             PropertyChanged?.Invoke(this, new PropertyChangedEventArgs(propertyName));
58         }
59
60         // 其他代码省略...
61
62         public ICommand SubmitCommand => new RelayCommand(Submit);
63
64         private void Submit()
65         {
66             AccountName = "账户:" + AccountName;
67             AccountPassword = "密码:" + AccountPassword;
68         }
69     }
70 }
MainView.xaml代码
 1 <!-- 第一行改成自己的 -->
 2 <Window x:Class="CommunityToolKitLearn.Views.MainView"
 3         xmlns="http://schemas.microsoft.com/winfx/2006/xaml/presentation"
 4         xmlns:x="http://schemas.microsoft.com/winfx/2006/xaml"
 5         xmlns:d="http://schemas.microsoft.com/expression/blend/2008"
 6         xmlns:mc="http://schemas.openxmlformats.org/markup-compatibility/2006"
 7         xmlns:local="clr-namespace:CommunityToolKitLearn.Views"
 8         xmlns:localvm="clr-namespace:CommunityToolKitLearn.ViewModels"
 9         mc:Ignorable="d"
10         xmlns:hc="https://handyorg.github.io/handycontrol"
11         xmlns:i="http://schemas.microsoft.com/xaml/behaviors"
12         xmlns:ex="clr-namespace:HandyControl.Tools.Extension;assembly=HandyControl"
13         Title="登录界面" Height="378" Width="400">
14     <!-- 用Grid布局登录表单,居中显示 -->
15     <Grid Background="#F5F5F5">
16         <Grid Width="300" Height="200" Background="White" Margin="0,0,0,100" HorizontalAlignment="Center" VerticalAlignment="Center">
17             <Grid.RowDefinitions>
18                 <RowDefinition Height="40"/>
19                 <RowDefinition Height="50"/>
20                 <RowDefinition Height="50"/>
21                 <RowDefinition Height="60"/>
22             </Grid.RowDefinitions>
23             <!-- 标题 -->
24             <TextBlock Grid.Row="0" Text="用户登录" FontSize="18" HorizontalAlignment="Center" VerticalAlignment="Center" FontWeight="Bold"/>
25             <!-- 账号输入框 -->
26             <StackPanel Grid.Row="1" Orientation="Horizontal" Margin="20,0">
27                 <Image HorizontalAlignment="Stretch" Height="20" Margin="0,20,0,0" VerticalAlignment="Center" Width="20" Source="/IMG/admin.png"/>
28                 <TextBox Style="{DynamicResource TextBoxExtend}"
29                          Margin="5,0,0,0"
30                          hc:TitleElement.Title="此项必填"
31                          hc:TitleElement.TitlePlacement="Top"
32                          hc:InfoElement.Symbol="*"
33                          hc:InfoElement.Necessary="True"
34                          hc:InfoElement.Placeholder="请输入账户"
35                          VerticalAlignment="Center"
36                          Width="210"
37                          Text ="{Binding AccountName}"/>
38             </StackPanel>
39             <!-- 账号输入框 -->
40             <StackPanel Grid.Row="2" Orientation="Horizontal" Margin="20,0">
41                 <Image HorizontalAlignment="Left" Height="20" Margin="0,0,0,0" VerticalAlignment="Center" Width="20" Source="/IMG/password.png"/>
42                 <!--为使普通密码输入文本框显示水印,需要设定PasswordBoxAttach.PasswordLength="0" -->
43                 <TextBox Style="{DynamicResource TextBoxExtend}"
44                              Margin="5,0,0,0"
45                              hc:InfoElement.Placeholder="请输入密码"
46                              VerticalAlignment="Center"
47                              Width="210"
48                          Text="{Binding AccountPassword}"/>
49             </StackPanel>
50             <!-- 登录按钮 -->
51             <Button Grid.Row="3" Content="登录" Width="100" Height="35" Margin="0,10"
52                     Command="{Binding SubmitCommand}"
53                     Background="#4A86E8" Foreground="White" />
54         </Grid>
55     </Grid>
56 </Window>
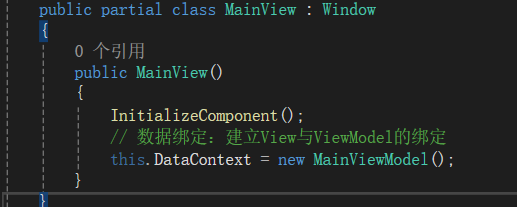
MainView.xaml.cs代码
 1 using CommunityToolKitLearn.ViewModels;
 2 using System;
 3 using System.Collections.Generic;
 4 using System.Linq;
 5 using System.Text;
 6 using System.Threading.Tasks;
 7 using System.Windows;
 8 using System.Windows.Controls;
 9 using System.Windows.Data;
10 using System.Windows.Documents;
11 using System.Windows.Input;
12 using System.Windows.Media;
13 using System.Windows.Media.Imaging;
14 using System.Windows.Shapes;
15
16 namespace CommunityToolKitLearn.Views
17 {
18     /// <summary>
19     /// MainView.xaml 的交互逻辑
20     /// </summary>
21     public partial class MainView : Window
22     {
23         public MainView()
24         {
25             InitializeComponent();
26             // 数据绑定:建立View与ViewModel的绑定
27             this.DataContext = new MainViewModel();
28         }
29     }
30 }
1.3 首先先将View与ViewMode绑定
1.4 并将View的UI控件属性与命令与ViewMode的属性与命令进行绑定
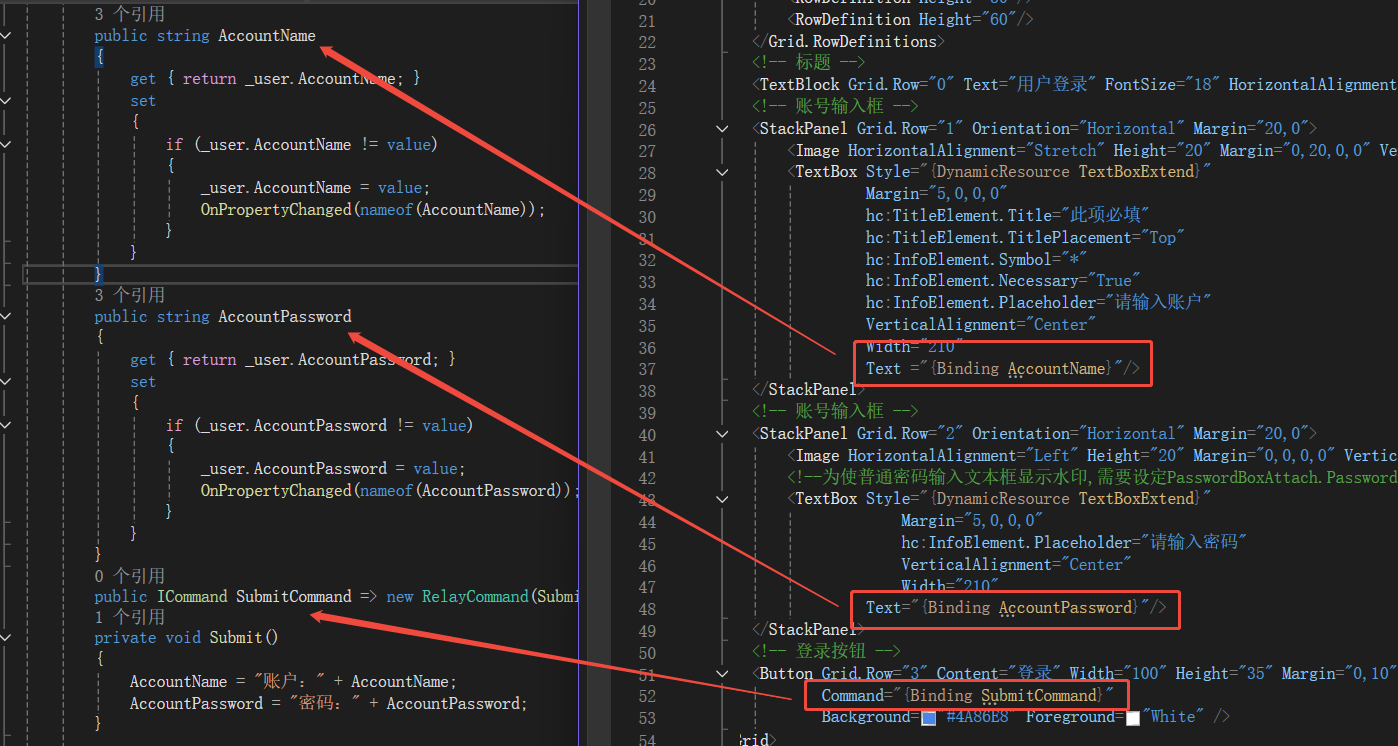
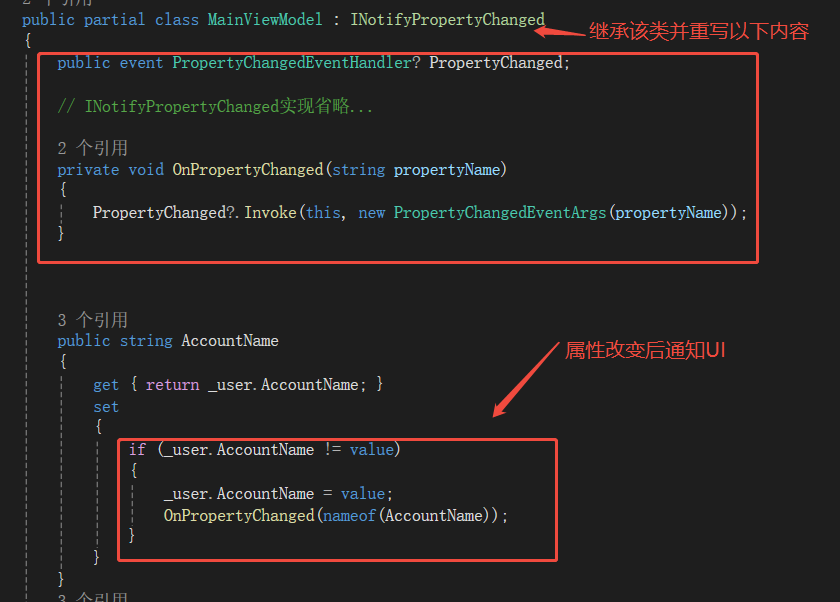
1.5 继承INotifyPropertyChanged,并重写方法,写属性改变通知UI的代码
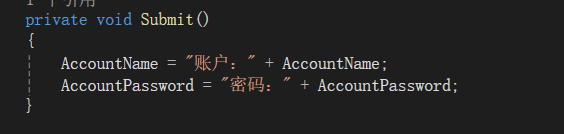
1.6 写一个当点击按键后,修改ViewMode的属性查看UI的属性值(文本框内容)会不会随之改变
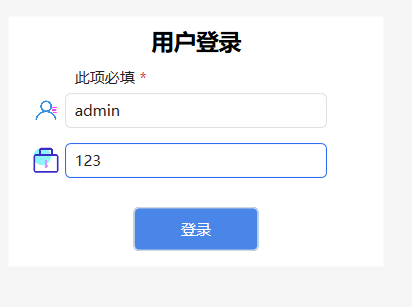
运行并输入信息完成之后
点击登陆之后
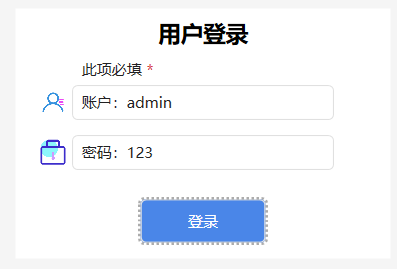
可以看到UI的文本框随之改变

 浙公网安备 33010602011771号