

如何使用Microsoft Management Console编写Snap-in(一)
2005-11-25 22:10 Yuanyi Wang 阅读(3281) 评论(5) 收藏 举报如果我们自己的应用程序使用Microsoft Management Console(MMC)设置界面,可能会显得我们的应用程序更专业。
下面我来介绍一下如何使用.NET 2.0编写基于Microsoft Management Console 3的Snap-in。
如果你要使用.NET 1.1编写对于MMC2的Snap-in,可以参考MMC.NET。
目前Microsoft Management Console 3还只是RC1,建议不要在正式生产环境中使用,本文只作学习使用。
可以在微软的网站下载Microsoft Management Console 3.0 Pre-Release (RC1 Refresh)的对应版本。
MMC3支持Windows 2000以上的操作系统,Vista自带MMC3。
我以下的说明是以Windows XP Pro with sp2 英文版为基础的。
1. 安装WindowsXP-KB907265-x86-ENU.exe,安装之后会在"C:\Windows\System32\"目录下多出两个文件:microsoft.managementconsole.dll
和mmcfxcommon.dll,最好将这两个文件加入GAC,省得以后麻烦。
2. 使用Visual Studio 2005 建立一个Windows Class Library Project,起名为"TestMMC3",并将microsoft.managementconsole.dll加入引用。
3. 写代码
 using System;using System.Collections.Generic;using System.Text;using System.ComponentModel;using Microsoft.ManagementConsole;namespace TestMMC3
 {
{

 //为一些安装工具提供的入口。比如InstallUtil.exe [RunInstaller(true)] public class InstallUtilSupport : SnapInInstaller
 {
{
 } //每一个Snap-In都要有一个继承与SnapIn的类,这个类必须构建一个根节点,并要为根节点命名。 [SnapInSettings("{784DEE12-EC06-4a72-87CA-C11D826A0657}", DisplayName = "- Simple SnapIn Sample", Description = "Simple Hello World SnapIn")] public class SimpleSnapIn : SnapIn { public SimpleSnapIn() { this.RootNode = new ScopeNode(); this.RootNode.DisplayName = "Hello World"; } }
  }
}3. 编译(废话)
4. 在编译目录运行installutil TestMMC3.dll命令,如果没有将mmcfxcommon.dll加入GAC,就需要将TestMMC3.dll放到"C:\Windows\System32\"中。
D:\MyDocuments\Work\Visual Studio 2005\Projects\TestMMC3\TestMMC3\bin\Debug>
installutil TestMMC3.dll
Microsoft (R) .NET Framework Installation utility Version 2.0.50727.42
Copyright (c) Microsoft Corporation. All rights reserved.
Running a transacted installation.
Beginning the Install phase of the installation.
See the contents of the log file for the D:\MyDocuments\Work\Visual Studio 2005\
Projects\TestMMC3\TestMMC3\bin\Debug\TestMMC3.dll assembly's progress.
The file is located at D:\MyDocuments\Work\Visual Studio 2005\Projects\TestMMC3.
0\TestMMC3\bin\Debug\TestMMC3.InstallLog.
Installing assembly 'D:\MyDocuments\Work\Visual Studio 2005\Projects\TestMMC3\
TestMMC3\bin\Debug\TestMMC3.dll'.
Affected parameters are:
logtoconsole =
assemblypath = D:\MyDocuments\Work\Visual Studio 2005\Projects\TestMMC3\Tes
tMMC3\bin\Debug\TestMMC3.dll
logfile = D:\MyDocuments\Work\Visual Studio 2005\Projects\TestMMC3\TestMMC3
.0\bin\Debug\TestMMC3.InstallLog
The Install phase completed successfully, and the Commit phase is beginning.
See the contents of the log file for the D:\MyDocuments\Work\Visual Studio 2005\
Projects\TestMMC3\TestMMC3\bin\Debug\TestMMC3.dll assembly's progress.
The file is located at D:\MyDocuments\Work\Visual Studio 2005\Projects\TestMMC3.
0\TestMMC3\bin\Debug\TestMMC3.InstallLog.
Committing assembly 'D:\MyDocuments\Work\Visual Studio 2005\Projects\TestMMC3\
TestMMC3\bin\Debug\TestMMC3.dll'.
Affected parameters are:
logtoconsole =
assemblypath = D:\MyDocuments\Work\Visual Studio 2005\Projects\TestMMC3\Tes
tMMC3\bin\Debug\TestMMC3.dll
logfile = D:\MyDocuments\Work\Visual Studio 2005\Projects\TestMMC3\TestMMC3
.0\bin\Debug\TestMMC3.InstallLog
The Commit phase completed successfully.
The transacted install has completed.
Instillutil.exe会在HKLM/Software/Microsoft/MMC/NodeTypes/SnapIns创建一个Key。
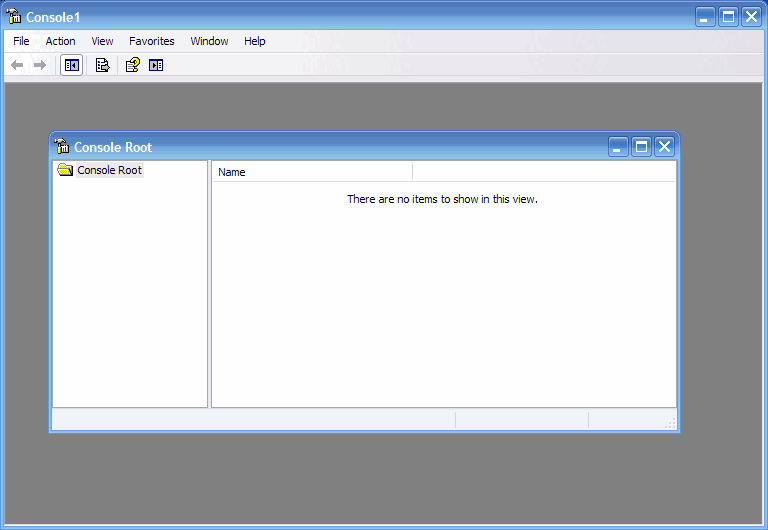
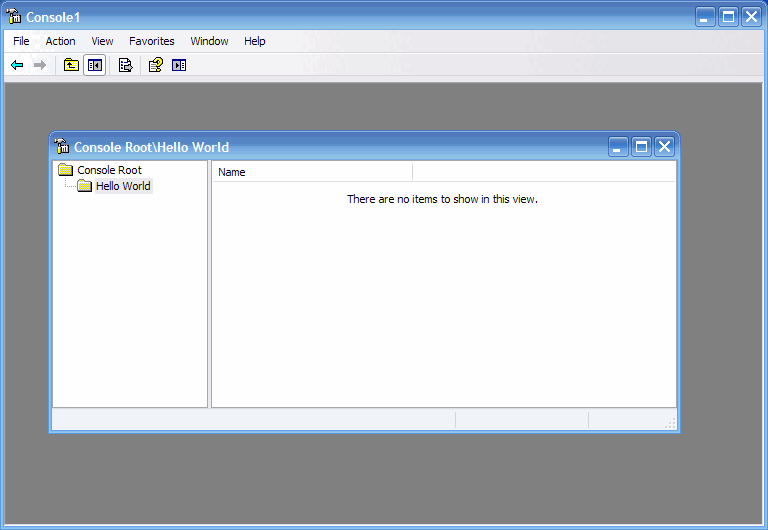
5. 在"Run"中运行mmc
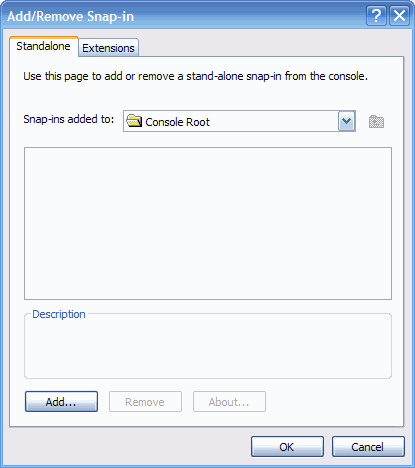
单击File->Add/Remove Snap-in
单击"Add"
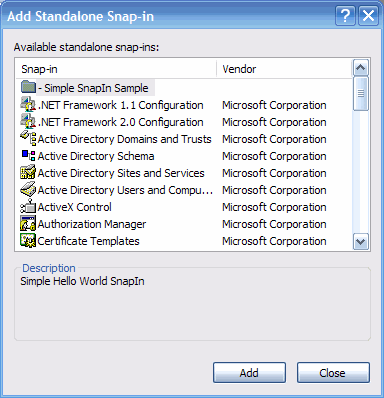
选择"- Simple SnapIn Sample"
待续……

 浙公网安备 33010602011771号