HMVue5.2【vue基础综合案例-购物车】
1 案例效果 & 实现步骤、初始项目
1-1 课件
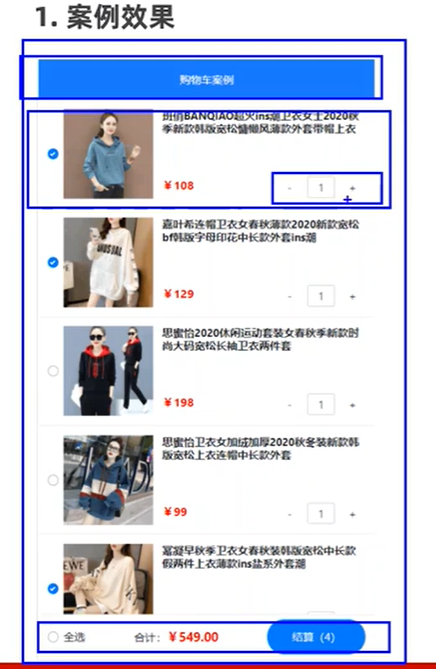
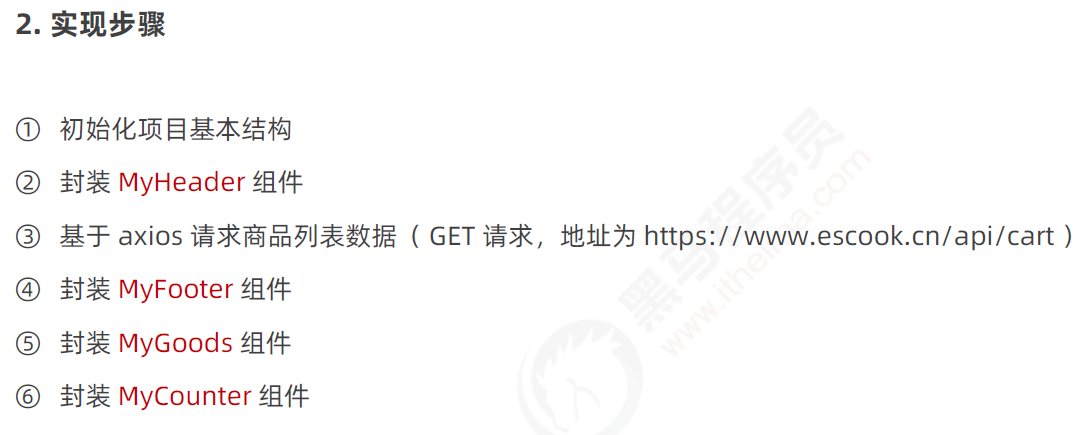
1-2 初始项目装包&运行
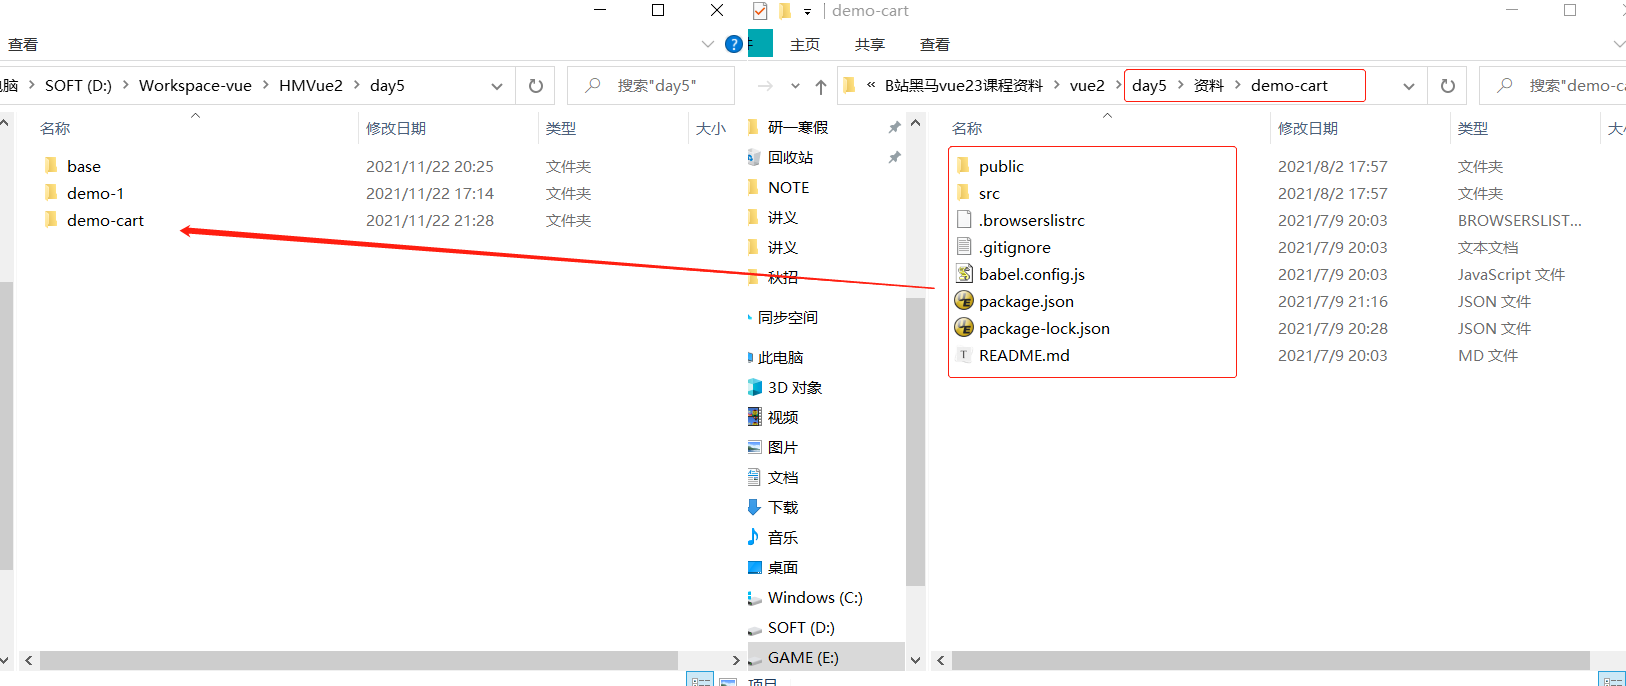
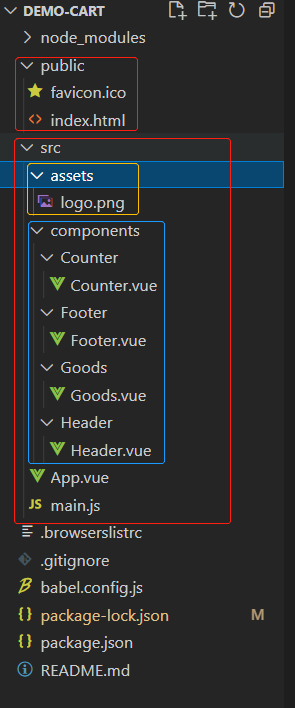
npm install
npm audit fix
npm run serve
http://localhost:8080/
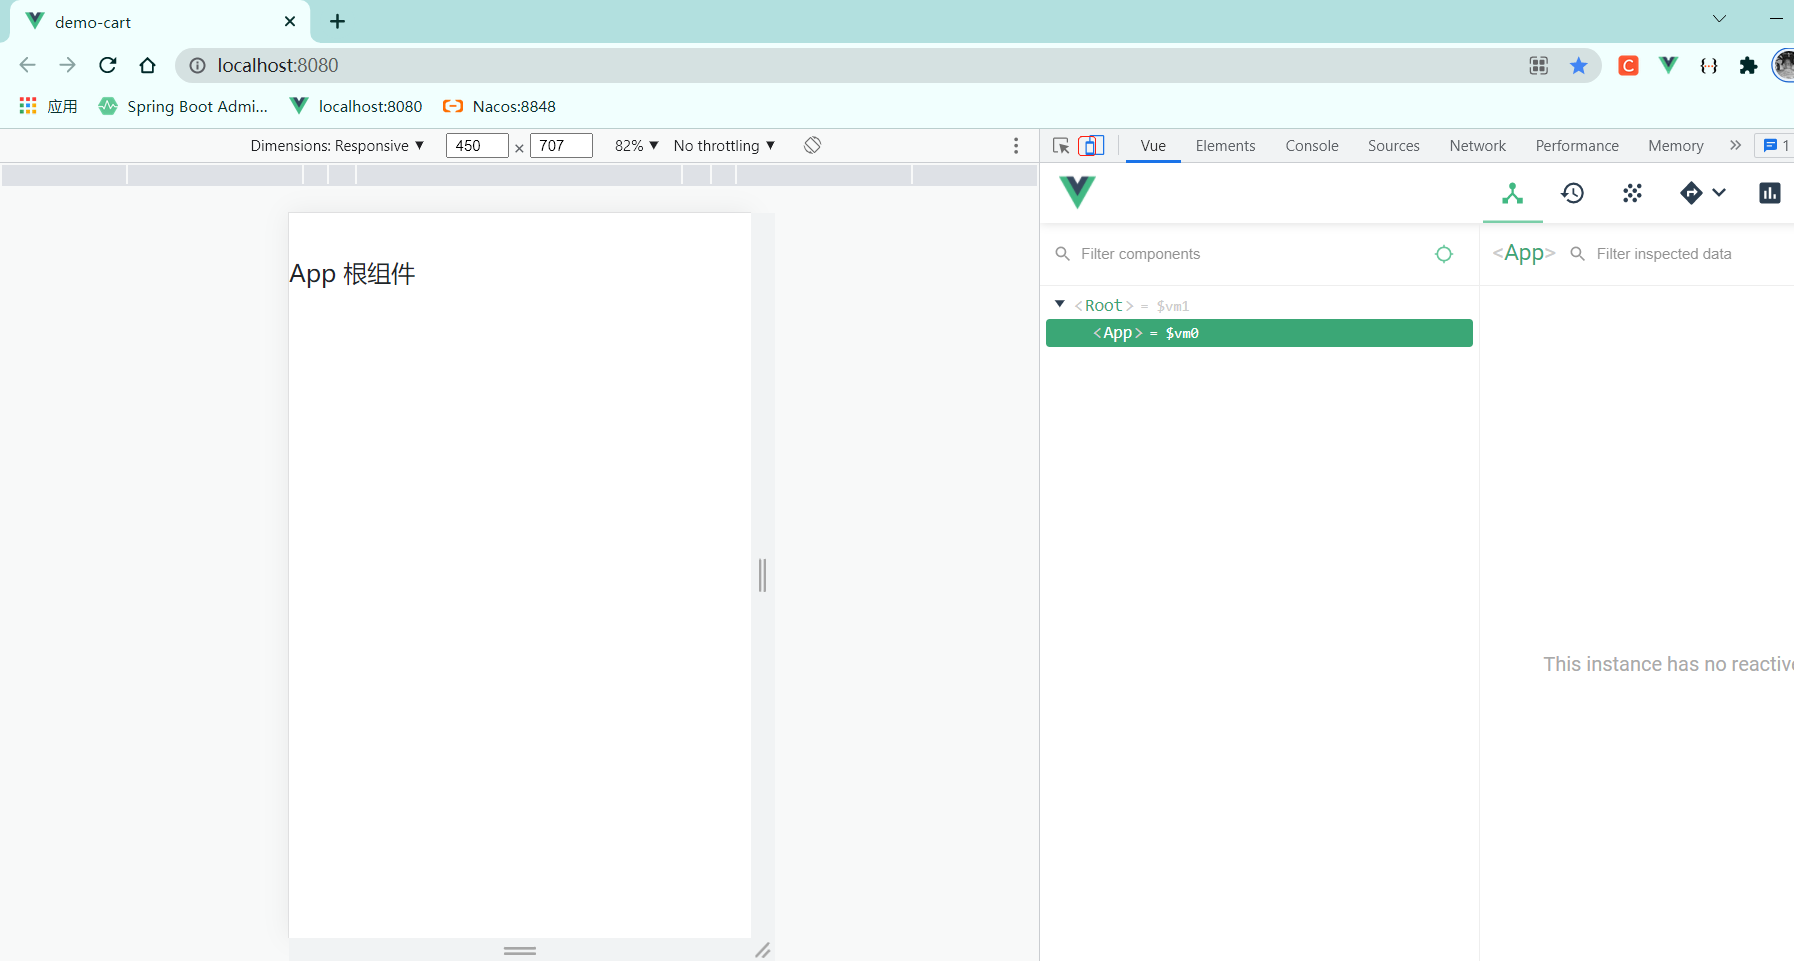
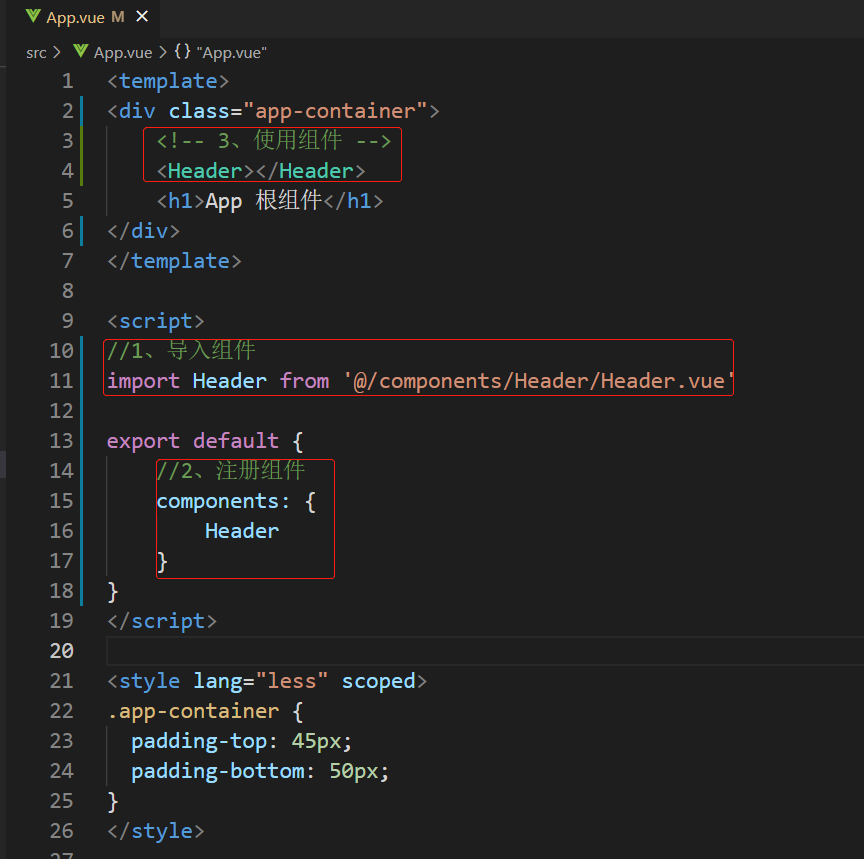
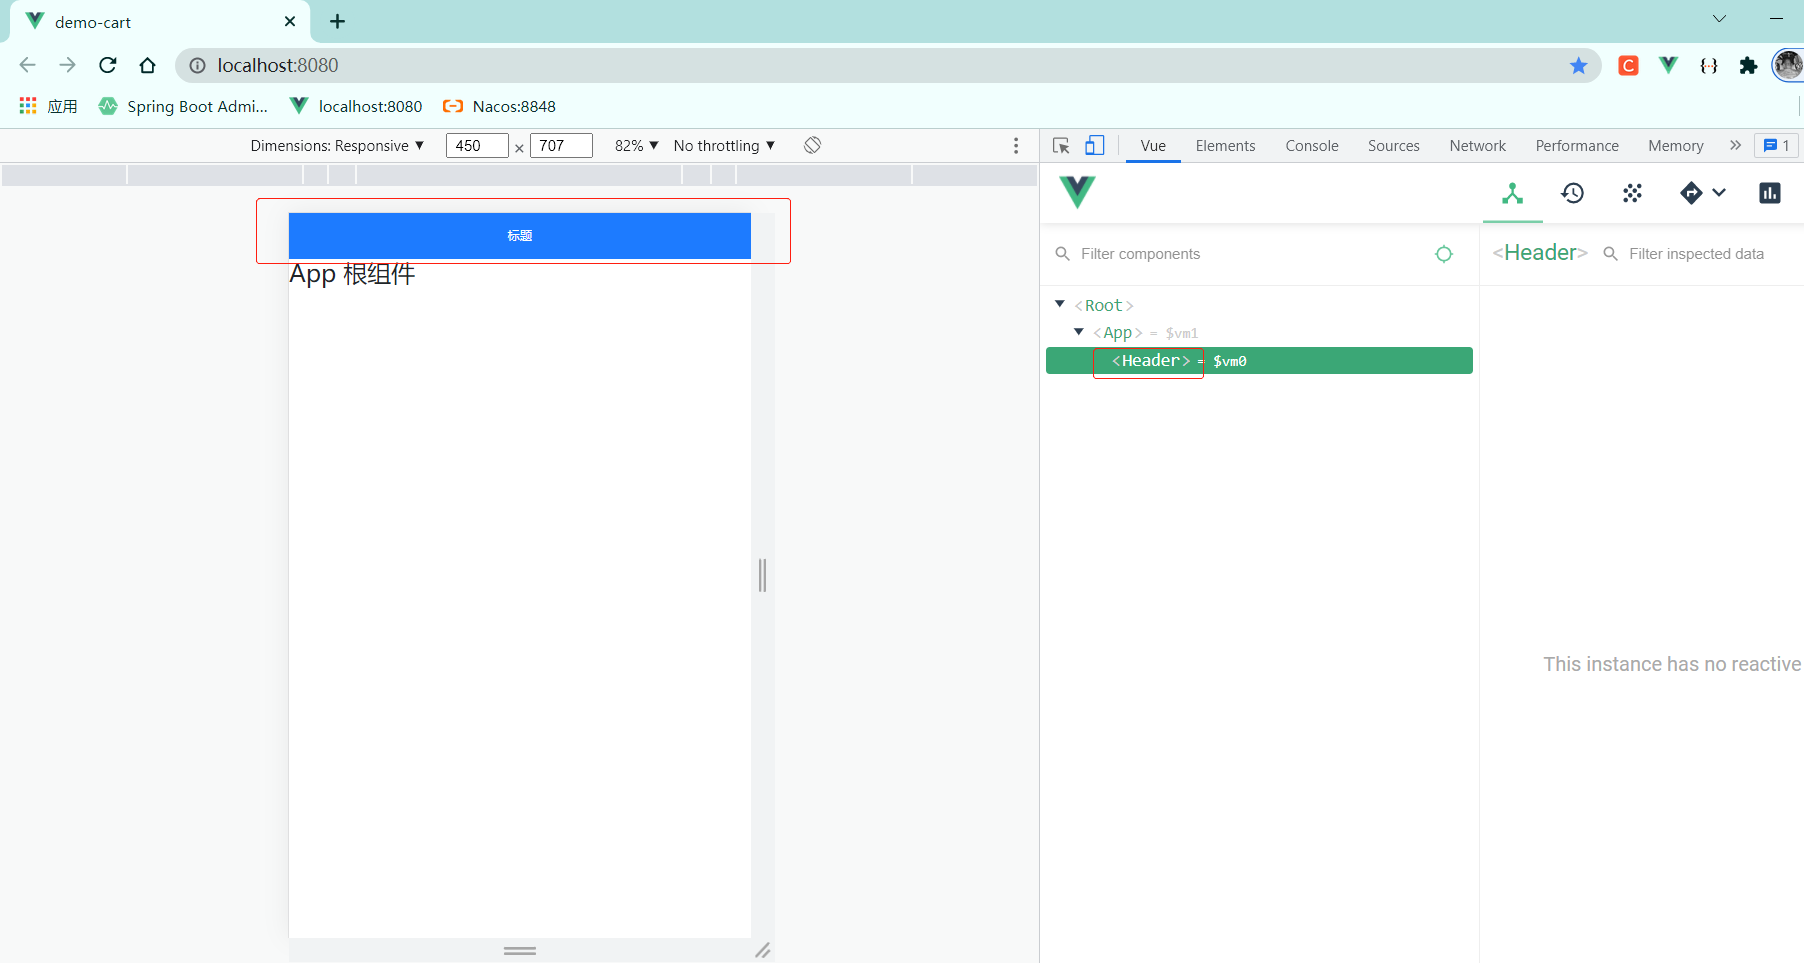
2 导入、注册、使用Header组件

<template>
  <div class="header-container">{{title}}</div>
</template>

<script>
export default {
    props: {
        //声明title自定义属性,允许使用者自定义标题内容
        title: {
            default: '标题',
            type: String
        }
    }
}
</script>

<style lang="less" scoped>
.header-container {
  font-size: 12px;
  height: 45px;
  width: 100%;
  background-color: #1d7bff;
  display: flex;
  justify-content: center;
  align-items: center;
  color: #fff;
  position: fixed;
  top: 0;
  z-index: 999;
}
</style>
3 基于axios请求列表数据
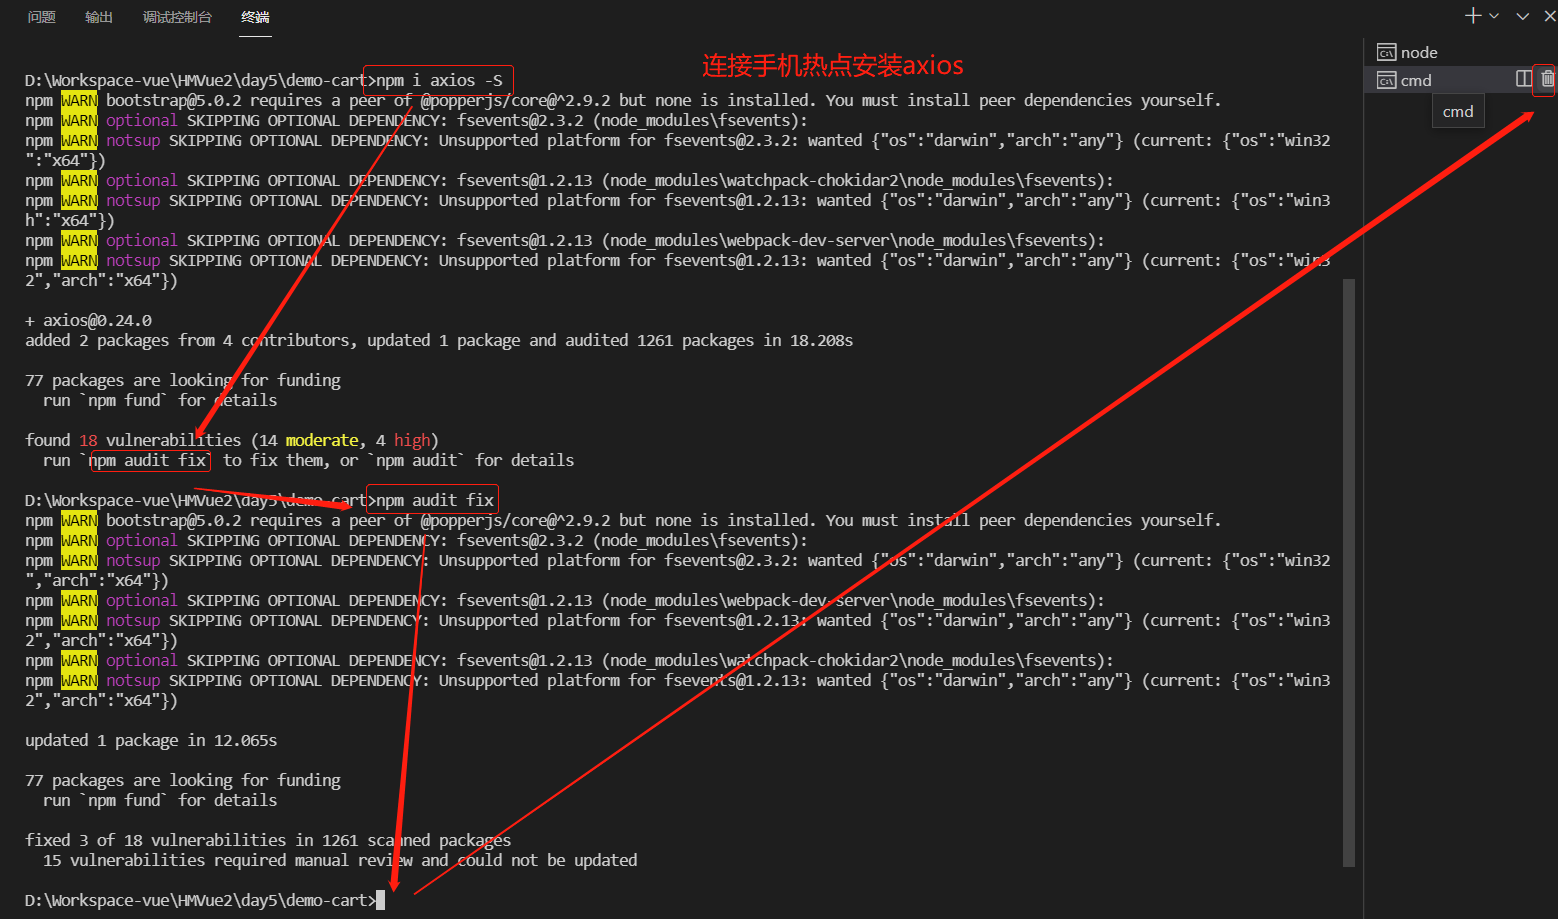
3-1 实现步骤

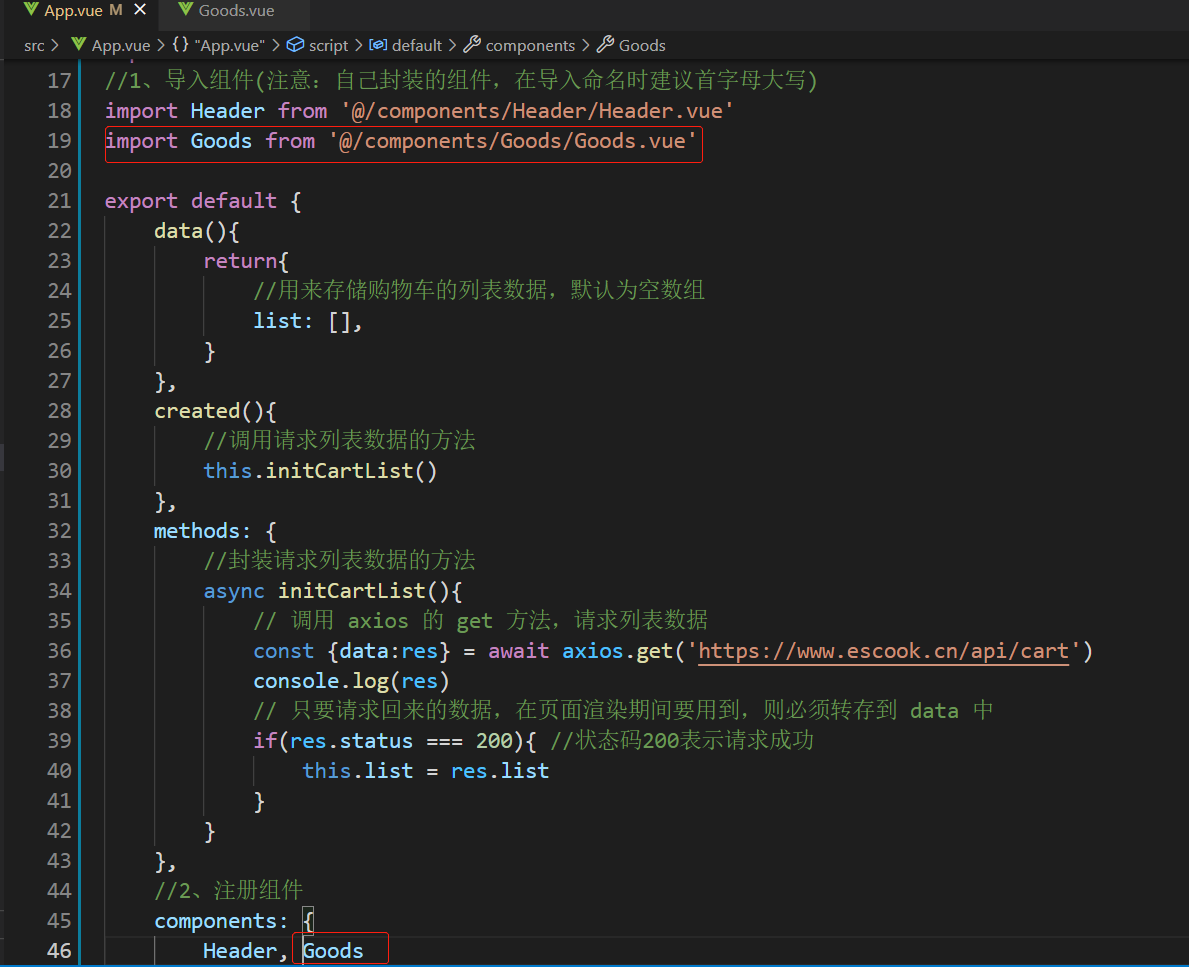
3-2 初步实现

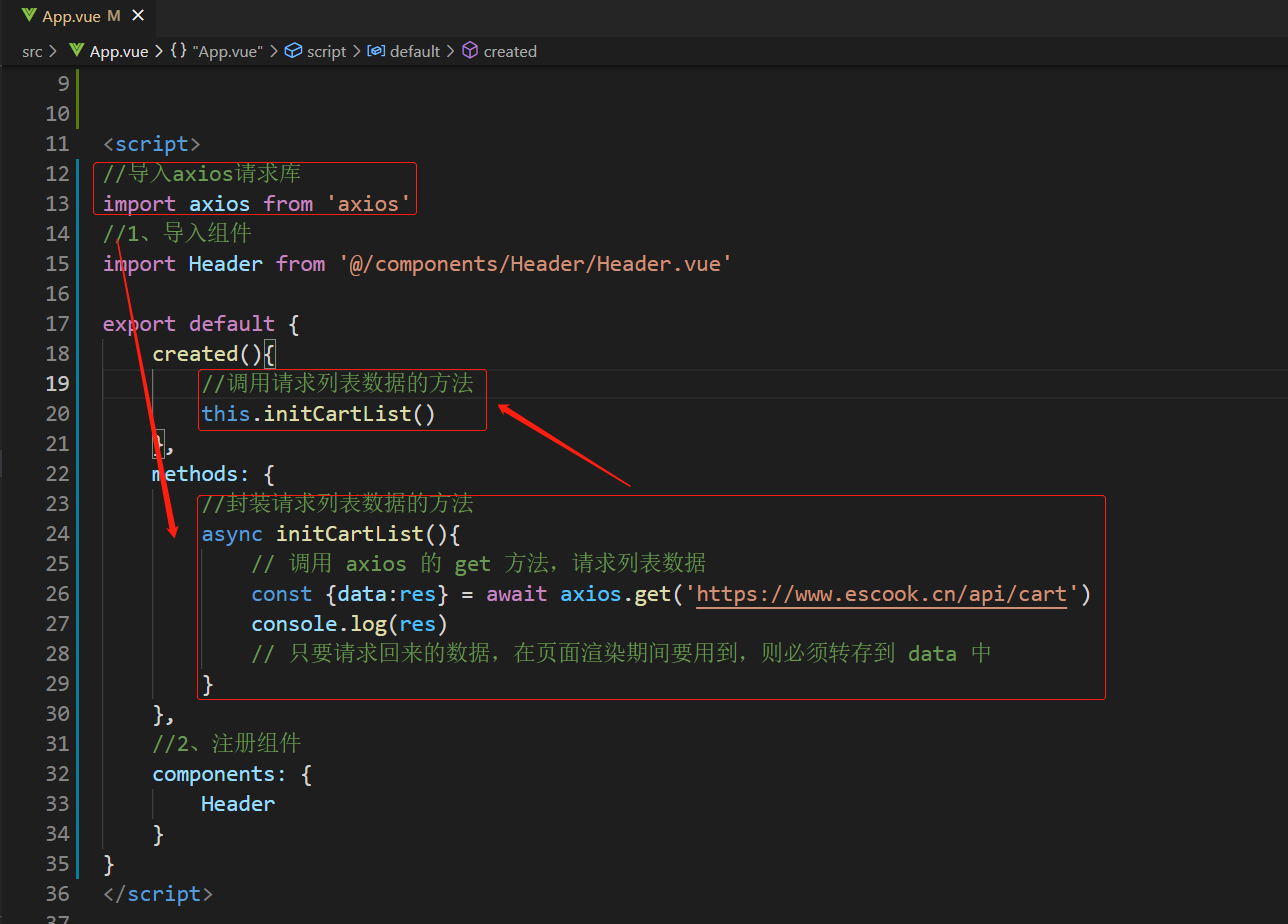
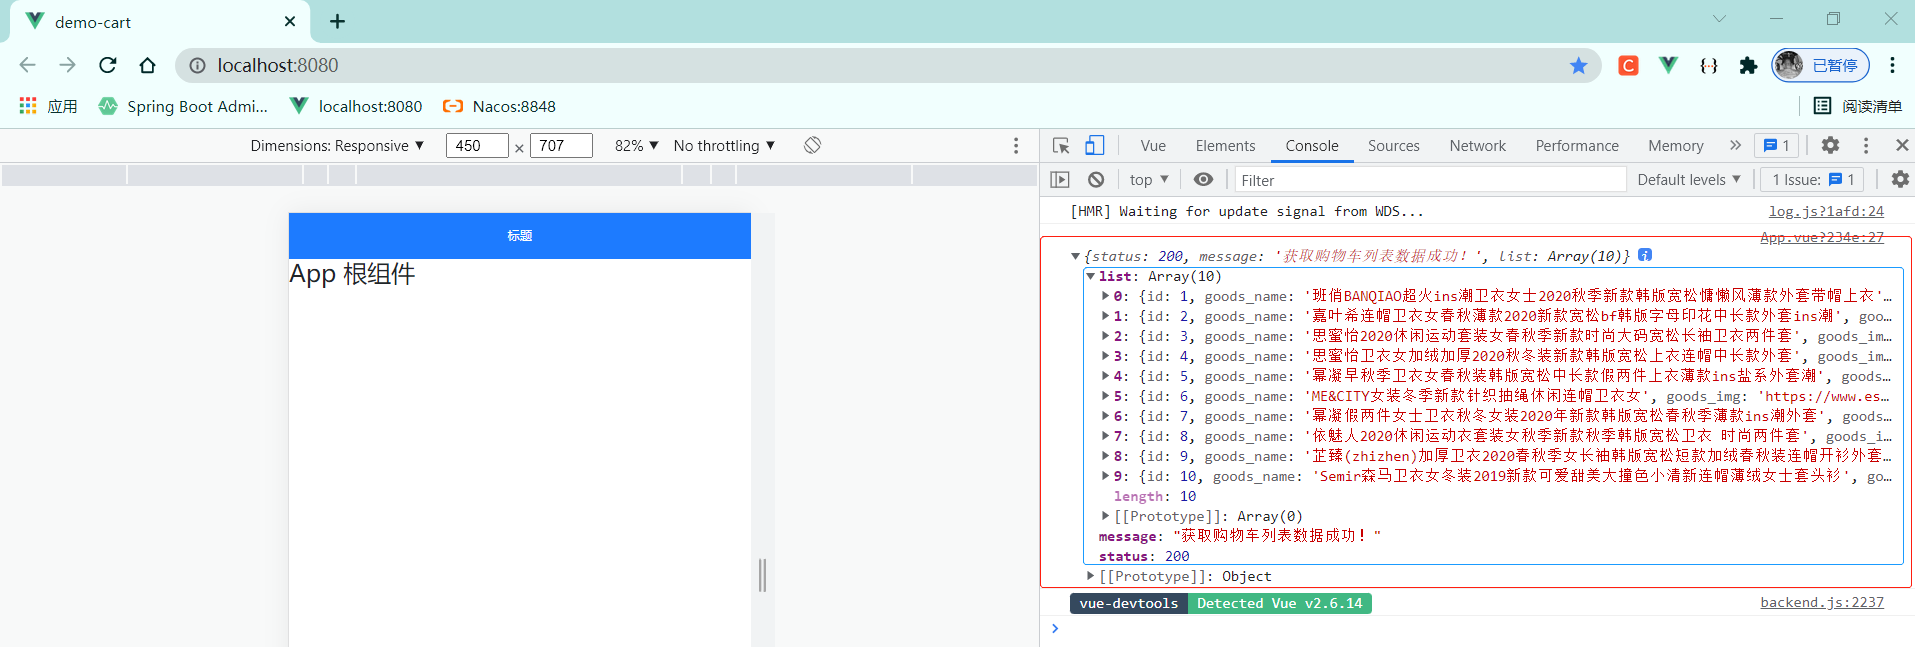
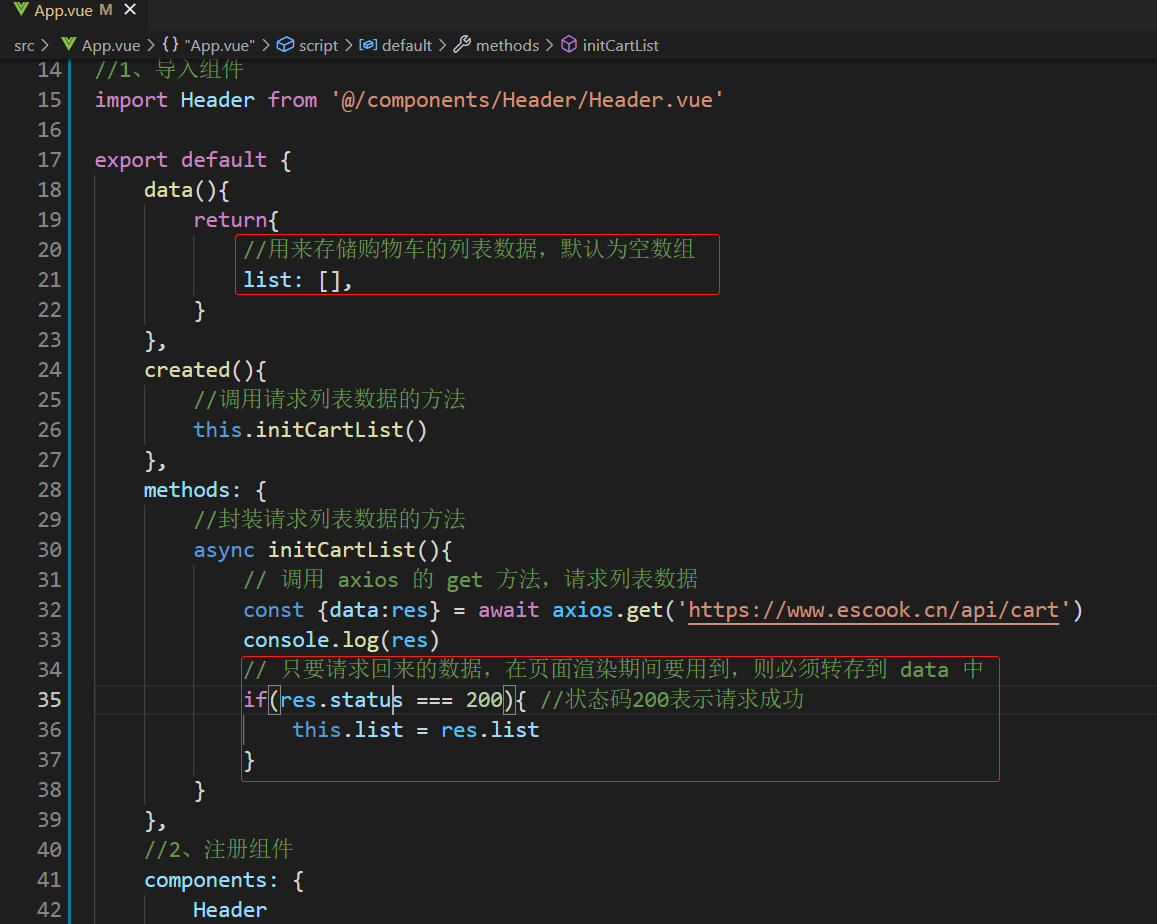
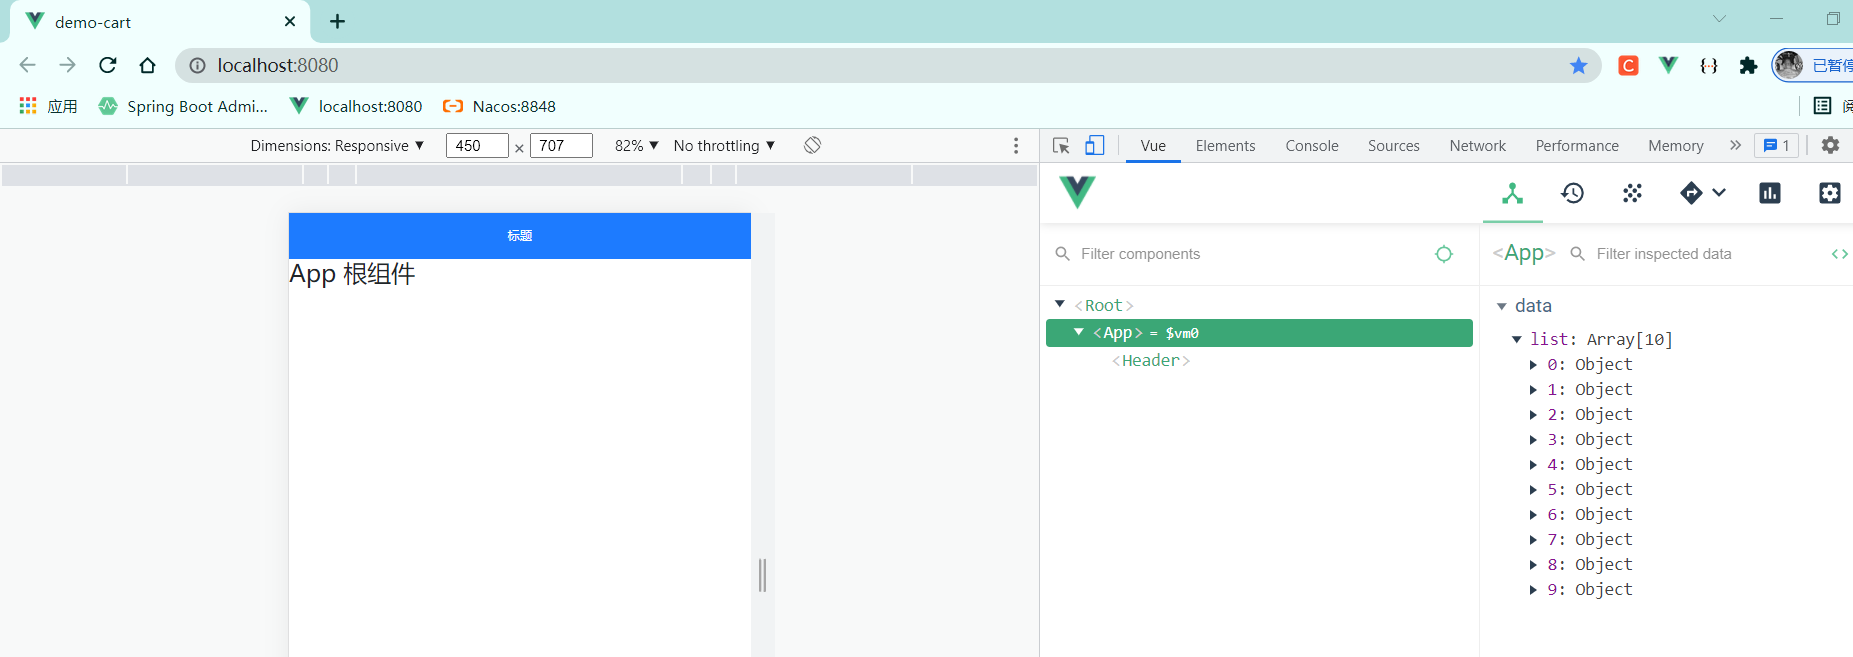
3-3 请求回来的数据需要转存到data中
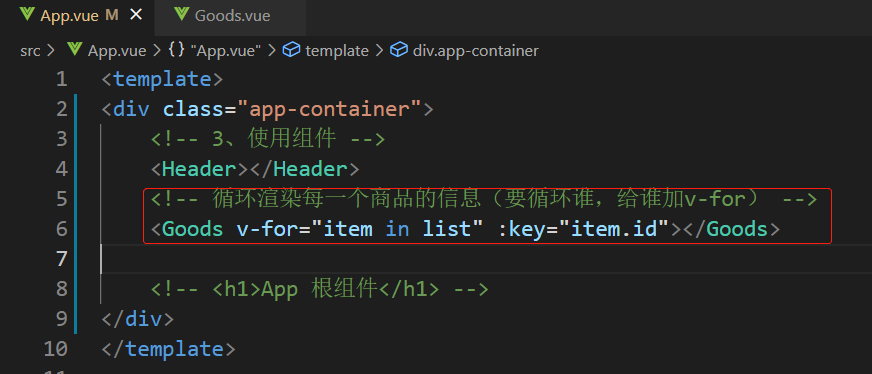
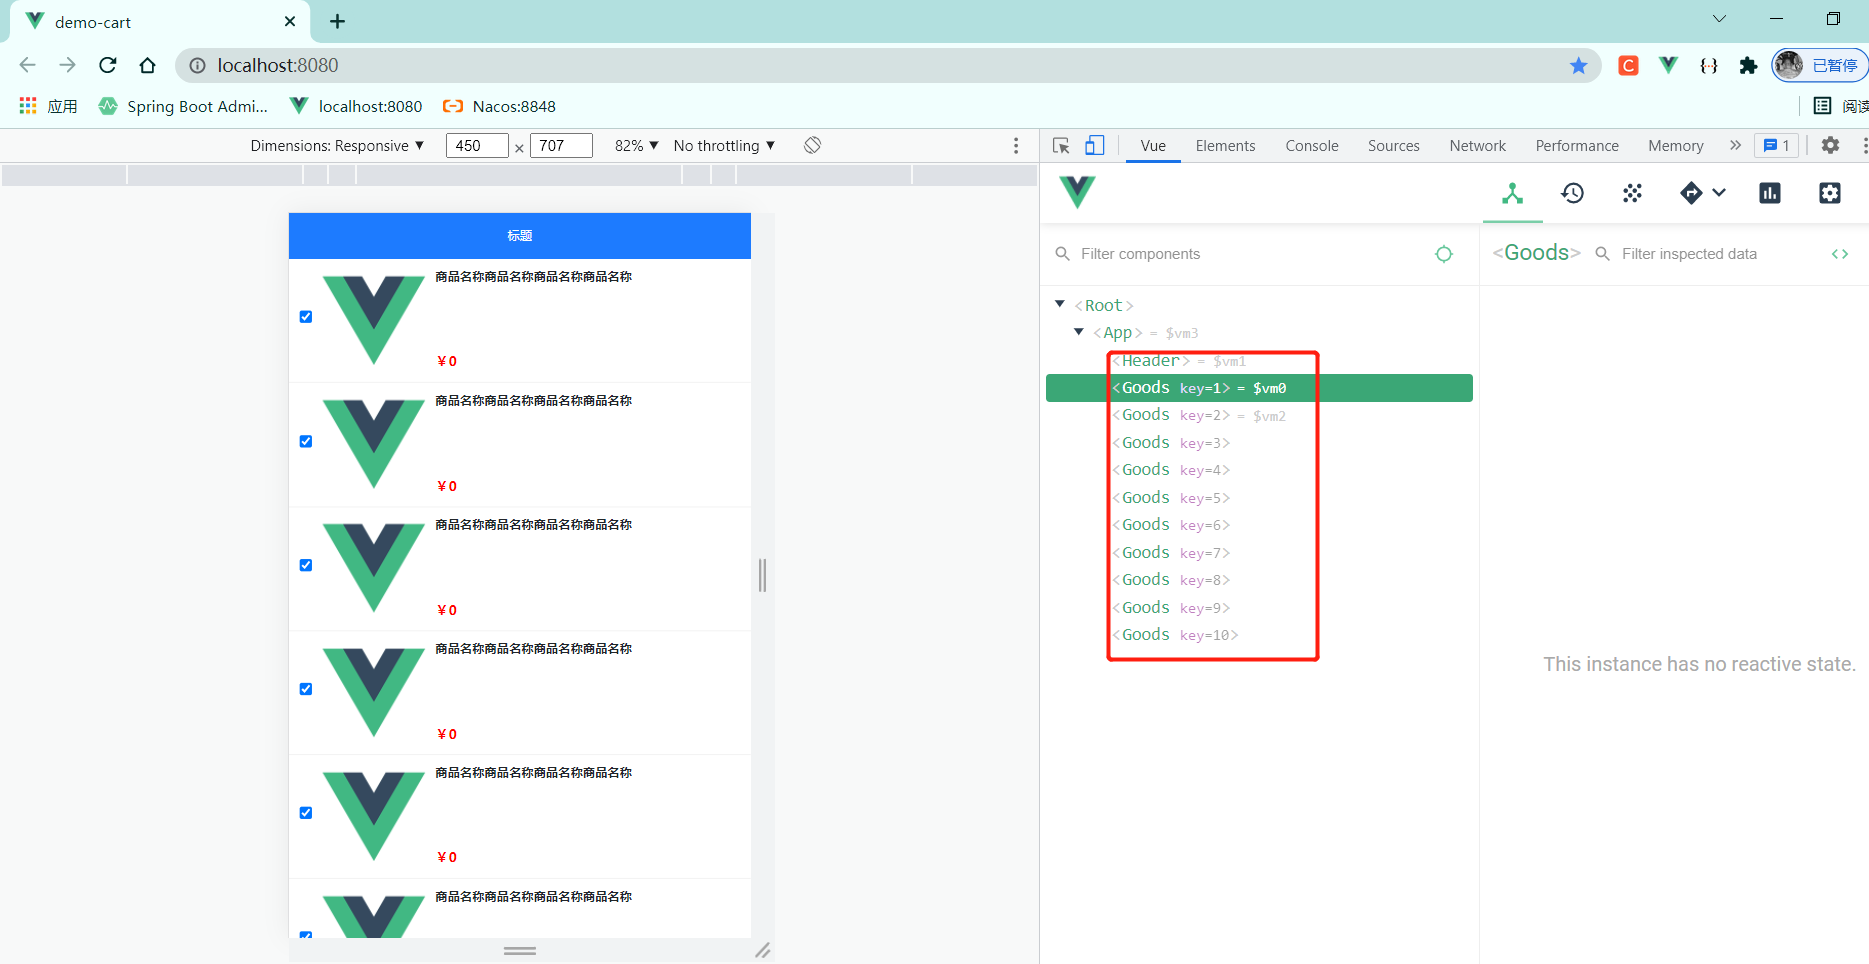
4 循环渲染商品信息
4-1 初步实现

<template>
  <div class="goods-container">
    <!-- 左侧图片 -->
    <div class="thumb">
      <div class="custom-control custom-checkbox">
        <!-- 复选框 -->
        <input type="checkbox" class="custom-control-input" id="cb1" :checked="true" />
        <label class="custom-control-label" for="cb1">
          <!-- 商品的缩略图 -->
          <img src="../../assets/logo.png" alt="" />
        </label>
      </div>
    </div>
    <!-- 右侧信息区域 -->
    <div class="goods-info">
      <!-- 商品标题 -->
      <h6 class="goods-title">商品名称商品名称商品名称商品名称</h6>
      <div class="goods-info-bottom">
        <!-- 商品价格 -->
        <span class="goods-price">¥0</span>
        <!-- 商品的数量 -->
      </div>
    </div>
  </div>
</template>

<script>
export default {}
</script>

<style lang="less" scoped>
.goods-container {
  + .goods-container {
    border-top: 1px solid #efefef;
  }
  padding: 10px;
  display: flex;
  .thumb {
    display: flex;
    align-items: center;
    img {
      width: 100px;
      height: 100px;
      margin: 0 10px;
    }
  }

  .goods-info {
    display: flex;
    flex-direction: column;
    justify-content: space-between;
    flex: 1;
    .goods-title {
      font-weight: bold;
      font-size: 12px;
    }
    .goods-info-bottom {
      display: flex;
      justify-content: space-between;
      .goods-price {
        font-weight: bold;
        color: red;
        font-size: 13px;
      }
    }
  }
}
</style>
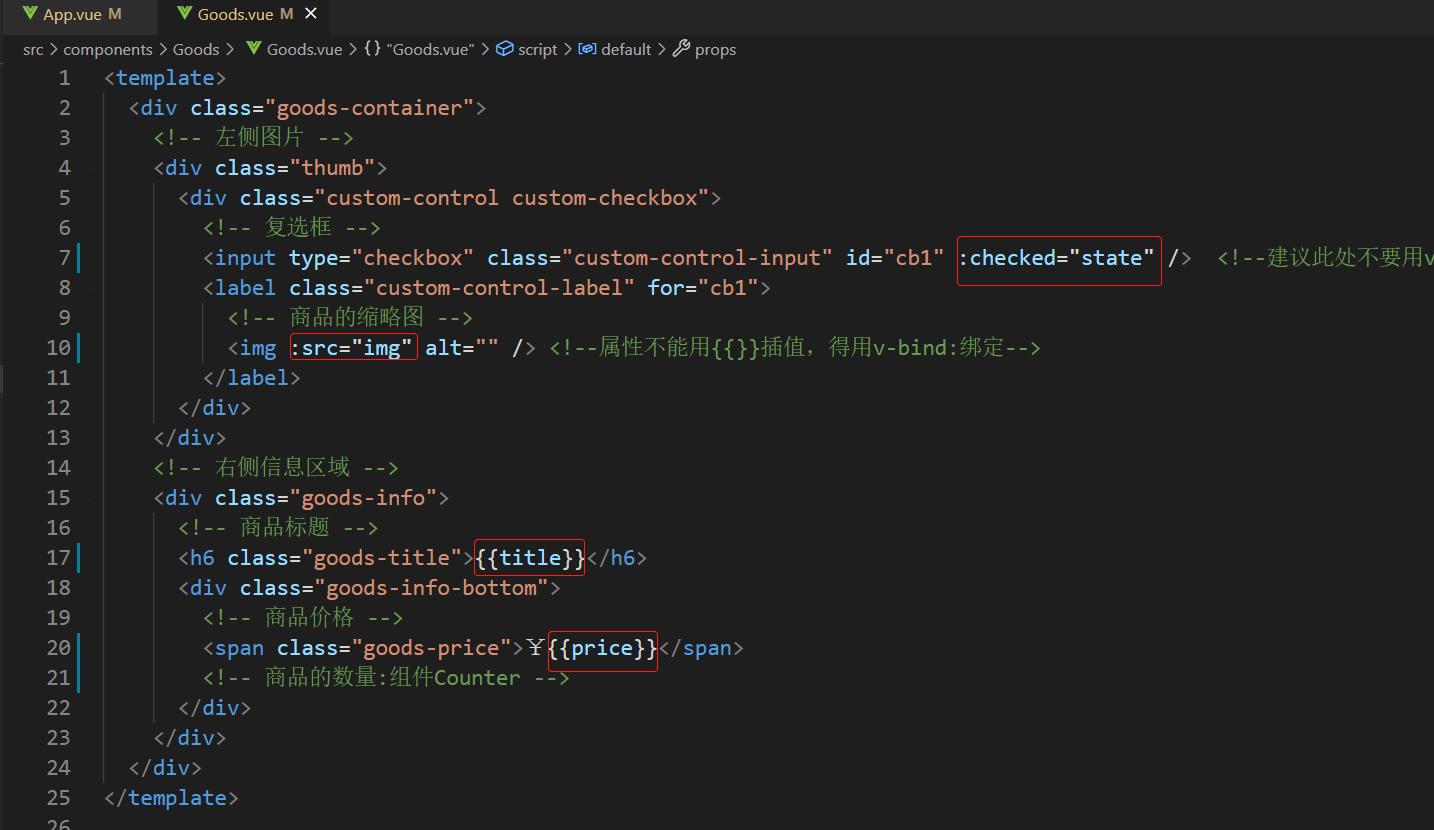
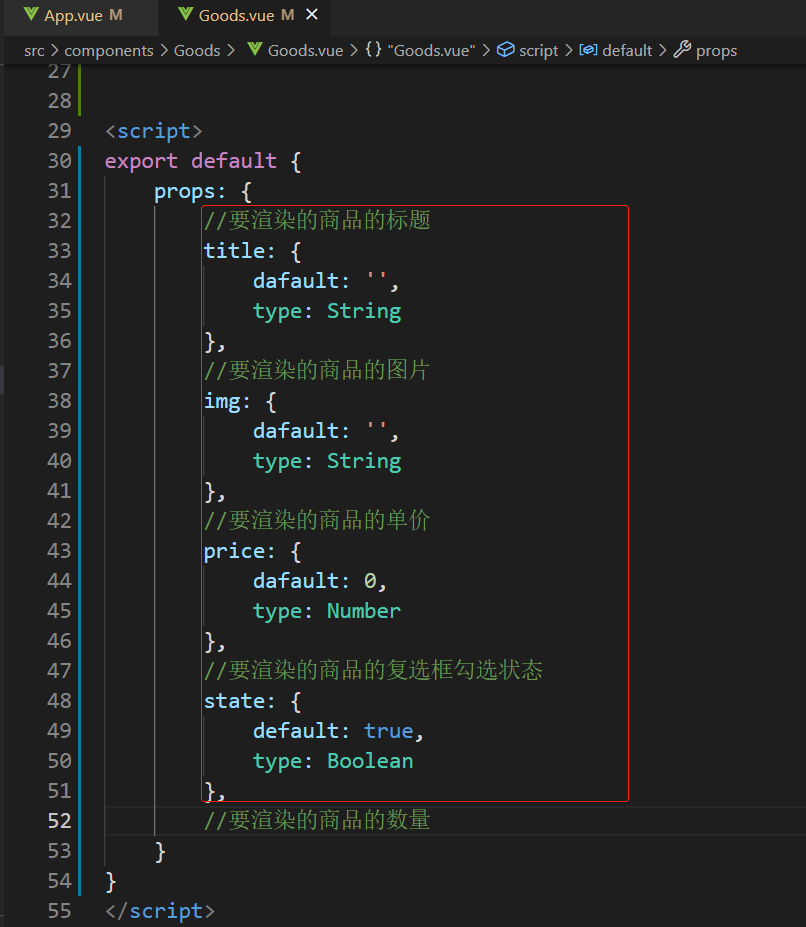
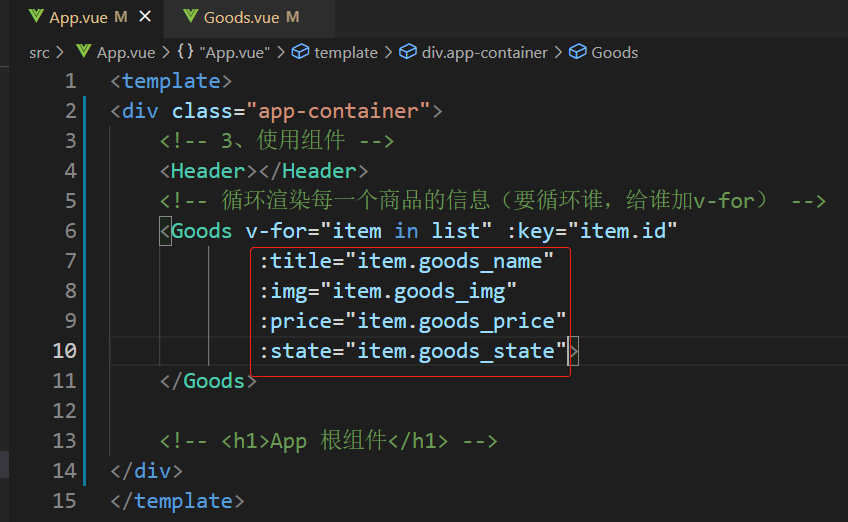
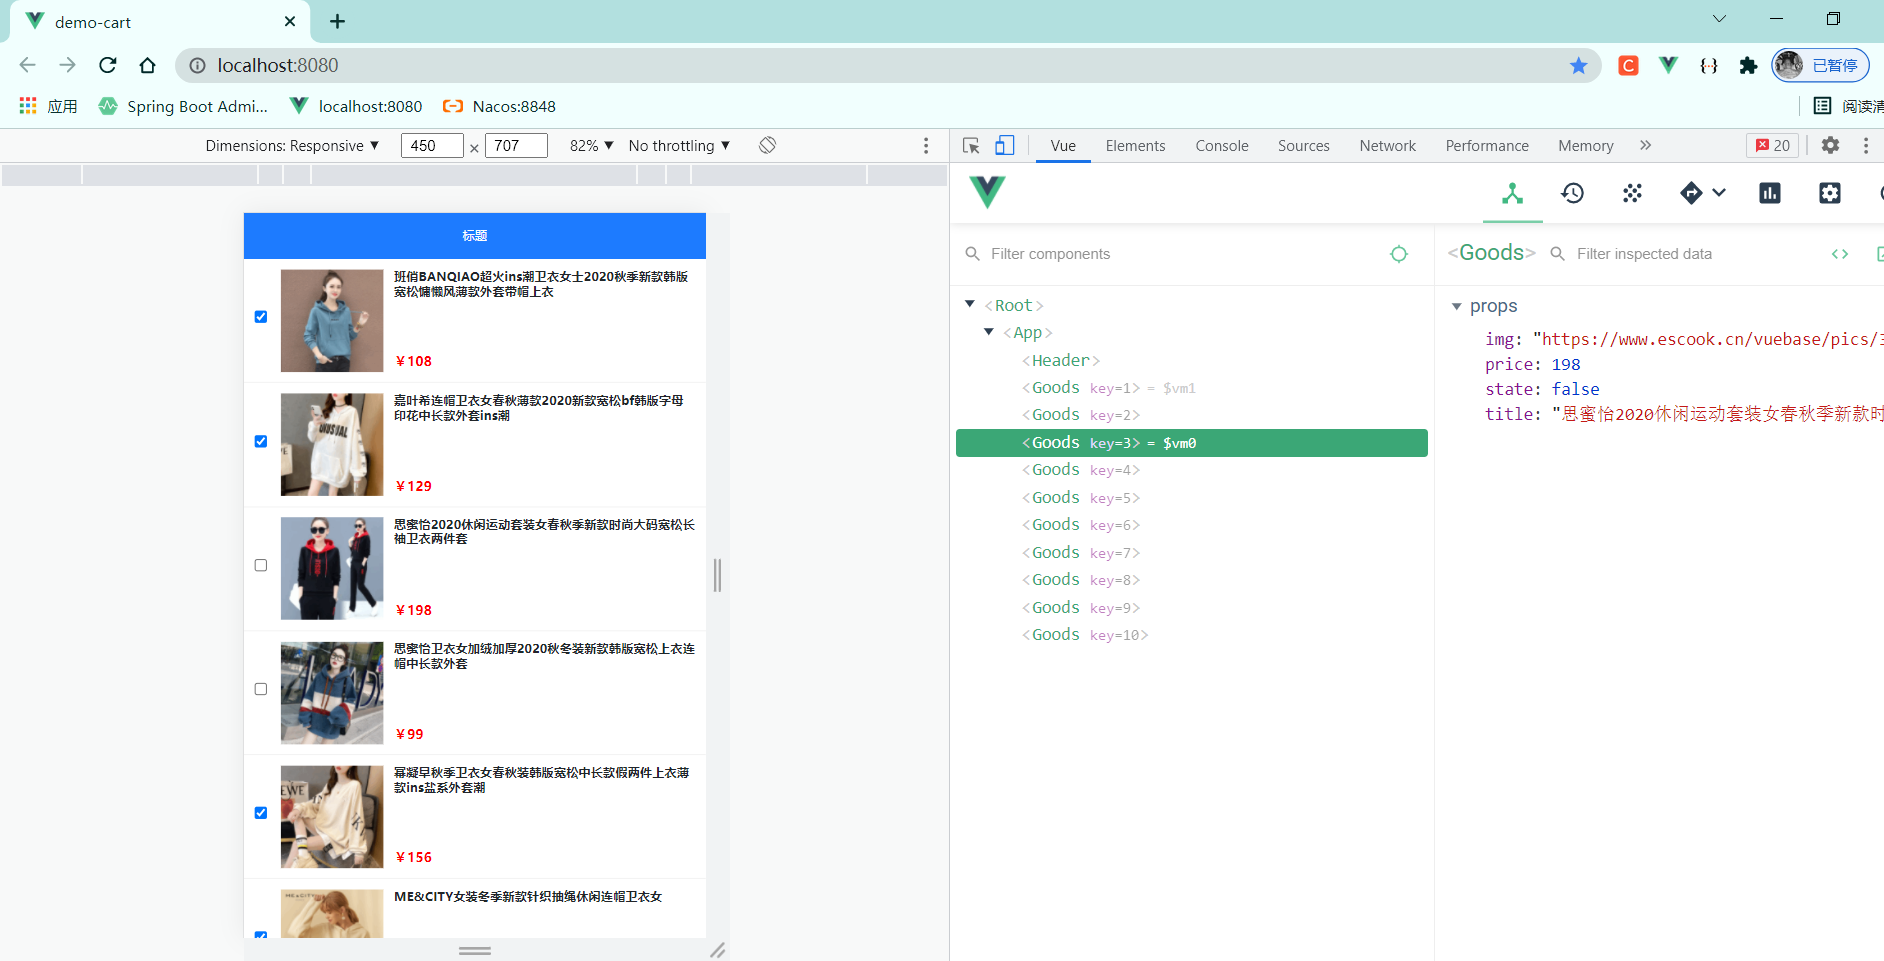
4-2 为Goods组件封装商品的相关信息
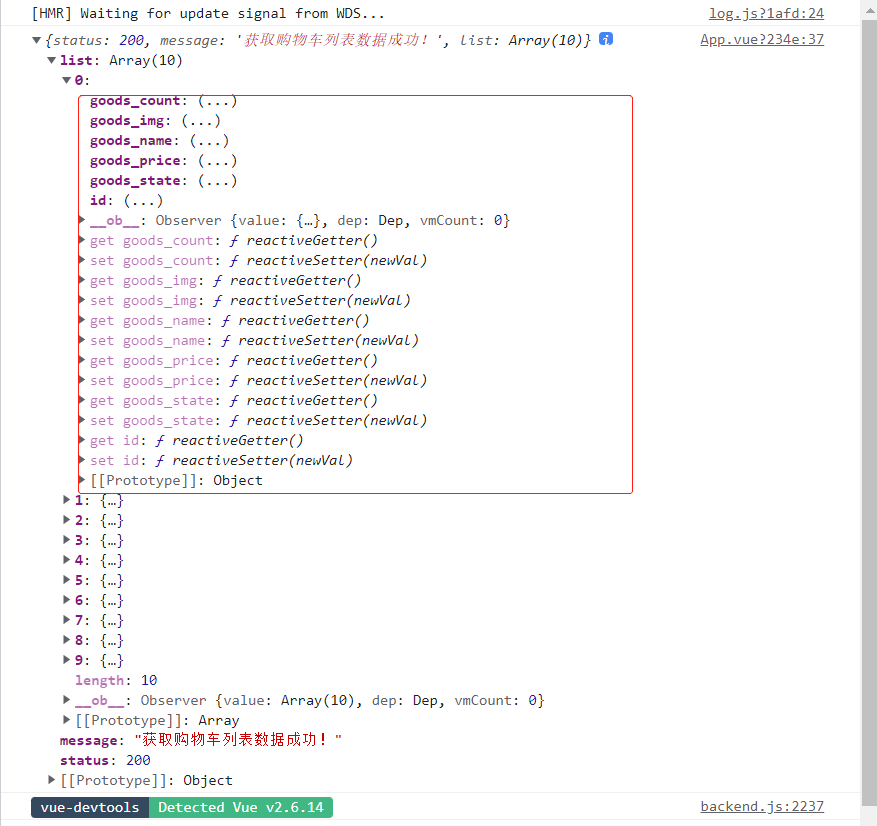
父组件向子组件传值---自定义属性 (props、v-bind、{{}})
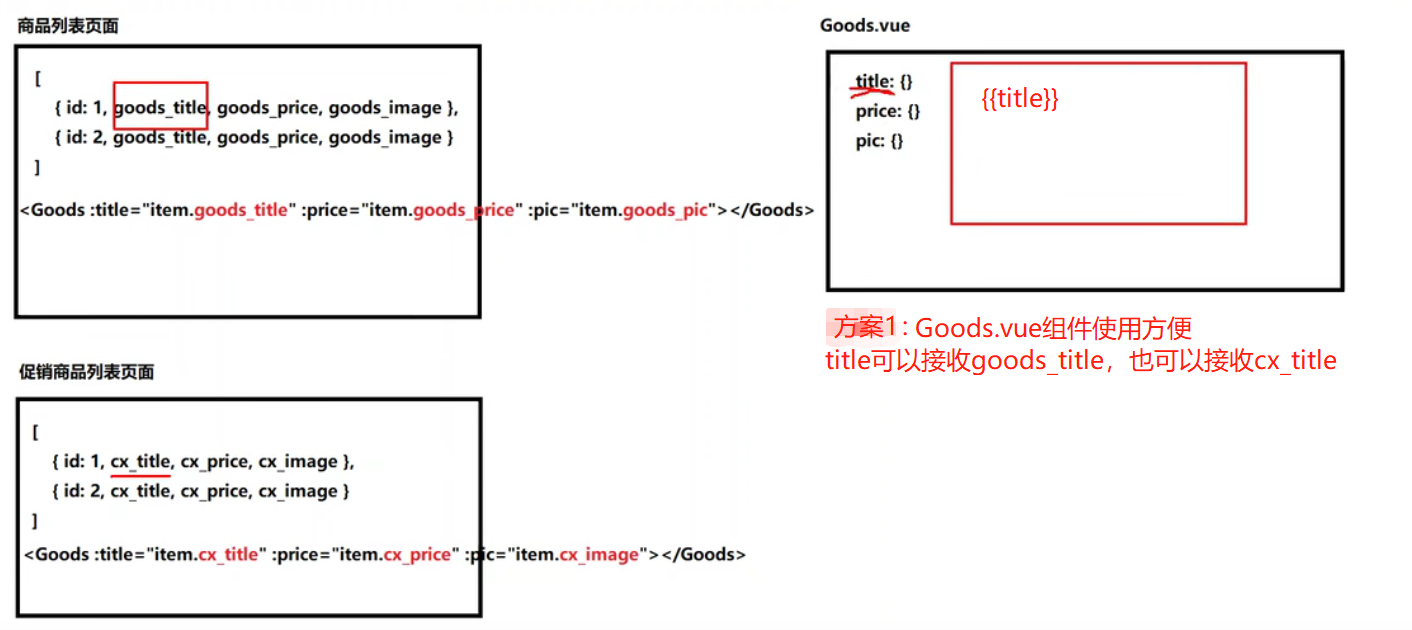
4-3 props两种封装方案的优缺点对比分析
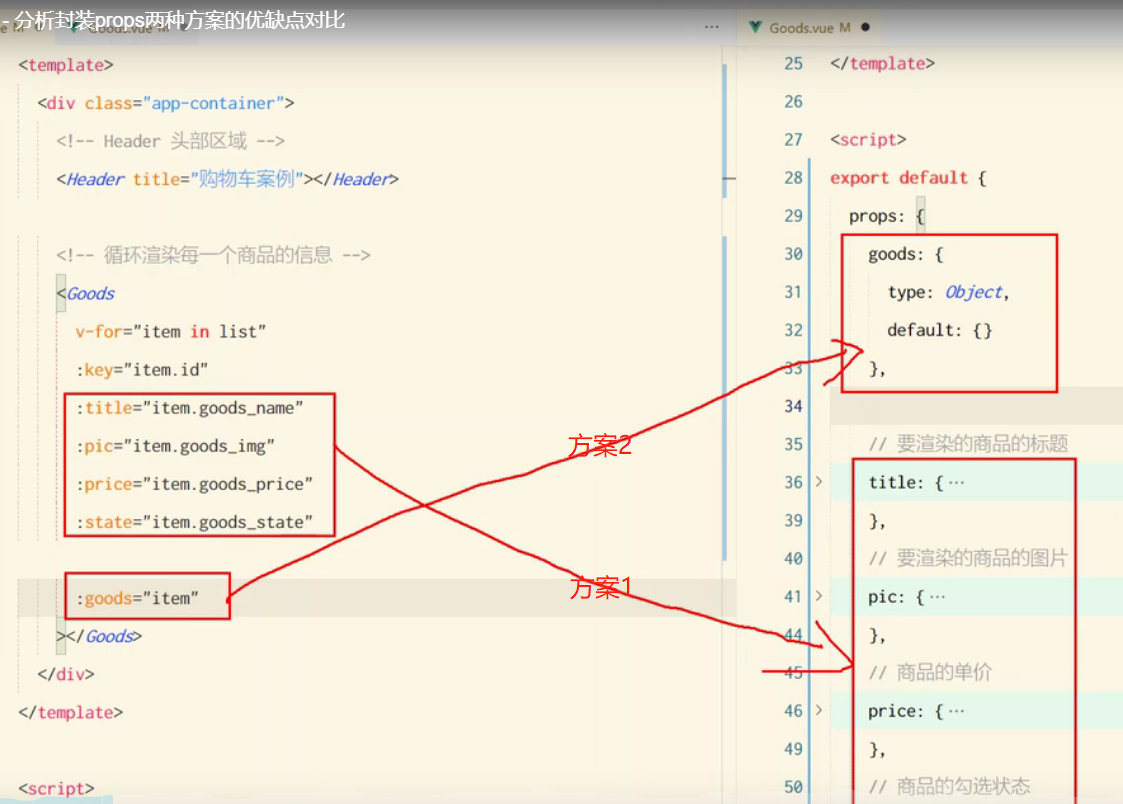
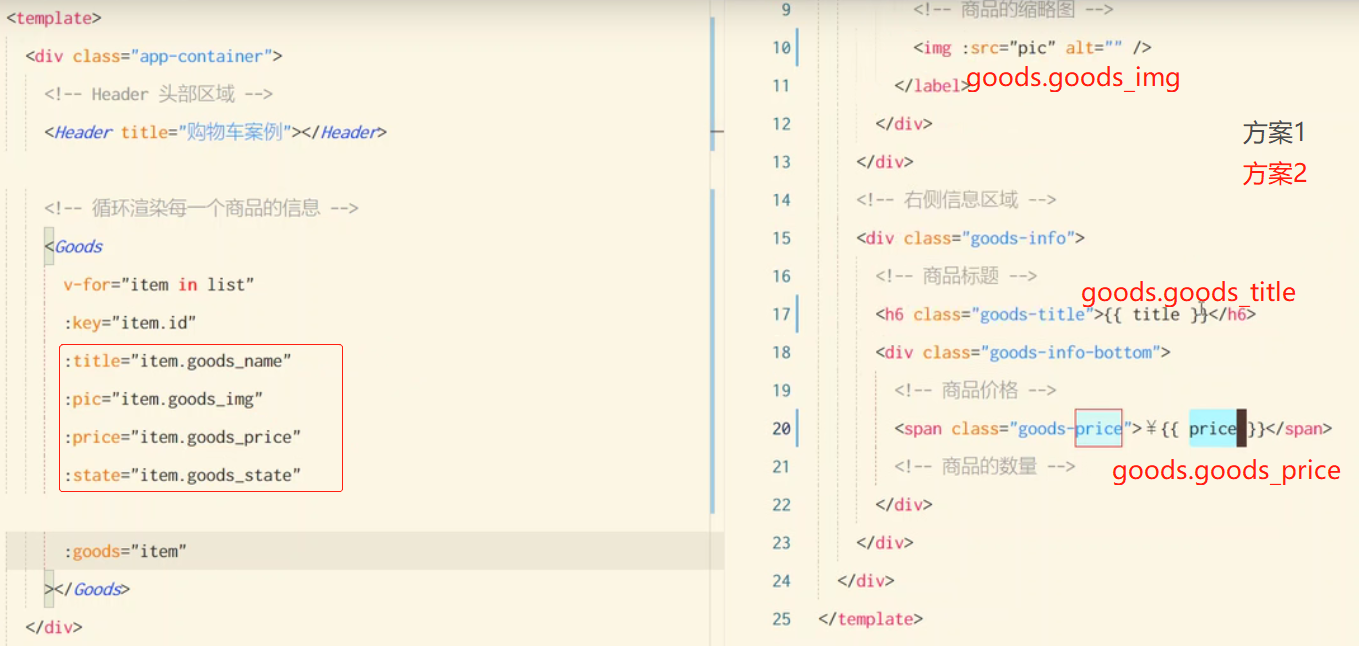
方案1好
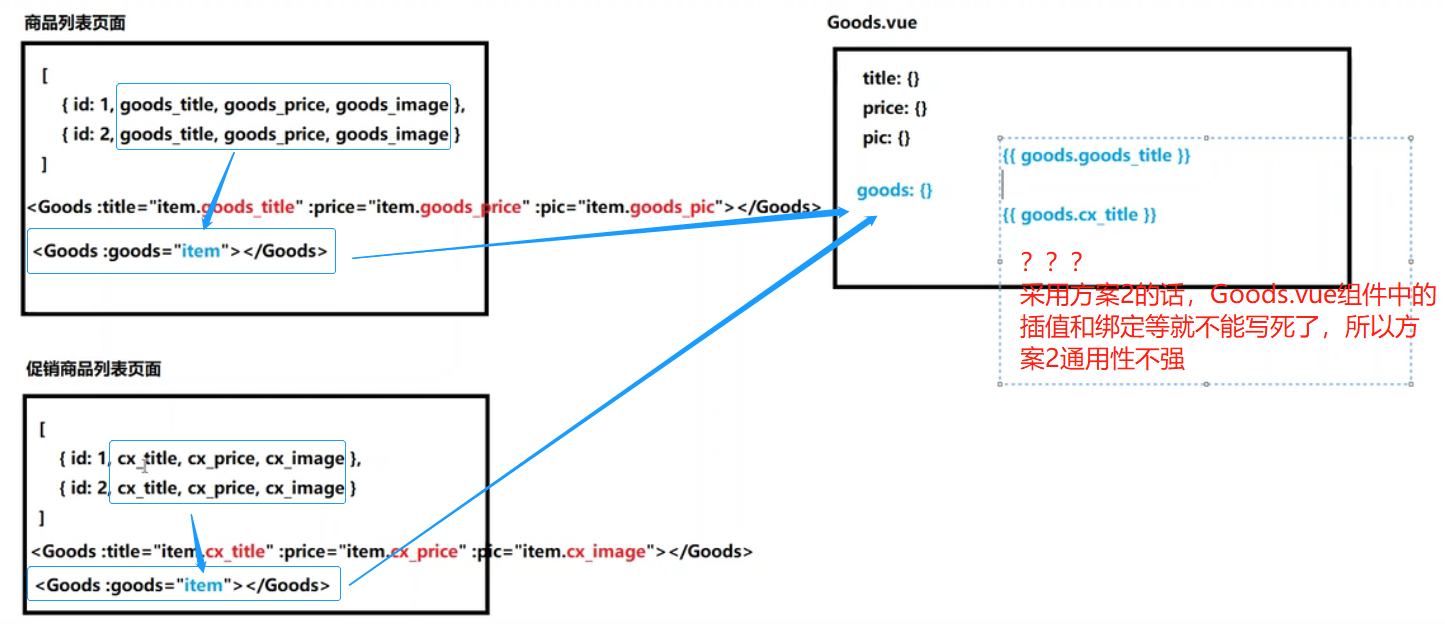
5 修改商品的勾选状态
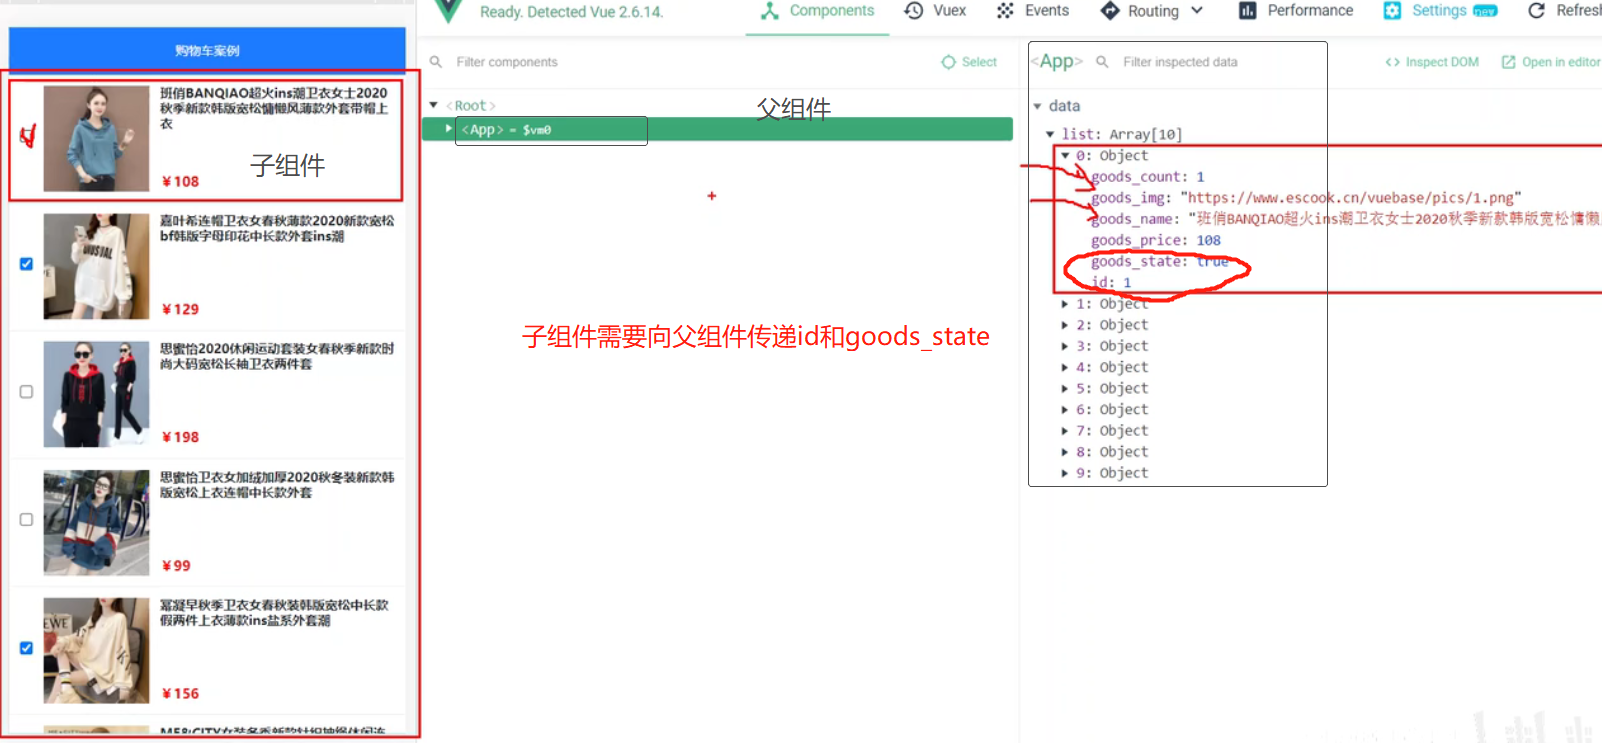
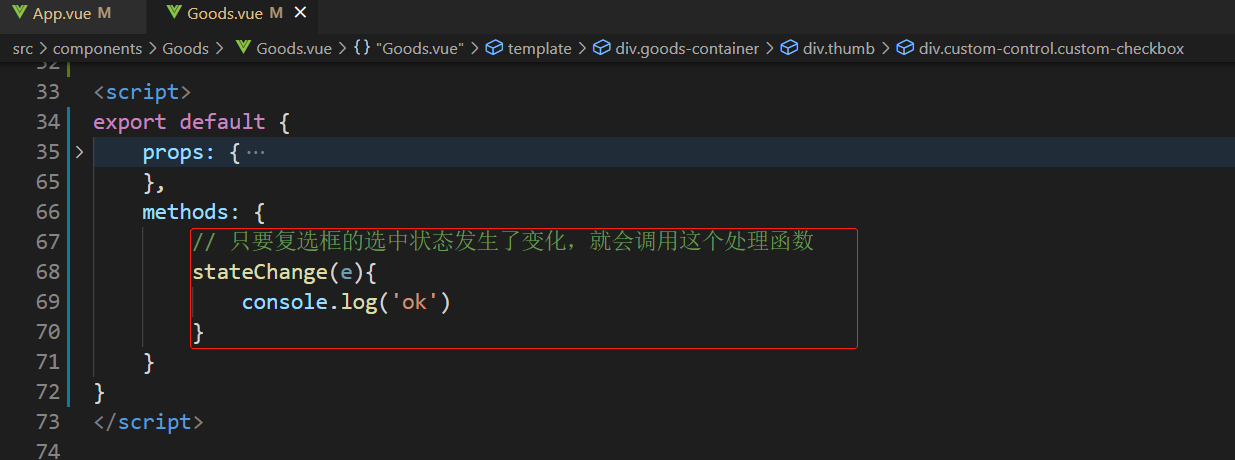
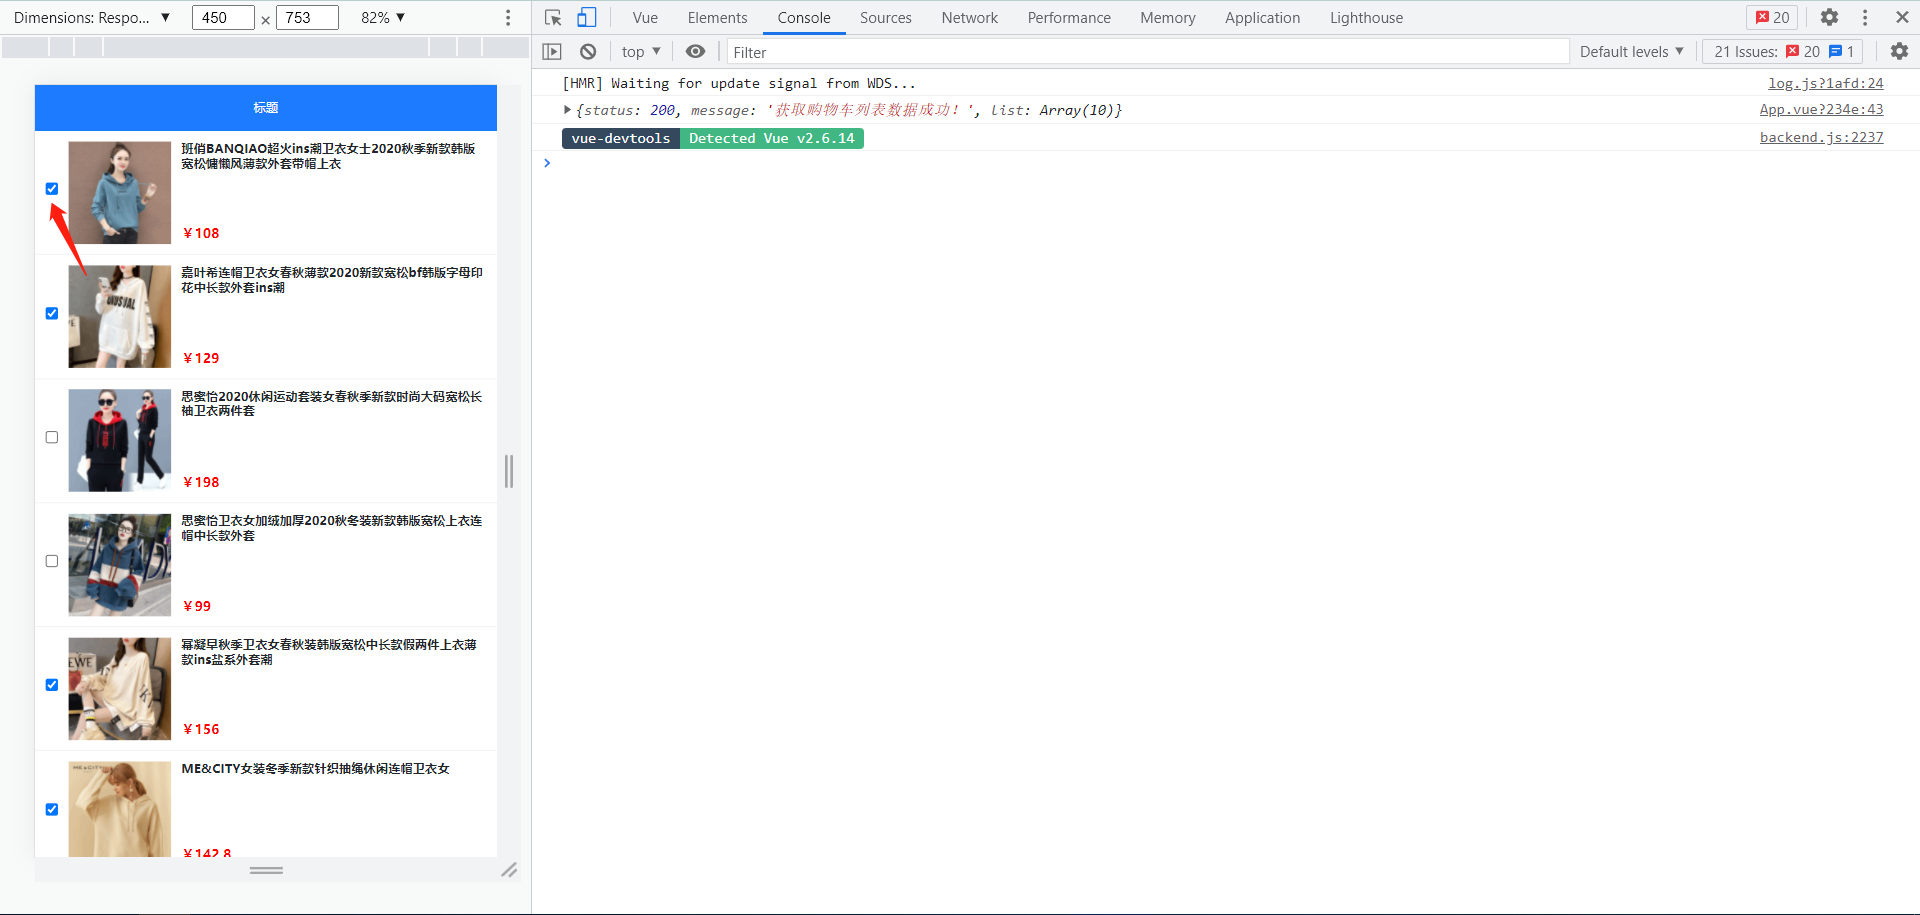
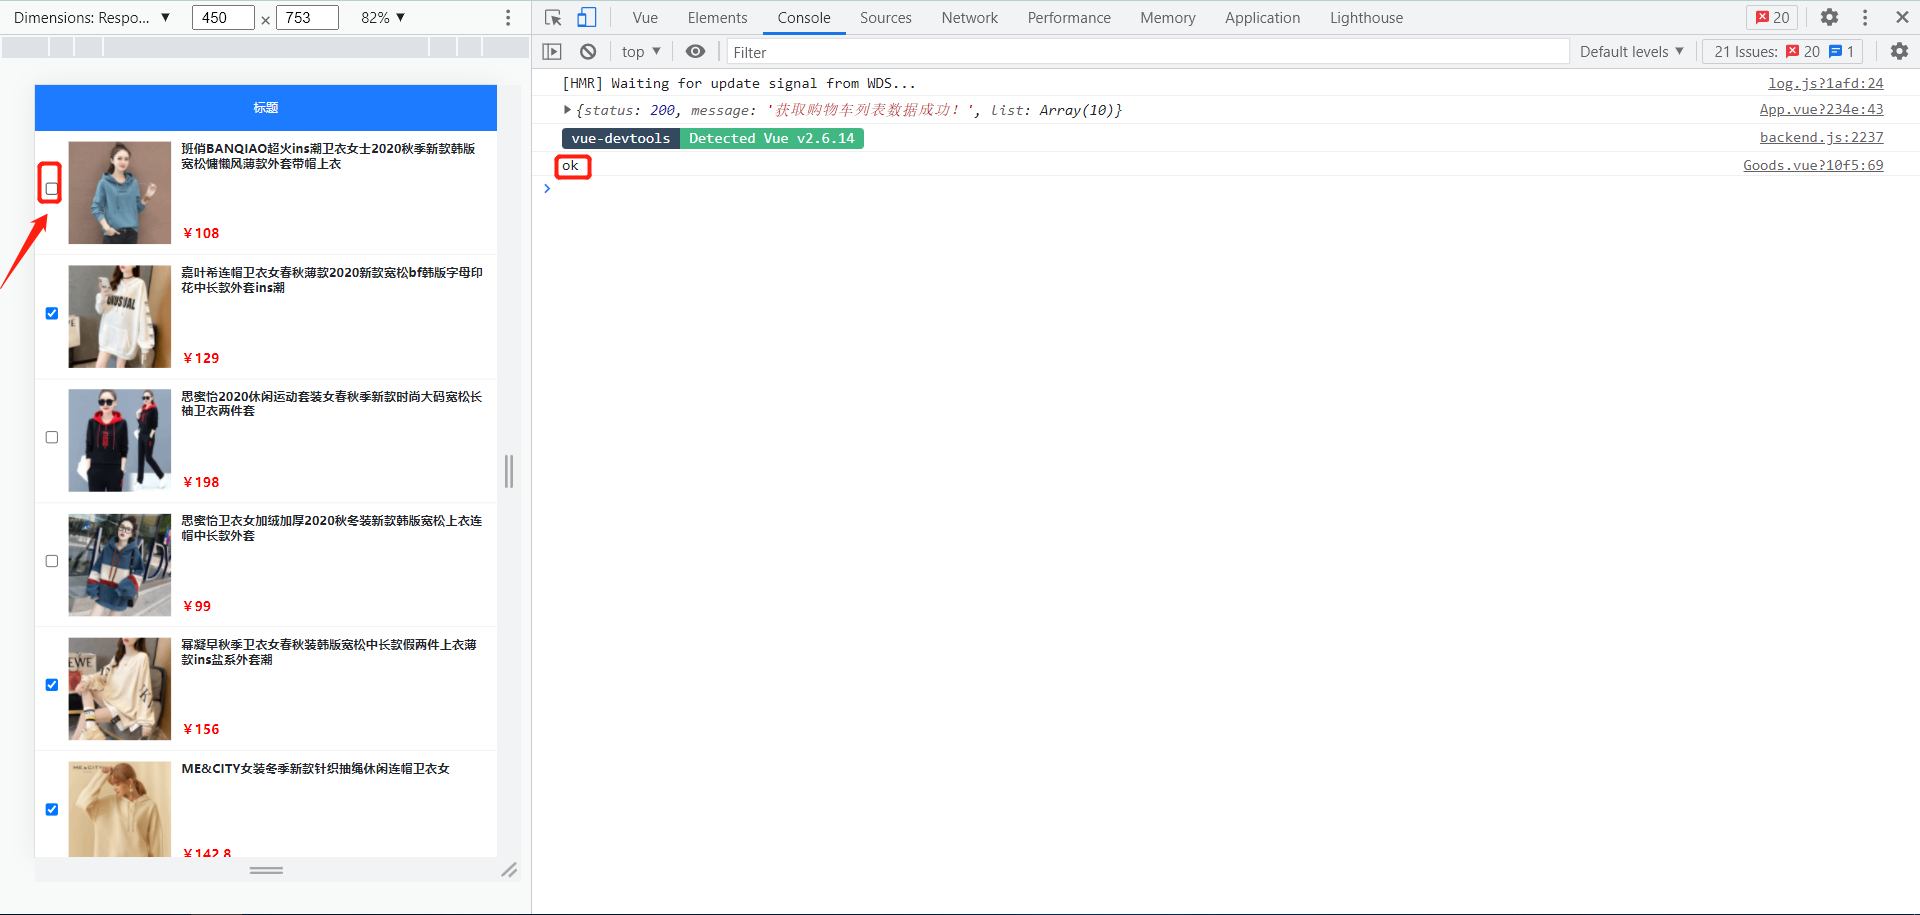
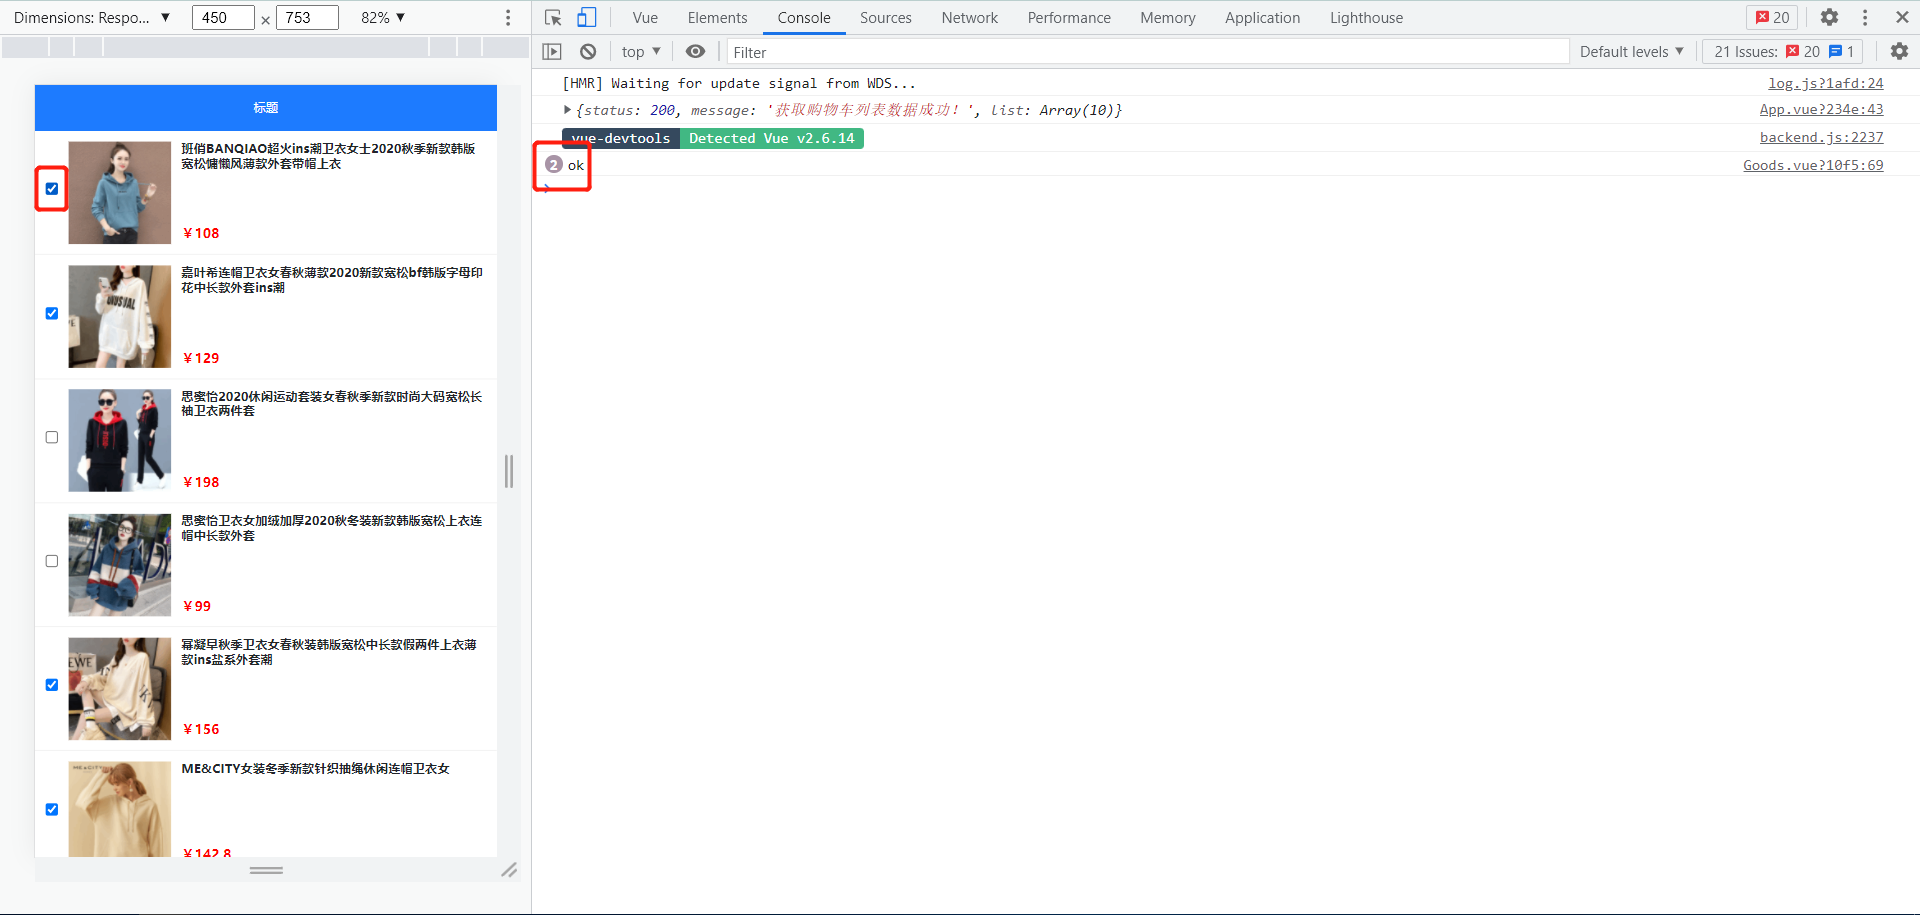
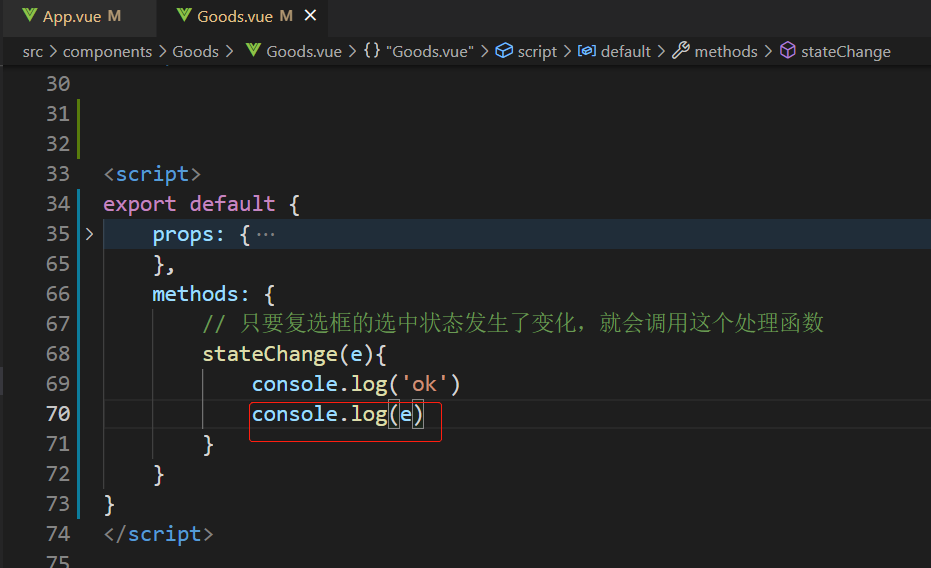
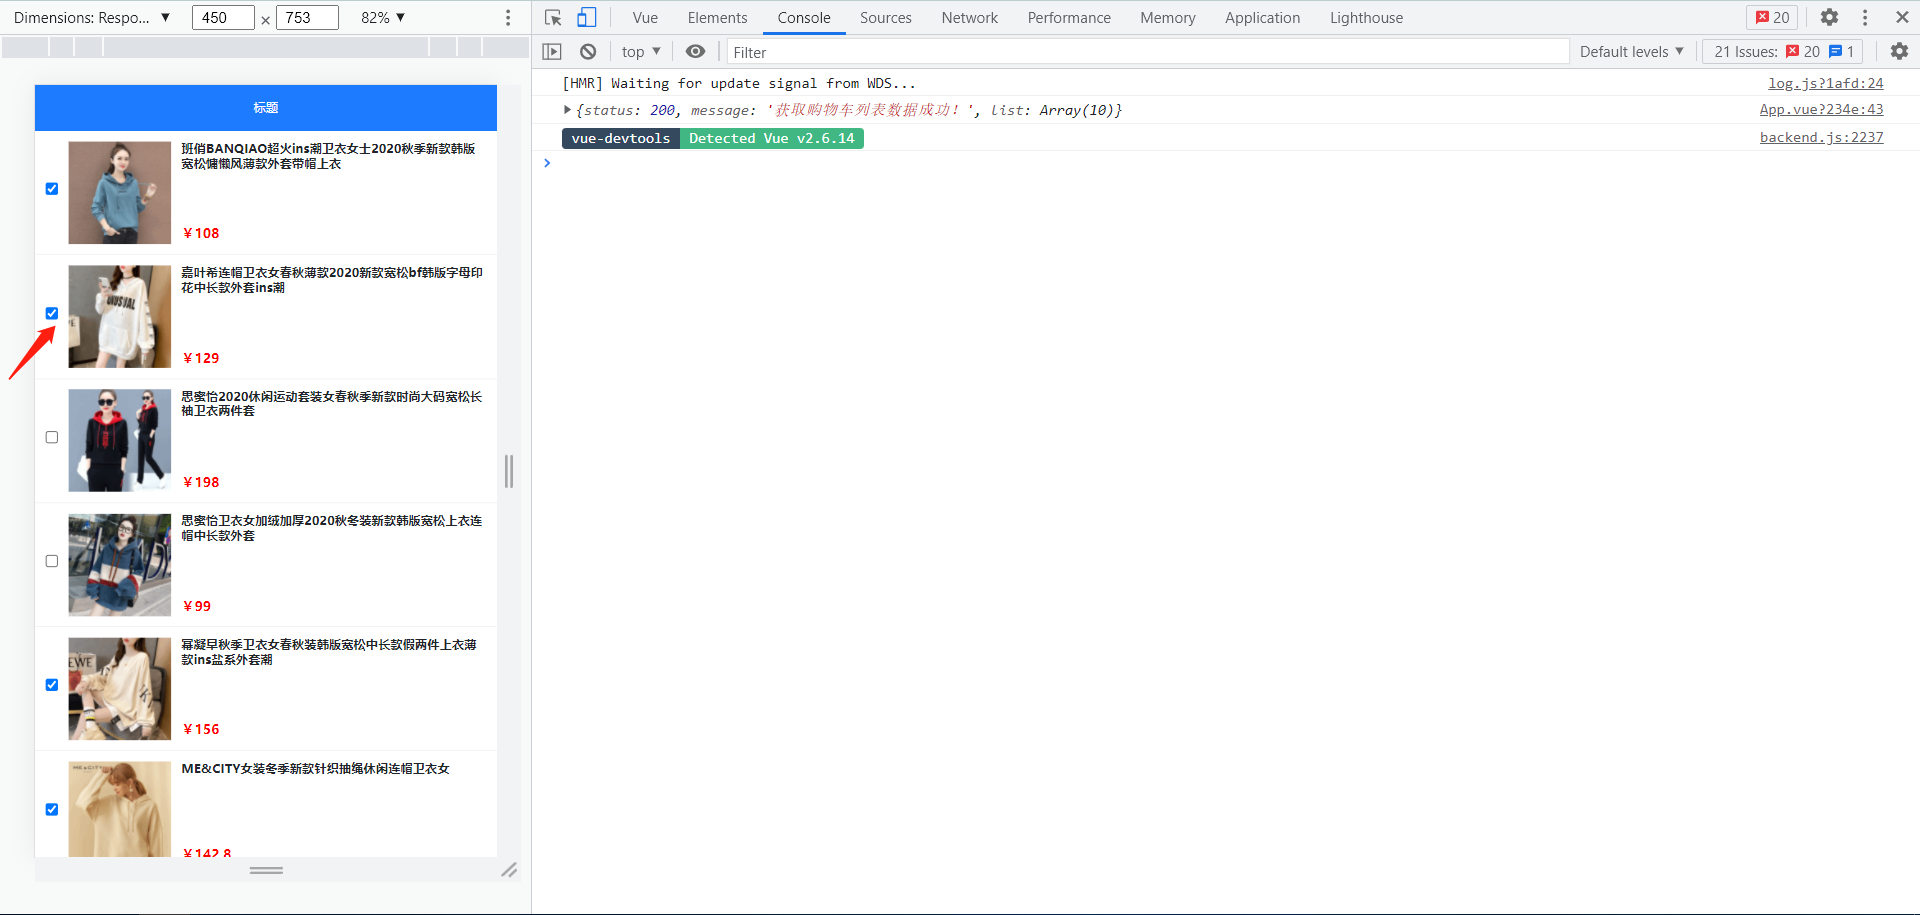
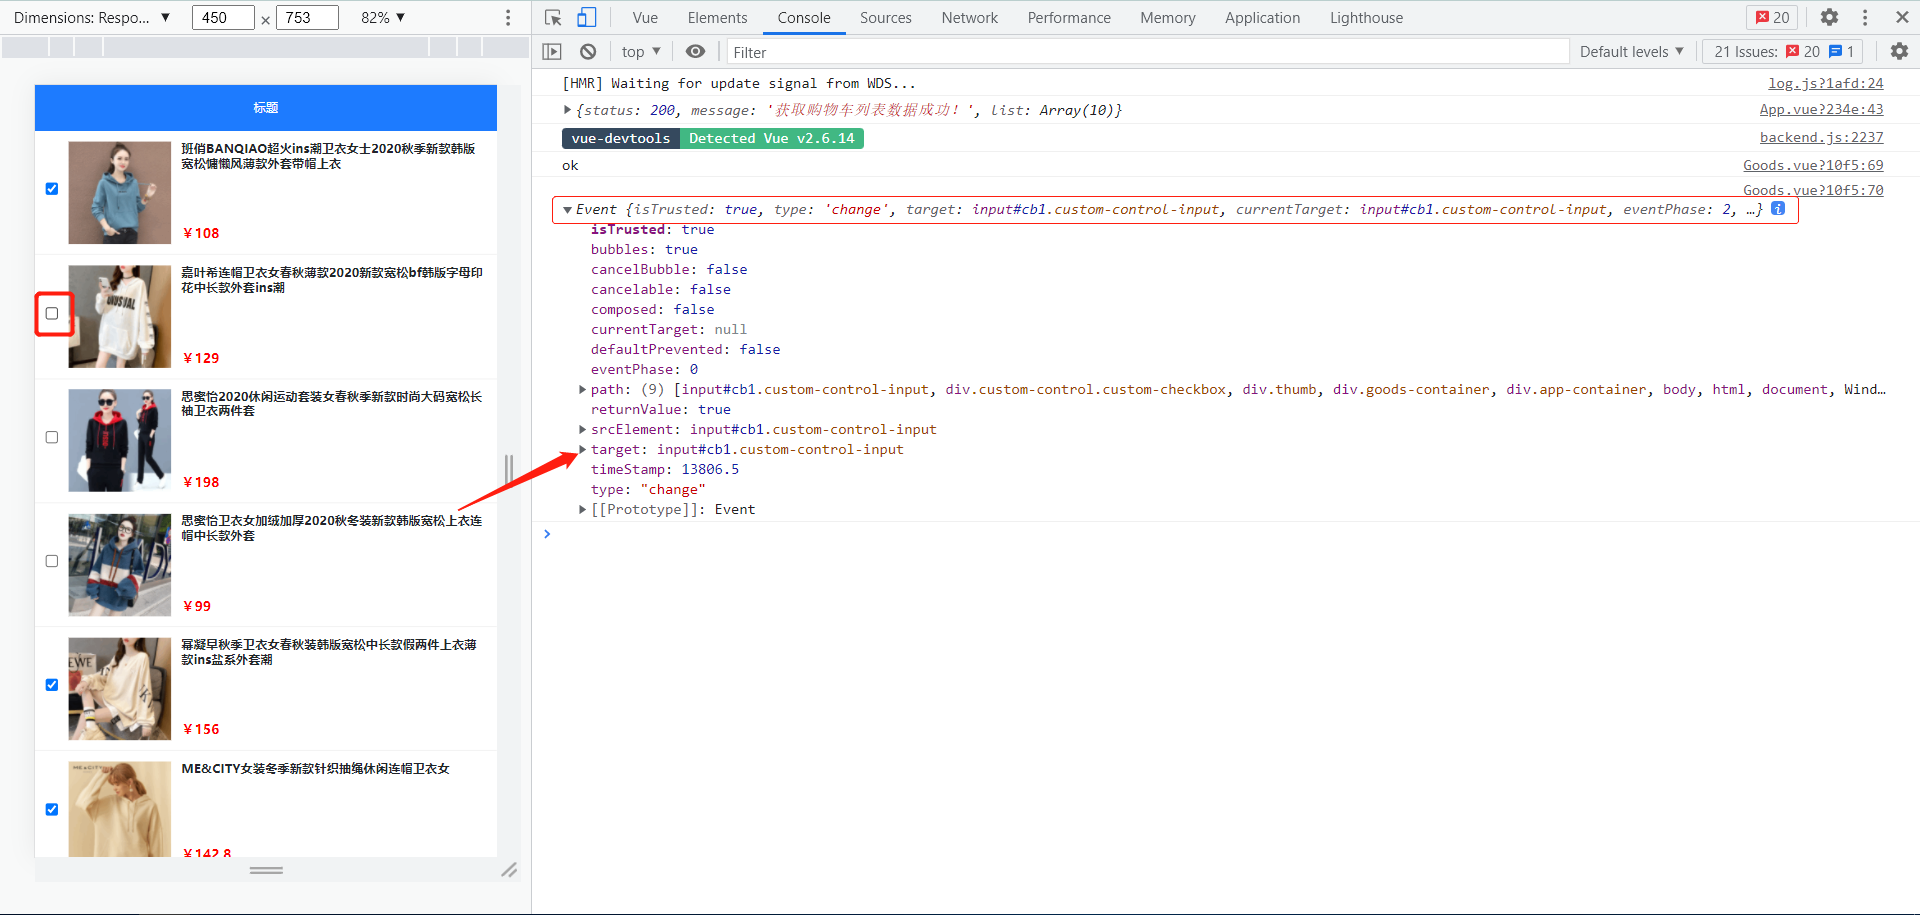
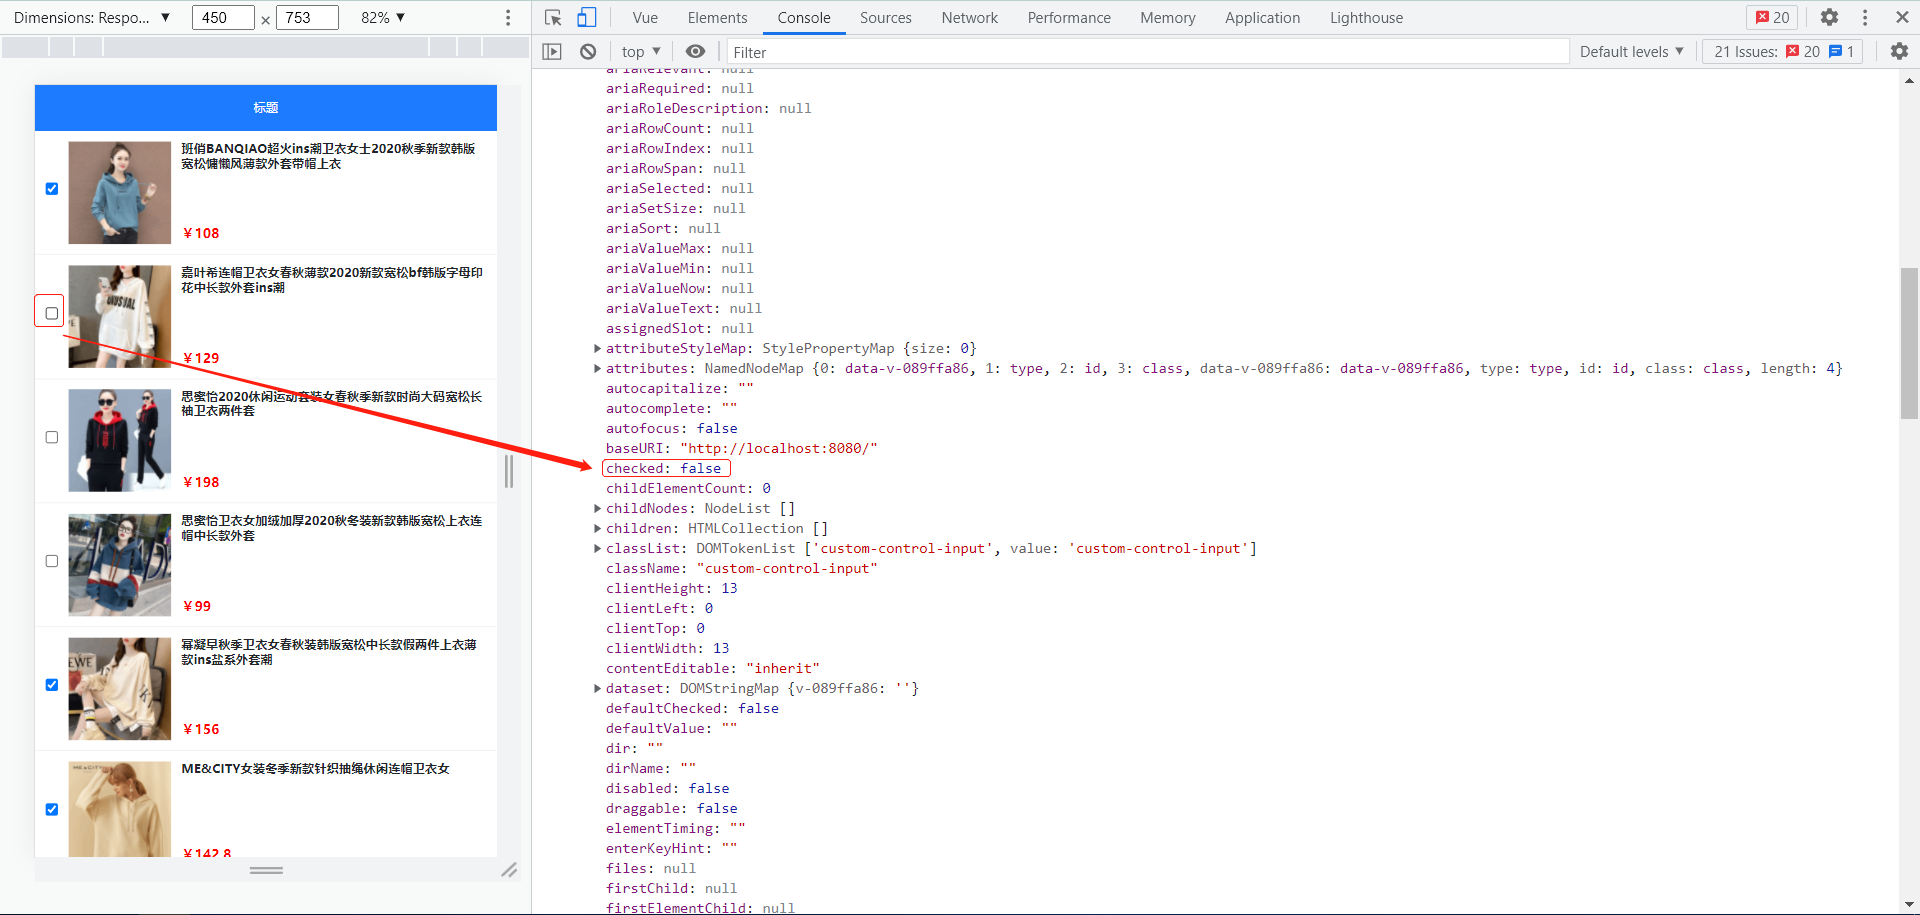
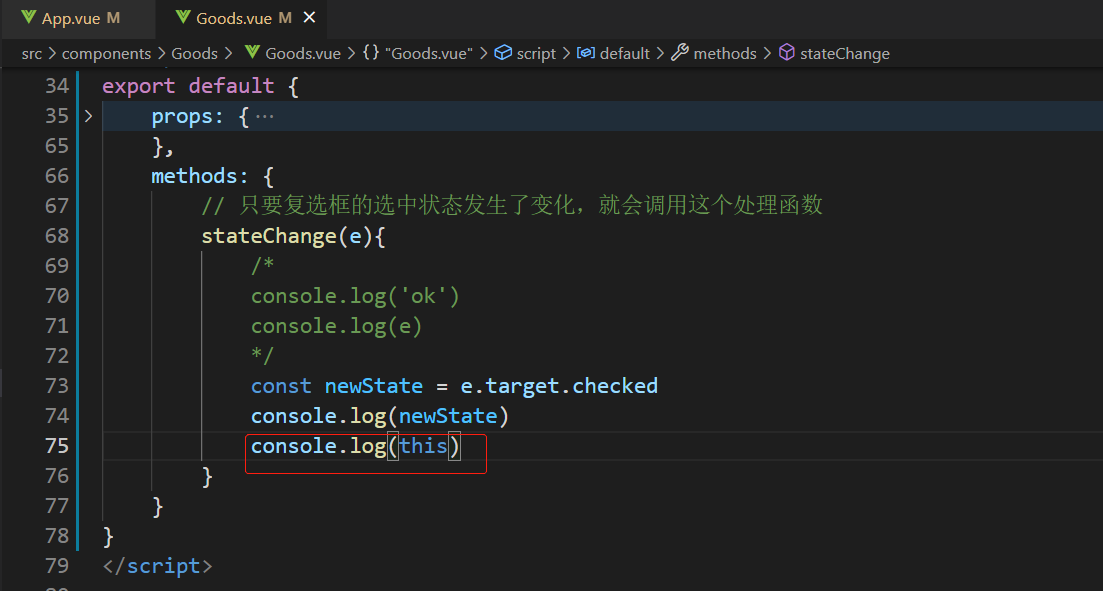
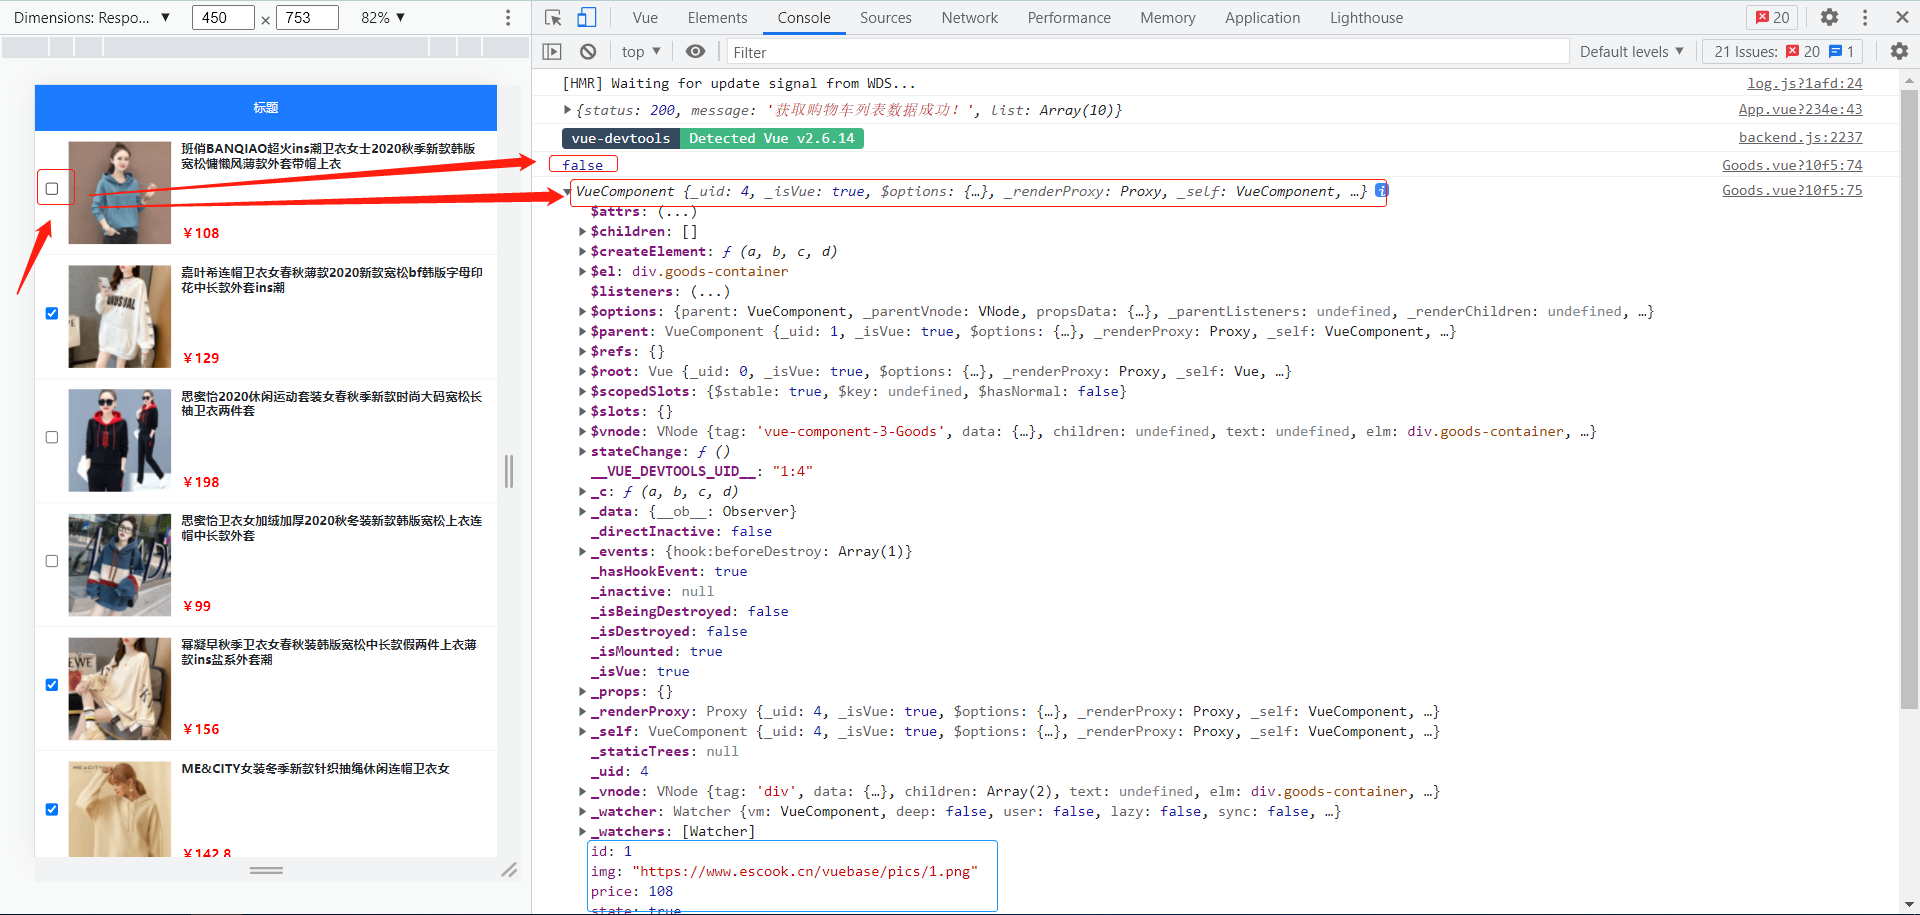
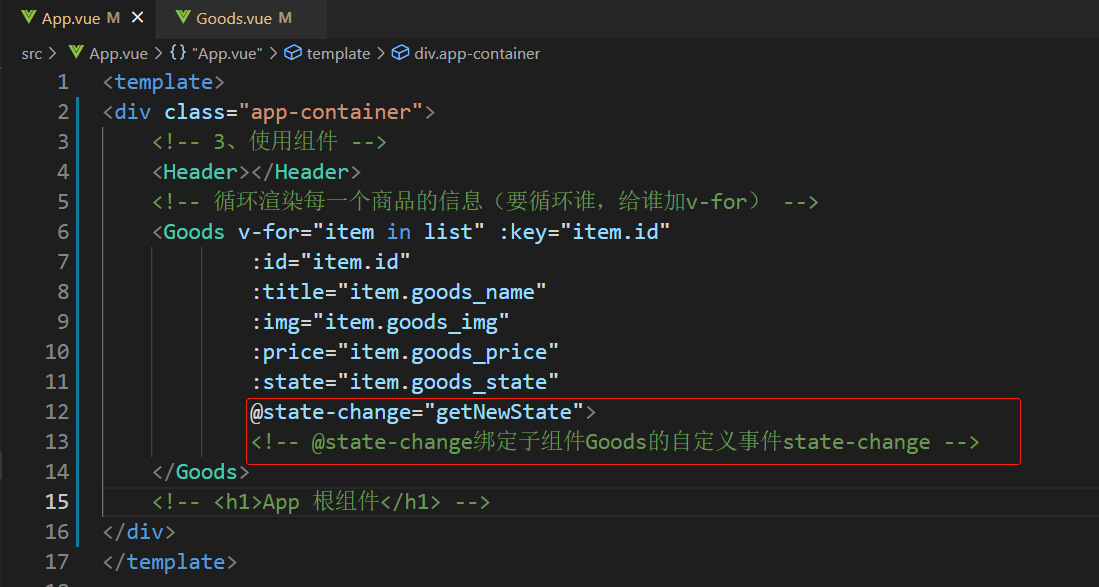
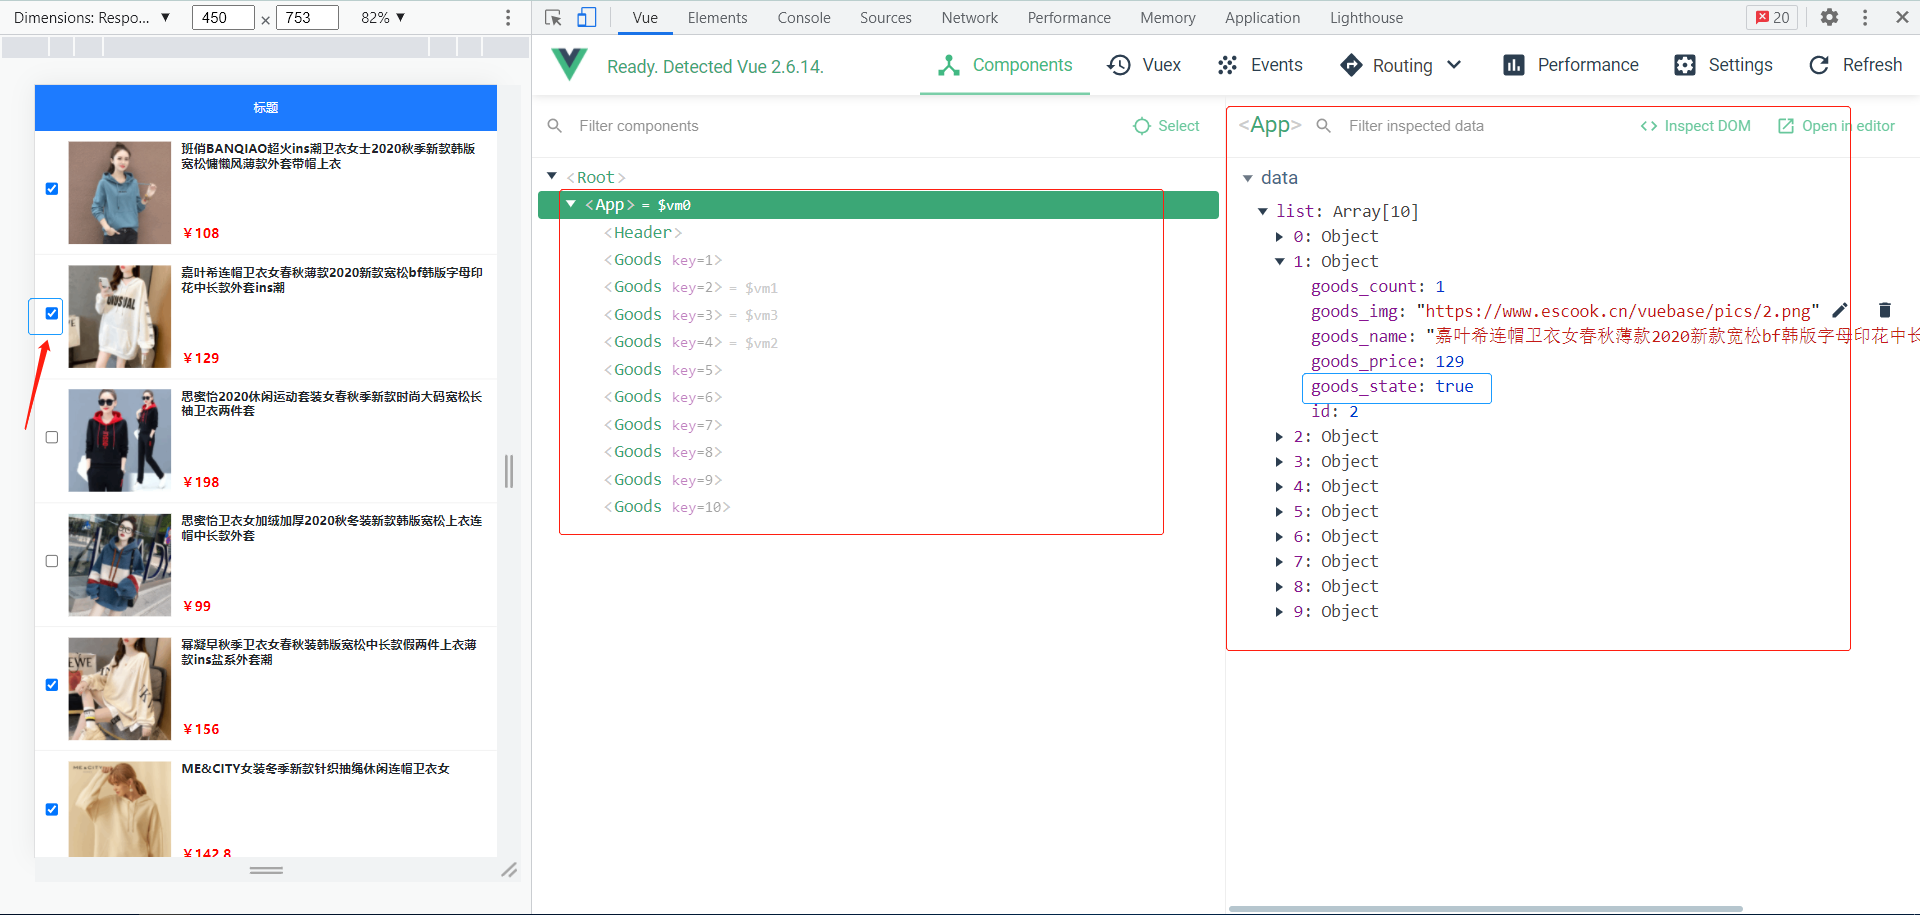
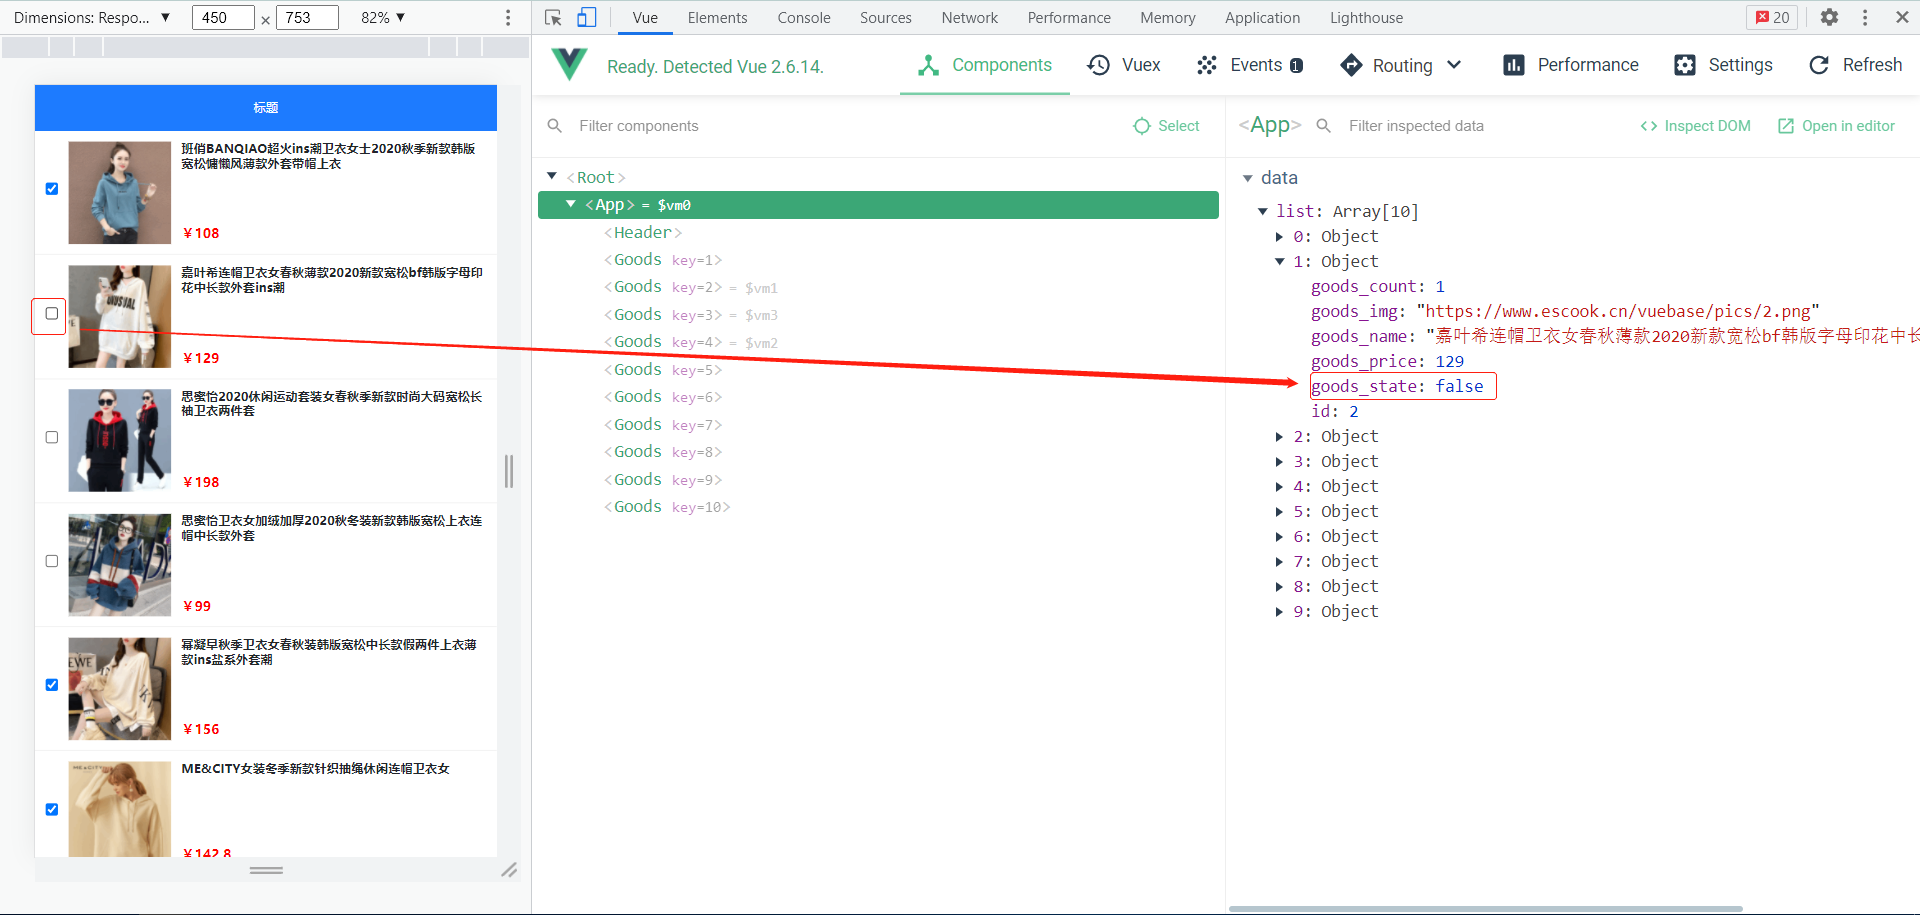
5-1 问题分析
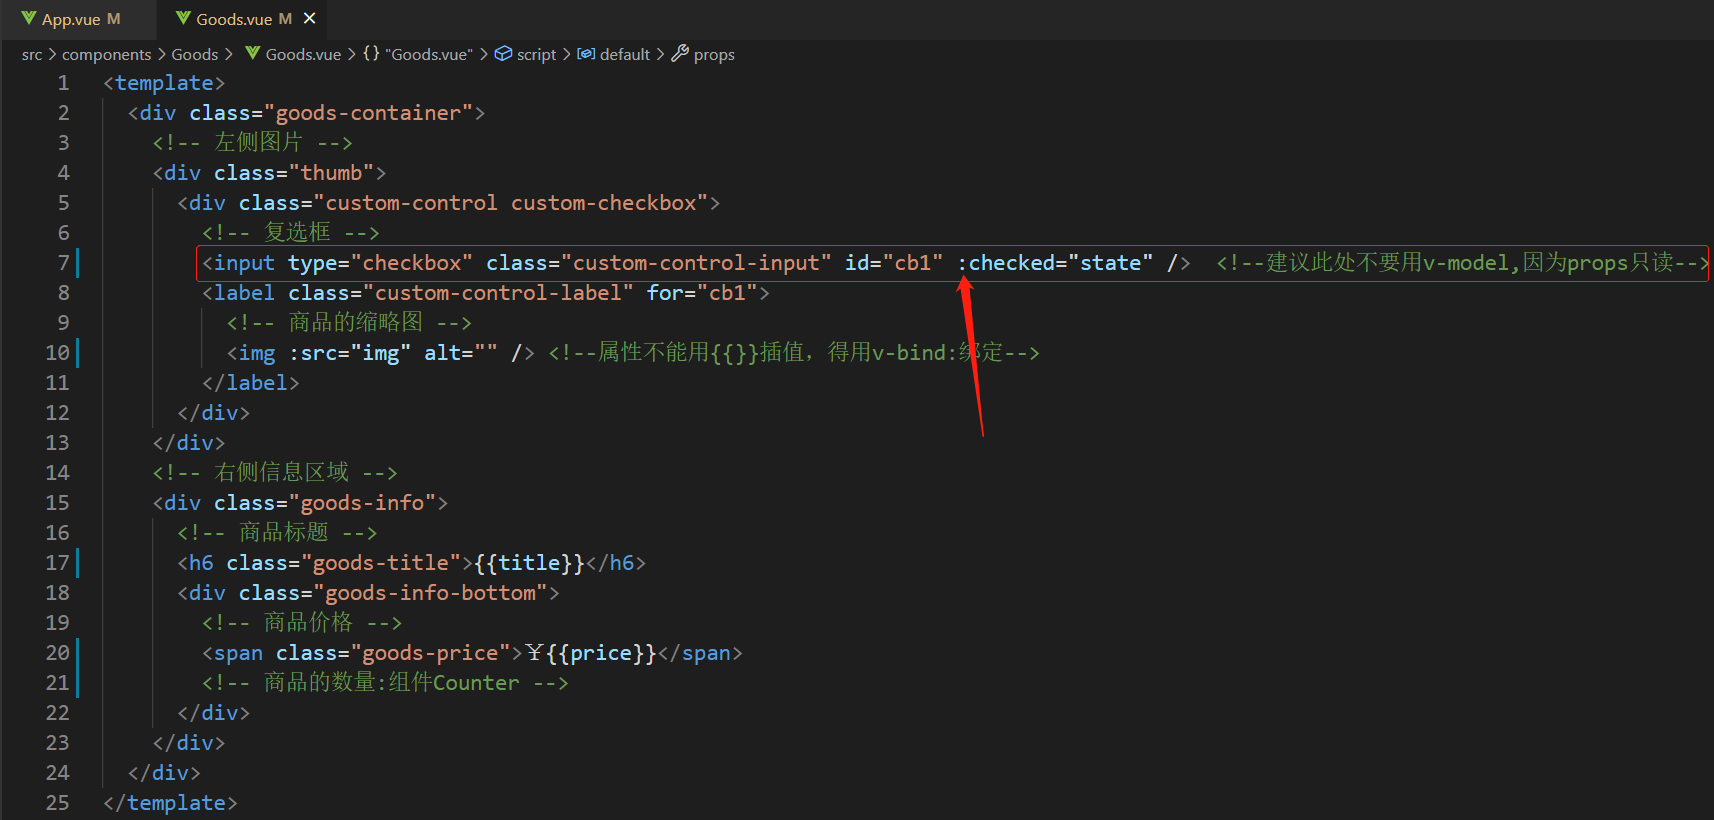
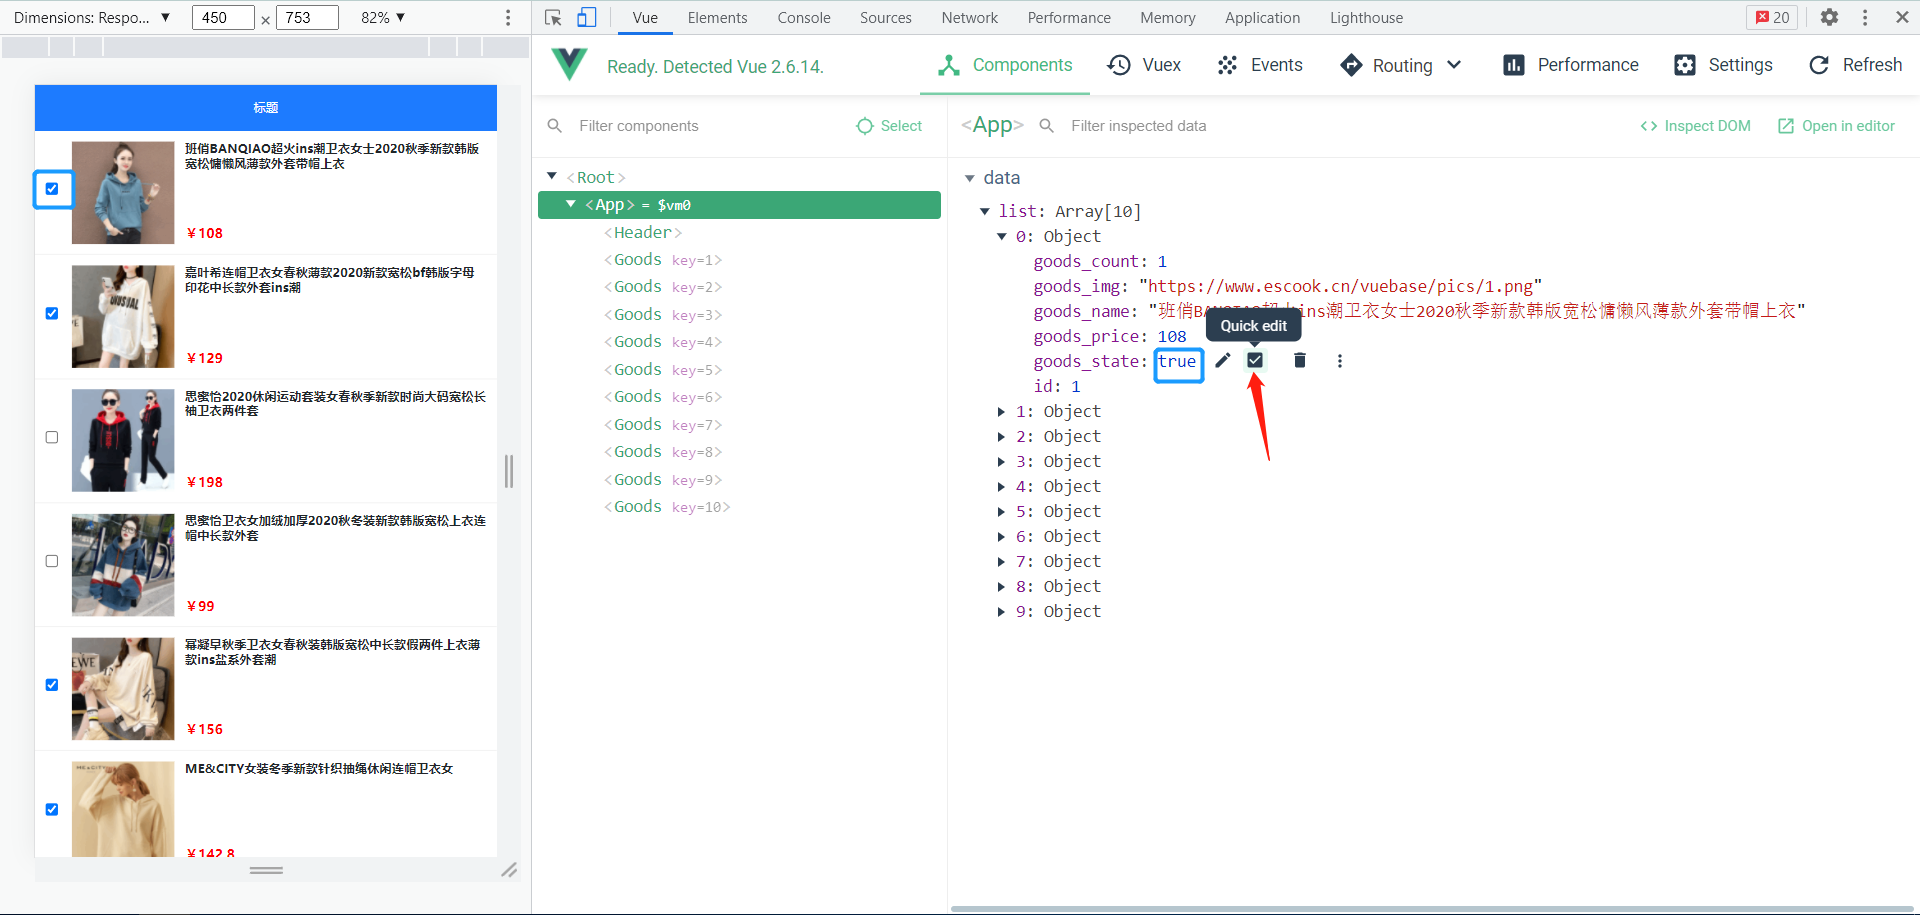
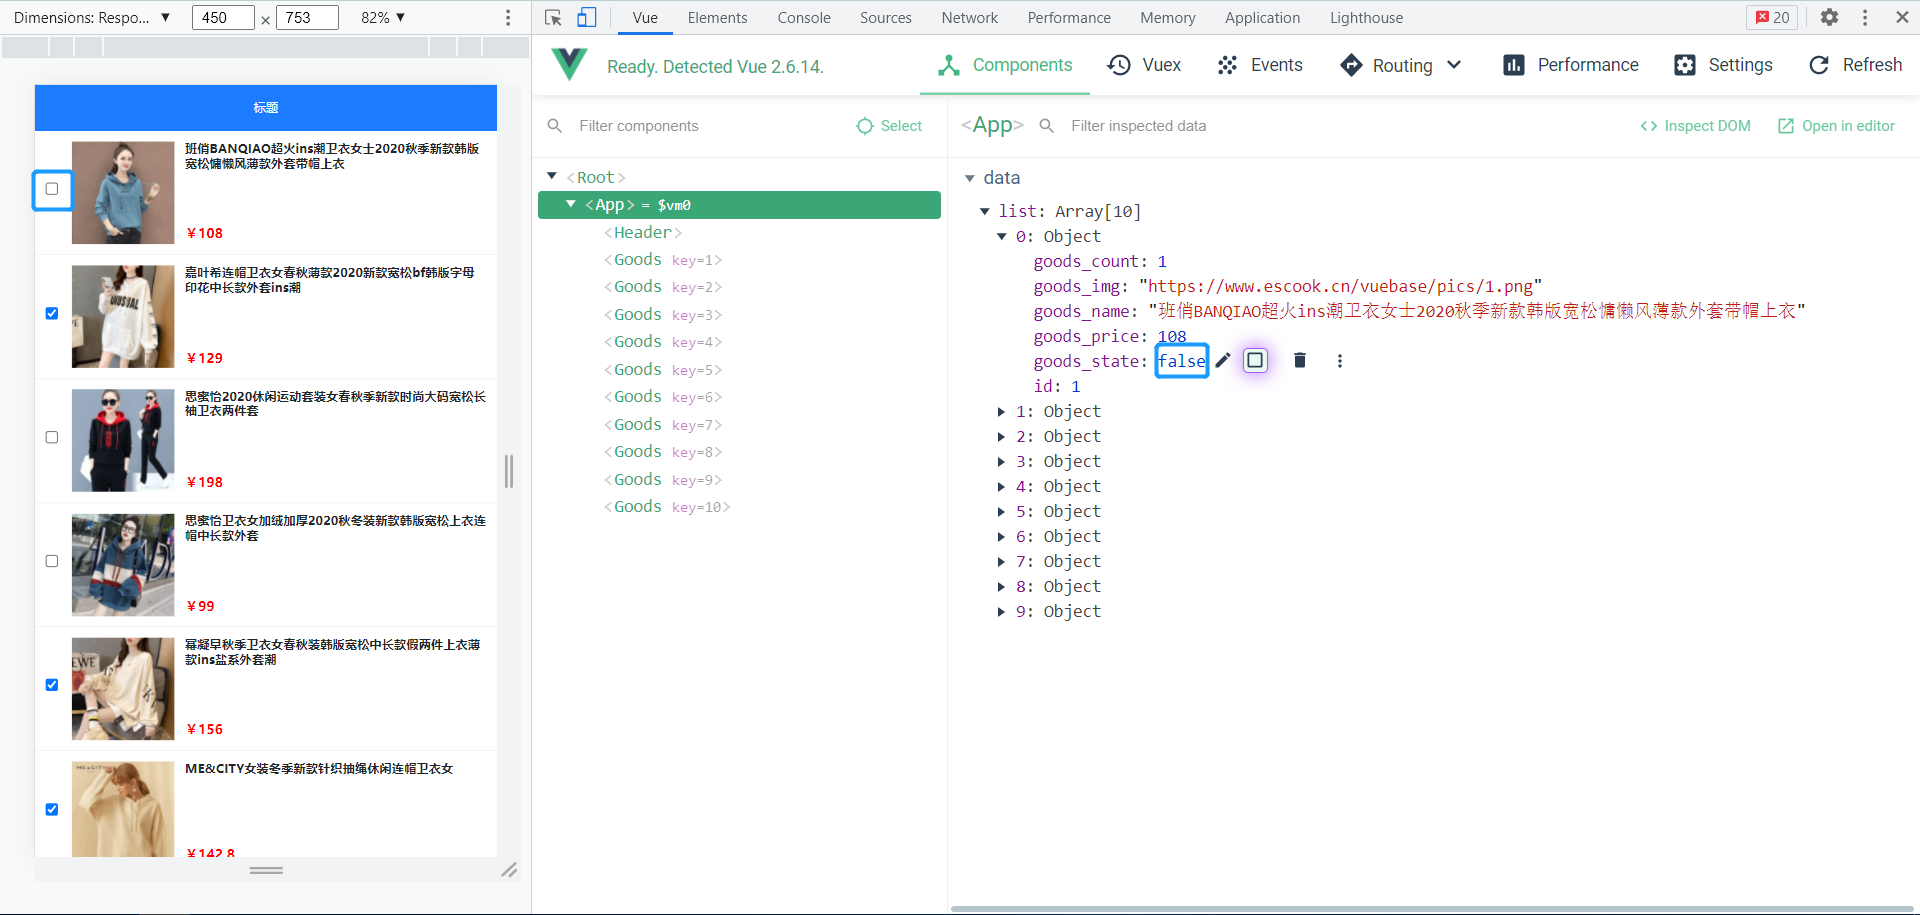
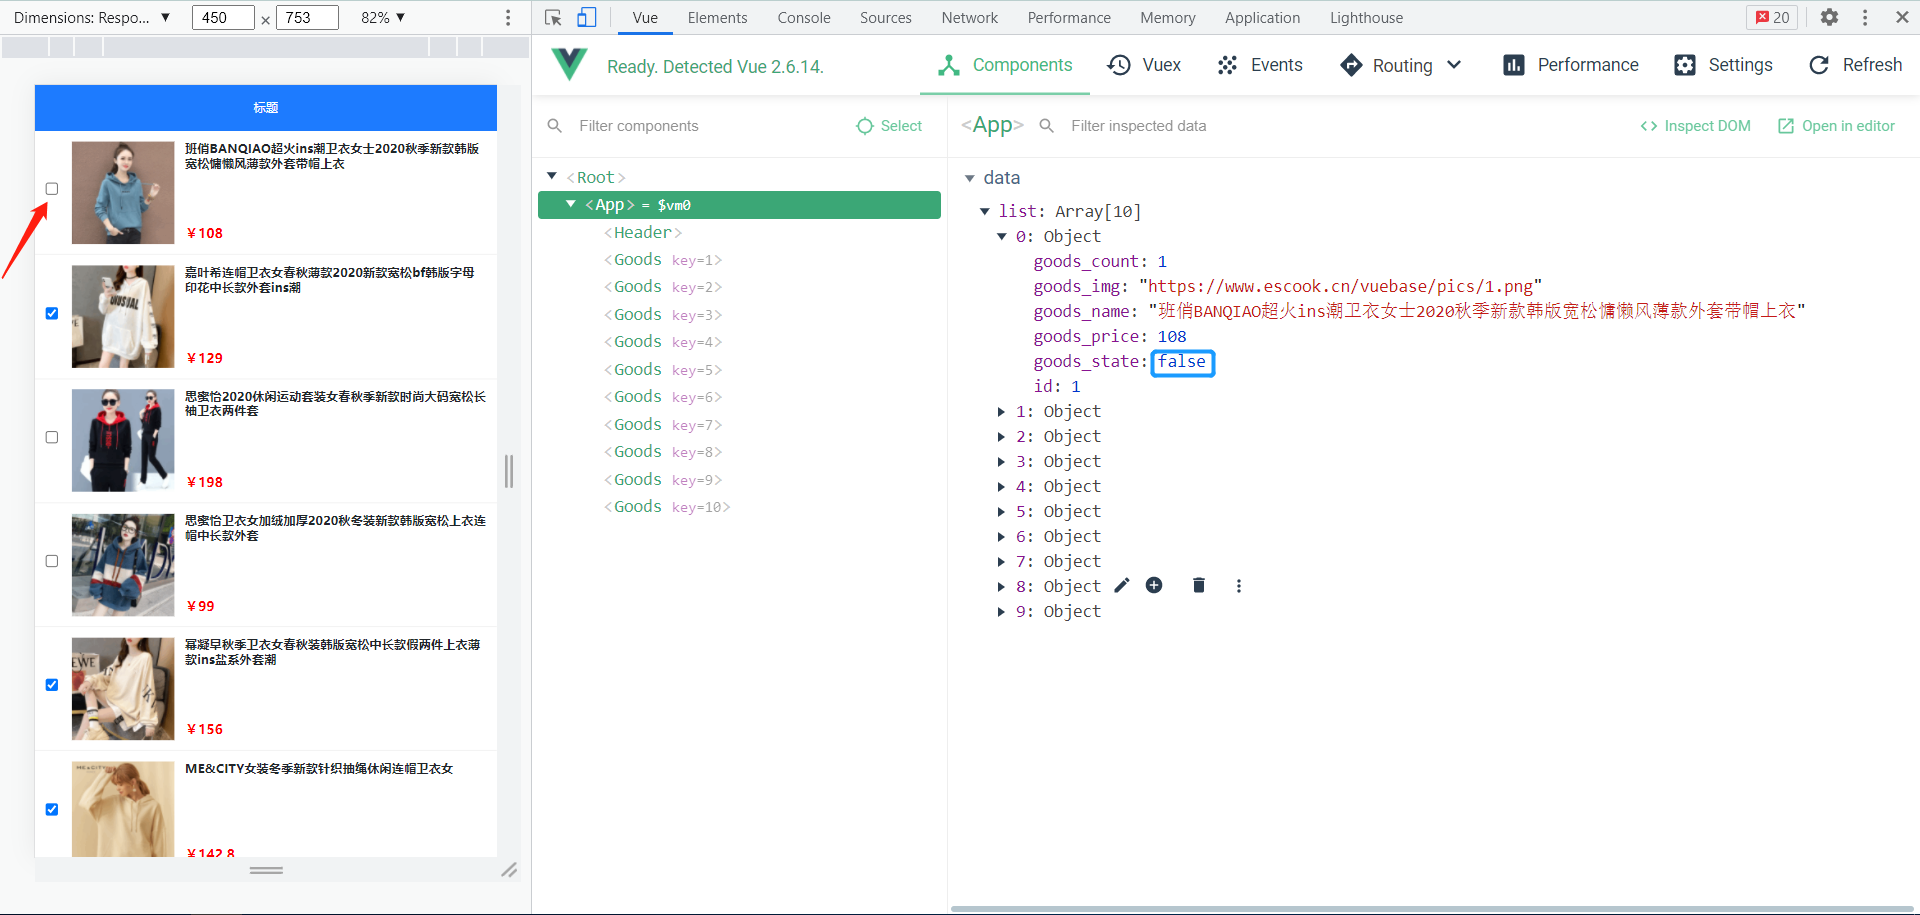
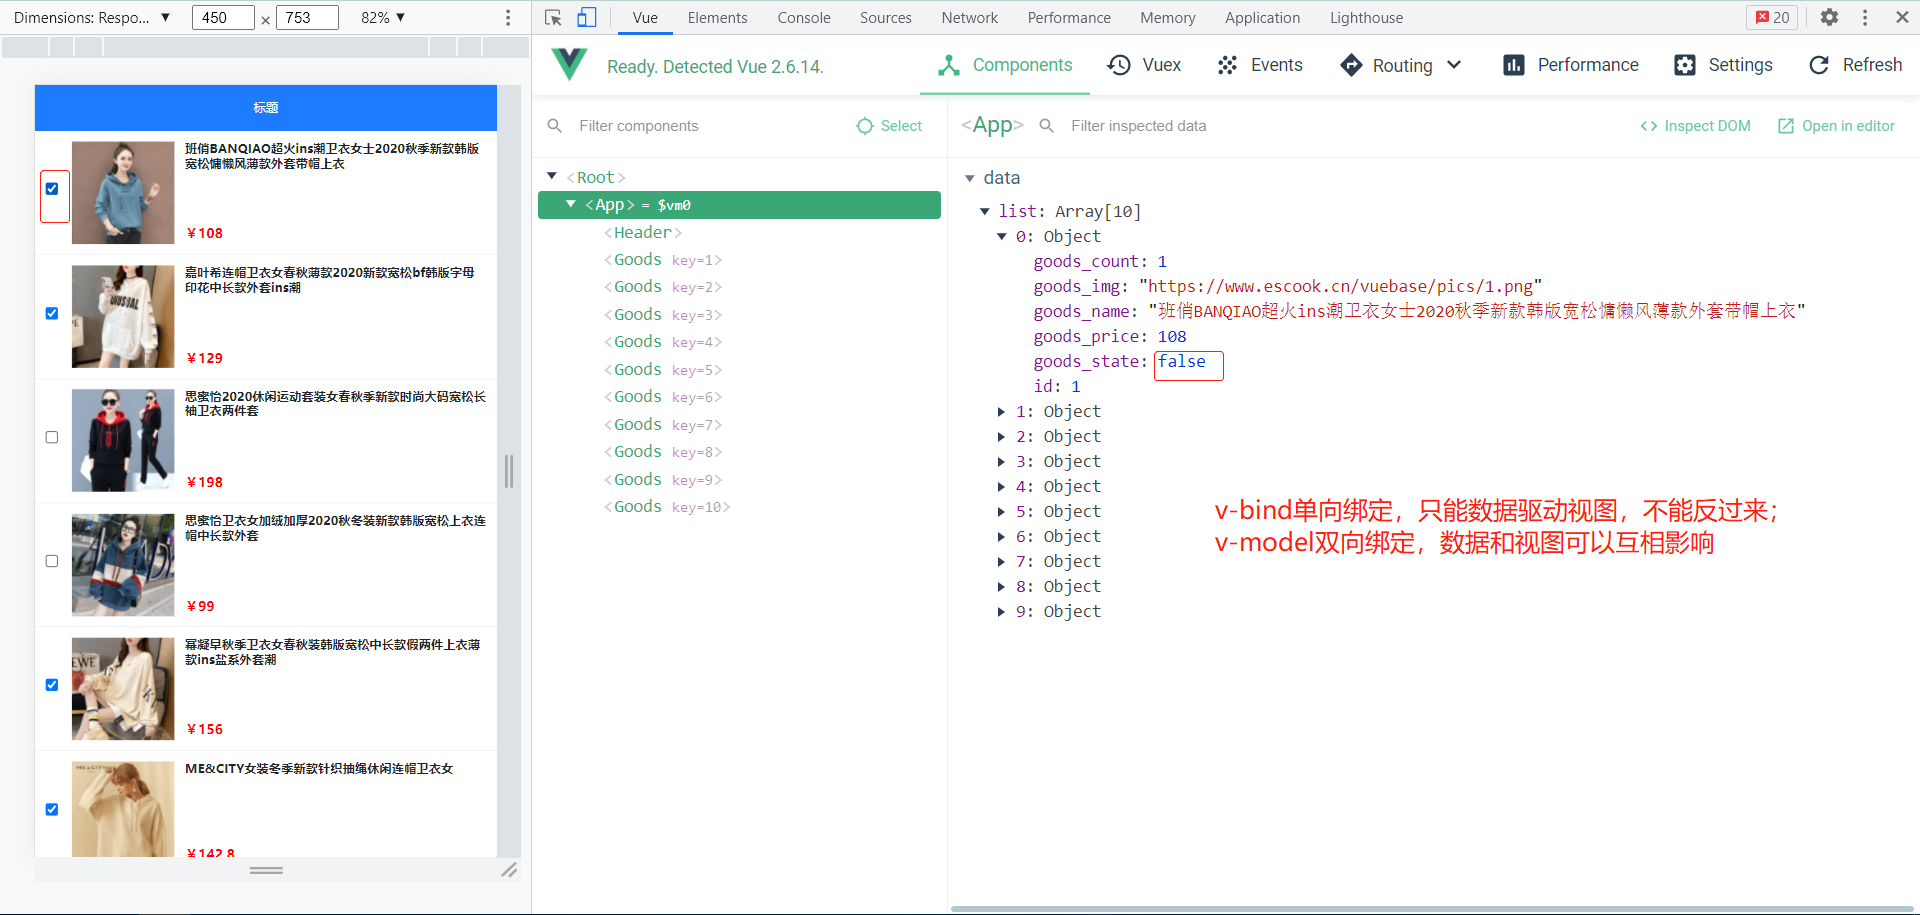
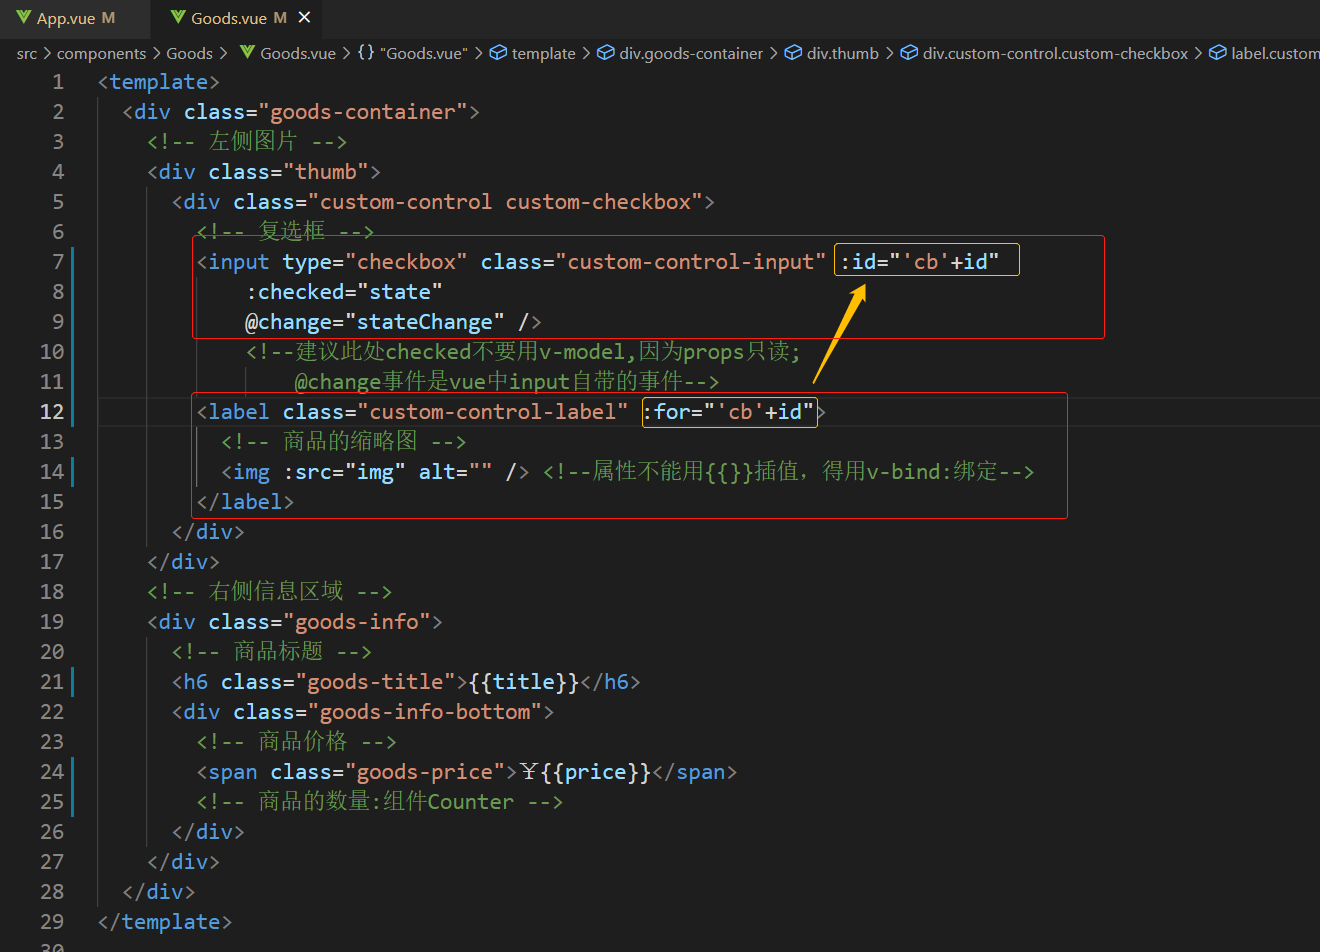
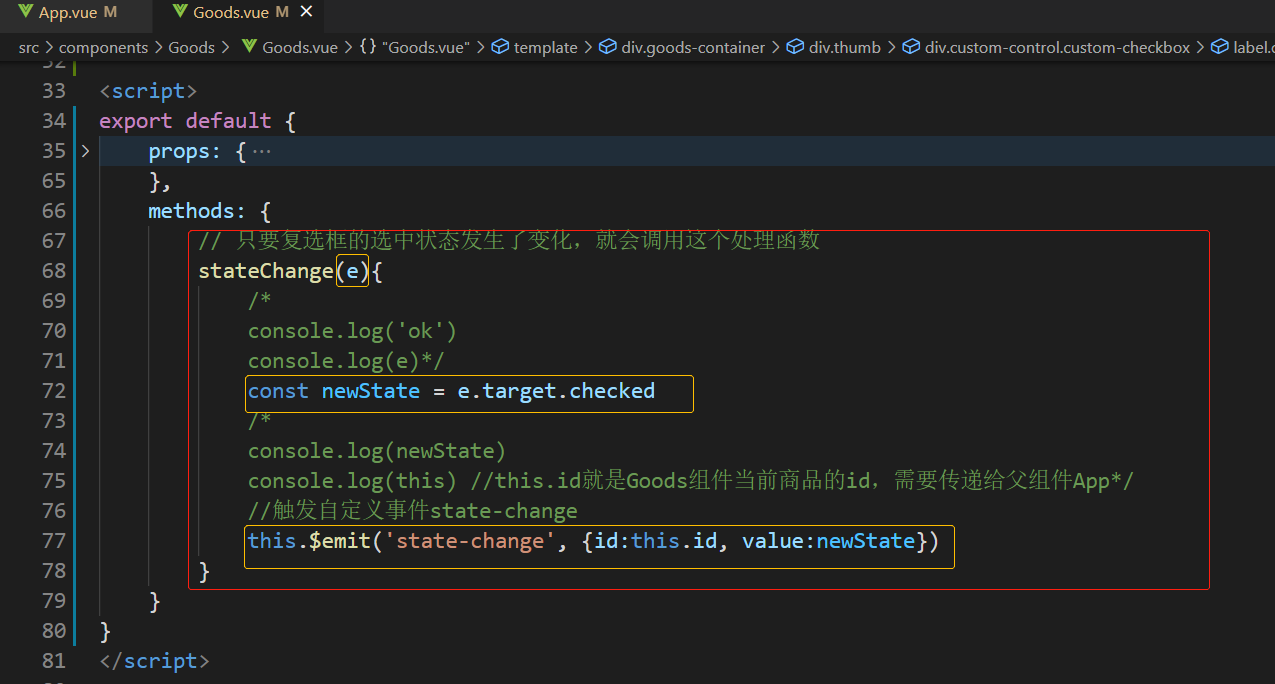
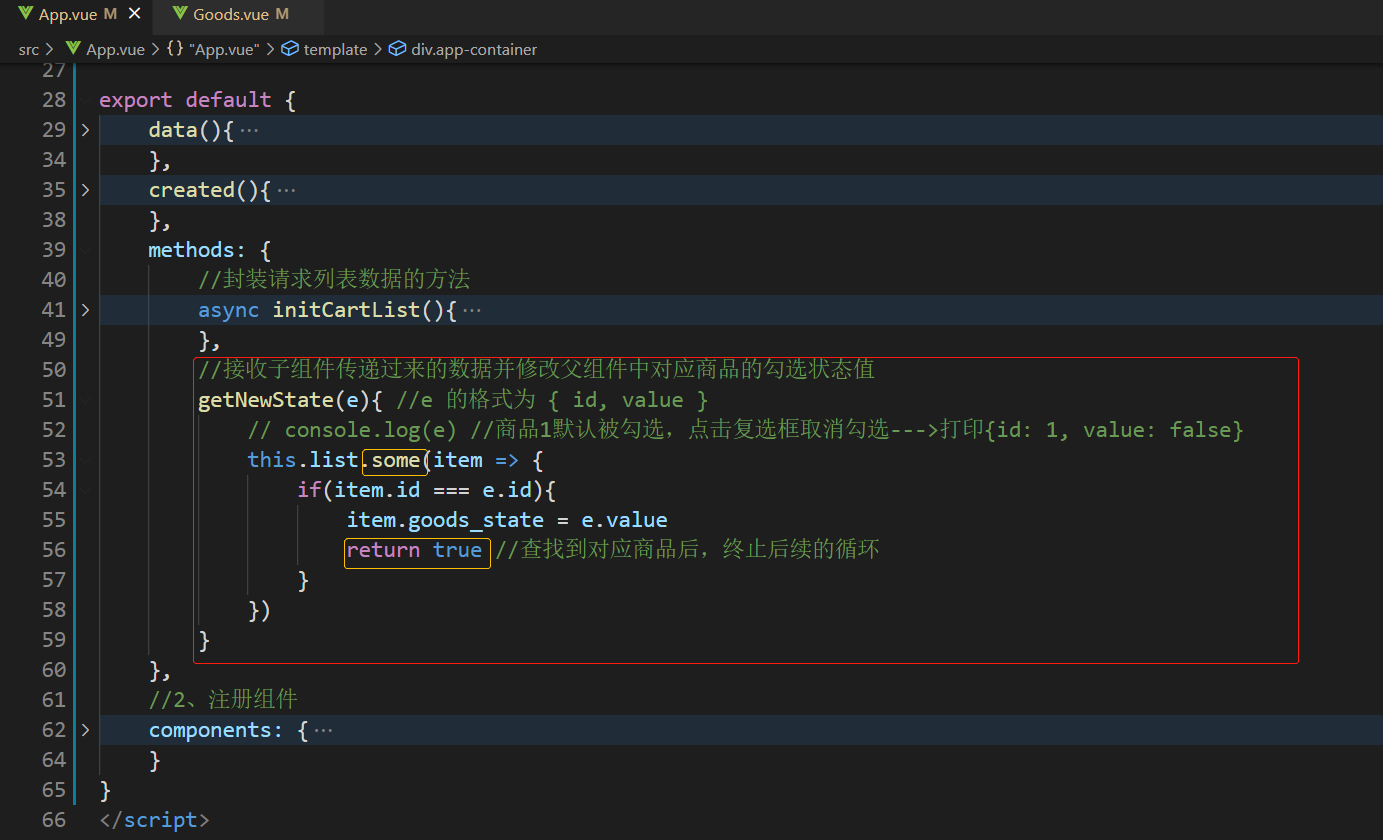
解决方案:子组件向父组件传值---自定义事件
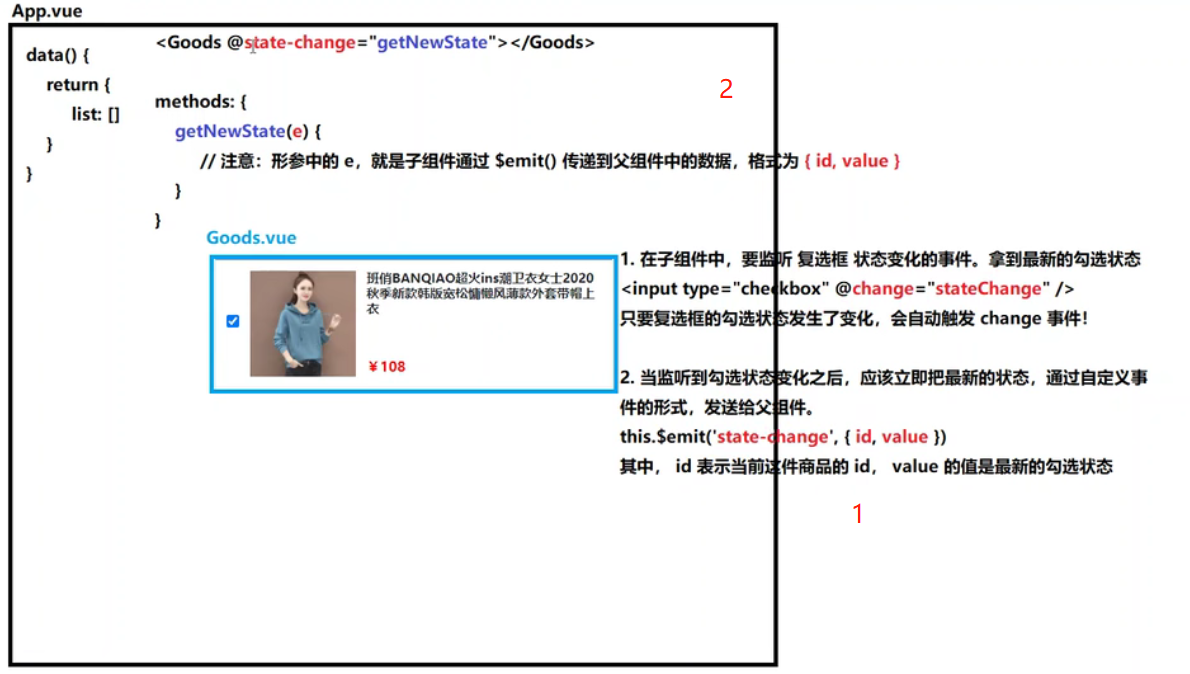
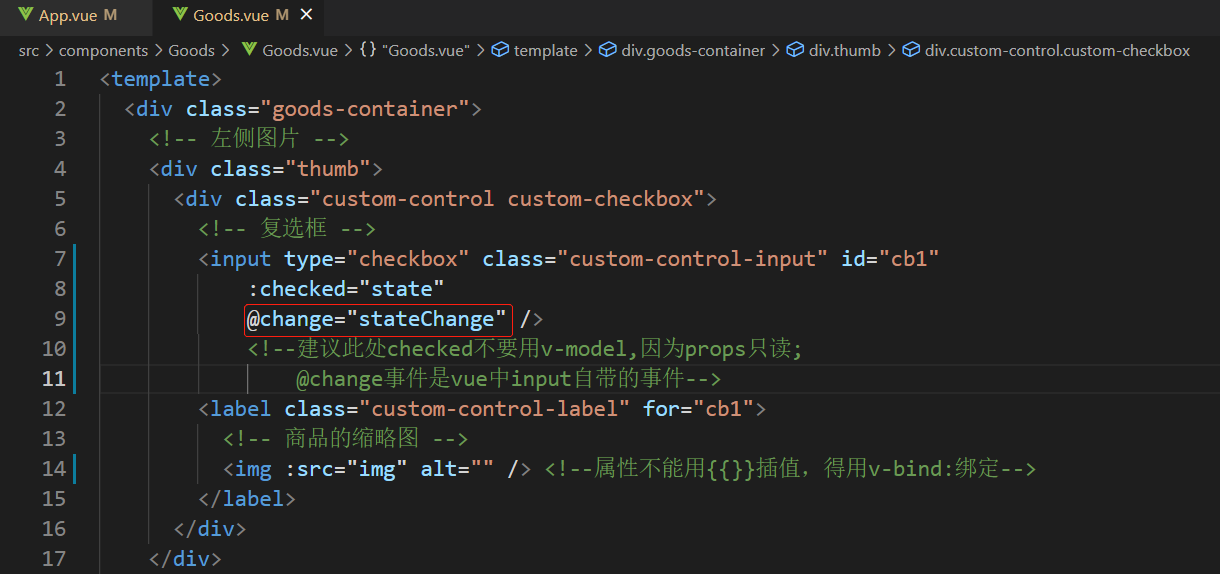
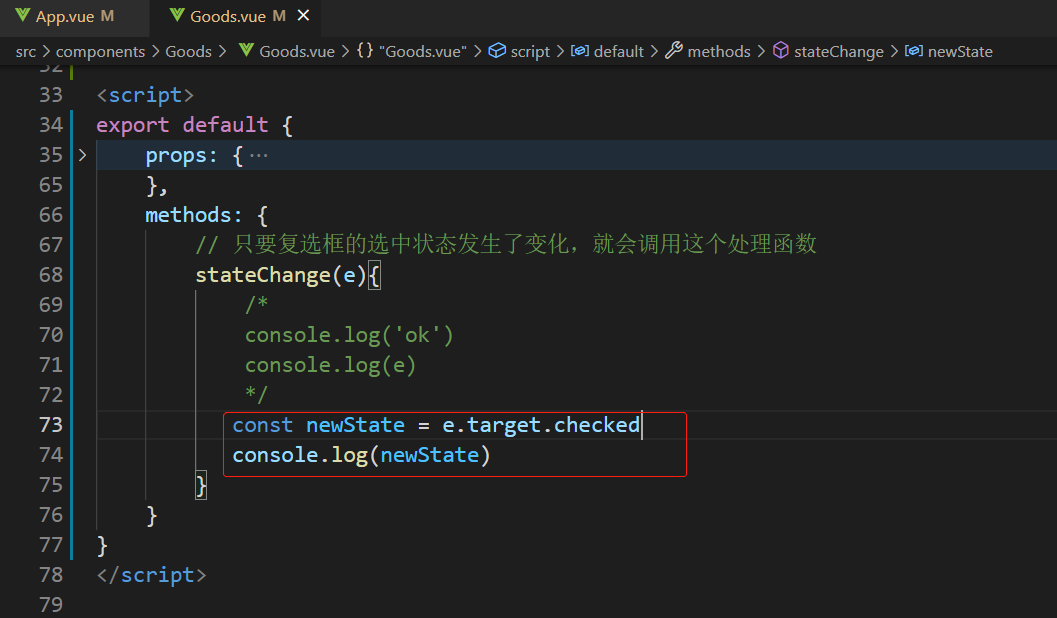
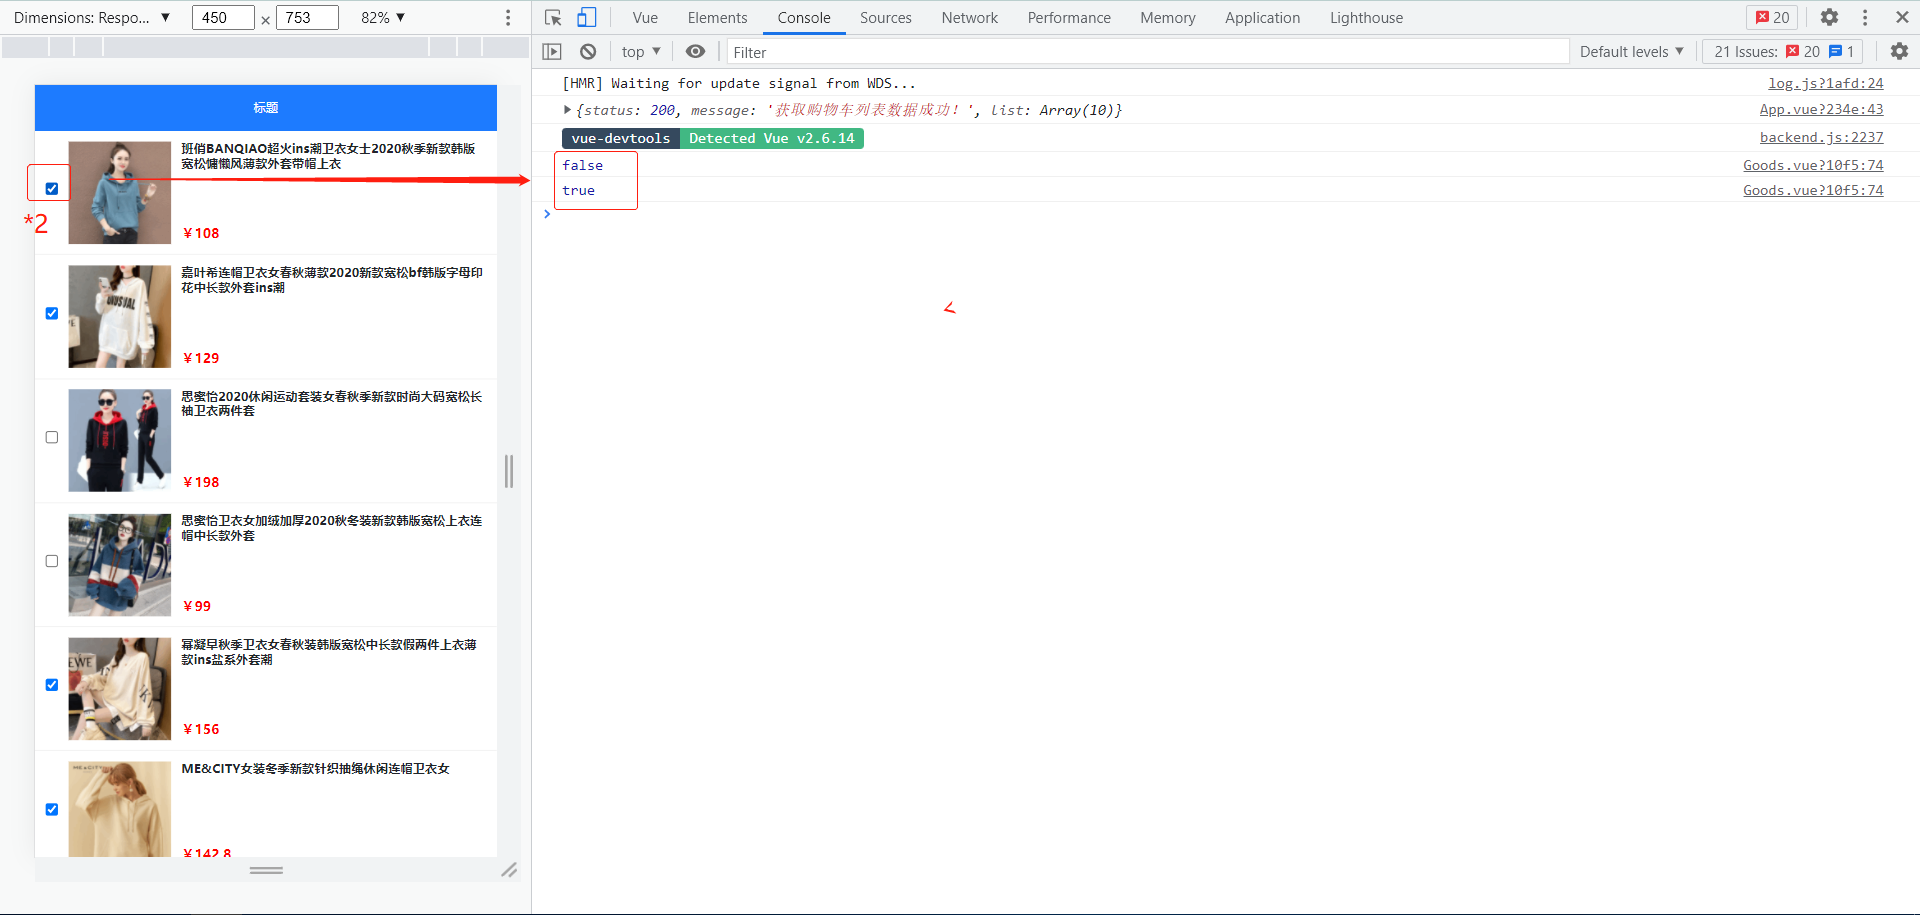
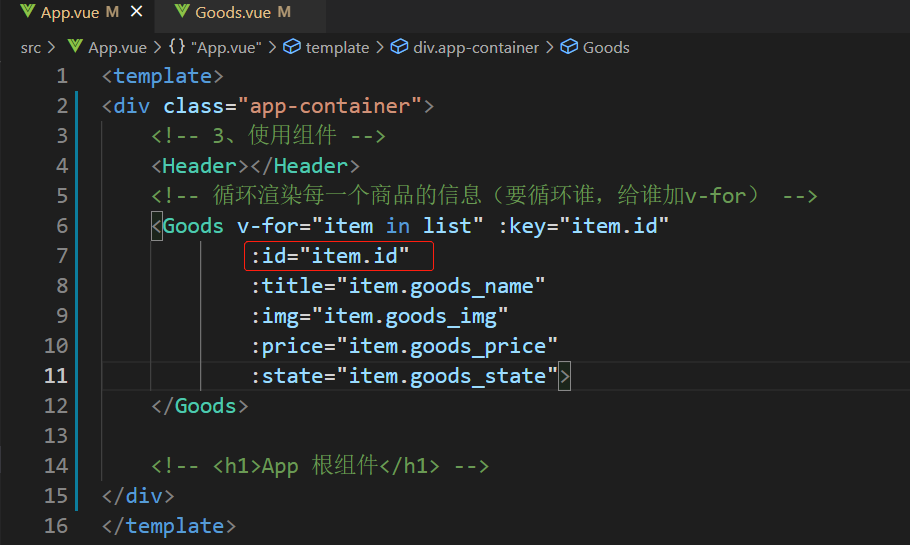
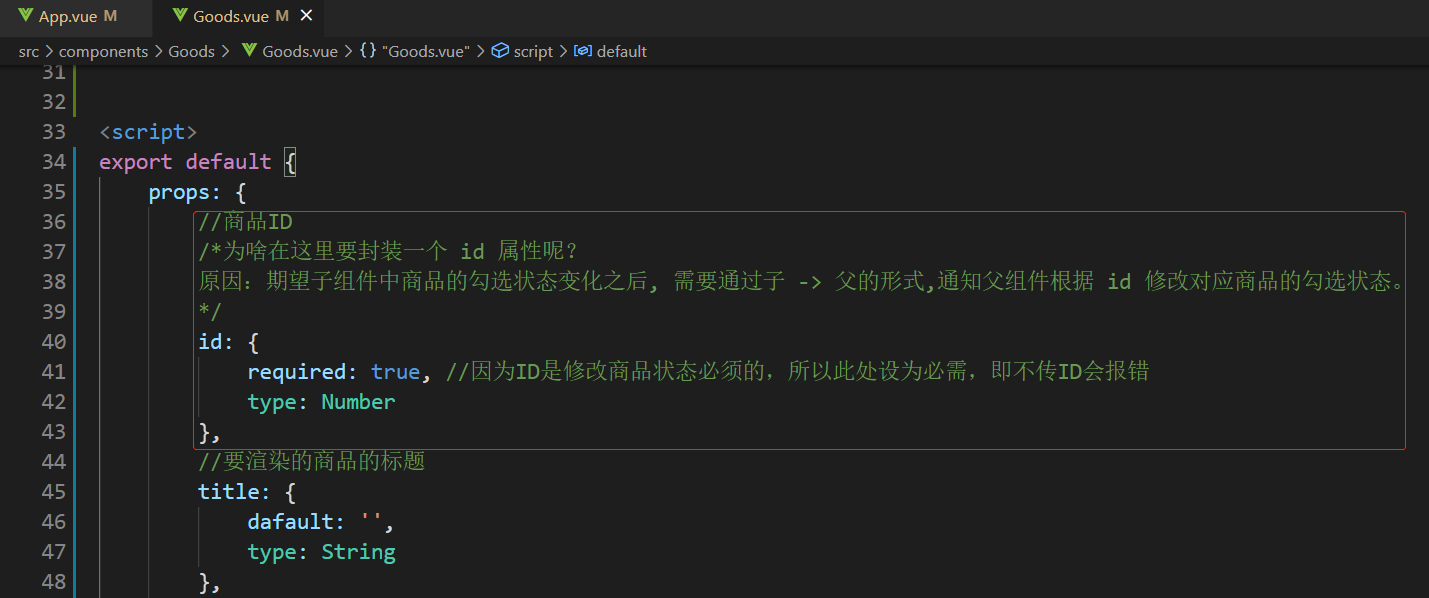
5-2 功能实现
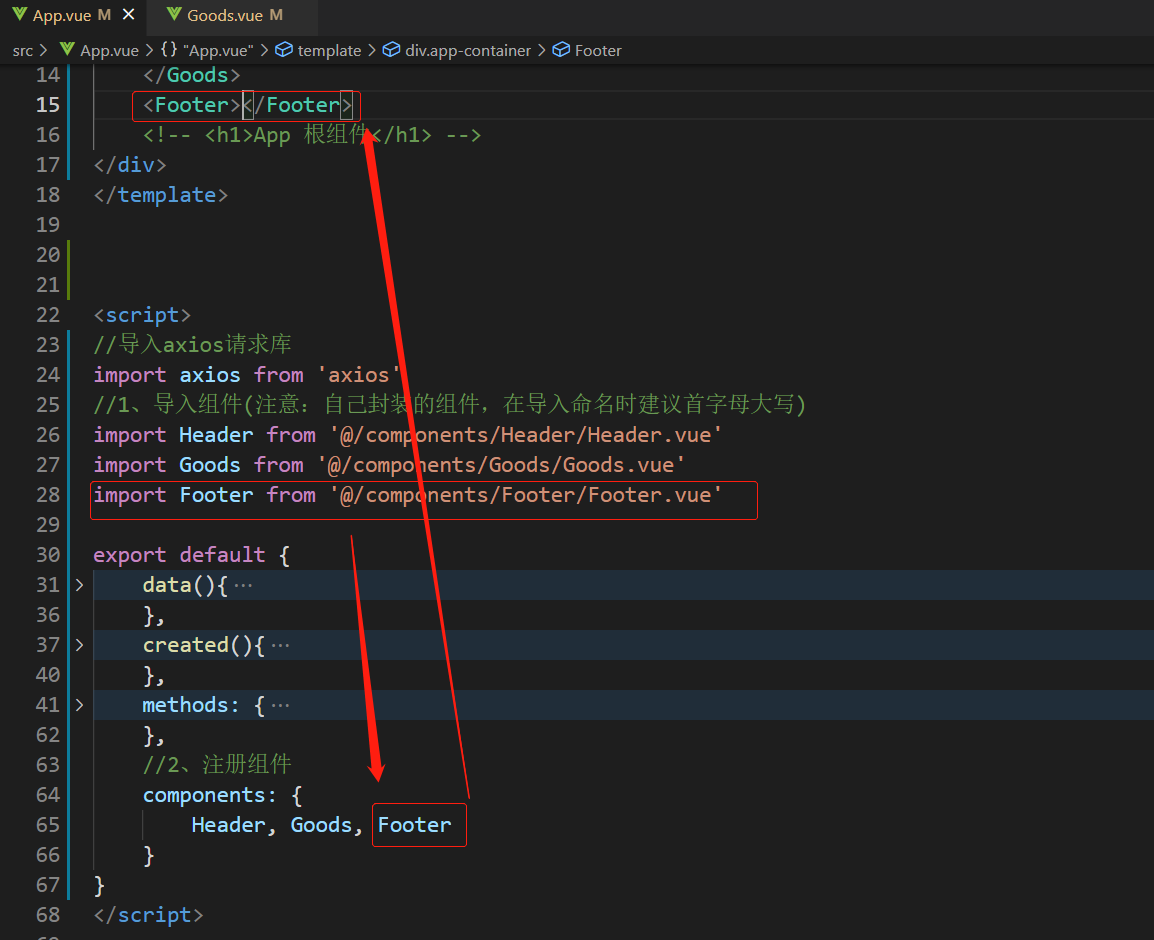
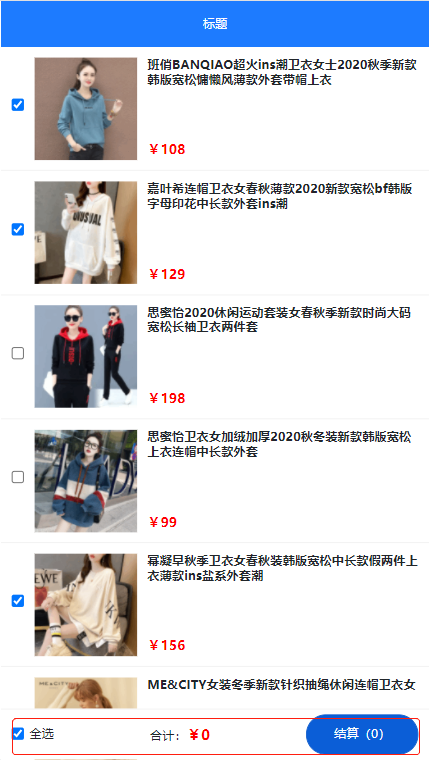
6 Footer组件使用 & 全选功能
6-1 导入、注册、使用Footer组件

<template>
  <div class="footer-container">
    <!-- 左侧的全选 -->
    <div class="custom-control custom-checkbox">
      <input type="checkbox" class="custom-control-input" id="cbFull" :checked="true" />
      <label class="custom-control-label" for="cbFull">全选</label>
    </div>

    <!-- 中间的合计 -->
    <div>
      <span>合计:</span>
      <span class="total-price">¥{{ 0 }}</span>
    </div>

    <!-- 结算按钮 -->
    <button type="button" class="btn btn-primary btn-settle">结算({{ 0 }})</button>
  </div>
</template>

<script>
export default {}
</script>


<style lang="less" scoped>
.footer-container {
  font-size: 12px;
  height: 50px;
  width: 100%;
  border-top: 1px solid #efefef;
  position: fixed;
  bottom: 0;
  background-color: #fff;
  display: flex;
  justify-content: space-between;
  align-items: center;
  padding: 0 10px;
}

.custom-checkbox {
  display: flex;
  align-items: center;
}

#cbFull {
  margin-right: 5px;
}

.btn-settle {
  height: 80%;
  min-width: 110px;
  border-radius: 25px;
  font-size: 12px;
}

.total-price {
  font-weight: bold;
  font-size: 14px;
  color: red;
}
</style>
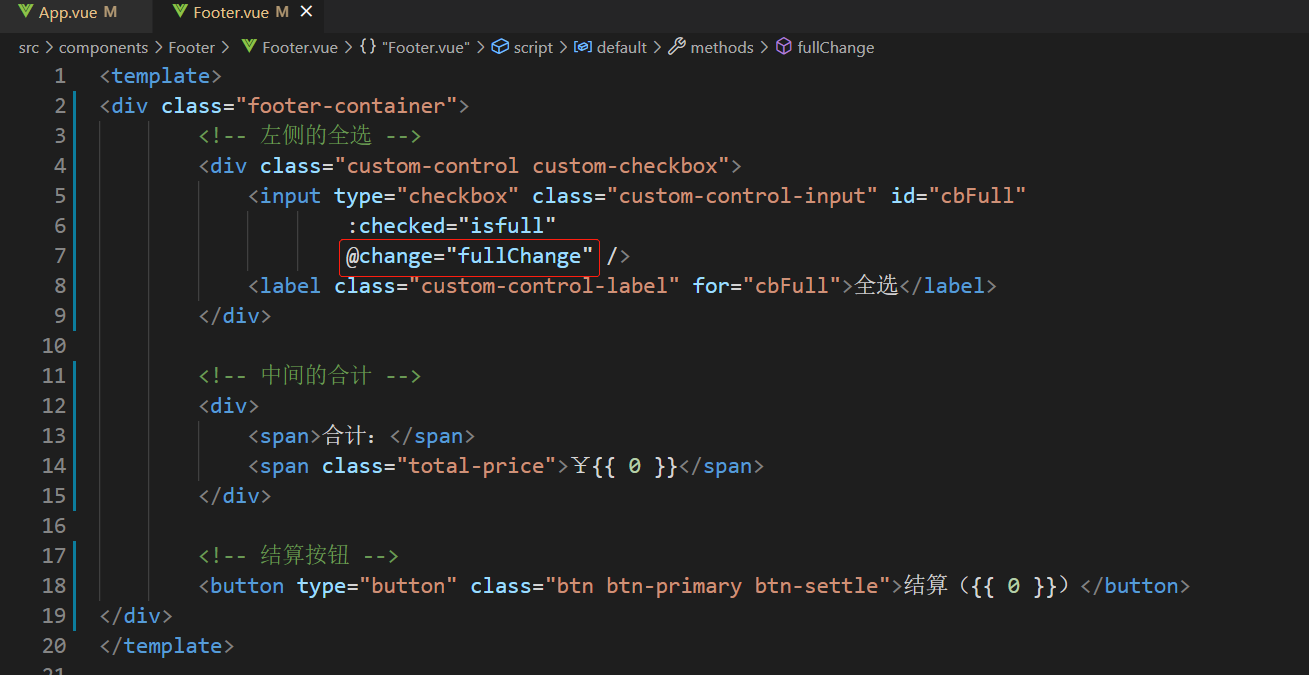
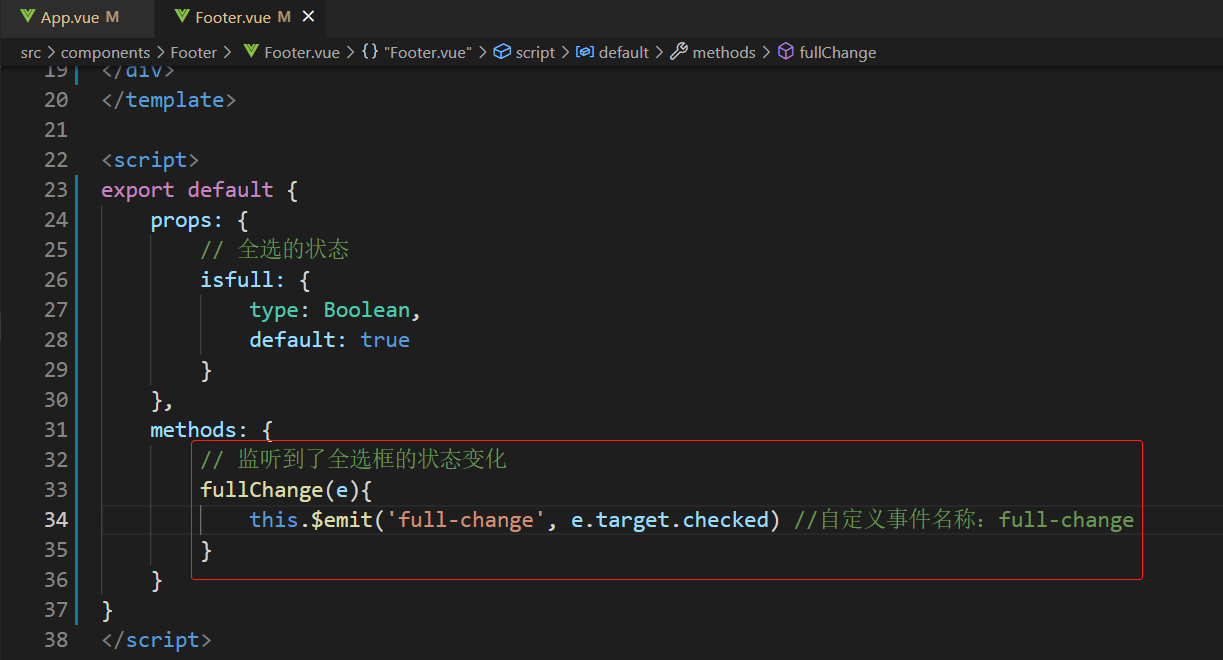
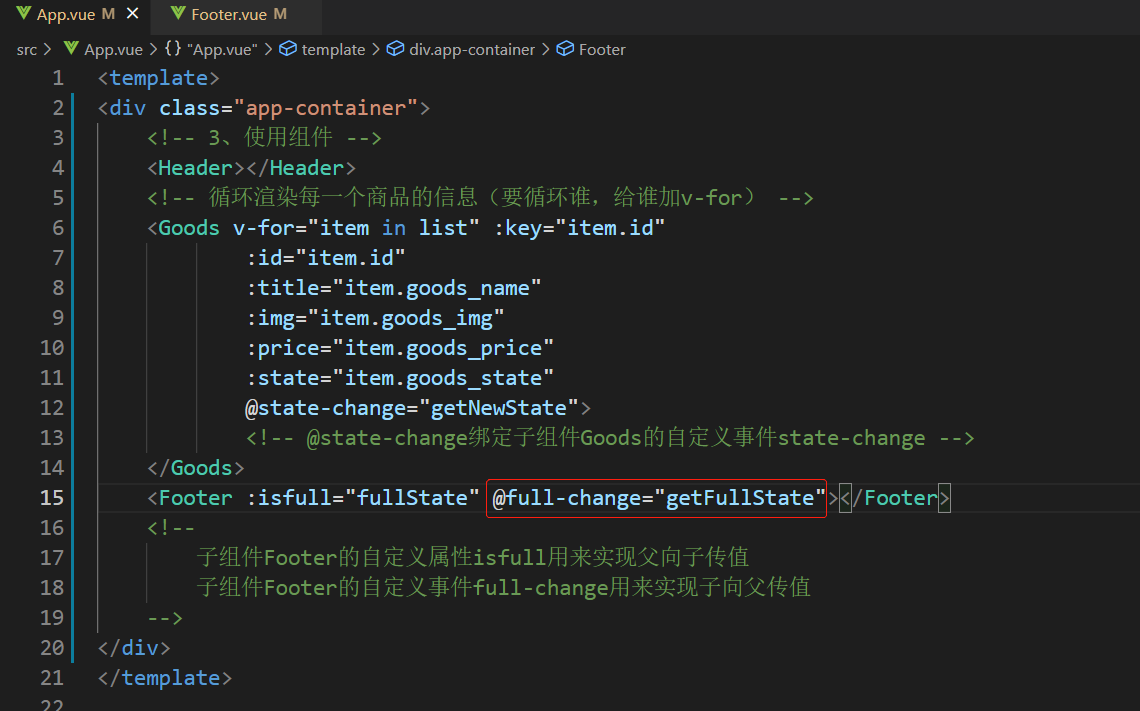
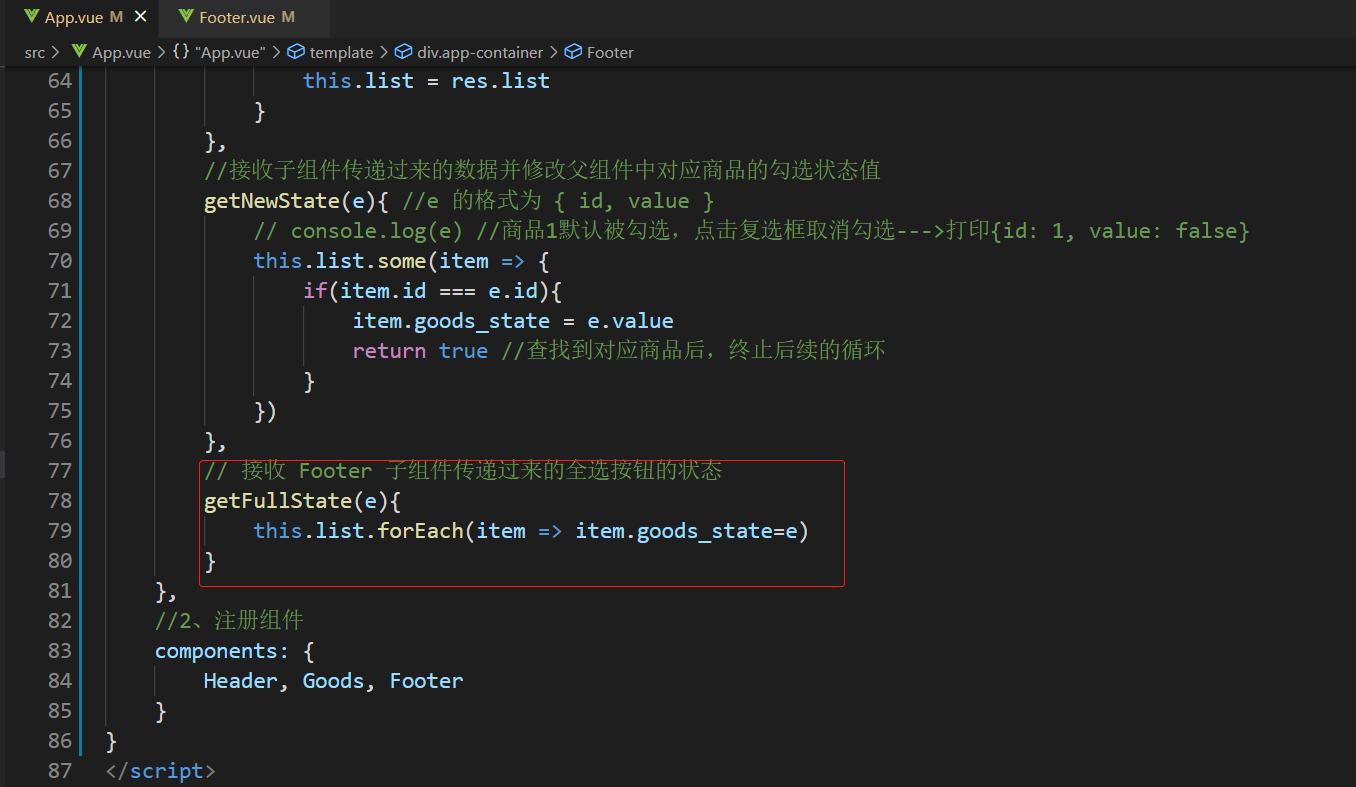
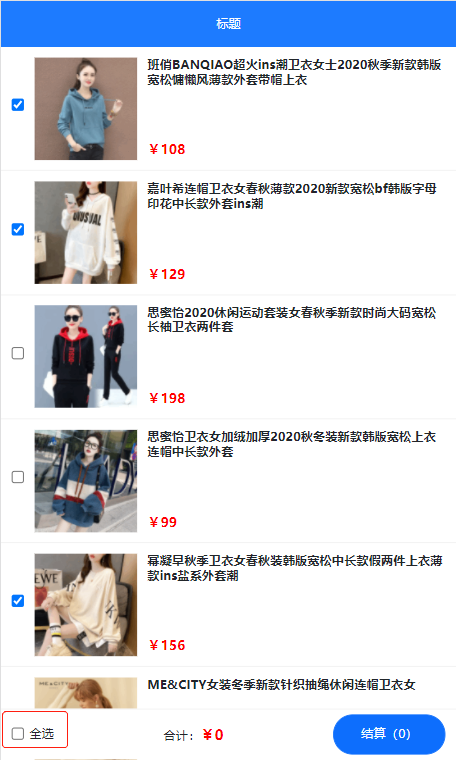
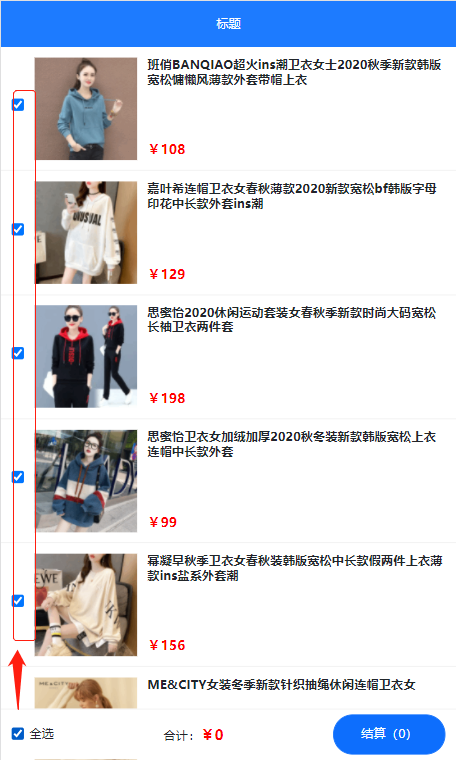
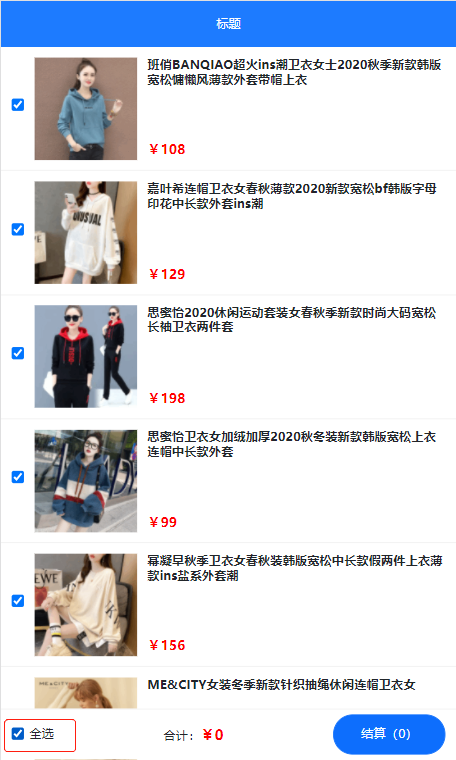
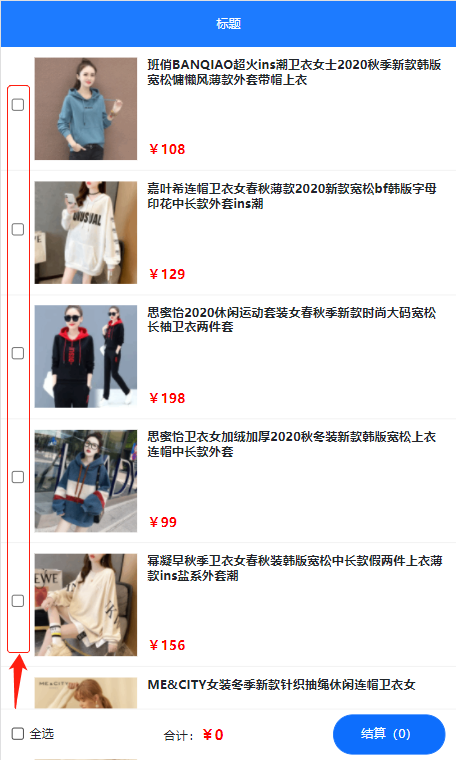
6-2 全选功能
计算属性、父向子自定义属性传值、子向父自定义事件传值
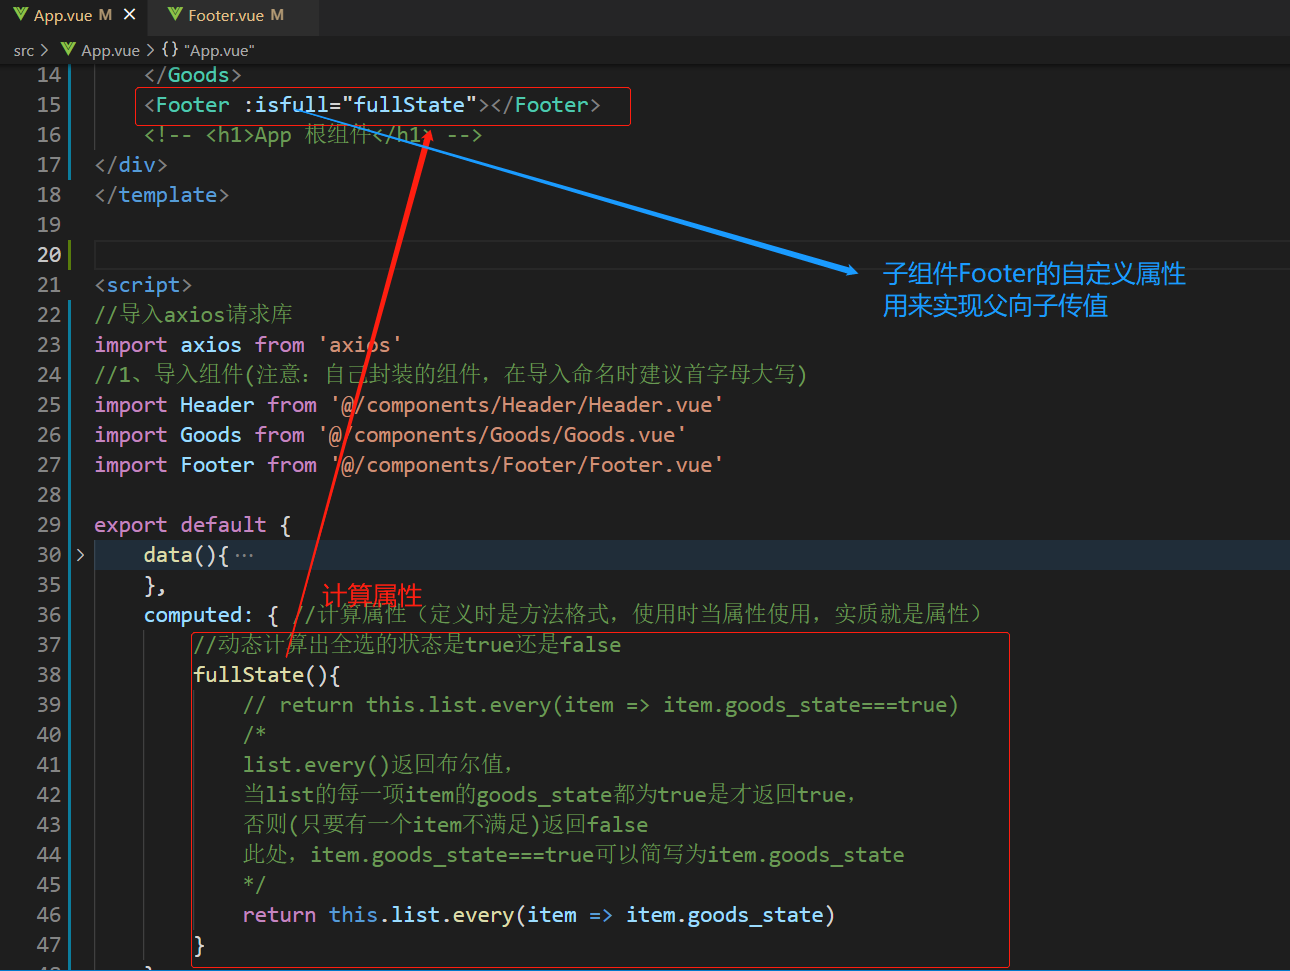
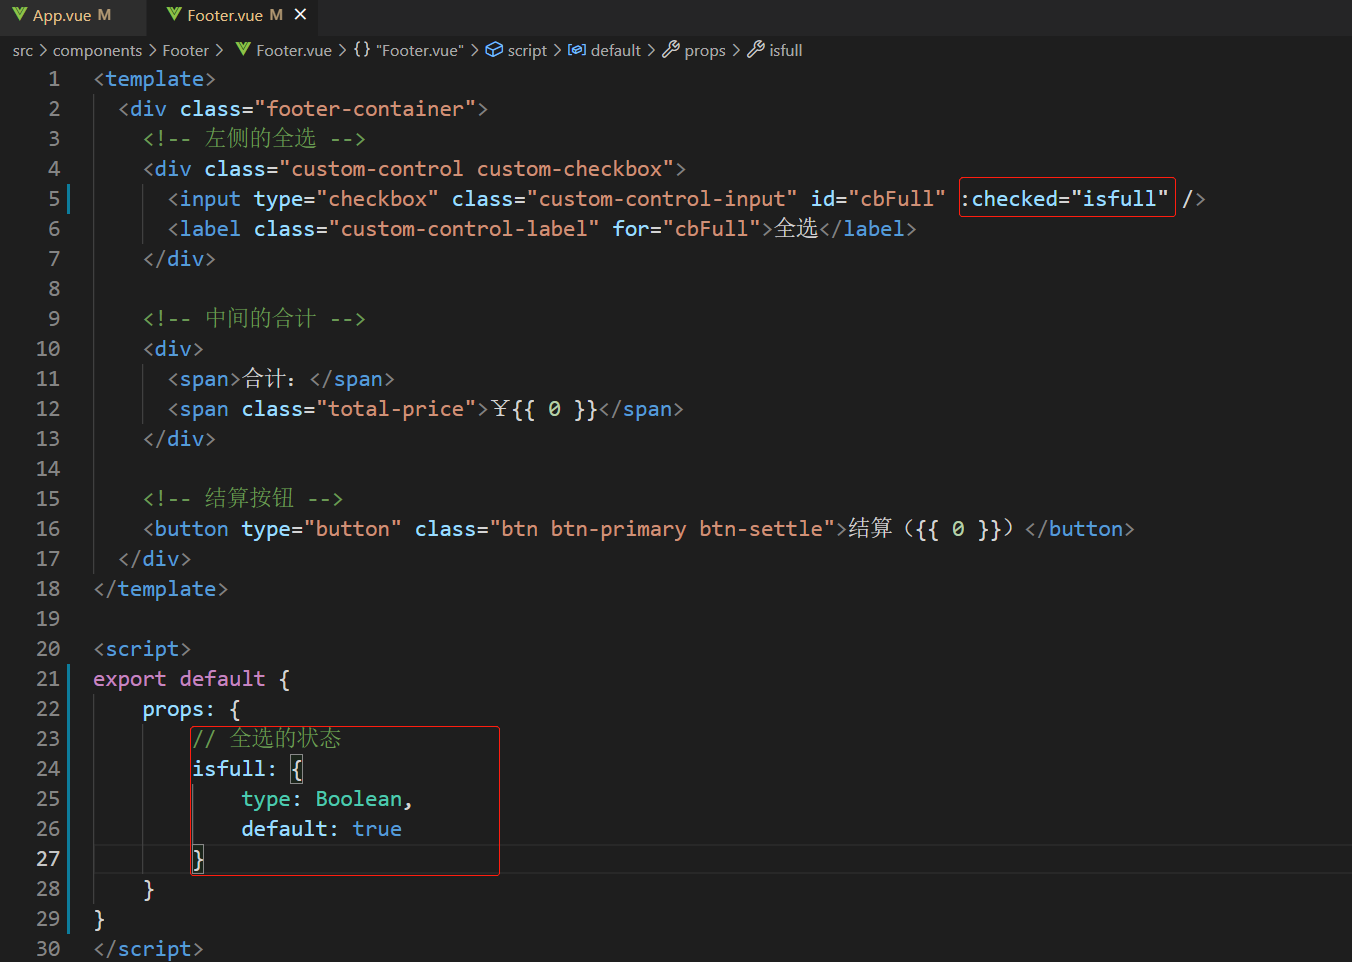
实现了所有商品被勾选后,全选框会自动被勾选;但此时,还没实现全选框控制每件商品的勾选状态
至此,功能完整实现
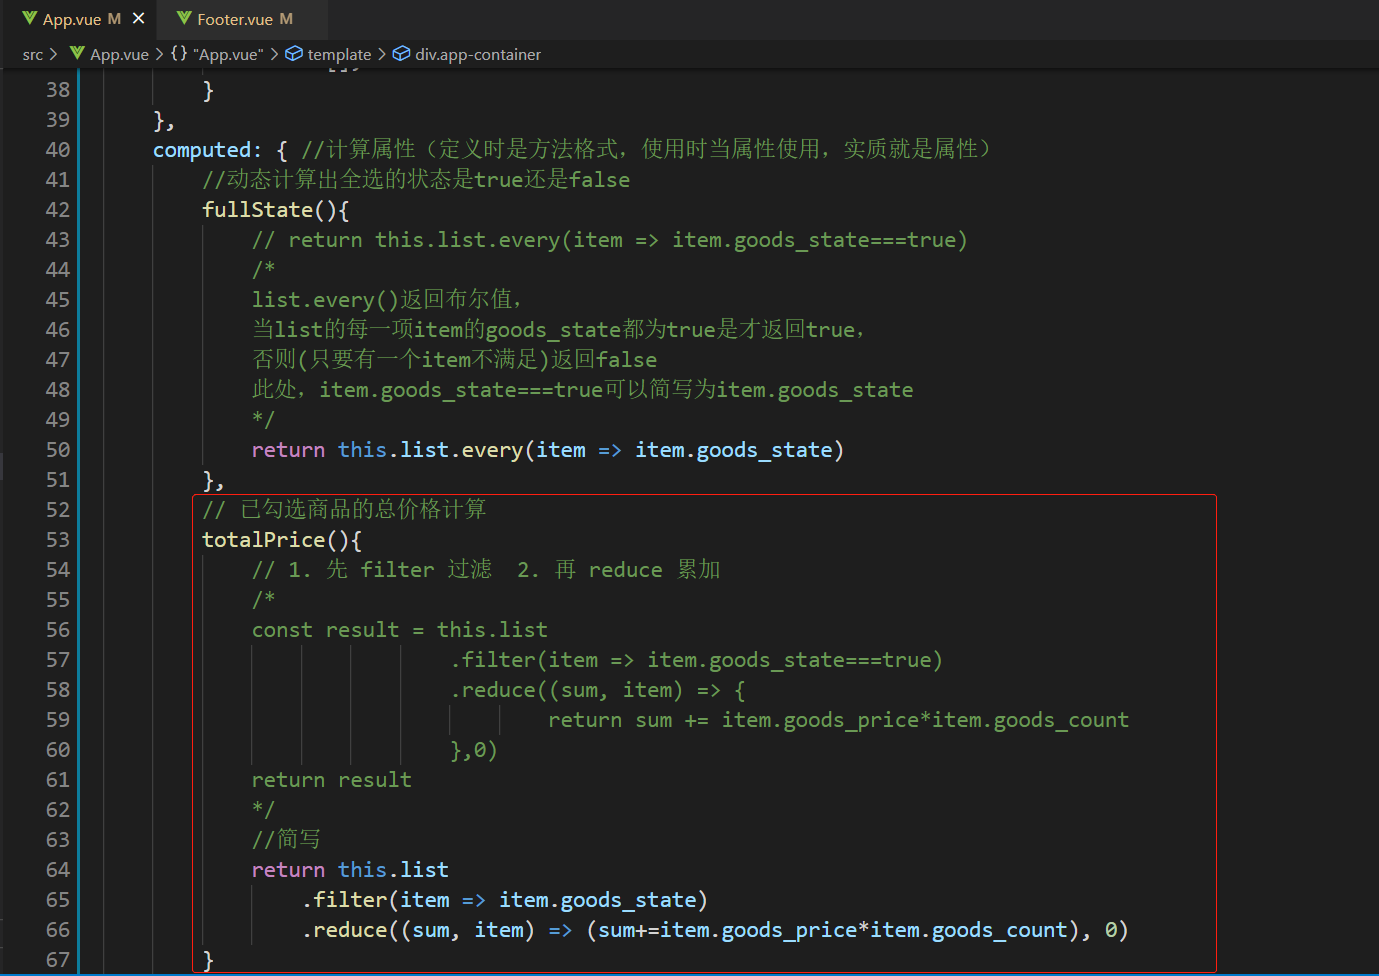
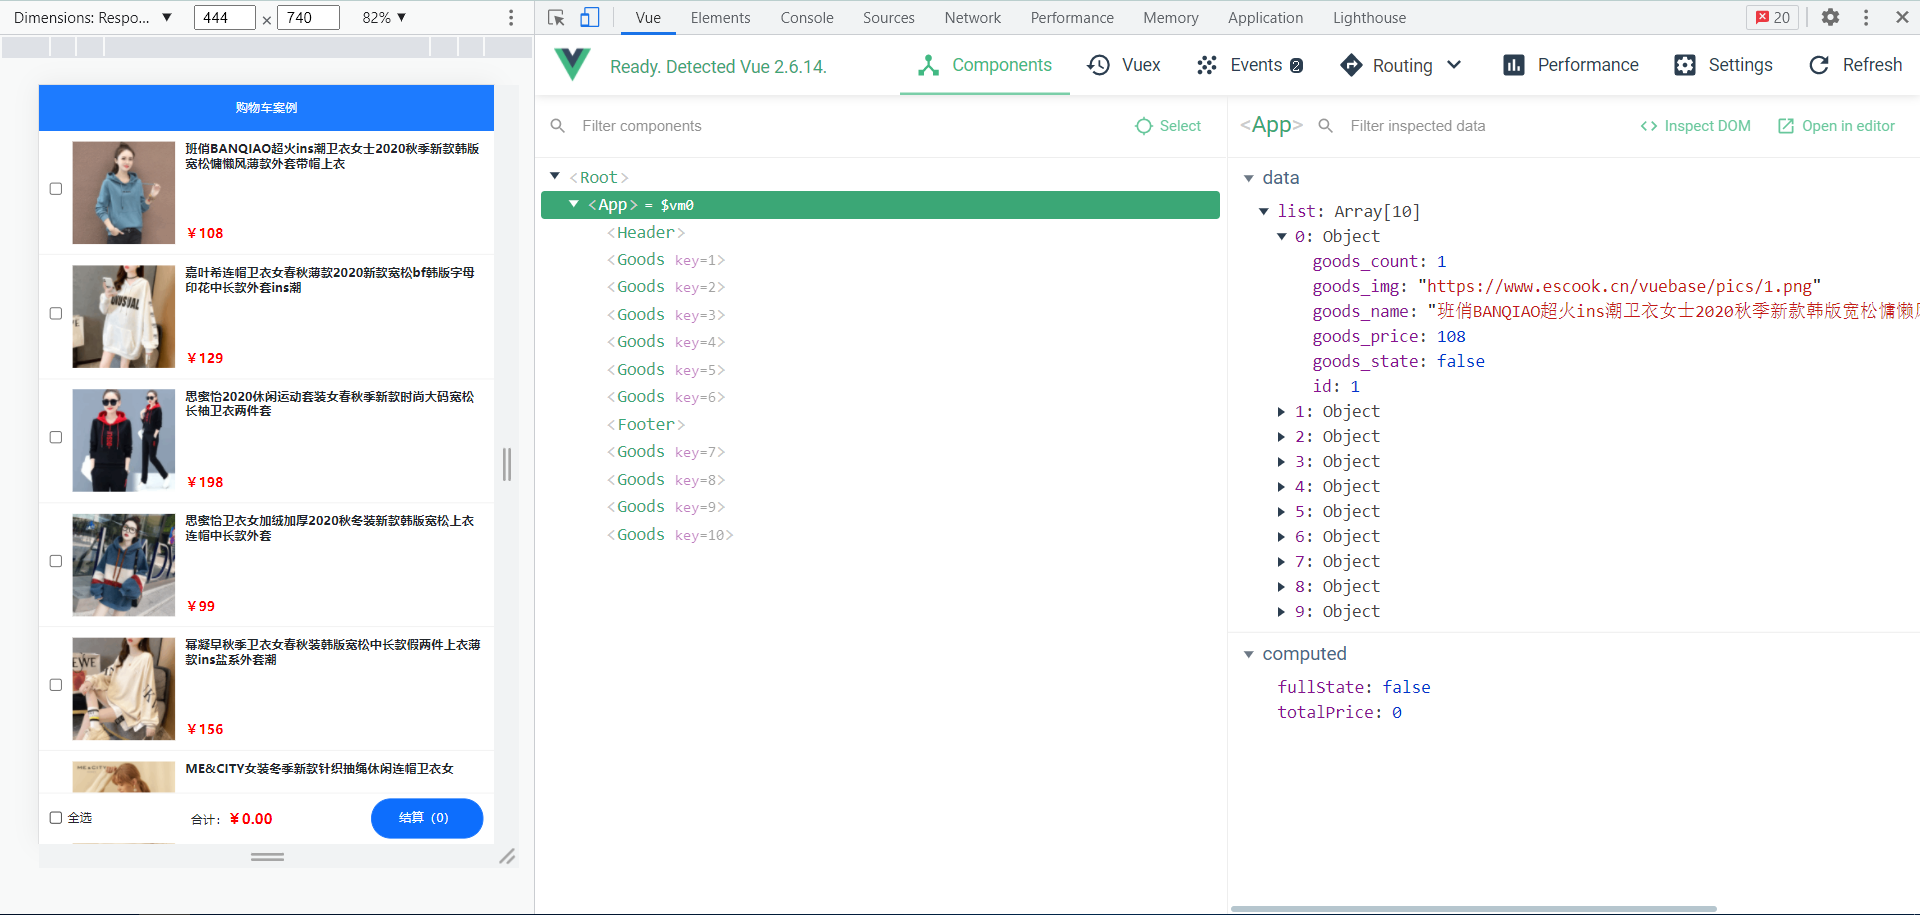
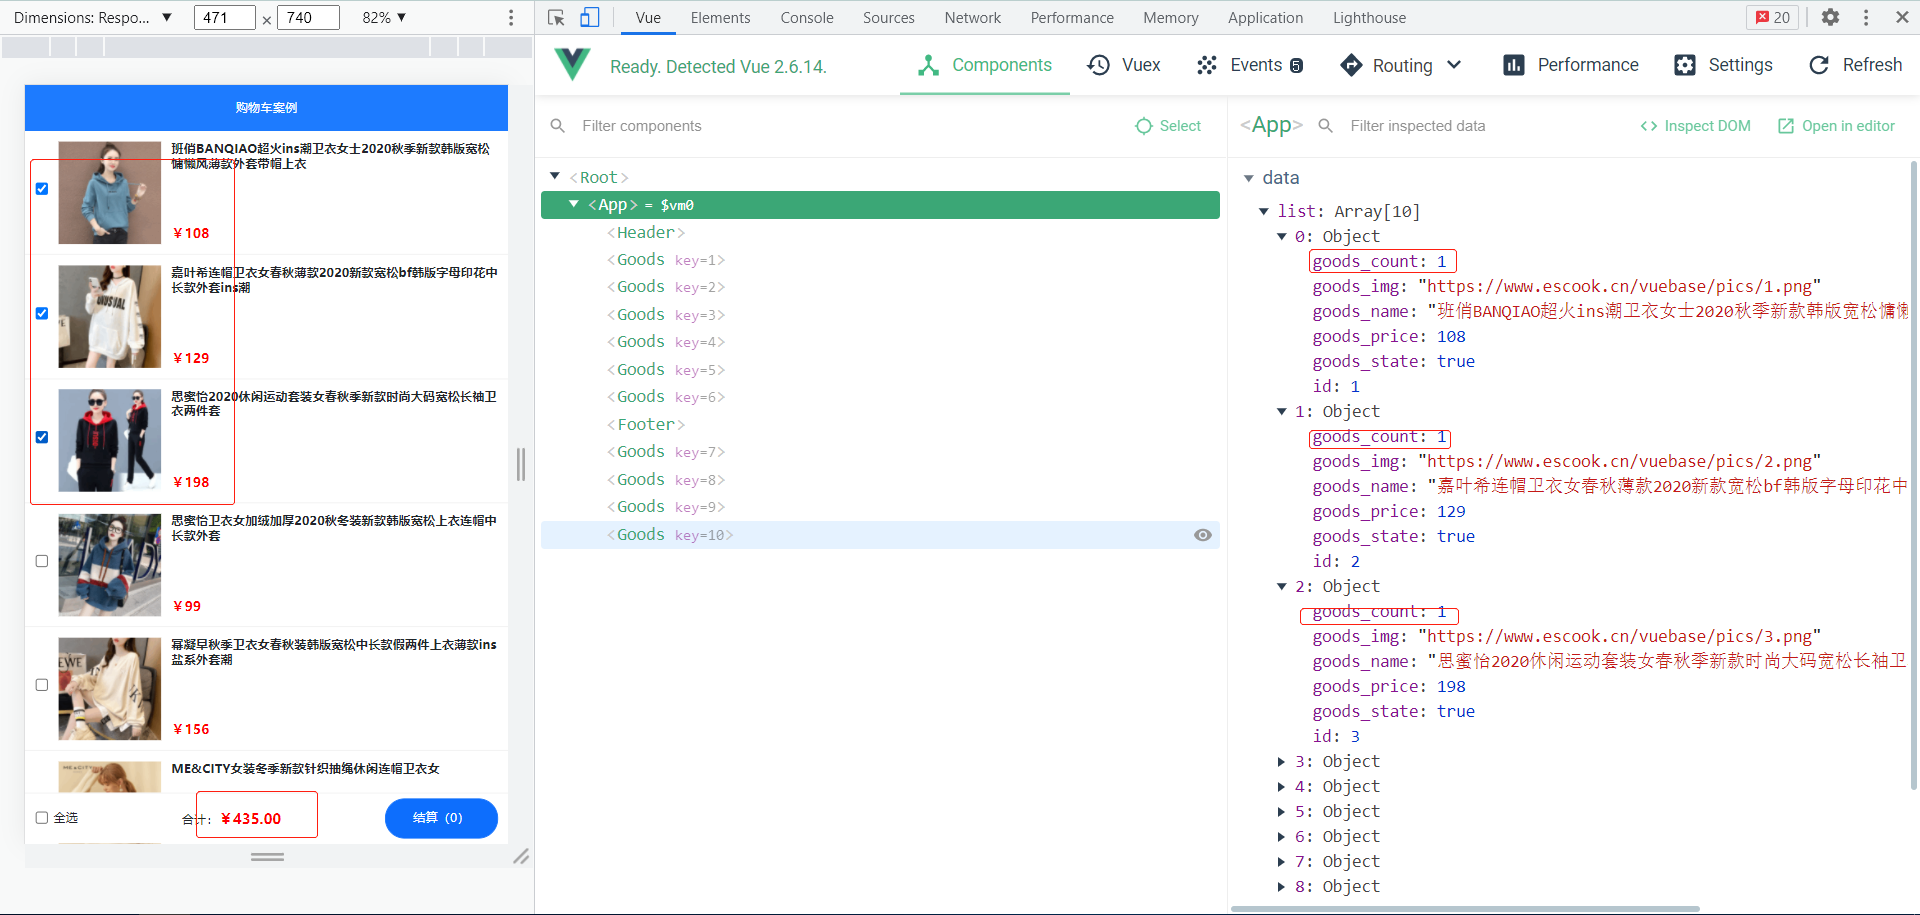
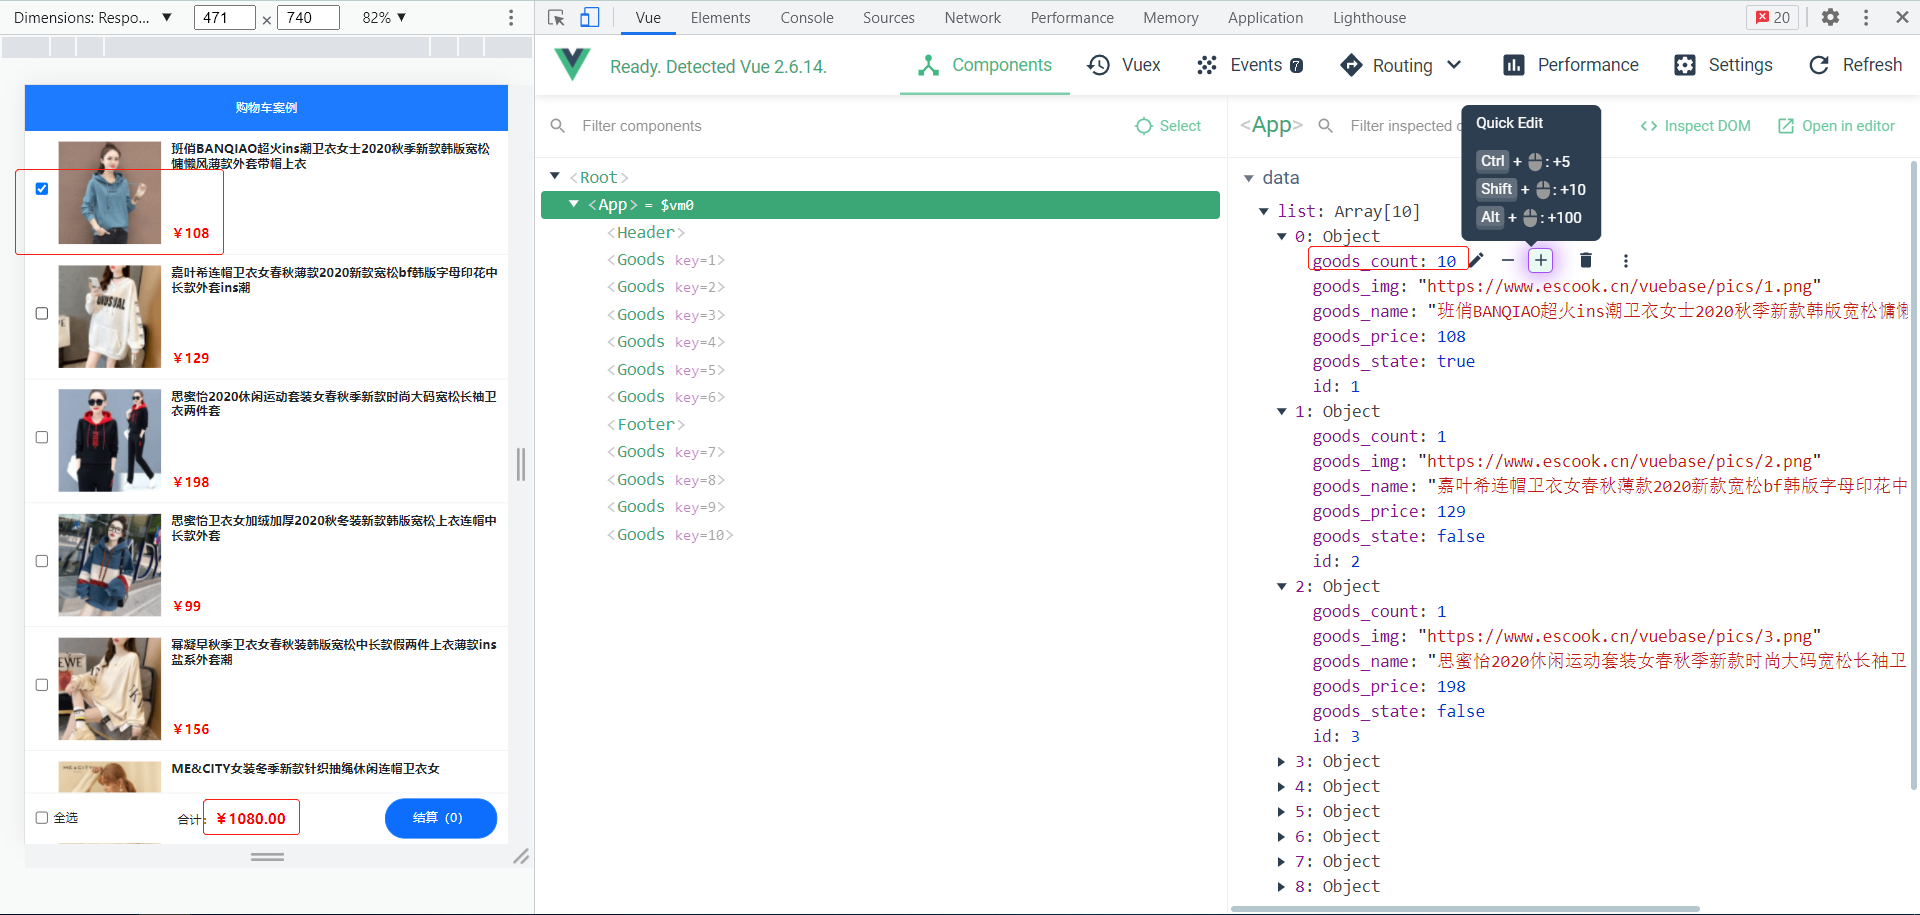
6 计算商品的总价格
在父组件App中通过计算属性计算出总价格
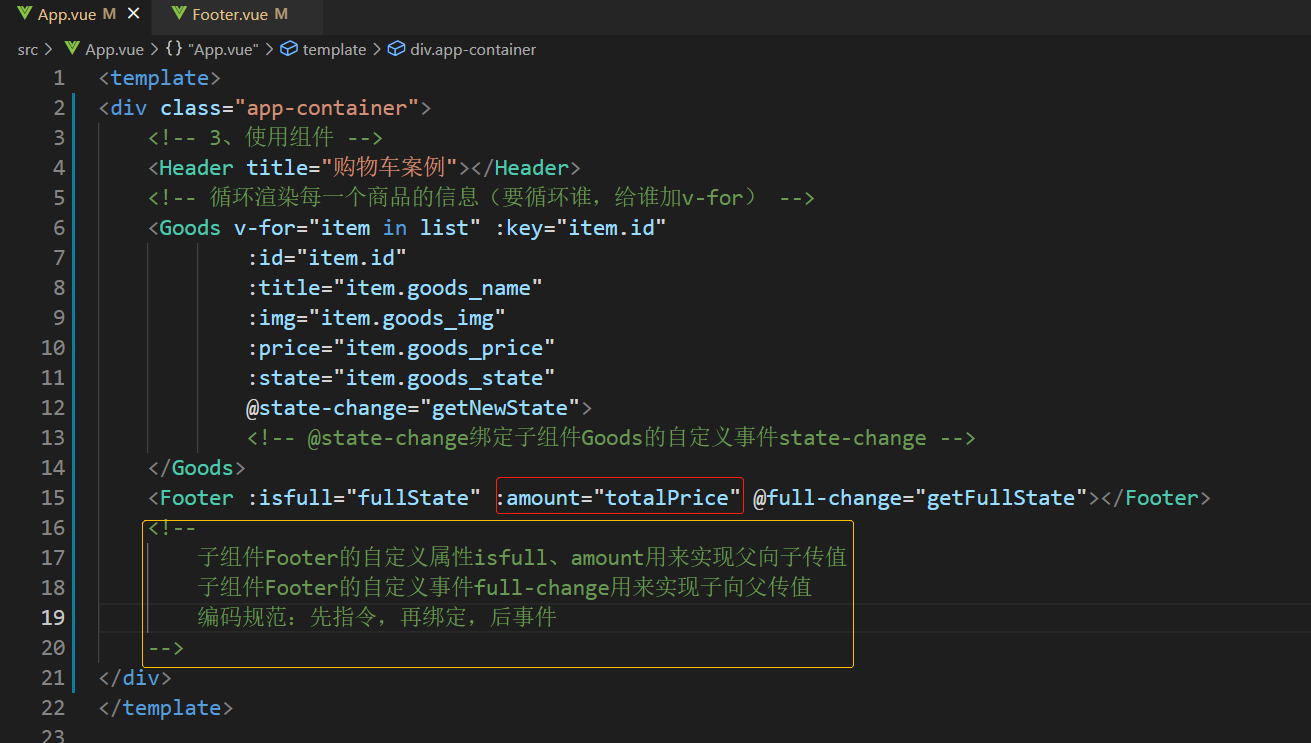
通过自定义属性将总价格传递给子组件Footer

7 Counter组件
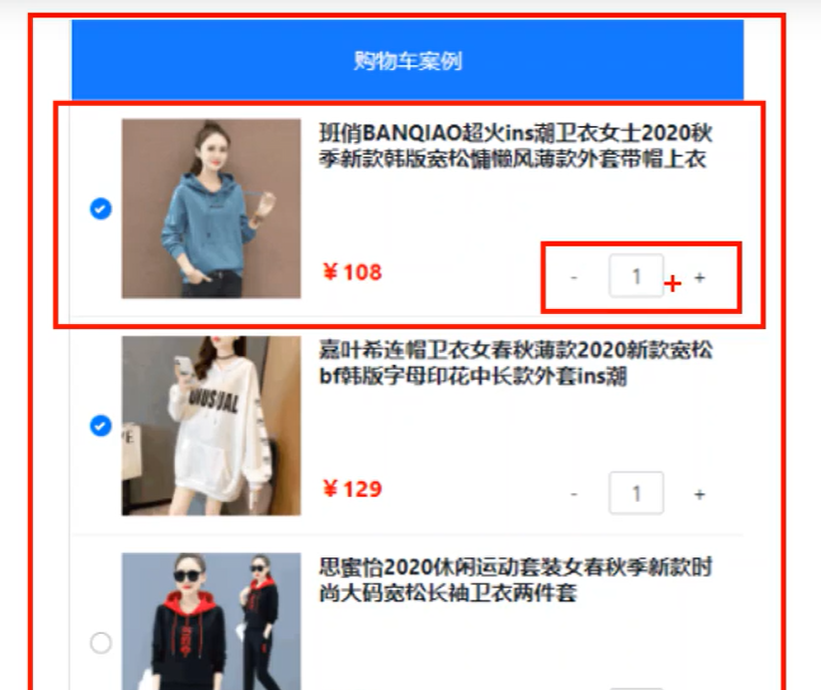
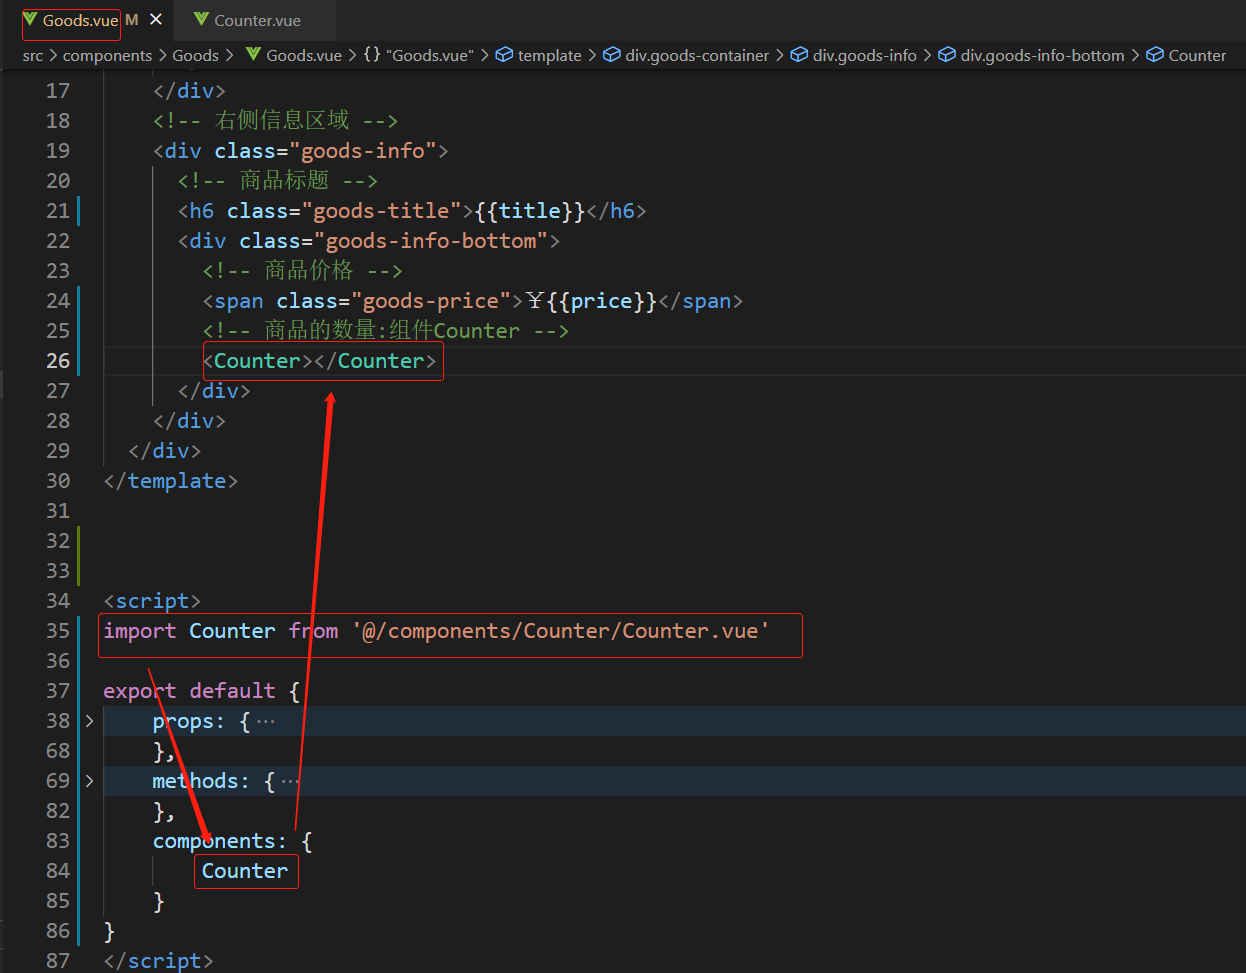
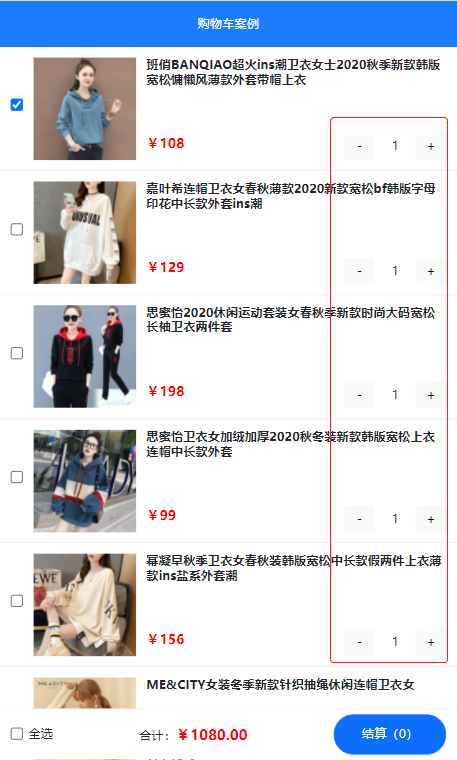
7-1 导入、注册、使用Counter组件

<template>
  <div class="number-container d-flex justify-content-center align-items-center">
    <!-- 减 1 的按钮 -->
    <button type="button" class="btn btn-light btn-sm">-</button>
    <!-- 购买的数量 -->
    <span class="number-box">1</span>
    <!-- 加 1 的按钮 -->
    <button type="button" class="btn btn-light btn-sm">+</button>
  </div>
</template>

<script>
export default {}
</script>

<style lang="less" scoped>
.number-box {
  min-width: 30px;
  text-align: center;
  margin: 0 5px;
  font-size: 12px;
}

.btn-sm {
  width: 30px;
}
</style>
7-2 把实际购买数量传给Counter
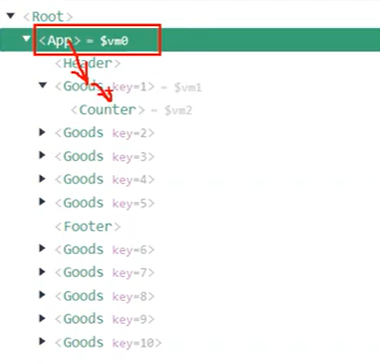
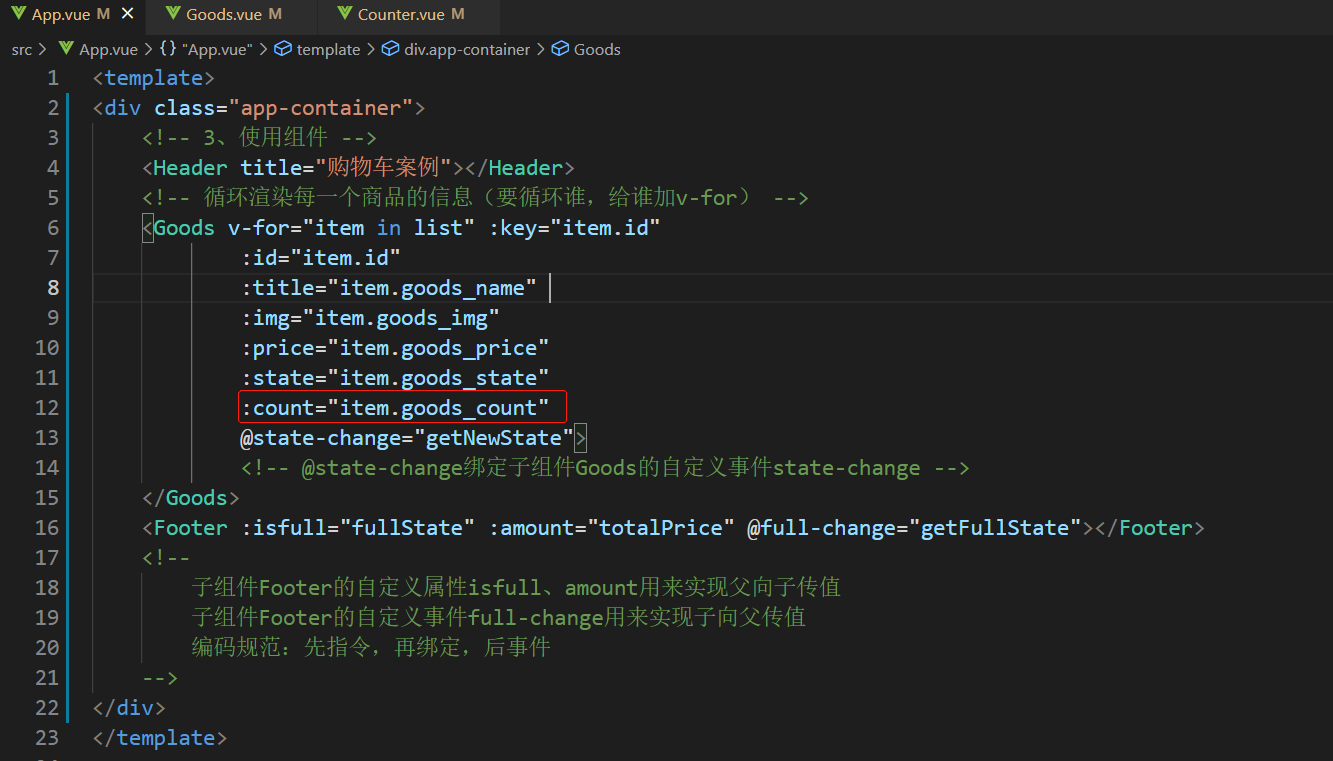
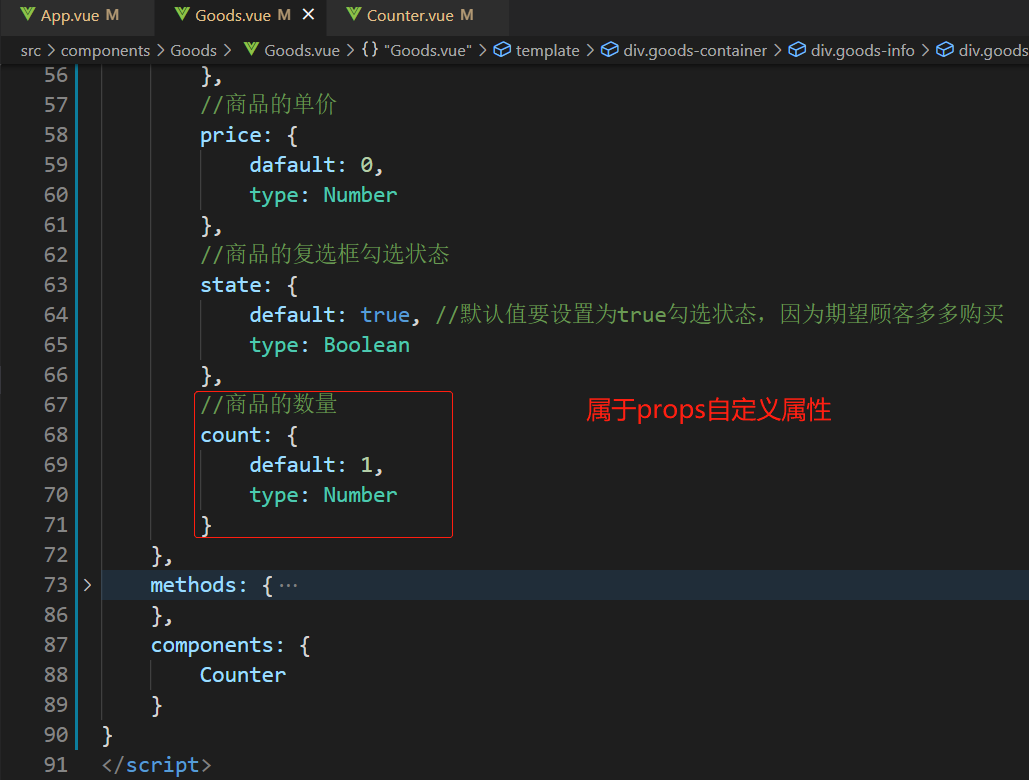
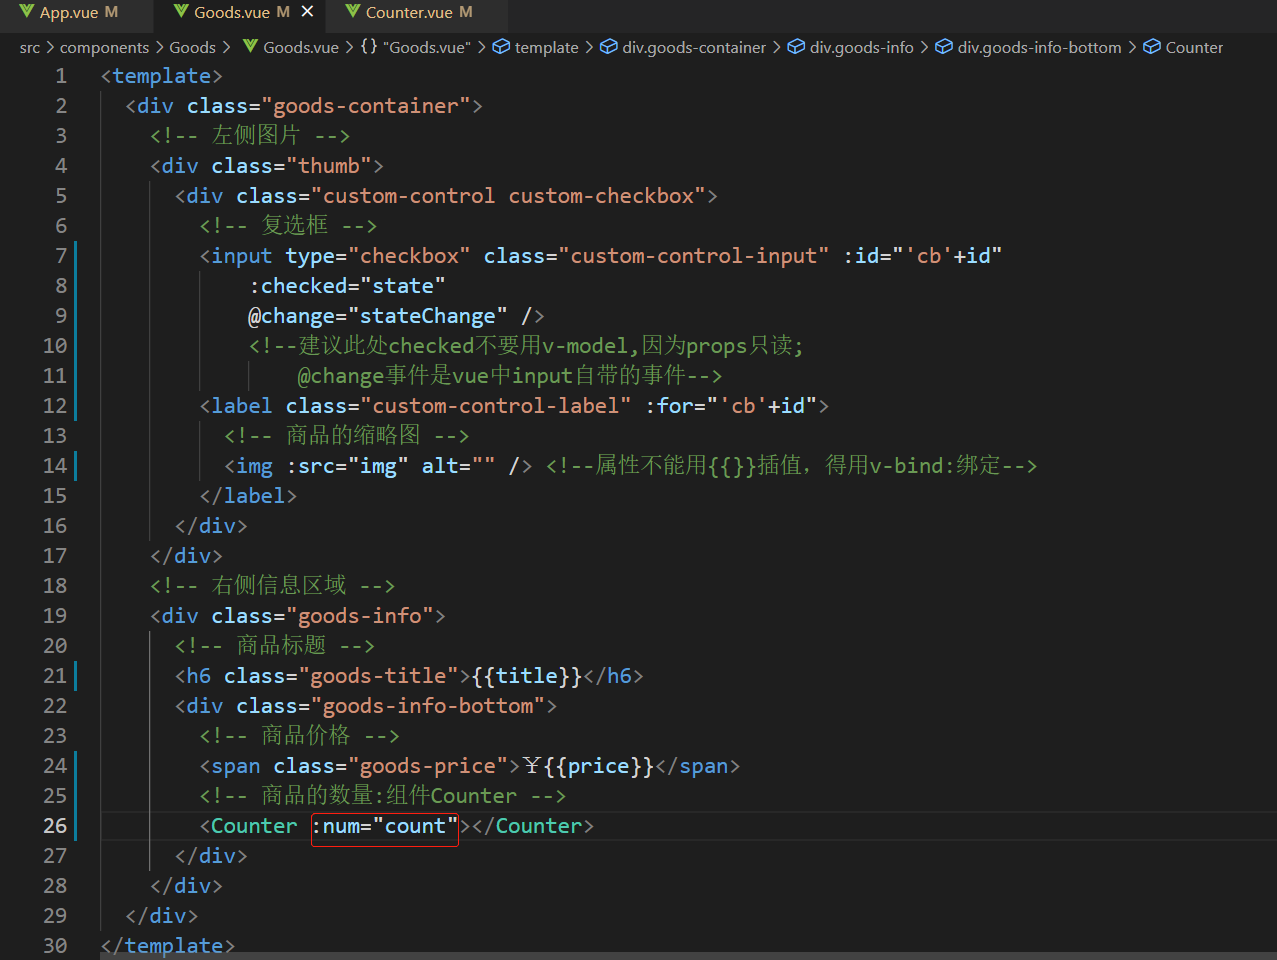
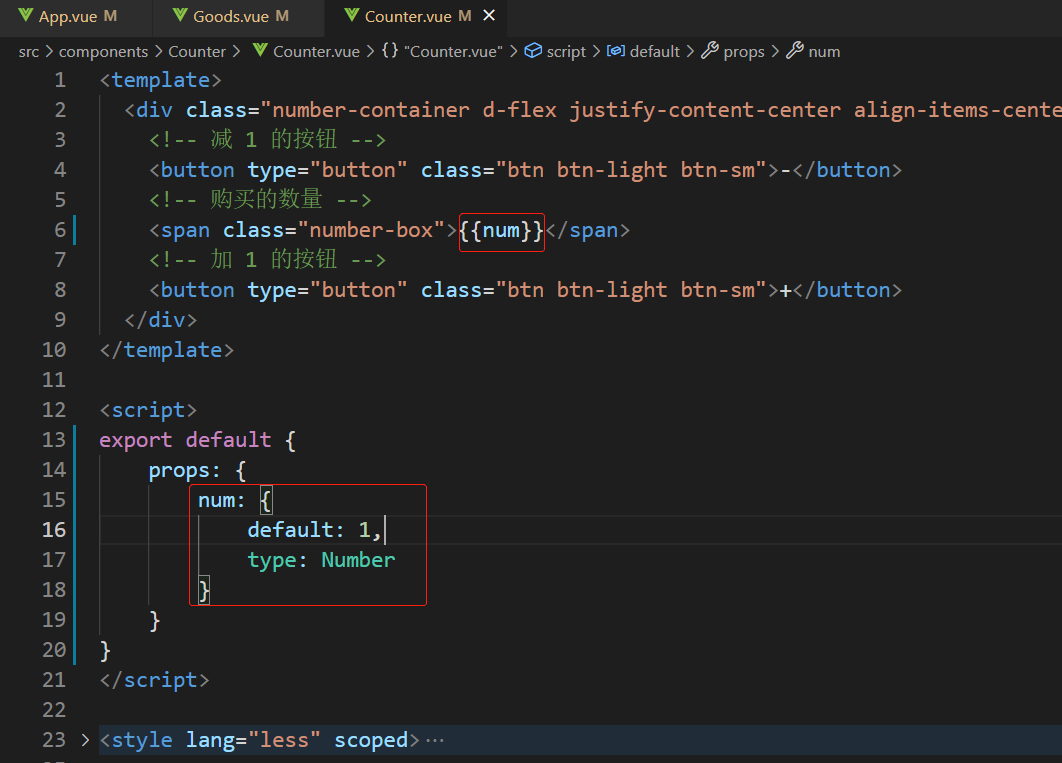
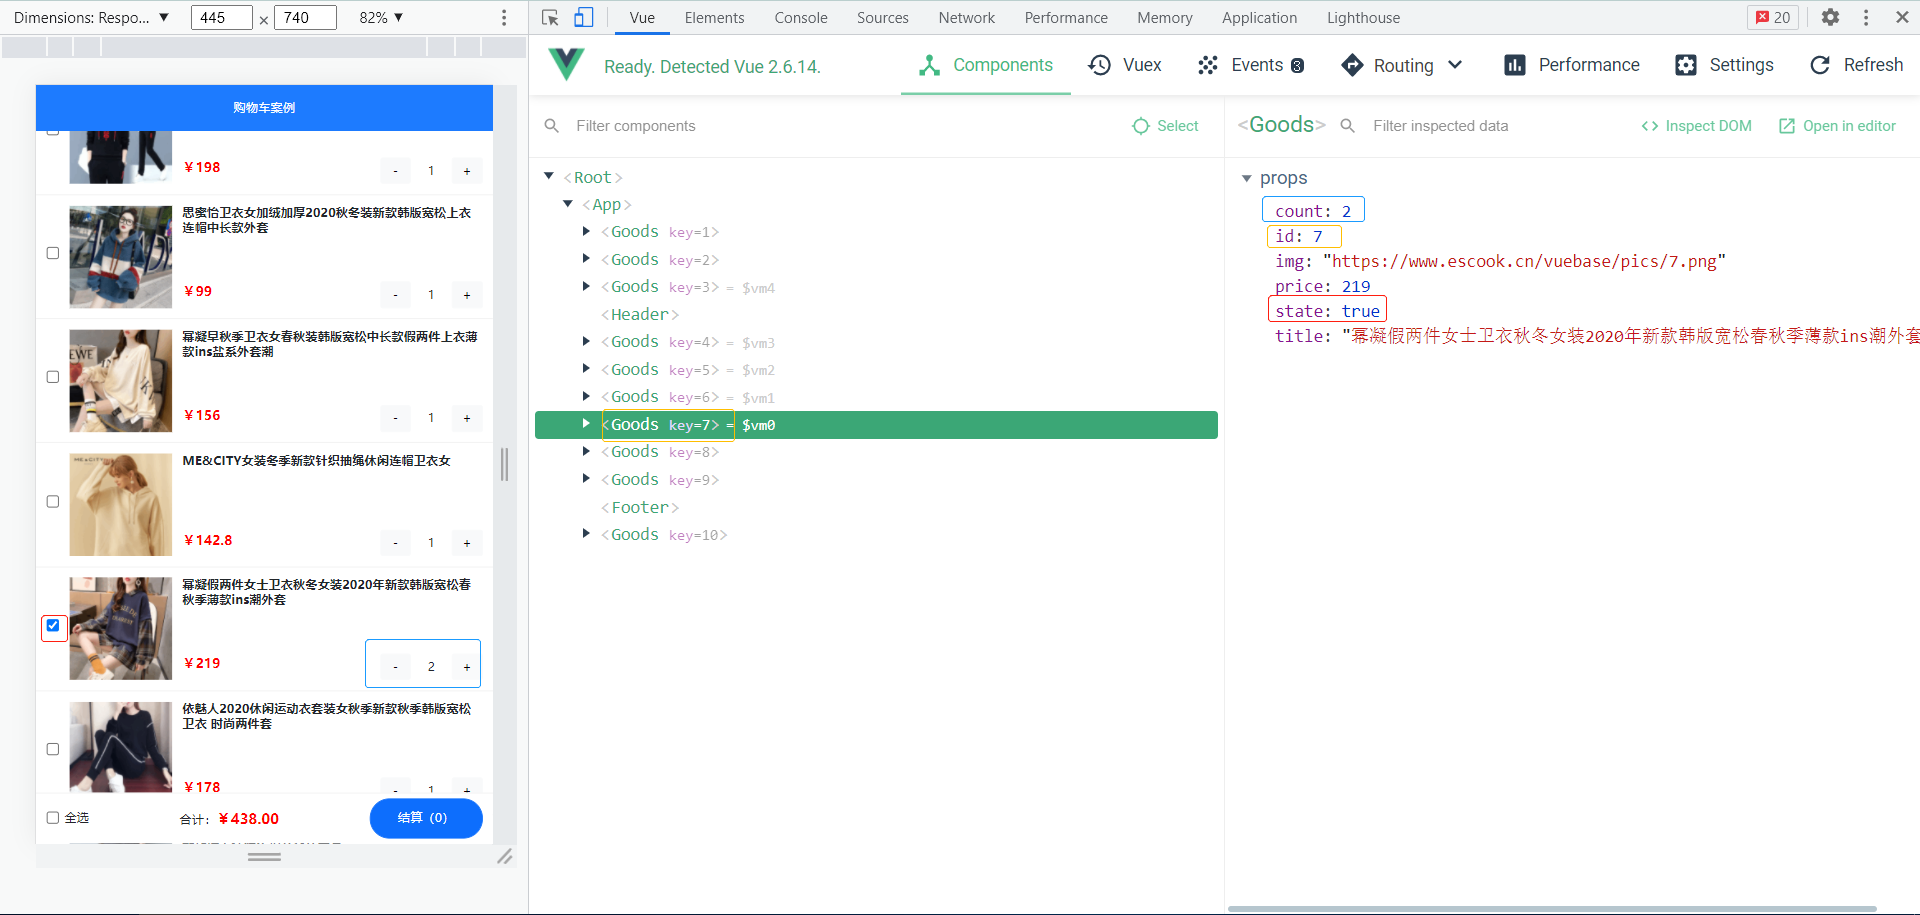
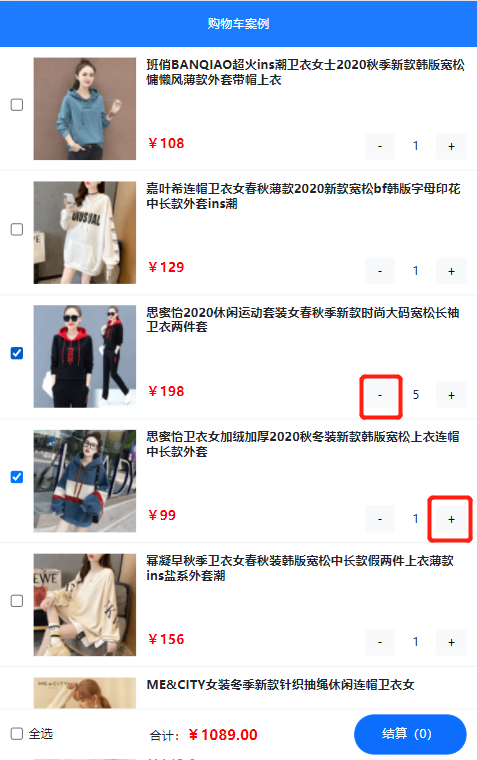
7-3 组件Count向组件App发送数据(实现商品数量的+-)
Counter-->Goods-->App,一层一层往外传值可以实现,但是太麻烦,推荐以下方案:
利用EventBus实现:孙子组件向爷爷组件传值(EventBus不仅仅可以实现兄弟组件间的传值,还可以实现嵌套较深的组件与外层组件的传值)


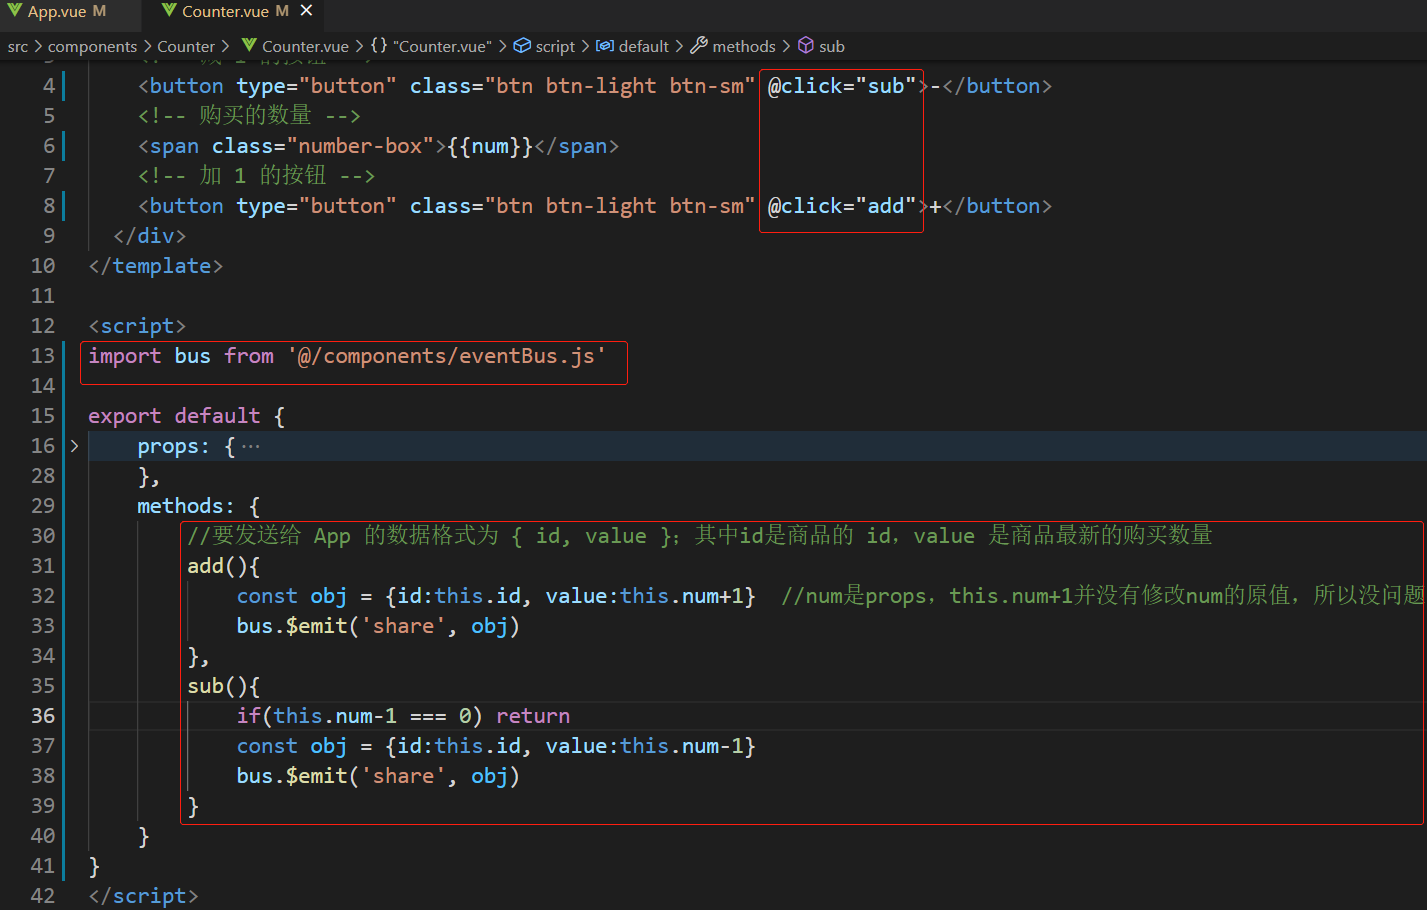
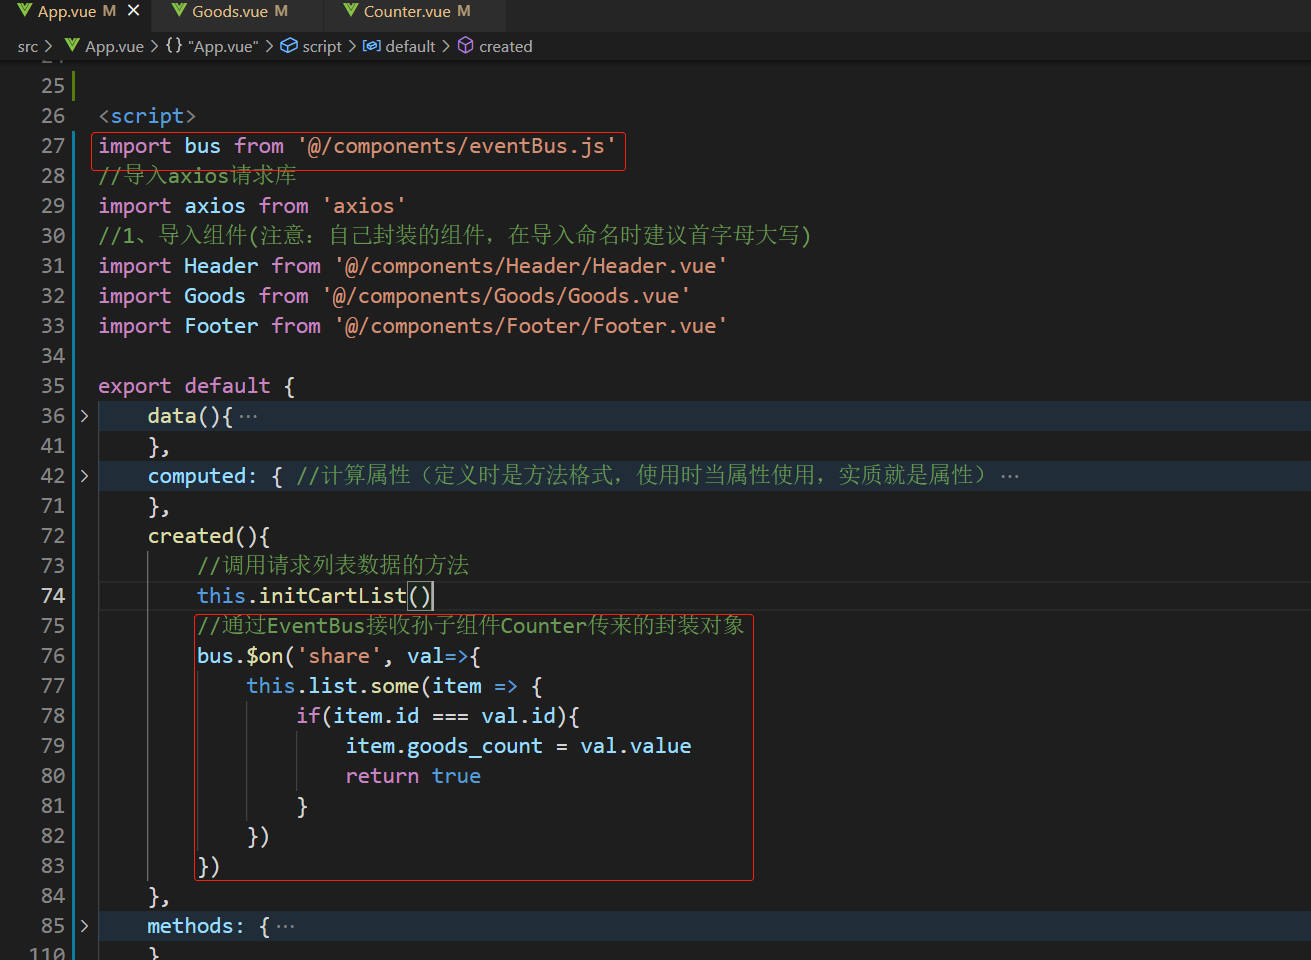

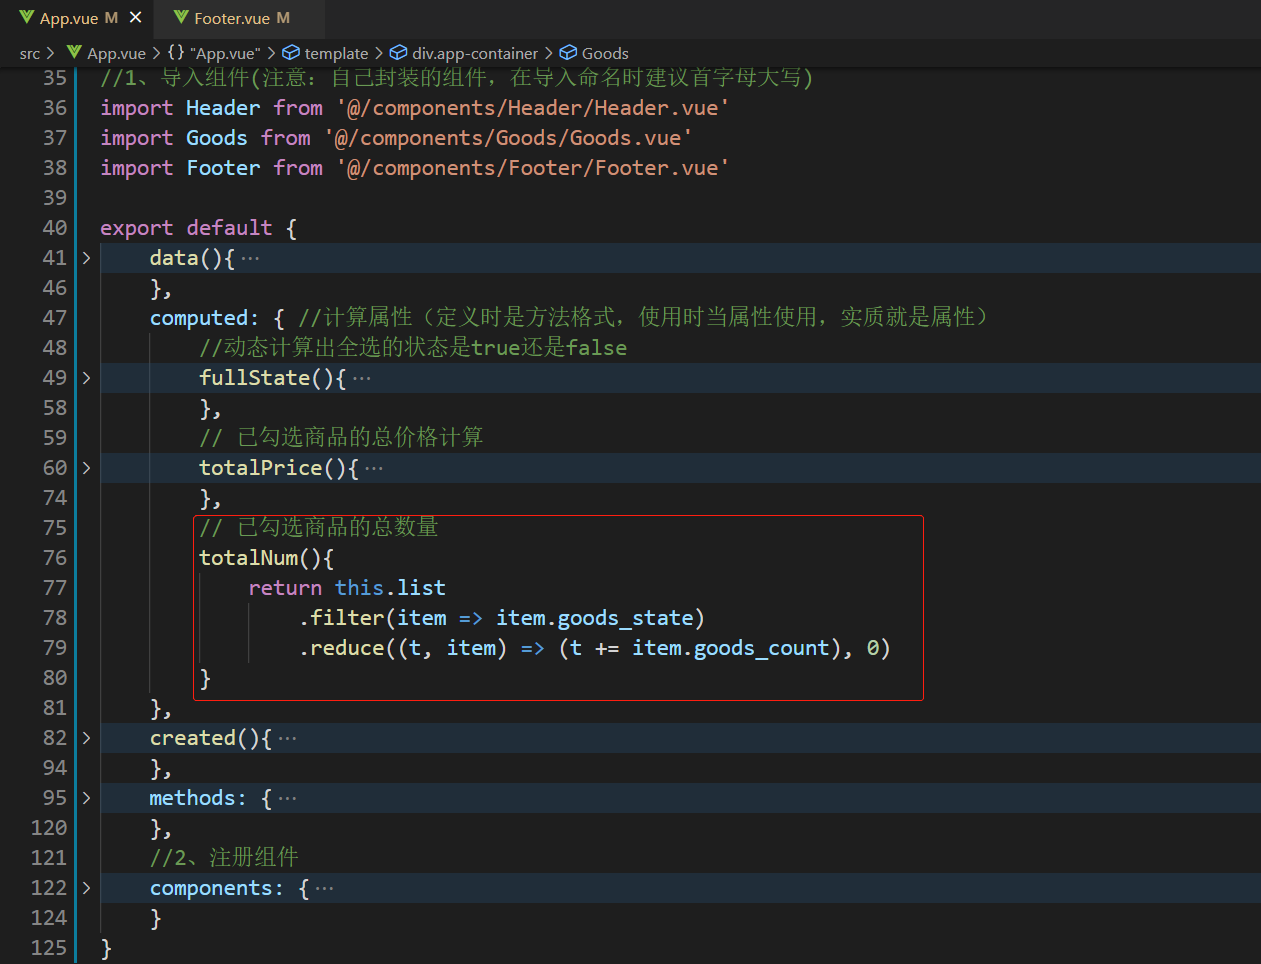
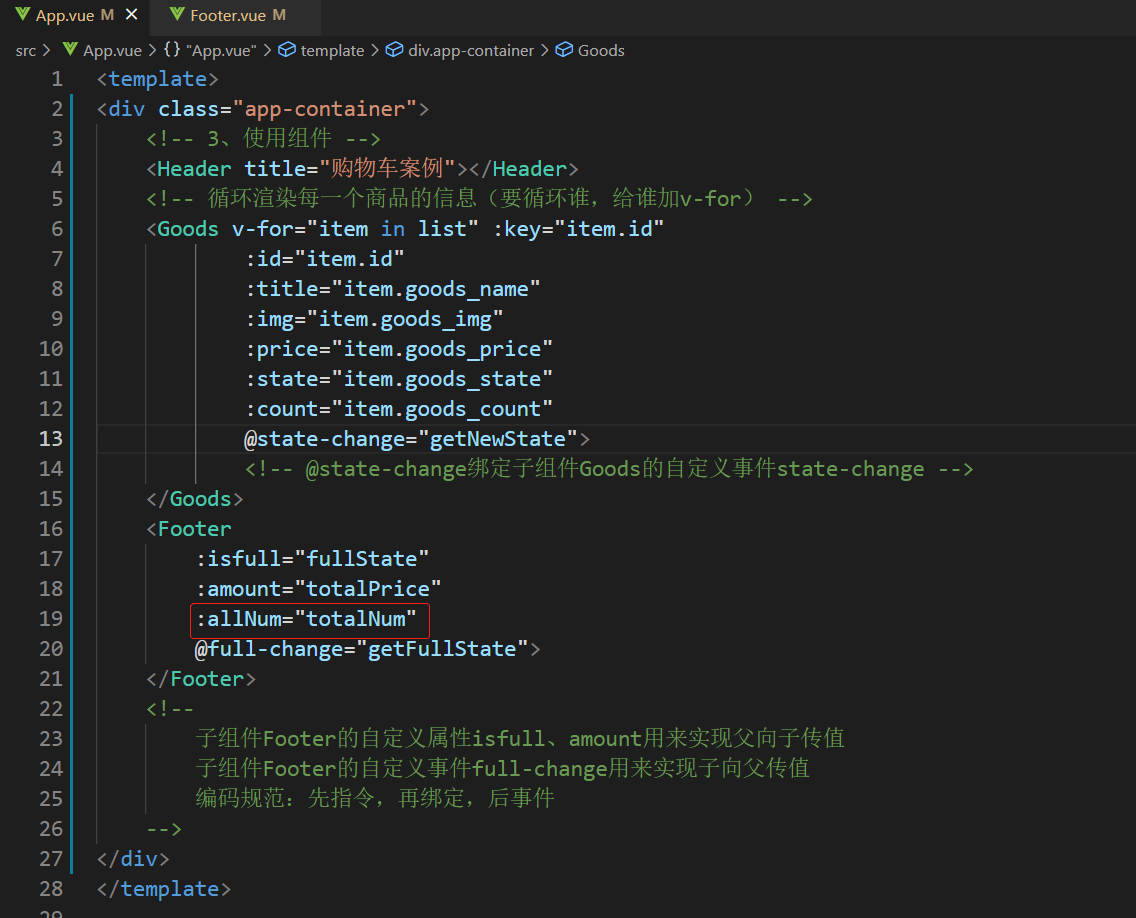
7-5 动态计算已勾选商品的总数量
计算属性、父传子


8 源码
App.vue

<template>
<div class="app-container">
    <!-- 3、使用组件 -->
    <Header title="购物车案例"></Header>
    <!-- 循环渲染每一个商品的信息(要循环谁,给谁加v-for) -->
    <Goods v-for="item in list" :key="item.id"
            :id="item.id"
            :title="item.goods_name"
            :img="item.goods_img"
            :price="item.goods_price"
            :state="item.goods_state"
            :count="item.goods_count"
            @state-change="getNewState">
            <!-- @state-change绑定子组件Goods的自定义事件state-change -->
    </Goods>
    <Footer
        :isfull="fullState"
        :amount="totalPrice"
        :allNum="totalNum"
        @full-change="getFullState">
    </Footer>
    <!--
        子组件Footer的自定义属性isfull、amount用来实现父向子传值
        子组件Footer的自定义事件full-change用来实现子向父传值
        编码规范:先指令,再绑定,后事件
    -->
</div>
</template>


<script>
import bus from '@/components/eventBus.js'
//导入axios请求库
import axios from 'axios'
//1、导入组件(注意:自己封装的组件,在导入命名时建议首字母大写)
import Header from '@/components/Header/Header.vue'
import Goods from '@/components/Goods/Goods.vue'
import Footer from '@/components/Footer/Footer.vue'

export default {
    data(){
        return{
            //用来存储购物车的列表数据,默认为空数组
            list: [],
        }
    },
    //计算属性(定义时是方法格式,使用时当属性使用,实质就是属性)
    computed: {
        //动态计算出全选的状态是true还是false
        fullState(){
            // return this.list.every(item => item.goods_state===true)
            /*
            list.every()返回布尔值,
            当list的每一项item的goods_state都为true是才返回true,
            否则(只要有一个item不满足)返回false
            此处,item.goods_state===true可以简写为item.goods_state
            */
            return this.list.every(item => item.goods_state)
        },
        // 已勾选商品的总价格计算
        totalPrice(){
            // 1. 先 filter 过滤  2. 再 reduce 累加
            /*
            const result = this.list
                            .filter(item => item.goods_state===true)
                            .reduce((sum, item) => {
                                    return sum += item.goods_price*item.goods_count
                            },0)
            return result
            */
            //简写
            return this.list
                .filter(item => item.goods_state)
                .reduce((sum, item) => (sum+=item.goods_price*item.goods_count), 0)
        },
        // 已勾选商品的总数量
        totalNum(){
            return this.list
                .filter(item => item.goods_state)
                .reduce((t, item) => (t += item.goods_count), 0)
        }
    },
    created(){
        //调用请求列表数据的方法
        this.initCartList()

        //通过EventBus接收孙子组件Counter传来的封装对象
        bus.$on('share', val=>{
            this.list.some(item => {
                if(item.id === val.id){
                    item.goods_count = val.value
                    return true
                }
            })
        })
    },
    methods: {
        //封装请求列表数据的方法
        async initCartList(){
            // 调用 axios 的 get 方法,请求列表数据
            const {data:res} = await axios.get('https://www.escook.cn/api/cart')
            console.log(res)
            // 只要请求回来的数据,在页面渲染期间要用到,则必须转存到 data 中
            if(res.status === 200){ //状态码200表示请求成功
                this.list = res.list
            }
        },
        //接收子组件传递过来的数据并修改父组件中对应商品的勾选状态值
        getNewState(e){ //e 的格式为 { id, value }
            // console.log(e) //商品1默认被勾选,点击复选框取消勾选--->打印{id: 1, value: false}
            this.list.some(item => {
                if(item.id === e.id){
                    item.goods_state = e.value
                    return true //查找到对应商品后,终止后续的循环
                }
            })
        },
        // 接收 Footer 子组件传递过来的全选按钮的状态
        getFullState(e){
            this.list.forEach(item => item.goods_state=e)
        }
    },
    //2、注册组件
    components: {
        Header, Goods, Footer
    }
}
</script>


<style lang="less" scoped>
.app-container {
  padding-top: 45px;
  padding-bottom: 50px;
}
</style>
Header.vue

<template>
  <div class="header-container">{{title}}</div>
</template>

<script>
export default {
    props: {
        //声明title自定义属性,允许使用者自定义标题内容
        title: {
            default: '标题',
            type: String
        }
    }
}
</script>

<style lang="less" scoped>
.header-container {
  font-size: 12px;
  height: 45px;
  width: 100%;
  background-color: #1d7bff;
  display: flex;
  justify-content: center;
  align-items: center;
  color: #fff;
  position: fixed;
  top: 0;
  z-index: 999;
}
</style>
Goods.vue

<template>
<div class="goods-container">

    <!-- 左侧图片 -->
    <div class="thumb">
        <div class="custom-control custom-checkbox">
            <!-- 复选框 -->
            <input type="checkbox" class="custom-control-input" :id="'cb'+id"
                :checked="state"
                @change="stateChange" />
                <!--建议此处checked不要用v-model,因为props只读; @change事件是vue中input自带的事件-->
            <label class="custom-control-label" :for="'cb'+id">
                <!-- 商品的缩略图 -->
                <img :src="img" alt="" /> <!--属性不能用{{}}插值,得用v-bind:绑定-->
            </label>
        </div>
    </div>

    <!-- 右侧信息区域 -->
    <div class="goods-info">
        <!-- 商品标题 -->
        <h6 class="goods-title">{{title}}</h6>
        <div class="goods-info-bottom">
            <!-- 商品价格 -->
            <span class="goods-price">¥{{price}}</span>
            <!-- 商品的数量:组件Counter -->
            <Counter :id="id" :num="count"></Counter>
        </div>
    </div>

</div>
</template>


<script>
import Counter from '@/components/Counter/Counter.vue'

export default {
    props: {
        //商品ID
        /*为啥在这里要封装一个 id 属性呢?
        原因:期望子组件中商品的勾选状态变化之后, 需要通过子 -> 父的形式,通知父组件根据 id 修改对应商品的勾选状态。
        */
        id: {
            required: true, //因为ID是修改商品状态必须的,所以此处设为必需,即不传ID会报错
            type: Number
        },
        //商品的标题
        title: {
            dafault: '',
            type: String
        },
        //商品的图片
        img: {
            dafault: '',
            type: String
        },
        //商品的单价
        price: {
            dafault: 0,
            type: Number
        },
        //商品的复选框勾选状态
        state: {
            default: true, //默认值要设置为true勾选状态,因为期望顾客多多购买
            type: Boolean
        },
        //商品的数量
        count: {
            default: 1,
            type: Number
        }
    },
    methods: {
        // 只要复选框的选中状态发生了变化,就会调用这个处理函数
        stateChange(e){
            /*
            console.log('ok')
            console.log(e)*/
            const newState = e.target.checked
            /*
            console.log(newState)
            console.log(this) //this.id就是Goods组件当前商品的id,需要传递给父组件App*/
            //触发自定义事件state-change
            this.$emit('state-change', {id:this.id, value:newState})
        }
    },
    components: {
        Counter
    }
}
</script>


<style lang="less" scoped>
.goods-container {
  + .goods-container {
    border-top: 1px solid #efefef;
  }
  padding: 10px;
  display: flex;
  .thumb {
    display: flex;
    align-items: center;
    img {
      width: 100px;
      height: 100px;
      margin: 0 10px;
    }
  }

  .goods-info {
    display: flex;
    flex-direction: column;
    justify-content: space-between;
    flex: 1;
    .goods-title {
      font-weight: bold;
      font-size: 12px;
    }
    .goods-info-bottom {
      display: flex;
      justify-content: space-between;
      .goods-price {
        font-weight: bold;
        color: red;
        font-size: 13px;
      }
    }
  }
}
</style>
Footer.vue

<template>
<div class="footer-container">

        <!-- 左侧的全选 -->
        <div class="custom-control custom-checkbox">
            <input type="checkbox" class="custom-control-input" id="cbFull"
                    :checked="isfull"
                    @change="fullChange" />
            <label class="custom-control-label" for="cbFull">全选</label>
        </div>

        <!-- 中间的合计 -->
        <div>
            <span>合计:</span>
            <span class="total-price">¥{{amount.toFixed(2)}}</span> <!--.toFied(n):n位小数-->
        </div>

        <!-- 结算按钮 -->
        <button type="button" class="btn btn-primary btn-settle">结算{{allNum}}件</button>

</div>
</template>


<script>
export default {
    props: {
        // 全选的状态
        isfull: {
            type: Boolean,
            default: true
        },
        //金额,总价格
        amount: {
            type: Number,
            default: 0
        },
        //已勾选商品总数
        allNum: {
            type: Number,
            default: 0
        }
    },
    methods: {
        // 监听到了全选框的状态变化
        fullChange(e){
            this.$emit('full-change', e.target.checked) //自定义事件名称:full-change
        }
    }
}
</script>


<style lang="less" scoped>
.footer-container {
  font-size: 12px;
  height: 50px;
  width: 100%;
  border-top: 1px solid #efefef;
  position: fixed;
  bottom: 0;
  background-color: #fff;
  display: flex;
  justify-content: space-between;
  align-items: center;
  padding: 0 10px;
}

.custom-checkbox {
  display: flex;
  align-items: center;
}

#cbFull {
  margin-right: 5px;
}

.btn-settle {
  height: 80%;
  min-width: 110px;
  border-radius: 25px;
  font-size: 12px;
}

.total-price {
  font-weight: bold;
  font-size: 14px;
  color: red;
}
</style>
Counter.vue

<template>
<div class="number-container d-flex justify-content-center align-items-center">

    <!-- 减 1 的按钮 -->
    <button type="button" class="btn btn-light btn-sm" @click="sub">-</button>
    <!-- 购买的数量 -->
    <span class="number-box">{{num}}</span>
    <!-- 加 1 的按钮 -->
    <button type="button" class="btn btn-light btn-sm" @click="add">+</button>

</div>
</template>


<script>
import bus from '@/components/eventBus.js'

export default {
    props: {
        //接收商品的 id 值
        //期望使用 EventBus 方案,把数量传递到 App.vue 的时候,需要通知 App 组件,更新哪个商品的数量
        id: {
            required: true,
            type: Number
        },
        // 接收到的商品数量
        num: {
            default: 1,
            type: Number
        }
    },
    methods: {
        //要发送给 App 的数据格式为 { id, value };其中id是商品的 id,value 是商品最新的购买数量
        add(){
            const obj = {id:this.id, value:this.num+1}  //num是props,this.num+1并没有修改num的原值,所以没问题
            bus.$emit('share', obj)
        },
        sub(){
            if(this.num-1 === 0) return
            const obj = {id:this.id, value:this.num-1}
            bus.$emit('share', obj)
        }
    }
}
</script>


<style lang="less" scoped>
.number-box {
  min-width: 30px;
  text-align: center;
  margin: 0 5px;
  font-size: 12px;
}

.btn-sm {
  width: 30px;
}
</style>


 浙公网安备 33010602011771号