使用Electron和Dynamsoft条形码阅读器创建跨平台条形码阅读器应用
Dynamsoft Barcode Reader SDK一款多功能的条码读取控件,只需要几行代码就可以将条码读取功能嵌入到Web或桌面应用程序。这可以节省数月的开发时间和成本。能支持多种图像文件格式以及从摄像机或扫描仪获取的DIB格式。使用Dynamsoft Barcode Reader SDK,你可以创建强大且实用的条形码扫描仪软件,以满足你的业务需求。
慧都网免费下载Dynamsoft Barcode Reader最新版
Electron是最流行的跨平台桌面应用程序框架之一,已在众多著名应用程序中使用。借助网络技术,开发人员可以快速构建适用于Windows,macOS和Linux的产品。在本文中,我们将使用Electron通过Dynamsoft Barcode Reader构建条形码解码和扫描应用程序。
安装
要创建我们的应用,我们需要以下软件/软件包/工具。
- Dynamsoft条码阅读器
- 电子
- npm
- Node.js
- 节点gyp
- 电子重建
- GCC / Clang /其他C ++编译器
Node.js是电子和节点程序包管理的基础。在继续开发工作之前,必须在主机中安装Node.js。
Dynamsoft条码读取器是行业领先的条码解码SDK。它支持各种格式的条形码,并且可以在所有主流平台上运行。
我们将为我们的项目导入一个C ++插件。node-gyp是用于将C ++程序编译为Node.js插件的配置工具。
创建项目
初始化项目
我们使用官方的快速入门示例开始我们的工作。
首先,让我们将示例项目克隆到我们的主机。
git clone https://github.com/electron/electron-quick-start.git
然后,安装依赖项并启动项目以测试我们是否可以正确运行Electron项目。
cd electron-quick-start
npm install
npm start
如果没有错误,您将看到一个弹出窗口,显示“ Hello World!”。
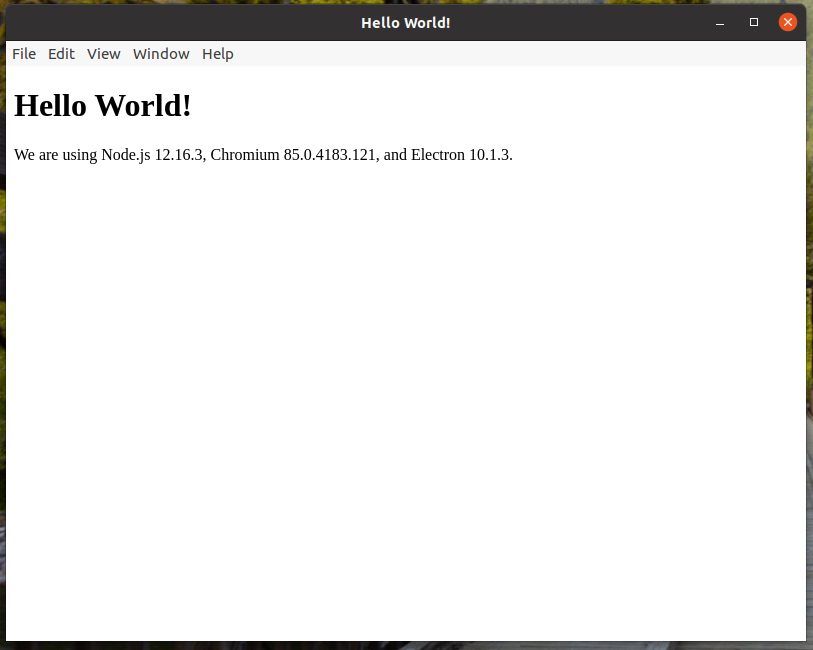
电子应用程序成功运行
在您的终端中,输入以下命令以安装所需的依赖项。
npm install --save-dev electron-rebuild
npm install -g node-gyp
启用Node.js集成
默认情况下,Node.js集成处于禁用状态。我们将其更改为true以便require在导入模块时使用。在main.js中,我们在中指定此值BrowserWindow。
const mainWindow = new BrowserWindow({
    width: 1280,
    height: 1024,
    webPreferences: {
      preload: path.join(__dirname, 'preload.js'),
      nodeIntegration: true // Change to true to use Node API
    }
  })
导入Node.js C ++插件
Dynamsoft条形码阅读器提供JavaScript和C / C ++条形码SDK。为了获得Electron应用程序的更好性能,我们可以用C ++编写Node.js条形码插件。我们可以从Github获取插件源代码。
我们libs在项目根目录下创建一个名为文件夹,然后克隆节点条形码存储库。
mkdir libs
cd libs
git clone https://github.com/Dynamsoft/nodejs-barcode
克隆过程完成后,我们将使用node-gyp更改目录并为我们的项目构建库。
cd nodejs-barcode
../../node_modules/.bin/electron-rebuild
该命令electron-rebuild将检测构建环境并获取相应的标头以完成构建。

通过电子重建来重建模块
构建完成后,将创建包含动态链接库的几个目录。
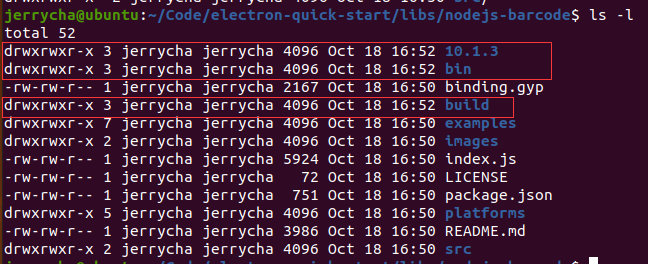
标头和已编译的二进制文件将放在三个文件夹中
由于该库已正确引用了二进制库,因此我们只需要index.js在项目中导入文件即可。
返回项目根目录,并使用编辑器打开main.js文件。main.js是整个应用程序的起点。我们导入条形码附件以进行快速测试。
const dbr = require('dbr')

需要nodejs-barcode库后未生成任何错误
从文件解码条形码
在开始编码之前,让我们看一下API。
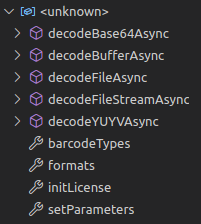
Node.js-条形码库的API
- decodeBufferAsync:从原始RGBA数据读取和解码。
- decodeFileAsync:通过读取图像文件进行读取和解码。
- decodeFileStreamAsync:通过读取文件流来读取和解码。
- decodeBase64Async:图像数据作为base64字符串传递
- decodeYUYVAsync:图像数据是RGBA以外的YUV格式
创建解码服务
我们创建两个脚本文件:background-services.js和foreground-services.js。
Web部件使用了前台服务.js,而后台服务.js调用了C ++附加API并提供了解码服务。
在background-services.js中,我们导入Node.js条码插件。
const { ipcMain } = require('electron')
const dbr = require('./libs/nodejs-barcode/index')
const barcodeTypes = dbr.barcodeTypes

function decodeFileAsync(evt, filepath) {
}

function decodeBase64Async(evt, base64Str) {
}

function decodeBufferAsync(evt, imgData, width, height) {
}

function register() {
  ipcMain.on('decodeFileAsync', decodeFileAsync)
  ipcMain.on('decodeBase64Async', decodeBase64Async)
  ipcMain.on('decodeBufferAsync', decodeBufferAsync)
}

module.exports = {
  register
}
由于Node.js使用事件模型,因此我们使用事件侦听器进行进程间通信。要在主进程上注册侦听器,我们使用ipcMain.on添加事件名称和相应的处理程序。我们将注册过程放在函数中,register以控制何时注册这些事件。
在中foreground-services.js,我们现在可以使用这些服务。
const { ipcRenderer } = require('electron')

const DEBUG = false

ipcRenderer.setMaxListeners(30)

const resultBuffer = {
  lastUpdate: null,
  results: []
}

const frameBuffer = {
  lastUpdate: null,
  imgData: Uint8ClampedArray.from([]),
  width: 0,
  height: 0,
  channel: 0,
  decoding: false
}

function setFrameBuffer(img, width, height, channel) {
  console.log('frame buffer to update')
  frameBuffer.imgData = img
  frameBuffer.width = width
  frameBuffer.height = height
  frameBuffer.channel = channel
  frameBuffer.lastUpdate = Date.now()
}

function startVideoDecode() {
  frameBuffer.decoding = true
  videoDecode()
}

function stopVideoDecode() {
  frameBuffer.decoding = false
}

function videoDecode() {
  ipcRenderer.send('videoDecode', frameBuffer.imgData, frameBuffer.width, frameBuffer.height)
}

ipcRenderer.on('videoDecode-next', (evt, msg) => {
  updateResultBuffer(msg)
  if (frameBuffer.decoding)
    videoDecode()
})

function decodeFileAsync(filepath) {
  if (DEBUG)
    console.log('sending decodeFileAsync from renderer process with args: ' + filepath)
  ipcRenderer.send('decodeFileAsync', filepath)
}

function decodeBase64Async(base64Str) {
  if (DEBUG)
    console.log('sending decodeBase64Async from renderer process')
  ipcRenderer.send('decodeBase64Async', base64Str)
}

function decodeBufferAsync(imgData, width, height) {
  if (DEBUG)
    console.log('sending decodeBufferAsync from renderer process')
  ipcRenderer.send('decodeBufferAsync', imgData, width, height )
}

function updateResultBuffer(msg) {
  resultBuffer.lastUpdate = Date.now()
  resultBuffer.results = msg
}

ipcRenderer.on('decodeBufferAsync-done', (evt, msg) => {
  updateResultBuffer(msg)
})

ipcRenderer.on('decodeFileAsync-done', (evt, msg) => {
  updateResultBuffer(msg)
})

ipcRenderer.on('decodeBase64Async-done', (evt, msg) => {
  updateResultBuffer(msg)
})

  module.exports = {
    decodeFileAsync,
    decodeBase64Async,
    decodeBufferAsync,
    setFrameBuffer,
    startVideoDecode,
    stopVideoDecode,
    resultBuffer
  }
消费服务
我们已经准备了服务。现在,我们将注意力转向“前端”。
要在Web应用程序中选择文件,通常使用HTML输入元素。
<input id="file-selector" type="file">
要在选择文件后将文件路径发送到解码服务,我们可以注册该onchange 事件。不要忘记同时注册onclick ,否则它将不会再次解码同一张图像。
document.getElementById('file-selector').onchange = handleFileChange
document.getElementById('file-selector').onclick = evt => {
  evt.target.value = ''
}

async function handleFileChange(evt) {
  const file = evt.target.files[0]
  const results = await services.decodeFileAsync(file.path)
  updateResults(results)
}
async function updateResults(results) {
  // Remove existing results
  const container = document.getElementById('result-box')
  container.innerHTML = ''
  const nodes = []
  results.forEach(result => {
    nodes.push(`<div class="result-card"> \
                  <p>Format: ${result.format}</p> \
                  <p>Text: ${result.value}</p> \
                </div>`
              )
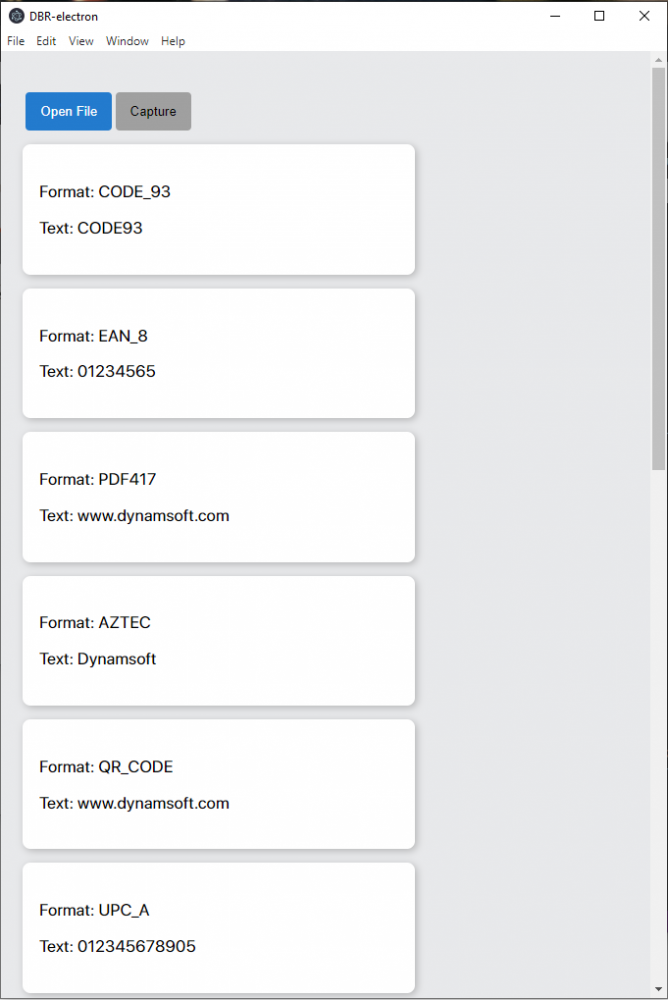
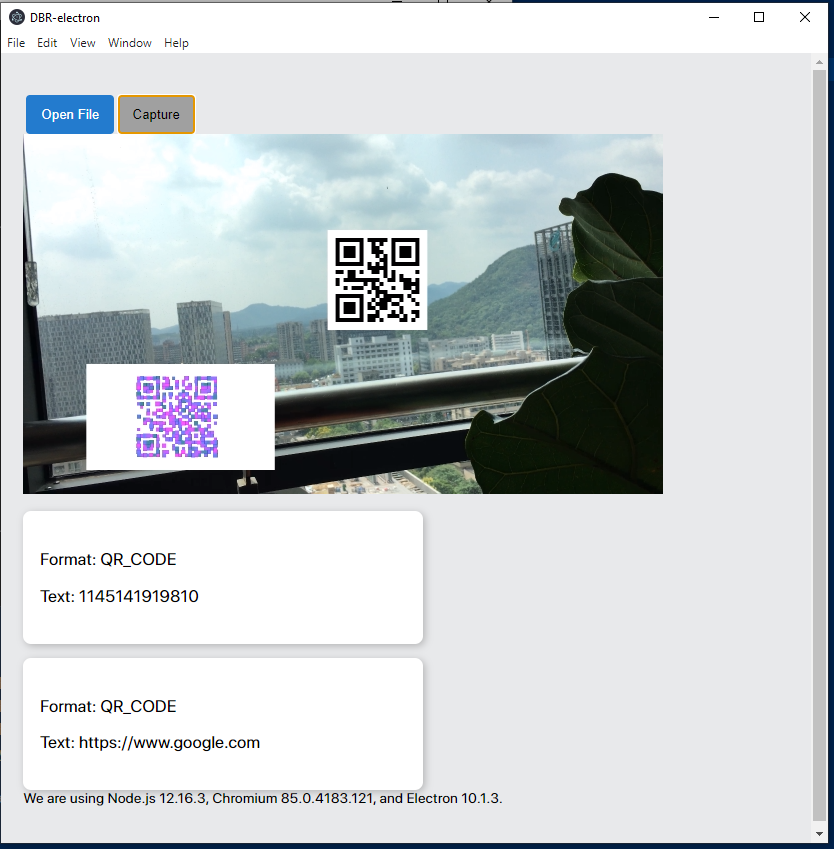
显示解码结果
相机实时解码
存取相机
显然,我们的第一步是访问摄像机。类似于在浏览器中激活相机,我们用于navigator.mediaDevices.getUserMedia申请相机访问。
function initCamera() {
  const video = document.querySelector('video') || document.createElement("video")
  const navigator = window.navigator
  const stream = navigator.mediaDevices.getUserMedia({
    video: { facingMode: 'user', width: 1280, height: 720 }
  })
  stream.then(stream => {
    video.srcObject = stream
  })
}
将getUserMedia返回一个承诺,其将与视频流来解决。我们添加随后的语句以将指定srcObject 为视频元素的解析流。
在中index.html,我们添加一个按钮,并使用指定onclick 事件处理程序initCamera。
<button id="video-capture-btn" class="btn-secondary">Capture</button>
document.getElementById('video-capture-btn').onclick = initCamera
检索图像数据
我们使用画布来获取图像数据。
function getFrame(videoElement) {
  const cvs = new OffscreenCanvas(640, 360)
  const ctx = cvs.getContext('2d')
  ctx.drawImage(videoElement, 0, 0, cvs.width, cvs.height)
  const imgData = ctx.getImageData(0, 0, cvs.width, cvs.height)
  decodeFromFrame(imgData)
}
画布可以接受视频元素,并使用视频帧绘制图形。只需指定视频元素和要绘制的区域,我们便可以随后获取帧数据。
每次检索视频帧时,都会将其分发到服务以进行解码。
async function decodeFromFrame(frame) {
  const res = await services.decodeBufferAsync(frame.data, frame.width, frame.height)
  updateResults(res.data)
}
最后,解码过程需要触发一个事件。在中initCamera,我们onplay使用间隔动作注册处理程序,该动作定期执行该getFrame功能以读取和解码图像数据。
派送图像数据
有了图像数据后,我们可以将其发送到解码服务。的ipcMain和ipcRenderer分别是用于主处理和渲染过程的流程间通信的对象。通过注册事件侦听器,每个进程都可以侦听特定的消息。我们注册以下事件及其相应的完成消息协议。
发件人 接收者 活动名称 讯息通讯协定
渲染器 主要 encodeFileAsync 文件路径
主要 渲染器 encodeFileAsync-done 结果
渲染器 主要 encodeBufferAsync 图像数据,宽度,高度
主要 渲染器 encodeBufferAsync-done 结果
渲染器 主要 encodeBase64Async Base64字符串
主要 渲染器 encodeBase64Async-done 结果
主要 渲染器 解码视频 图像数据,宽度,高度
渲染器 主要 下一视频 结果
在后台服务中,我们注册以下侦听器,
ipcMain.on('decodeFileAsync', decodeFileAsync)
ipcMain.on('decodeBase64Async', decodeBase64Async)
ipcMain.on('decodeBufferAsync', decodeBufferAsync)
ipcMain.on('videoDecode', videoDecode)
function videoDecode(evt, imgData, width, height) {
  if (DEBUG)
    console.log(`${new Date().toLocaleString()}/real-time decoding for video stream: ${imgData.length/height}, ${width}`)
  dbr.decodeBufferAsync(imgData, width, height, width*4, barcodeTypes, (err, msg) => {
    if (err)
      console.log(err)
    let results = [];
    for (index in msg) {
      let result = Object()
      let res = msg[index];
      result.format = res['format']
      result.value = res['value']
      results.push(result)
    }
    evt.reply('videoDecode-next', results)
    if (DEBUG)
      console.log('ipcMain: replied with ' + JSON.stringify(results))
  })
}

function decodeFileAsync(evt, filepath) {
  if (DEBUG)
    console.log('ipcMain: decodeFileAsync invoked: ' + filepath)
    dbr.decodeFileAsync(filepath, barcodeTypes, (err, msg) => {
      if (err)
        console.log(err)
      let results = [];
      for (index in msg) {
        let result = Object()
        let res = msg[index];
        result.format = res['format']
        result.value = res['value']
        results.push(result)
      }
      evt.reply('decodeFileAsync-done', results)
      if (DEBUG)
        console.log('ipcMain: replied with ' + JSON.stringify(results))
    })
}

function decodeBase64Async(evt, base64Str) {
  if (DEBUG)
    console.log('ipcMain: decodeBase64Async is invoked')
  dbr.decodeBase64Async(base64Str, barcodeTypes, (err, msg) => {
    if (err)
      console.error(err)
    let results = [];
    for (index in msg) {
      let result = Object()
      let res = msg[index];
      result.format = res['format']
      result.value = res['value']
      results.push(result)
    }
    evt.reply('decodeBase64Async-done', results)
    if (DEBUG)
        console.log('ipcMain: replied with ' + JSON.stringify(results))
  })
}

function decodeBufferAsync(evt, imgData, width, height) {
  if (DEBUG)
    console.log('ipcMain: decodeBufferAsync is invoked')
  console.log(imgData)
  dbr.decodeBufferAsync(imgData, width, height, width*4, barcodeTypes, (err, msg) => {
    if (err)
      console.error(err)
    let results = [];
    for (index in msg) {
      let result = Object()
      let res = msg[index];
      result.format = res['format']
      result.value = res['value']
      results.push(result)
    }
    evt.reply('decodeBufferAsync-done', results)
    if (DEBUG)
        console.log('ipcMain: replied with ' + JSON.stringify(results))
  })
}
阅读条形码
我们已经实现了我们想要的功能。现在该运行并测试我们的项目了。转到项目根路径,npm start在终端中键入以启动电子条形码读取器。
请注意,如果Electron或平台的版本发生更改,则必须每次编译nodejs-barcode库。
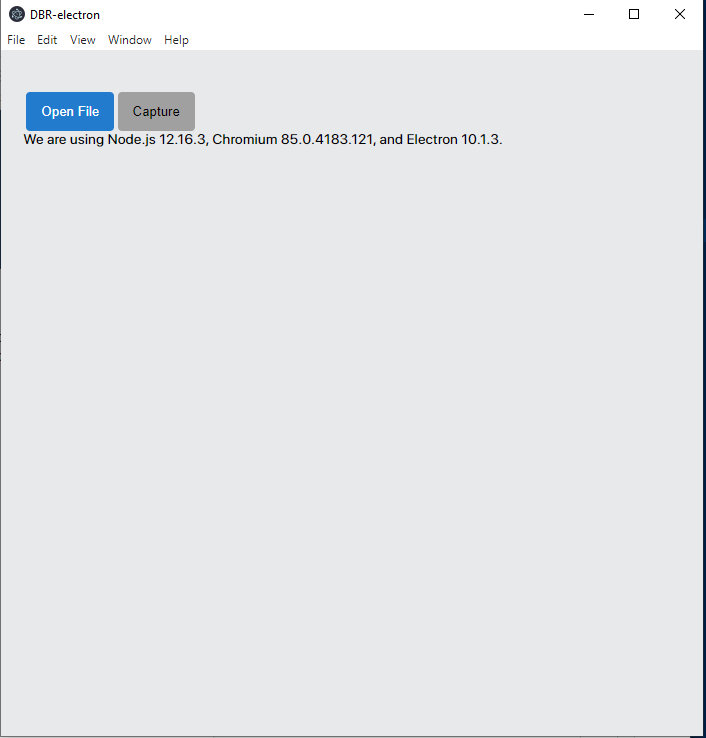
启动应用程序后的第一页


 浙公网安备 33010602011771号