

python测试开发django-58.MySQL server has gone away错误的解决办法
前言
使用django执行sql相关操作的时候,出现一个“MySQL server has gone away”错误,后来查了下是sql执行过程中,导入的文件较大时候,会出现这个异常。
检查了下sql语句,确实有插入图片,图片较大导致出现MySQL server has gone away。
该问题是max_allowed_packet配置的默认值设置太小,只需要相应调大该项的值之后再次导入便能成功。
该项的作用是限制mysql服务端接收到的包的大小,因此如果导入的文件过大则可能会超过该项设置的值从而导致导入不成功!
环境:
CentOS7.4
mysql5.6
max_allowed_packet
首先连接数据库,查看max_allowed_packet的值。
以linux系统为例,输入mysql -uroot -p进入mysql,输入root用户密码进入mysql
mysql -uroot -p
[root@yoyo ~]# mysql -uroot -p
Enter password:
Welcome to the MySQL monitor.  Commands end with ; or \g.
Your MySQL connection id is 33700
Server version: 5.6.42 MySQL Community Server (GPL)

Copyright (c) 2000, 2018, Oracle and/or its affiliates. All rights reserved.

Oracle is a registered trademark of Oracle Corporation and/or its
affiliates. Other names may be trademarks of their respective
owners.

Type 'help;' or '\h' for help. Type '\c' to clear the current input statement.

mysql>
查看 max_allowed_packet 的值
show global variables like 'max_allowed_packet';
查看到max_allowed_packet值是4194304,也就是默认4M(410241024)
mysql> show global variables like 'max_allowed_packet';
+--------------------+---------+
| Variable_name      | Value   |
+--------------------+---------+
| max_allowed_packet | 4194304 |
+--------------------+---------+
1 row in set (0.00 sec)

mysql>
修改max_allowed_packet 的值
默认情况下max_allowed_packet的大小只有4M,接下来将该值设置成100M(10241024100)
set global max_allowed_packet=104857600;
重新查看max_allowed_packet的大小
mysql> set global max_allowed_packet=104857600;
Query OK, 0 rows affected (0.00 sec)

mysql> show global variables like 'max_allowed_packet';
+--------------------+-----------+
| Variable_name      | Value     |
+--------------------+-----------+
| max_allowed_packet | 104857600 |
+--------------------+-----------+
1 row in set (0.00 sec)

mysql> exit
Bye
设置完成之后,exit退出数据库即可。
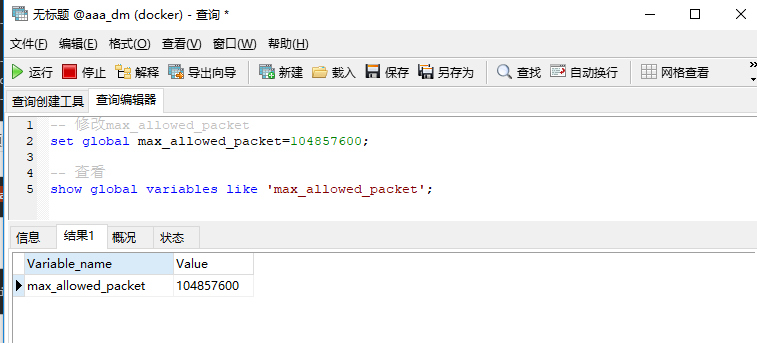
Navicat修改
如果你不会直接进数据库操作,使用远程工具Navicat也是可以直接修改的
-- 修改max_allowed_packet
set global max_allowed_packet=104857600;

-- 查看
show global variables like 'max_allowed_packet';
请注意通过在命令行中进行设置只对当前有效,重启mysql服务之后则恢复默认值,但可以通过修改my.cnf配置文件来达到永久有效的目的
my.cnf配置
my.cnf配置文件一般在/etc/my.cnf或者/etc/mysql/my.cnf目录,使用cat查看当前配置
[root@yoyo ~]# cat /etc/my.cnf
# For advice on how to change settings please see
# http://dev.mysql.com/doc/refman/5.6/en/server-configuration-defaults.html

[mysqld]
#
# Remove leading # and set to the amount of RAM for the most important data
# cache in MySQL. Start at 70% of total RAM for dedicated server, else 10%.
# innodb_buffer_pool_size = 128M
#
# Remove leading # to turn on a very important data integrity option: logging
# changes to the binary log between backups.
# log_bin
#
# Remove leading # to set options mainly useful for reporting servers.
# The server defaults are faster for transactions and fast SELECTs.
# Adjust sizes as needed, experiment to find the optimal values.
# join_buffer_size = 128M
# sort_buffer_size = 2M
# read_rnd_buffer_size = 2M
datadir=/var/lib/mysql
socket=/var/lib/mysql/mysql.sock

# Disabling symbolic-links is recommended to prevent assorted security risks
symbolic-links=0

# Recommended in standard MySQL setup
sql_mode=NO_ENGINE_SUBSTITUTION,STRICT_TRANS_TABLES

[mysqld_safe]
log-error=/var/log/mysqld.log
pid-file=/var/run/mysqld/mysqld.pid
[root@yoyo ~]#
在可以在配置文件my.cnf中[mysqld]添加max_allowed_packet=100M即可

 浙公网安备 33010602011771号