Setting Up React, Webpack 4 & Babel 7 from scratch — 2019
https://blog.usejournal.com/setting-up-react-webpack-4-babel-7-from-scratch-2019-b771dca2f637
React is the most popular javascript framework which is used by millions of developers around the globe. Creating a React app from Scratch is quite painful as it requires a lot of configuration. We all know that create-react-app gives a nice boilerplate to begin a journey with react, but it lacks some amount of configuration.
Note: In this article, we will learn how to configure the React with Webpack 4 and Babel 7 from scratch in some simple steps.
Pre-requisites:
Install Nodejs & npm on your machine
Step 1
Create a project folder and cd into it
mkdir react_webpack_babel && cd react_webpack_babel
Step 2
Create a package.json file into the root of our project folder “react_webpack_babel”:
npm init
If you want to skip all the question asked during the creation of package.json with the above command, run:
npm init -y
Step 3
Create an “src folder, index.js, and index.html” file:
mkdir -p src
touch src/index.html src/index.js
Here, index.html and index.js files will serve as the entry point in our react application.
Step 4
Let's install React.js and React DOM:
npm i react react-dom --save-dev
You should see some message like t
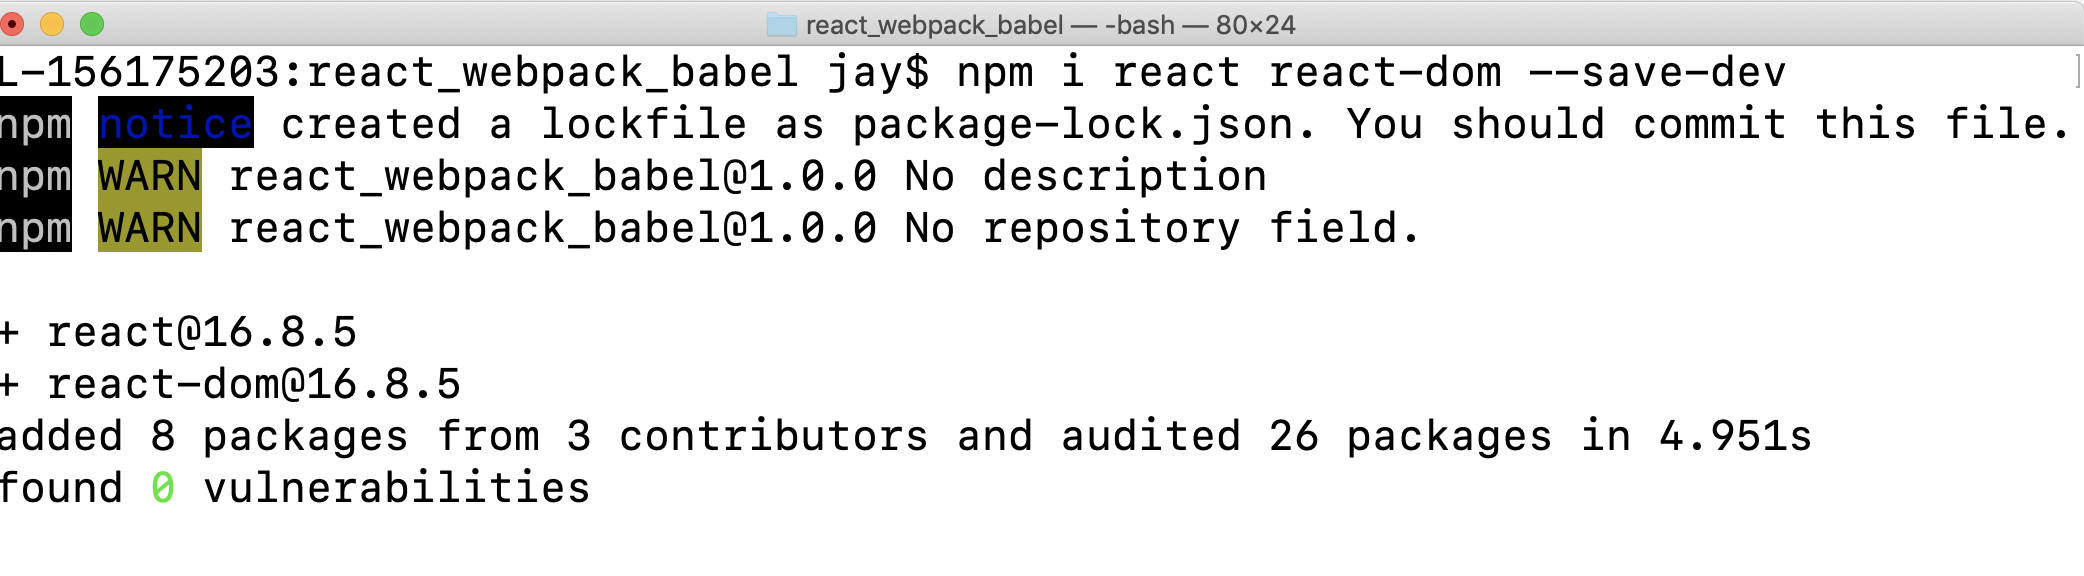
installing react & react-dom
Step 5
In this step, we will install Babel & Webpack
babel-core: babel transpile ES6 code to ES5
babel-loader: This is a webpack helper which allows to transpile Javascript files with babel and webpack. It uses babel under the hood
babel/preset-env: It determines which features needs to be transformed to run within different browsers or runtime versions. This is also known as browser polyfills
babel/preset-react: It is used to transform all your React JSX into functions.
npm i @babel/core babel-loader @babel/preset-env @babel/preset-react --save-dev

installing babel core, babel loader, babel preset-env, preset -react as a dev dependency
npm i webpack webpack-cli --save-dev
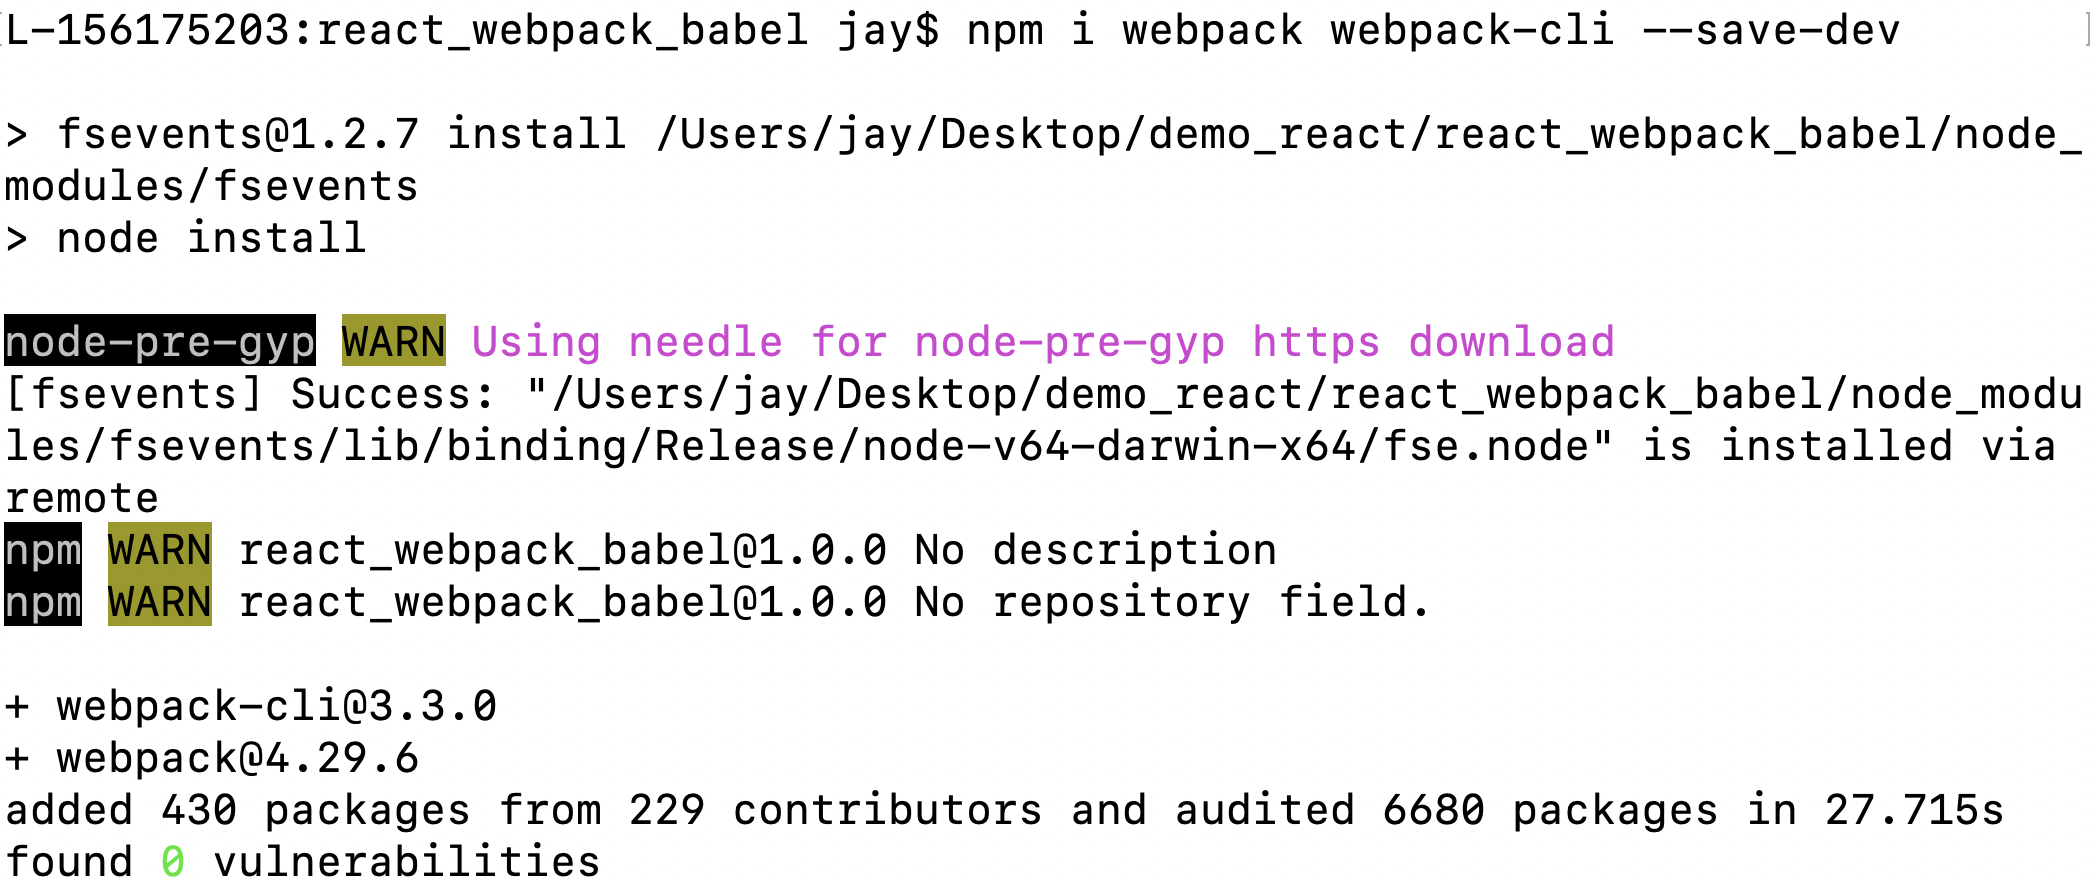
installing webpack and webpack-cli as a dev dependency
Now, create a webpack.config.js file inside our project folder and insert the below code into it
touch webpack.config.js
Step 6
Install webpack-dev-server
webpack-dev-server: Webpack has its own server called webpack-dev-server(WDS) which removes the pain of manually refreshing the browser once the changes have been saved.
npm i webpack-dev-server --save-dev
Now add below lines inside the package.json file
"scripts": {
"start": "webpack-dev-server --open --hot --mode development",
"build": "webpack --mode production"
}
— open: This will open the default browser and load the localhost environment running your app in the browser
— hot: It will watch all your changes, and reload the browser automatically
— mode: This can be development or production
Step 7
Insert below code into your index.js and index.html files
index.html
import React from "react";
import ReactDOM from "react-dom";
const App = () => {
return <div>Hello React,Webpack 4 & Babel 7!</div>;
};
ReactDOM.render(<App />, document.querySelector("#root"));
<!DOCTYPE html>
<!--[if lt IE 7]>      <html class="no-js lt-ie9 lt-ie8 lt-ie7"> <![endif]-->
<!--[if IE 7]>         <html class="no-js lt-ie9 lt-ie8"> <![endif]-->
<!--[if IE 8]>         <html class="no-js lt-ie9"> <![endif]-->
<!--[if gt IE 8]><!--> <html class="no-js"> <!--<![endif]-->
    <head>
        <meta charset="utf-8">
        <meta http-equiv="X-UA-Compatible" content="IE=edge">
        <title>React Webpack</title>
        <meta name="description" content="">
        <meta name="viewport" content="width=device-width, initial-scale=1">
    </head>
    <body>
        <section id="root"></section>
    </body>
</html>
Step 8
Install another webpack helper, css-loader and style-loader to make CSS work in our application. We will be importing CSS files into our components.
npm i css-loader style-loader --save-dev
Check index.html file for the same!
Step 9
Create a .babelrc file inside the root of your project folder and insert below lines to it.
.babelrc: As we know that, we are using babel-loader, it will look for a .babelrc file while the project is initialized
touch .babelrc
.babelrc file
Install HTML web pack plugin and HTML loader for displaying our page
htmlWebPackPlugin: This generates the HTML dynamically, with an <script> tag including our bundled js file.
npm i html-webpack-plugin html-loader --save-dev
Here is how our webpack.config.js file will look like:
const HtmlWebPackPlugin = require("html-webpack-plugin");
module.exports = {
  module: {
    rules: [
      {
        test: /\.(js|jsx)$/,
        exclude: /node_modules/,
        use: {
          loader: "babel-loader"
        }
      },
      {
        test: /\.html$/,
        use: [
          {
            loader: "html-loader"
          }
        ]
      }
    ]
  },
  plugins: [
    new HtmlWebPackPlugin({
      template: "./src/index.html",
      filename: "./index.html"
    })
  ]
};
the complete code for webpack.config.js
Here is how our package.json looks like :
Step 10
Now Run,
npm start
You will see that the code is compiled successfully.

code compiled successfully — npm start

React Application Up and Running
To make the build, run
npm build
This will then create /dist/ folder
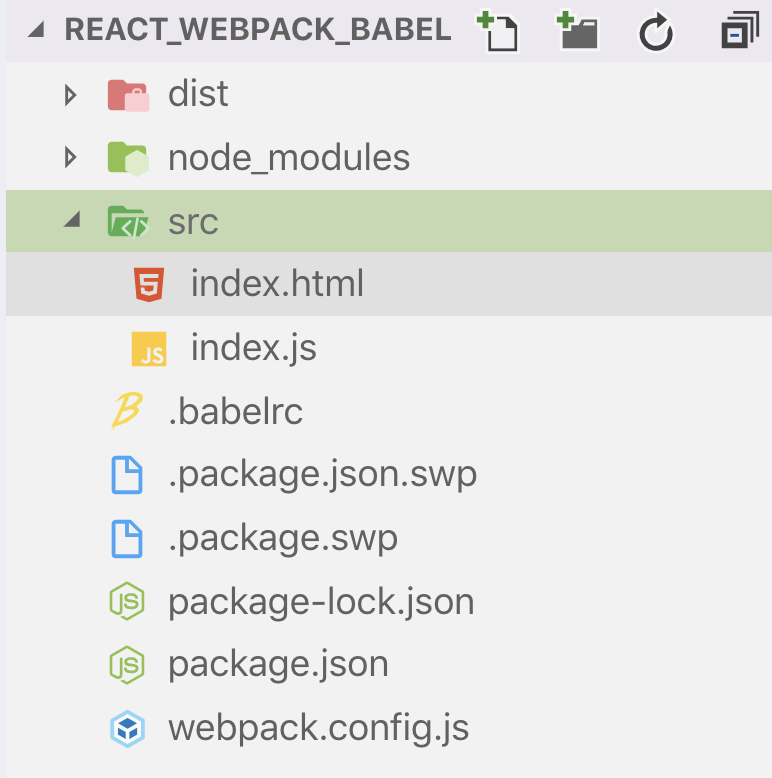
folder structure — react app
Conclusion
I have created a React, Webpack & Babel repository on my Github, please feel free to fork the code and try to run all the commands which I have mentioned above.
GitHub Repo React-Webpack-Babel
If you liked it please leave some claps to show your support. Also, leave your responses below and reach out to me if you face any issues.

 浙公网安备 33010602011771号