
搭建并配置本地GitLab服务器教程
由于工作单位不一定能够方便使用外部网络,现以下载rpm包来搭建一套本地GitLab服务器。
1. 系统准备
系统:redhat 7.3
2. 下载所需安装包
去官网下rpm包,下载地址,ce是免费的社区版
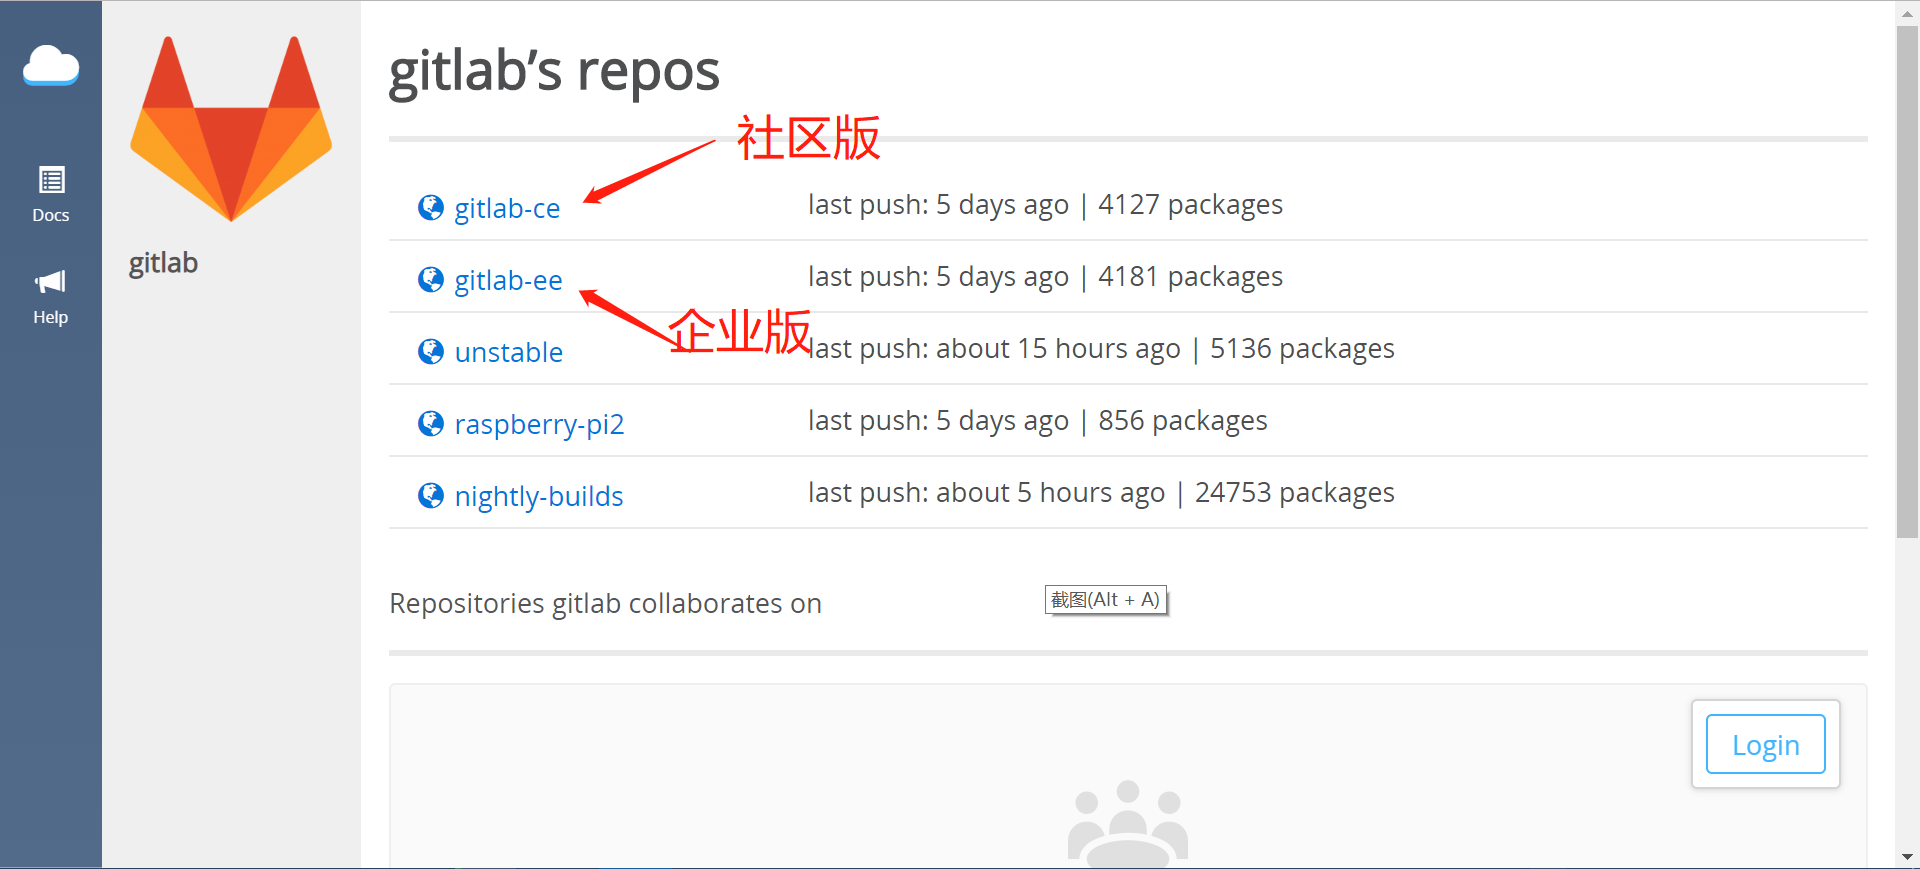
选择对应的系统版本
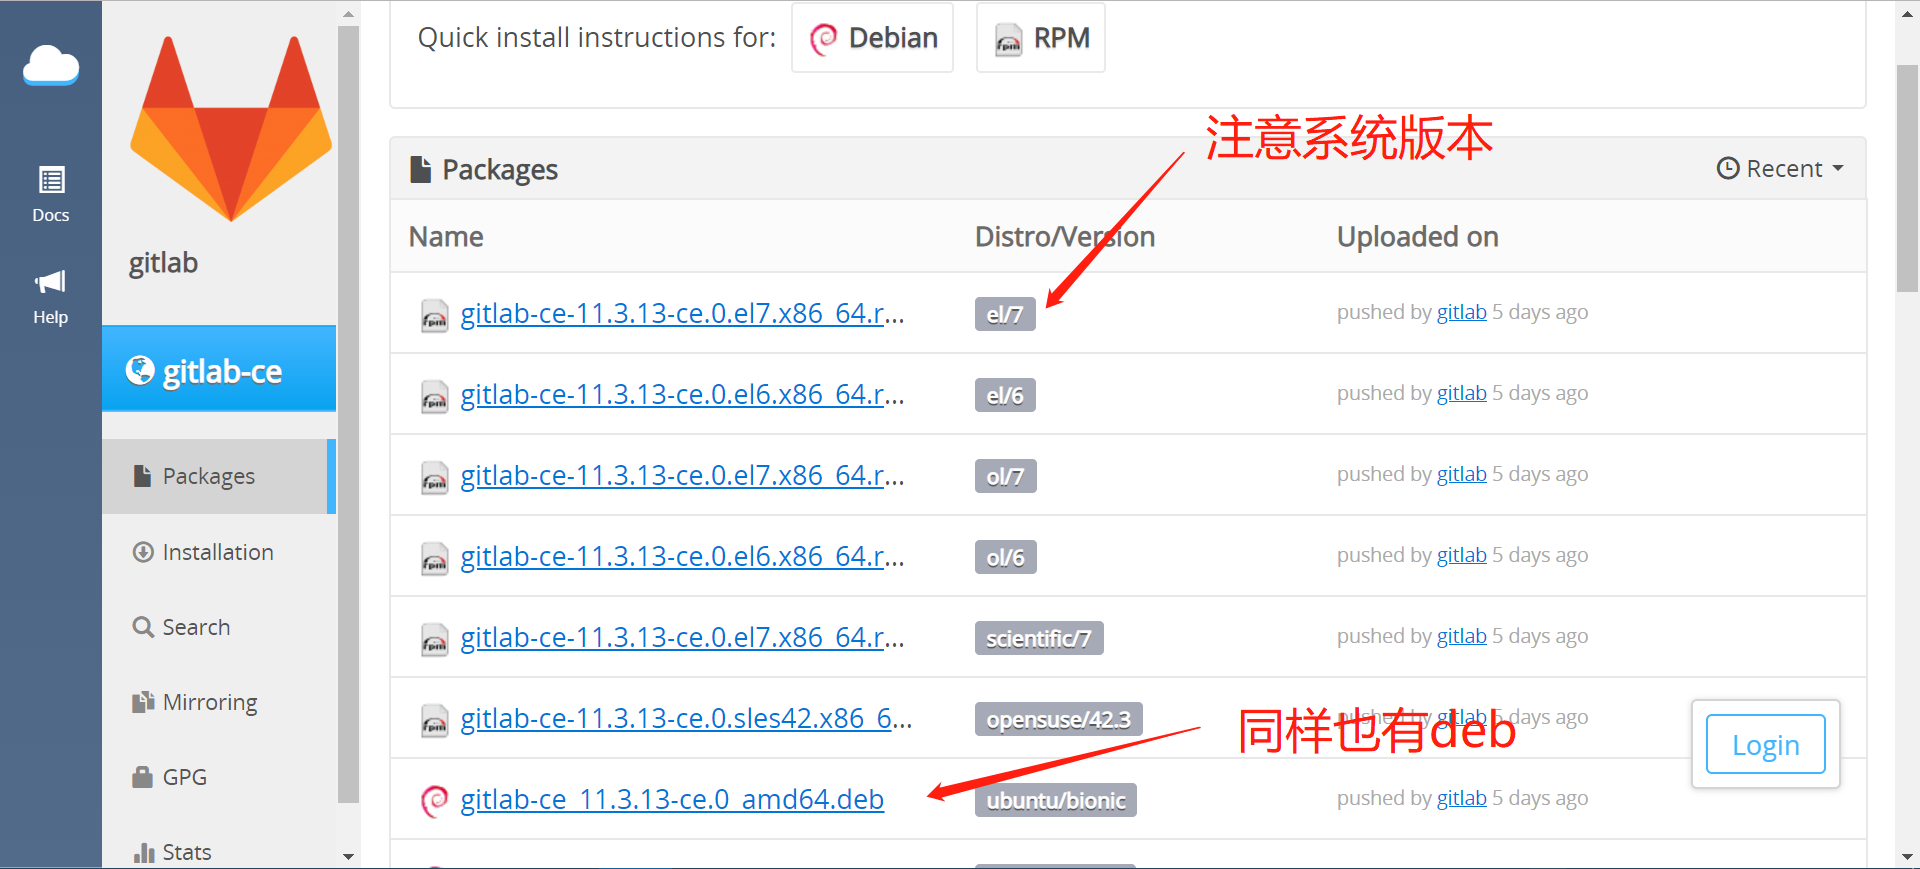
点击下载

下载完成后把包传到本地服务器上去
3. 安装过程
使用rpm命令去安装rpm包:
##检查依赖项
[root@stupidTrump~]# rpm -qpR download.rpm
warning: download.rpm: Header V4 RSA/SHA1 Signature, key ID f27eab47: NOKEY
openssh-server
policycoreutils-python
/bin/sh
/bin/sh
/bin/sh
/bin/sh
rpmlib(PayloadFilesHavePrefix) <= 4.0-1
rpmlib(CompressedFileNames) <= 3.0.4-1
[root@stupidTrump ~]# rpm -ivh download.rpm
warning: download.rpm: Header V4 RSA/SHA1 Signature, key ID f27eab47: NOKEY
Preparing...                          ################################# [100%]
Updating / installing...
   1:gitlab-ce-11.3.13-ce.0.el7       ################################# [100%]
It looks like GitLab has not been configured yet; skipping the upgrade script.

       *.                  *.
      ***                 ***
     *****               *****
    .******             *******
    ********            ********
   ,,,,,,,,,***********,,,,,,,,,
  ,,,,,,,,,,,*********,,,,,,,,,,,
  .,,,,,,,,,,,*******,,,,,,,,,,,,
      ,,,,,,,,,*****,,,,,,,,,.
         ,,,,,,,****,,,,,,
            .,,,***,,,,
                ,*,.


     _______ __  __          __
    / ____(_) /_/ /   ____ _/ /_
   / / __/ / __/ /   / __ `/ __ \
  / /_/ / / /_/ /___/ /_/ / /_/ /
  \____/_/\__/_____/\__,_/_.___/


Thank you for installing GitLab!
GitLab was unable to detect a valid hostname for your instance.
Please configure a URL for your GitLab instance by setting `external_url`
configuration in /etc/gitlab/gitlab.rb file.
Then, you can start your GitLab instance by running the following command:
  sudo gitlab-ctl reconfigure

For a comprehensive list of configuration options please see the Omnibus GitLab readme
https://gitlab.com/gitlab-org/omnibus-gitlab/blob/master/README.md
可以看到,安完了,但是还没有配置
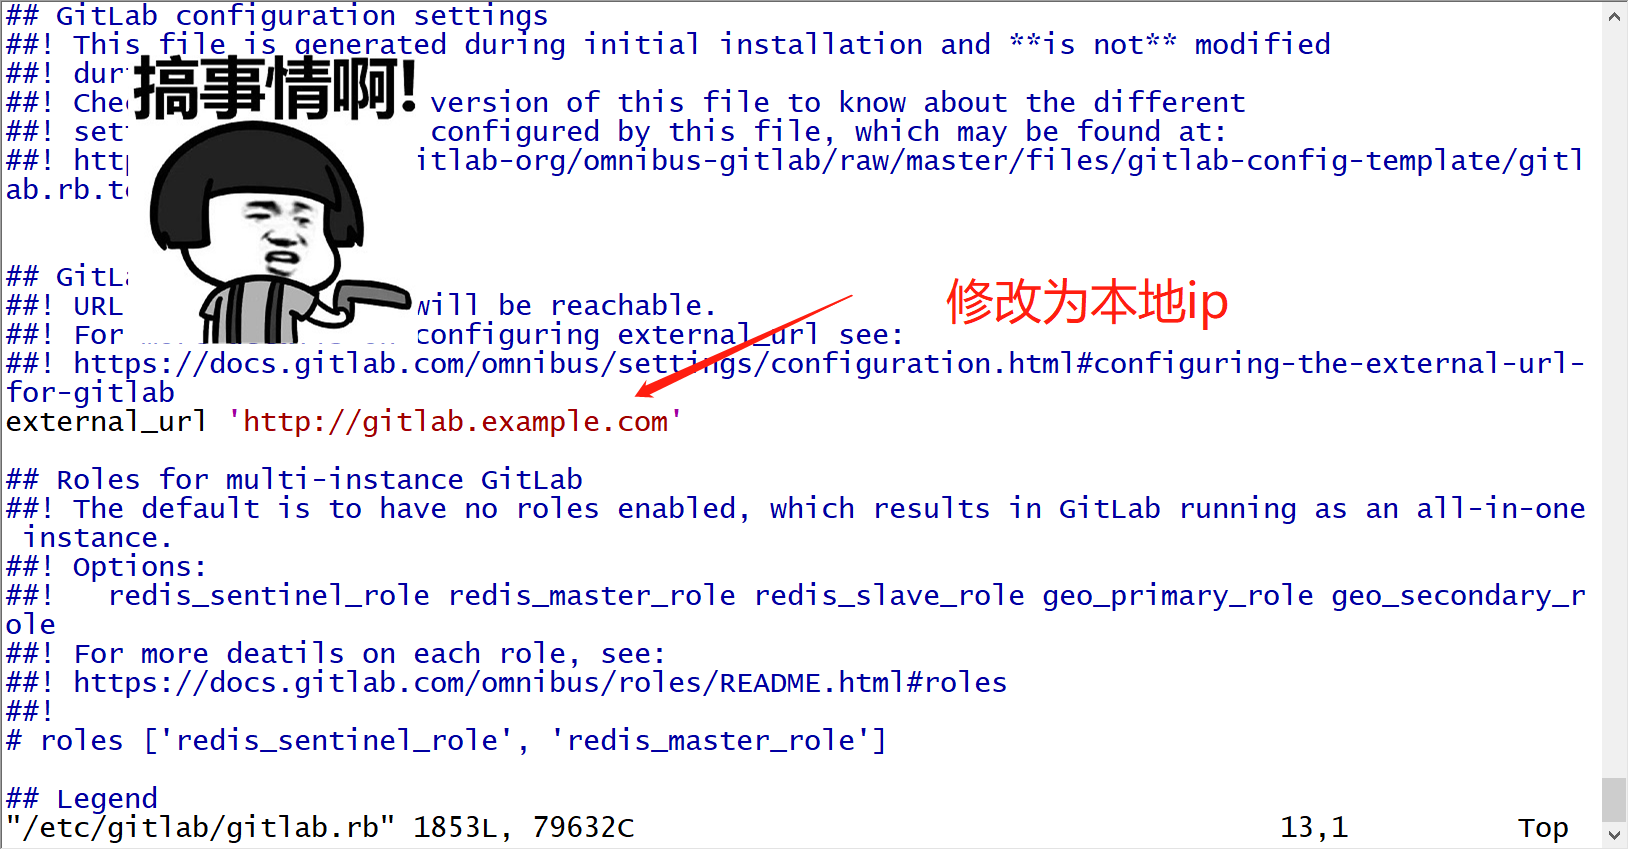
4. 配置GitLab
编辑配置文件:
##修改gitlab的配置文件
[root@stupidTrump ~]# vim /etc/gitlab/gitlab.rb
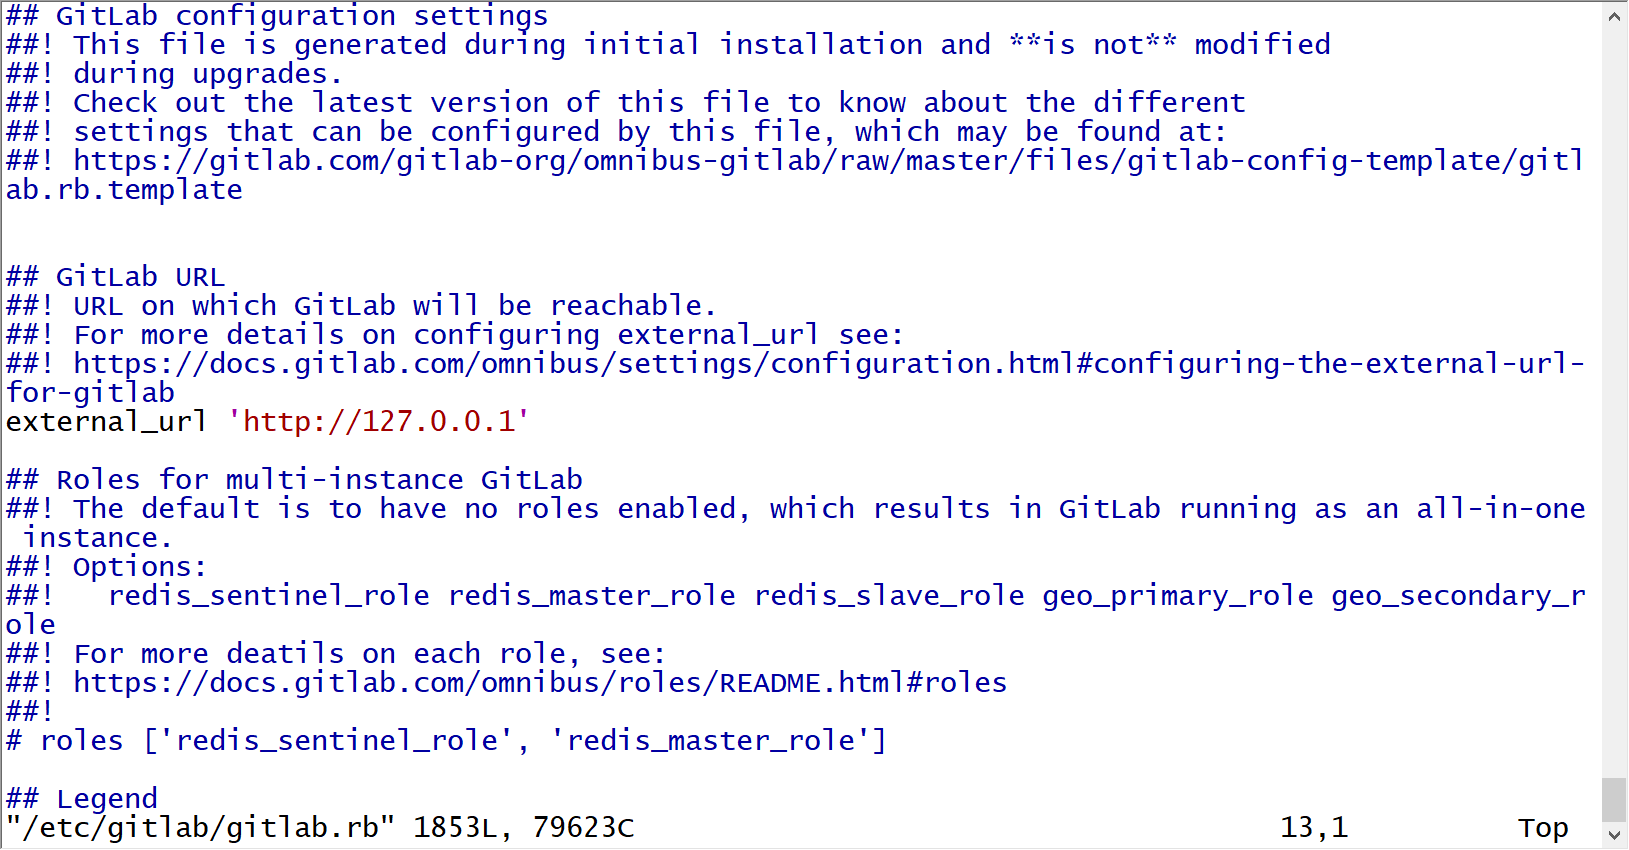
修改完后,使用新的配置文件再配置一遍,配置文件的其它地方不用修改,默认即可。
[root@hhh~]# gitlab-ctl reconfigure
启动gitlab:
[root@hhh ~]# gitlab-ctl start
查看gitlab服务器ip:
[root@hhh ~]# ip a
1: lo: <LOOPBACK,UP,LOWER_UP> mtu 65536 qdisc noqueue state UNKNOWN qlen 1
    link/loopback 00:00:00:00:00:00 brd 00:00:00:00:00:00
    inet 127.0.0.1/8 scope host lo
       valid_lft forever preferred_lft forever
    inet6 ::1/128 scope host
       valid_lft forever preferred_lft forever
2: eth0: <BROADCAST,MULTICAST,UP,LOWER_UP> mtu 1500 qdisc pfifo_fast state UP qlen 1000
    link/ether xxxxxxxxx brd ff:ff:ff:ff:ff:ff
    inet xxx.xxx.xxx.xxx/24 brd xxx.xxx.xxx.255 scope global eth0
       valid_lft forever preferred_lft forever
    inet6 xxxxxxxxxxxxxx/64 scope link
       valid_lft forever preferred_lft forever
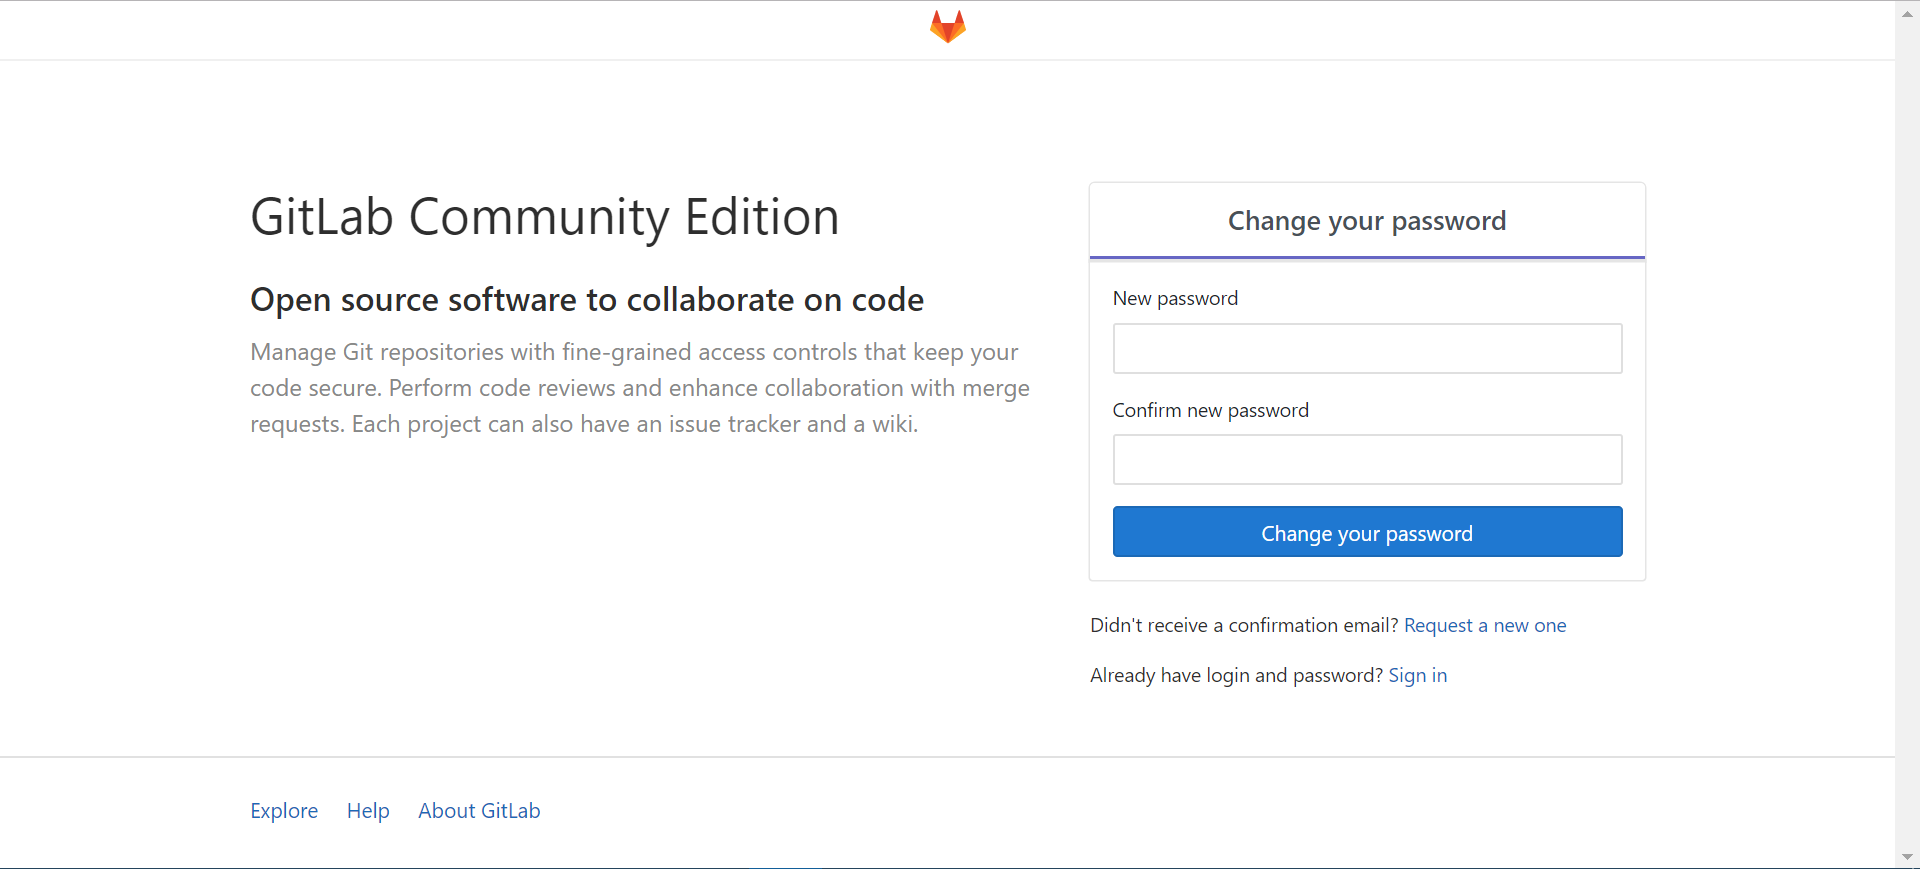
把ip粘到地址栏里访问,只要个人pc与gitlab服务器网络打通,即可看到gitlab服务器搭建成功。
5. 总结
该教程适合小型项目组搭建本地gitlab版本库使用,不连接到外网,故不做太多配置,如服务器防火墙关闭等,目的就是为了快速地创建、合并、托管、部署小型代码,如小型监控系统、小型CMDB等。
博文欢迎转载,转载请注明出处

 浙公网安备 33010602011771号