简介
使用Spring Boot搭建一套单体架构,涉及技术:构建聚合工程、原数建模、配置Spring Boot相关依赖及启动、Spring Boot自动装配简述、数据层整合HikariCP和MyBatis、MyBatis逆向成成工具、Restful风格进行增删改查、事务的传播性、整合Swagger2、跨域问题处理、Spring Boot日志处理、RestTemplate调用第三方服务、定时任务、Hibernate参数验证、自定义捕获异常、多环境配置文件管理。
具体步骤:
一、构建聚合工程
-
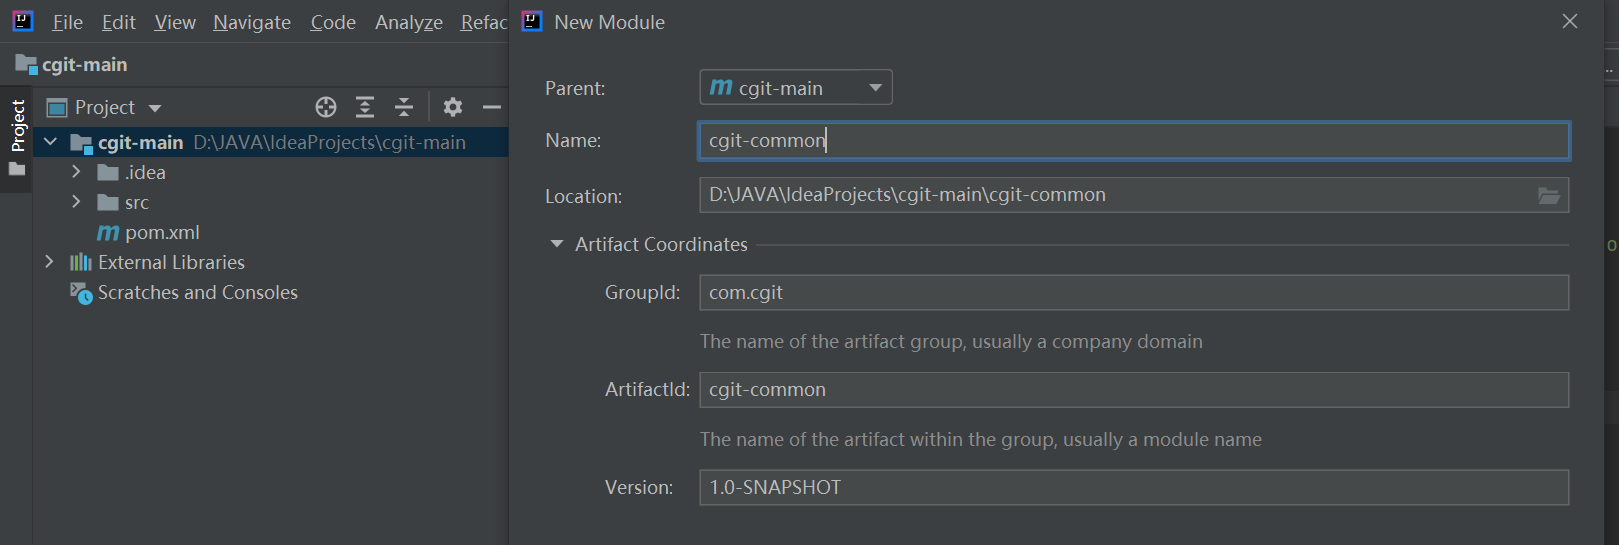
New Project
![image]()
-
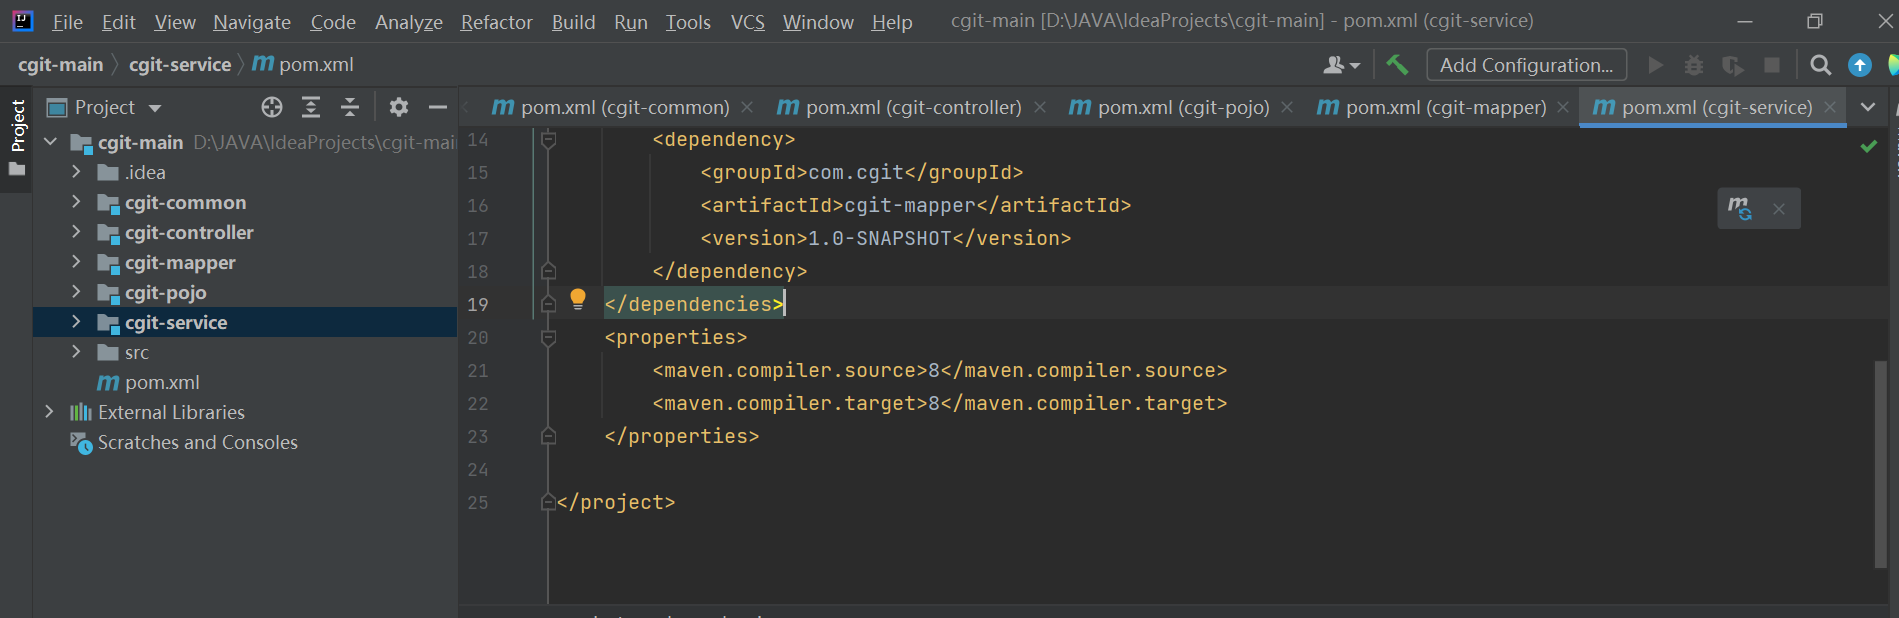
构建子模块
选中项目——右击——New——module——选择maven下一步
![image]()
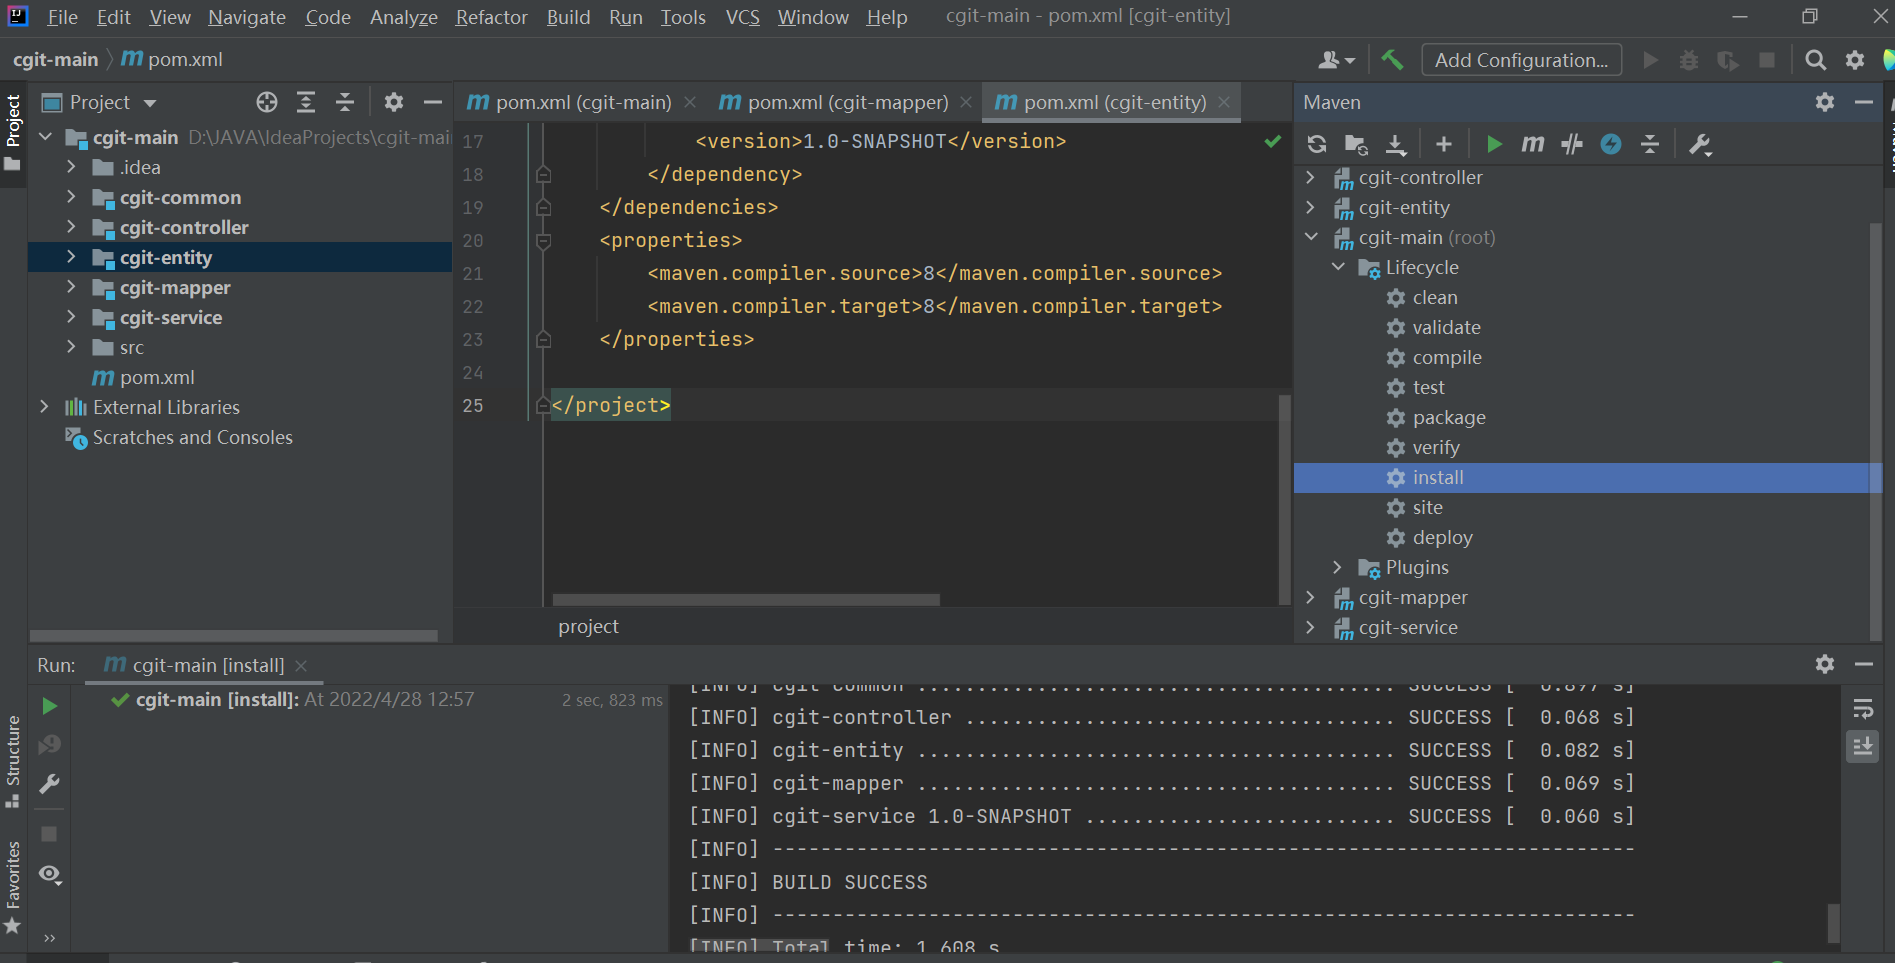
增加cgit-common、cgit-controller、cgit-pojo、cgit-service、cgit-mapper
![image]()
其中dependency依赖关系controller——>service——>mapper——>entity——>common;
实际开发调用关系controller接收请求后调用service,serviceImpl调用mapper,不建议controller直接调用mapper。
![image]()
执行mvn clean可将根目录下生成的target文件移除
执行mvn install命令装载各个子模块

二、PDMan数据库建模工具使用
详情见:
https://www.cnblogs.com/yimengxinghe/articles/16204200.html
三、配置Spring Boot相关依赖及启动
在cgit_main下面的pom.xml中配置


增加启动类及application.yml
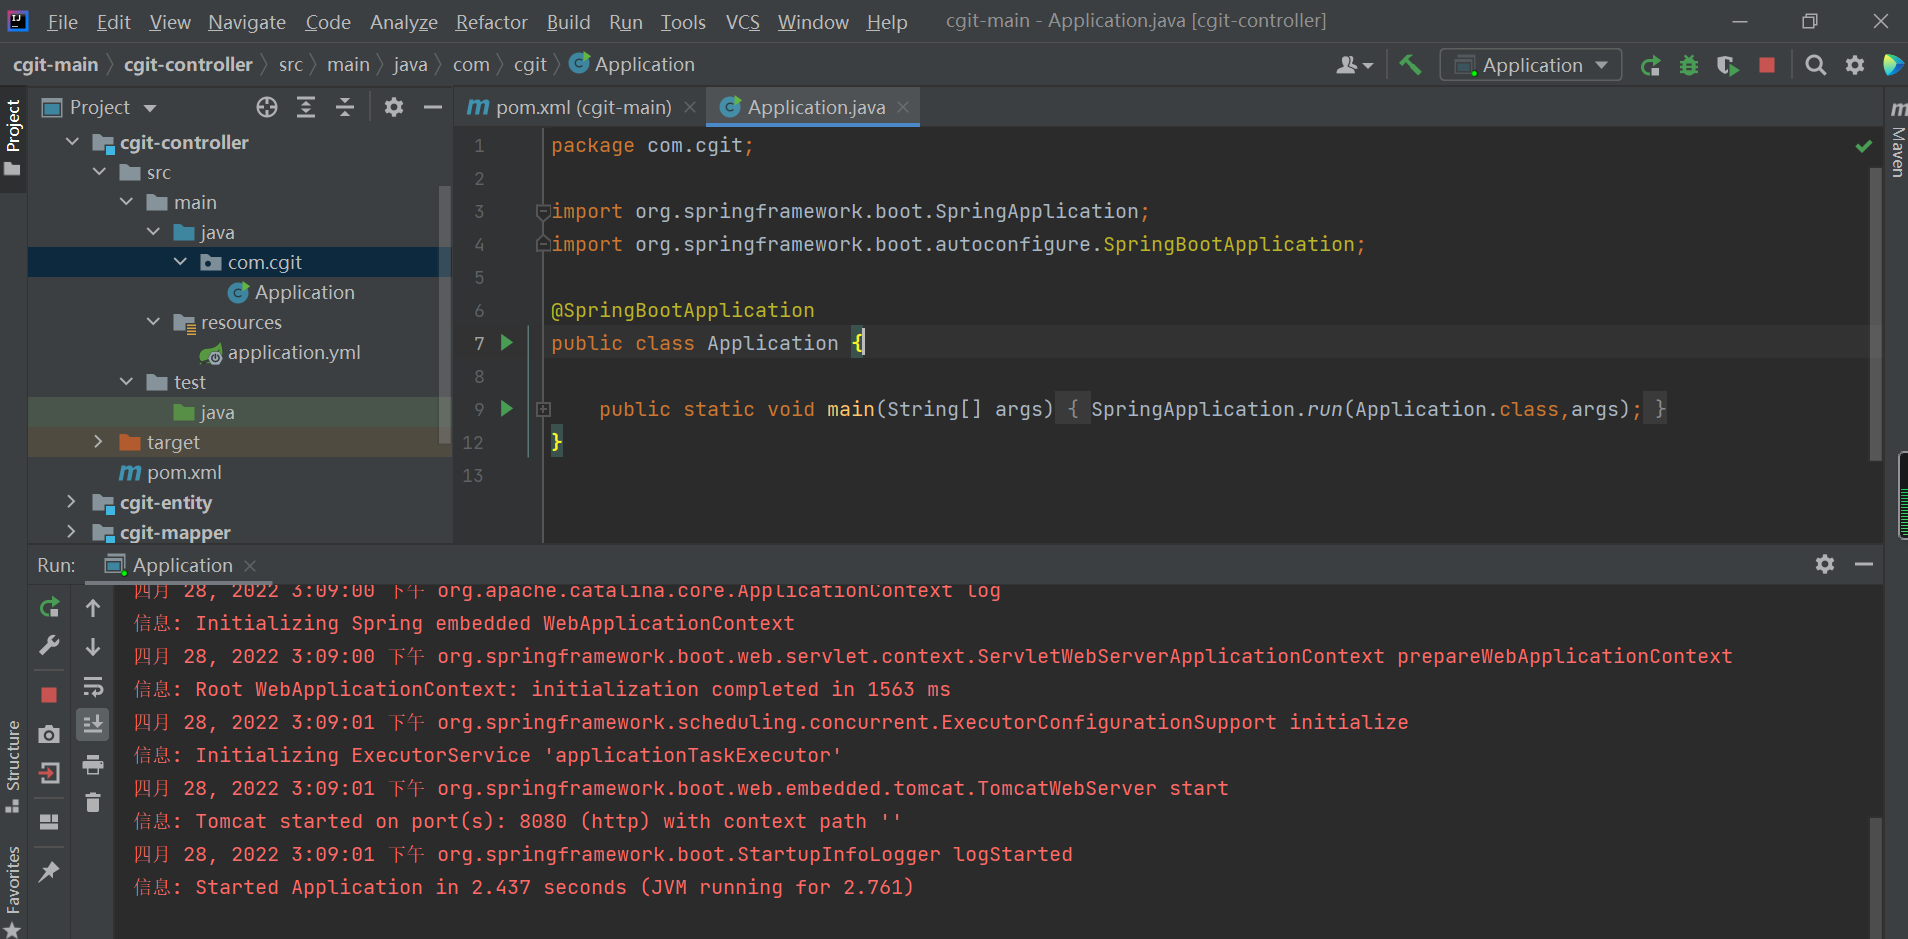
这时项目就可以正常启动了。
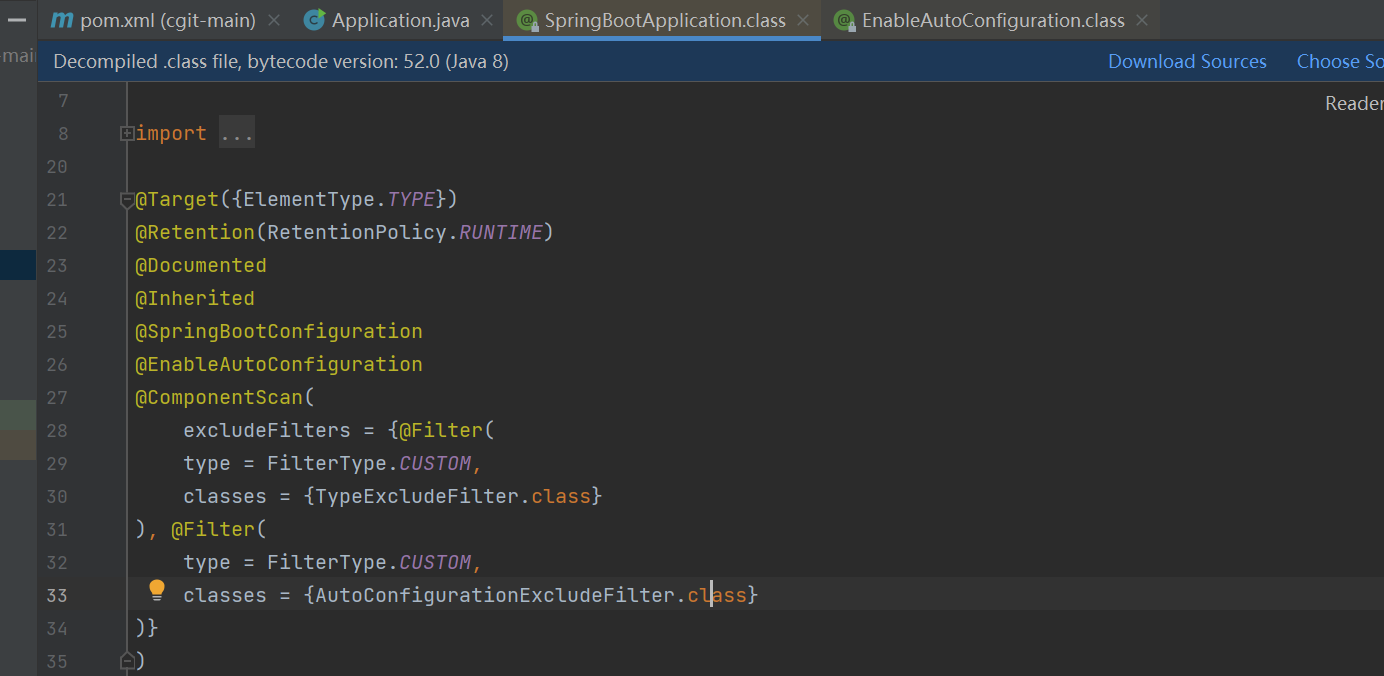
四、Spring Boot自动装配简述
@SpringBootApplication主要由3个注解组成 @SpringBootConfiguration,@ComponentScan,@EnableAutoConfiguration。扫描当前包及子包中的内容。
1、@Configuration
作用就是将配置了这个注解的类加载到ioc容器。主要是为了替换掉xml配置文件。
2、@ComponentScan
相当于xml配置文件中的context:component-scan。它的主要作用就是扫描指定路径下的标识了需要装配的类,自动装配到spring的Ioc容器中。
标识需要装配的类的形式主要是:@Component、@Repository、@Service、@Controller这类的注解标识的类。ComponentScan默认会扫描当前package下的的所有加了相关注解标识的类到IoC容器中。
3、@EnableAutoConfiguration

spring提供了一系列的@Enable开头的注解,是的用户在使用spring相关的框架是,避免配置大量的代码从而降低使用的难度比如常见的一些Enable注解:@EnableWebMvc,(这个注解引入了MVC框架在Spring 应用中需要用到的所有bean);比如@EnableScheduling,开启计划任务的支持。
3.1、@Import
这个注解相当于xml 格式下的
import就是把多个配置合并在一个配置中。在JavaConfig中所表达的意义是一样的。
我们用Import注解将bean进行注入
3.1.1、基于普通bean或者带有@Configuration的bean进行注入
比如这个时候@Import(AutoConfigurationImportSelector.class)。
3.1.2、实现ImportSelector接口进行动态注入

返回值是一个字符串的数组,这个数组会将里面的字符串加载到ioc容器当中,这个字符串必须就是类的的全限定名。
3.实现ImportBeanDefinitionRegistrar接口进行动态注入

我们回来过来继续看AutoConfigurationImportSelector 中有个selectImports 方法,将那些需要自动装备的类的名称找到并返回。
这个方法返回了configurations

configurations 是由一个SpringFactoriesLoader的类加载到的,没有加载到会提示“No auto configuration classes found in META-INF/spring.factories”,我们去spring.factories看下,里面就是自动装备的配置

五、数据层整合HikariCP和MyBatis
- 几个常用数据源对比
![image]()
- 引入数据源驱动及MyBatis依赖
![image]()
- 配置数据源信息和MyBatis信息
![image]()


注意:数据库版本及驱动若有冲突,可百度解决
- MyBatis逆向成成工具
4.1MyBatis_generator工具使用
4.1.1 在pom.xml添加
<build> <plugins> <plugin> <groupId>org.springframework.boot</groupId> <artifactId>spring-boot-maven-plugin</artifactId> </plugin> <plugin> <groupId>org.mybatis.generator</groupId> <artifactId>mybatis-generator-maven-plugin</artifactId> <version>1.3.7</version> <dependencies> <dependency> <groupId>mysql</groupId> <artifactId>mysql-connector-java</artifactId> <version>8.0.17</version> </dependency> </dependencies> </plugin> </plugins> </build>
4.1.2 src/main/resources/mybatis-generator.xml对应文件的配置
`
    <javaTypeResolver >
        <property name="forceBigDecimals" value="false" />
    </javaTypeResolver>

    <javaModelGenerator targetPackage="com.cgit.model" targetProject="src\main\java">
        <property name="enableSubPackages" value="true" />
        <property name="trimStrings" value="true" />
    </javaModelGenerator>

    <sqlMapGenerator targetPackage="mapper"  targetProject="src\main\resources">
        <property name="enableSubPackages" value="true" />
    </sqlMapGenerator>

    <javaClientGenerator type="XMLMAPPER" targetPackage="com.cgit.dao"  targetProject="src\main\java">
        <property name="enableSubPackages" value="true" />
    </javaClientGenerator>

    <table schema="" tableName="customer_info" domainObjectName="CustomerInfo" ></table>

</context>
`
4.1.3 在右侧maven双击mybatis-generator插件下的mybatis-generator:generate

网上也有各种版本,自己动手试试。
4.2项目中使用
4.2.1 项目pom.xml中添加依赖

4.2.1 生成一个MyMapper接口

同时在application.yml中配置进行通用Mapper配置

4.2.3将自动生成的代码拷贝过来

- MyMapper继承父类简介
interface MyMapper<T> extends Mapper<T>, MySqlMapper<T>
![image]()
随后看下Mapper所继承的类
![image]()
![image]()
![image]()
![image]()


六、Restful风格进行增删改查
-
RPC和RESTful区别
RESTful规范中,接口的设计核心是面向资源的,每一个资源都有一个唯一确定的地址,资源是通过唯一地址url进行暴露,资源本身是方法调用的目标,方法列表对所有资源都是一样的,这些方法都是HTTP标准方法,常用的有:GET、POST、PUT、DELETE。
RPC (远程调用)样式的 Web 服务的客户端将一个装满数据的信封(包括方法和参数信息)通过 HTTP 发送到服务器。服务器打开信封并使用传入参数执行指定的方法。方法的结果打包到一个信封并作为响应发回客户端。客户端收到响应并打开信封。它忽略 HTTP 的大部分特性且仅支持 POST 方法,HTTP只是一个传输层的协议,SOAP是应用层协议。 -
pom
添加分页依赖
![image]()
以及application.yml中添加分页插件配置
pagehelper:
helperDialect: mysql
supportMethodsArguments: true -
controller层
![image]()
![image]()
-
service及serviceImpl
service层
![image]()
serviceImpl
![image]()
![image]()
-
mapper及mapper.xml
mapper
![image]()
mapper.xml
![image]()


七、事务的传播性
@Transactional(propagation = Propagation.SUPPORTS)
@Transactional(propagation = Propagation.SUPPORTS)
PROPAGATION_REQUIRED--支持当前事务,如果当前没有事务,就新建一个事务。这是最常见的选择。
PROPAGATION_SUPPORTS--支持当前事务,如果当前没有事务,就以非事务方式执行。
PROPAGATION_MANDATORY--支持当前事务,如果当前没有事务,就抛出异常。
PROPAGATION_REQUIRES_NEW--新建事务,如果当前存在事务,把当前事务挂起。
PROPAGATION_NOT_SUPPORTED--以非事务方式执行操作,如果当前存在事务,就把当前事务挂起。
PROPAGATION_NEVER--以非事务方式执行,如果当前存在事务,则抛出异常。
八、整合Swagger2
-
pom添加依赖
![image]()
springfox-swagger-ui这个是官方提供的ui,不太美观,使用swagger-bootstrap-ui进行优化。 -
增加Swagger2类
增加注解@Configuration @EnableSwagger2
![image]()
-
在controller层增加注解
在类上增加
@Api(value = "客户模块", tags = {"用于展示客户信息相关接口"})
在方法上面增加
@ApiOperation(value = "根据客户Id查询", notes = "根据客户Id查询", httpMethod = "GET") -
页面展示效果
![image]()
同时可以在线测试接口
![image]()


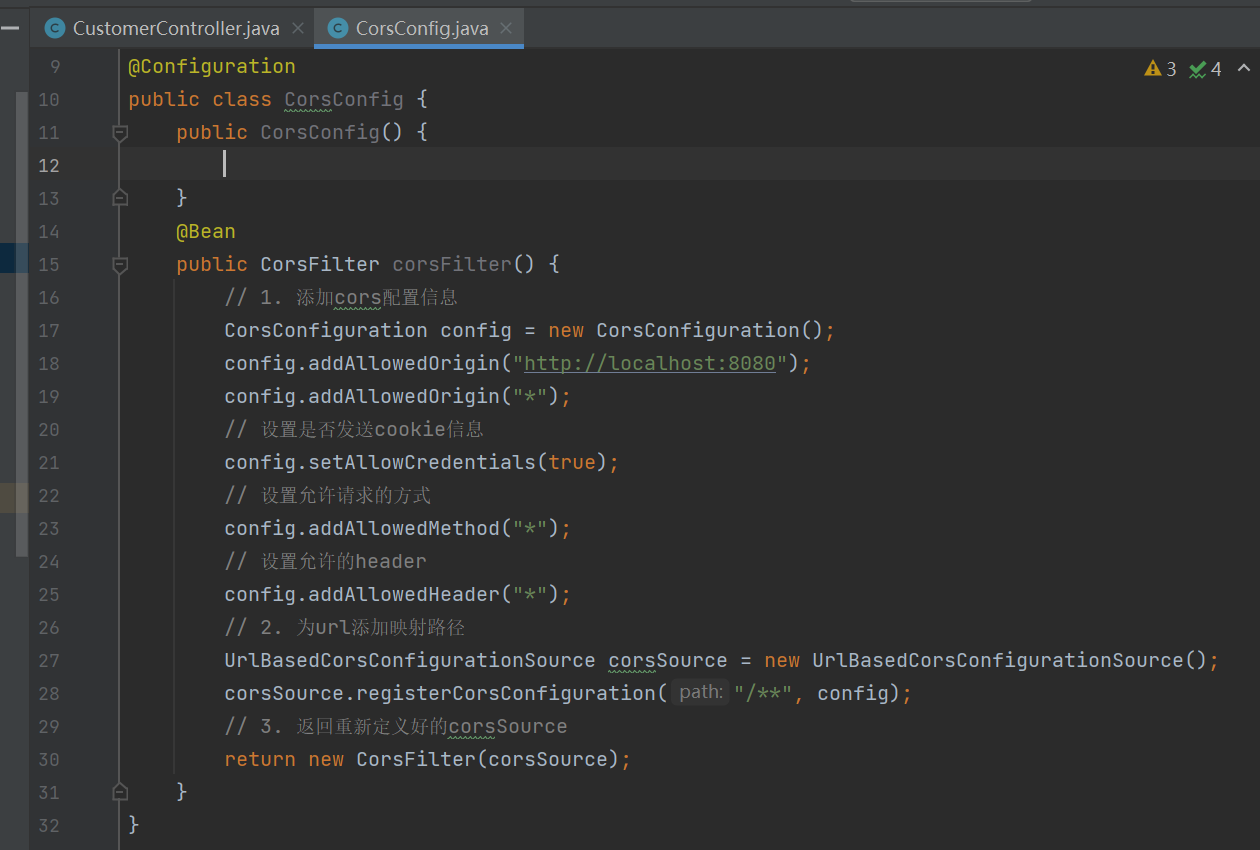
九、跨域问题处理
增加一个类CorsConfig添加@Configuration,再添加一个corsFilter过滤器并注入@Bean。
十、Spring Boot日志处理
-
Pom移除默认日志并加入新的依赖
![image]()
-
加入新的依赖
![image]()
-
src/main/resources路径下增加log4j.properties
![image]()
-
类中使用
![image]()
-
通过日志监控service
使用spring AOP面向切面的功能,先增加spring-boot-starter-aop依赖
![image]()
![image]()
![image]()
-
开启MyBatis日志SQL
只需在application.xml中添加配置
![image]()


十一、RestTemplate调用第三方服务
- 增加容器扫描
![image]()
- 代码实现
![image]()


十二、定时任务
- 增加一个启动类
![image]()
- 在Application启动类中添加启动配置
@EnableScheduling开启定时任务

十三、Hibernate参数验证
对实体类参数进行验证
例如:
@NotBlank(message = "身份证不能为空")
@Length(max = 12, message = "姓名不能超过12位")
@Pattern(regexp = "^(((13[0-9]{1})|(15[0-9]{1})|(18[0-9]{1}))+\\d{8})$", message = "手机号格式不正确")
@Email
十四、自定义捕获异常
- 在application.xml中添加拦截
![image]()
- 添加拦截类,捕获异常
![image]()


十五、多环境配置文件管理

取消application.xml配置及增加profiles配置

增加application-dev.xml配置

增加application-cloud.xml配置


 浙公网安备 33010602011771号