1、环境准备
1.1、安装python
1.2、安装requests、pytest模块
apt install -y python3-requests python3-pytest
1.3、测试代码准备推至仓库
git clone git@192.168.10.10:web/tomcat_pro.git
cd tomcat_pro/tomcat-web/
mkdir test_script

cat <<'CAT_END' > test_script/test_api.py
#!/usr/bin/env python
# -*- coding: utf-8 -*-
import requests

def test_url():
    assert 200 == requests.get('http://192.168.10.21:8081/',timeout=3).status_code
CAT_END

# 推送代码到仓库
git add . && git commit -m "test script" && git push origin
2、构建后,测试生成测试报告的实践
2.1、pipline代码
stage('Test') {
steps {
echo "检查项目"
sh 'sleep 3'
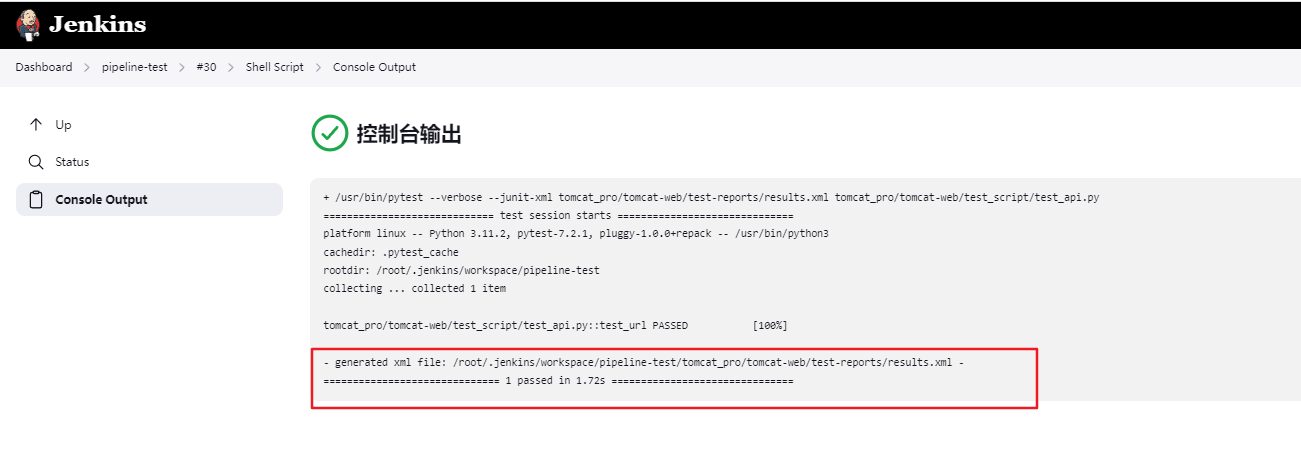
sh '/usr/bin/pytest --verbose --junit-xml tomcat_pro/tomcat-web/test-reports/results.xml tomcat_pro/tomcat-web/test_script/test_api.py'
}
post {
always {
junit 'tomcat_pro/tomcat-web/test-reports/results.xml'
}
}
}
2.2、构建查看结果
3、构建后根据状态发送邮件
3.1、Email Extension Plugin安装插件

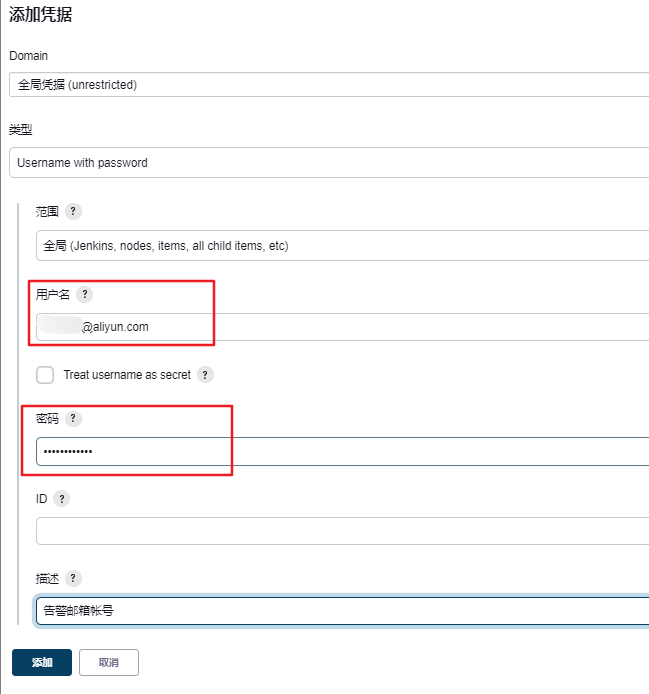
3.2、增加邮箱帐号和密码
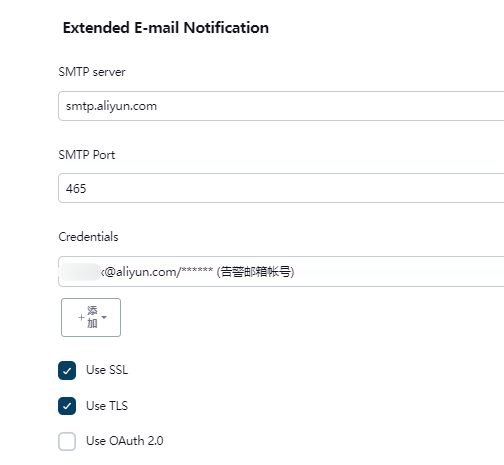
3.3、配置邮件的参数
3.4、配置post,不同状态发送指定的邮件
post {
   unstable {
       emailext (
           body: "任务名称:${JOB_NAME}\n构建编号:${BUILD_NUMBER}\n构建日志:${BUILD_URL}console",
           subject: '【Jenkins构建通知】:$JOB_NAME - Build # $BUILD_NUMBER - 不稳定!',
           to: '27766****@qq.com',
           from: '**@aliyun.com'
       )
   }
   success {
       emailext (
           body: """项目名称:${JOB_NAME}\n构建编号:${BUILD_NUMBER}\n构建日志:${BUILD_URL}console""",
           subject: '【Jenkins构建通知】:$JOB_NAME - Build # $BUILD_NUMBER - 成功!',
           to: '27766****@qq.com',
           from: '**@aliyun.com'
       )
   }
   failure {
       emailext (
           body: """项目名称:${JOB_NAME}\n构建编号:${BUILD_NUMBER}\n构建日志:${BUILD_URL}console""",
           subject: '【Jenkins构建通知】:$JOB_NAME - Build # $BUILD_NUMBER - 失败!',
           to: '27766****@qq.com',
           from: '**@aliyun.com'
       )
   }
}

参考资料:
https://www.jenkins.io/doc/pipeline/steps/email-ext/#emailext-extended-email
3.5、查看告警结果


 浙公网安备 33010602011771号