
【grunt第二弹】30分钟学会使用grunt打包前端代码(02)
前言
上一篇博客,我们简单的介绍了grunt的使用,一些基础点没能覆盖,我们今天有必要看看一些基础知识
配置任务/grunt.initConfig
前面我们简单的介绍了grunt相关的知识,这里我们这里还需要再熟悉下Gruntfile相关的知识点,比如说配置任务
grunt的任务配置都是在Gruntfile中的grunt.initConfig方法中指定的,这个配置主要都是一些命名性属性
比如我们上次用到的合并以及压缩的任务配置:
grunt.initConfig({
    concat: {
        //这里是concat任务的配置信息
    },
    uglify: {
        //这里是uglify任务的配置信息
    },
    //任意非任务特定属性
    my_property: 'whatever',
    my_src_file: ['foo/*.js', 'bar/*.js']
});
其中的my_property完全可能读取外部json配置文件,然后在上面任务配置中便可以,比如我们要压缩的文件为准或者最后要放到哪里,便可以在此配置
我们使用grunt的时候,主要工作就是配置任务或者创建任务,实际上就是做一个事件注册,然后由我们触发之,所以grunt的核心还是事件注册
每次运行grunt时,我们可以指定运行一个或者多个任务,通过任务决定要做什么,比如我们同时要压缩和合并还要做代码检查
grunt.registerTask('default', ['jshint','qunit','concat','uglify']);
当运行一个基本任务时,grunt并不会查找配置和检查运行环境,他仅仅运行指定的任务函数,可以传递冒号分割参数,比如:
grunt.registerTask('foo', 'A sample task that logs stuff.', function (arg1, arg2) {
  if (arguments.length === 0) {
    grunt.log.writeln(this.name + ", no args");
  } else {
    grunt.log.writeln(this.name + ", " + arg1 + " " + arg2);
  }
});
运行结果如下:
$ grunt foo:testing:123
Running "foo:testing:123" (foo) task
foo, testing 123

$ grunt foo:testing
Running "foo:testing" (foo) task
foo, testing undefined

$ grunt foo
Running "foo" task
foo, no args
这里有个多任务的情况,就是一个任务里面实际上第一了多个东东,这个时候就有所不同
grunt.initConfig({
    log: {
        demo01: [1,2,3],
        demo02: 'hello world',
        demo03: false
    }
});
grunt.registerTask('log','log stuff.', function(){
    grunt.log.writeln(this.target + ': ' + this.data);
});
如果我们运行,运行情况如下:
???????
更多时候,我们实际场景中都会需要自定义任务,而在我们任务内部使用 grunt.task.run({}) 运行任务
这块的知识点,我们后面以实际例子说明
grunt插件
学习grunt主要就是学习grunt的插件使用,所以我们今天先来学习常用的几个插件
grunt-contrib-unglify
我们仍然以简单例子学习
module.exports = function (grunt) {
  grunt.initConfig({
    uglify: {
      my_target: {
        files: {
          'dest/libs.min.js': ['src/zepto.js', 'src/underscoce.js']
        }
      }
    }
  });
  grunt.loadNpmTasks('grunt-contrib-uglify');
}
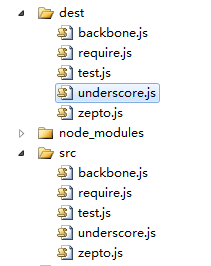
这样会将src里面的zepto等文件打包值dest的lib.min.js中
压缩一个文件夹的所有文件
然后这段代码非常有意思,他会将一个文件目录里面的所有js文件打包到另一个文件夹
module.exports = function (grunt) {
  grunt.initConfig({
    uglify: {
      my_target: {
        files: [{
          expand: true,
          cwd: 'src',
          src: '**/*.js',
          dest: 'dest'
        }]
      }
    }
  });
  grunt.loadNpmTasks('grunt-contrib-uglify');
}
若是你希望给你文件的头部加一段注释性语言配置banner信息即可
grunt.initConfig({
  pkg: grunt.file.readJSON('package.json'),
  uglify: {
    options: {
      banner: '/*! 注释信息 */'
    },
    my_target: {
      files: {
        'dest/output.min.js': ['src/input.js']
      }
    }
  }
});
grunt-contrib-concat
该插件主要用于代码合并,将多个文件合并为一个,我们前面的uglify也提供了一定合并的功能
在可选属性中我们可以设置以下属性:
① separator 用于分割各个文件的文字,
② banner 前面说到的文件头注释信息,只会出现一次
③ footer 文件尾信息,只会出现一次
④ stripBanners去掉源代码注释信息(只会清楚/**/这种注释)
一个简单的例子:
module.exports = function (grunt) {
  grunt.initConfig({
  concat: {
    options: {
      separator: '/*分割*/',
      banner: '/*测试*/',
      footer: '/*footer*/'

    },
    dist: {
      src: ['src/zepto.js', 'src/underscore.js', 'src/backbone.js'],
      dest: 'dist/built.js',
    }
  }
});
  grunt.loadNpmTasks('grunt-contrib-concat');
}
合并三个文件为一个,这种在我们源码调试时候很有意义
构建两个文件夹
有时候我们可能需要将合并的代码放到不同的文件,这个时候可以这样干
module.exports = function (grunt) {
  grunt.initConfig({
    concat: {
      basic: {
        src: ['src/zepto.js'],
        dest: 'dest/basic.js'
      },
      extras: {
        src: ['src/underscore.js', 'src/backbone.js'],
        dest: 'dest/with_extras.js'
      }
    }
  });
  grunt.loadNpmTasks('grunt-contrib-concat');
}
这种功能还有这样的写法:
module.exports = function (grunt) {
  grunt.initConfig({
    concat: {
      basic_and_extras: {
        files: {
          'dist/basic.js': ['src/test.js', 'src/zepto.js'],
          'dist/with_extras.js': ['src/underscore.js', 'src/backbone.js']
        }
      }
    }
  });
  grunt.loadNpmTasks('grunt-contrib-concat');
}
第二种写法便于使用配置文件,具体各位选取吧,至于读取配置文件的东西我们这里就先不关注了
grunt-contrib-jshint
该插件用于检测文件中的js语法问题,比如我test.js是这样写的:
alert('我是叶小钗')
module.exports = function (grunt) {
  grunt.initConfig({
    jshint: {
      all: ['src/test.js']
    }
  });
  grunt.loadNpmTasks('grunt-contrib-jshint');
}
运行结果是:
$ grunt jshint
Running "jshint:all" (jshint) task
Linting src/test.js ...ERROR
[L1:C15] W033: Missing semicolon.
alert('我是叶小钗')
说我缺少一个分号,好像确实缺少.....如果在里面写明显的BUG的话会报错
多数时候,我们认为没有分号无伤大雅,所以,我们文件会忽略这个错误:
jshint: {
  options: {
    '-W033': true
  },
  all: ['src/test.js']
}
这里有一个稍微复杂的应用,就是我们合并之前做一次检查,合并之后再做一次检查,我们可以这样写
module.exports = function (grunt) {
  grunt.initConfig({
    concat: {
      dist: {
        src: ['src/test01.js', 'src/test02.js'],
        dest: 'dist/output.js'
      }
    },
    jshint: {
      options: {
        '-W033': true
      },
      pre: ['src/test01.js', 'src/test02.js'],
      after: ['dist/output.js']
    }
  });
  grunt.loadNpmTasks('grunt-contrib-concat');
  grunt.loadNpmTasks('grunt-contrib-jshint');
}
$ grunt jshint:pre concat jshint:after
Running "jshint:pre" (jshint) task
>> 2 files lint free.
Running "concat:dist" (concat) task
File "dist/output.js" created.
Running "jshint:after" (jshint) task
>> 1 file lint free.
这里连续运行了三个任务,先做检查再合并,然后做检测,我这里写了两个简单的文件,如果将jquery搞进去的话,好像还出了不少BUG......
所以真的要用它还要自定一些规范,我们这里暂时到这里,先进入下一个插件学习
grunt-contrib-requirejs
我们的grunt打包程序极有可能与requirejs一起使用,但是几个插件学习下来又属requireJs的使用最为麻烦,因为网上资源很少,搞到这一段耗掉了我很多精力
这个时候你就会感叹,英语好不一定编程好,英语差想成为高手还是不简单啊!!!
requirejs: {
  compile: {
    options: {
      baseUrl: "path/to/base",
      mainConfigFile: "path/to/config.js",
      name: "path/to/almond", // assumes a production build using almond
      out: "path/to/optimized.js"
    }
  }
}
官方的例子首先就是这几个属性:
baseUrl 代表所有的js文件都会相对于这个目录
mainConfigFile 配置文件目录
name ???
out 输出文件
一些参数我们不太了解,这个时候就只能以例子破之了
module.exports = function (grunt) {
  grunt.initConfig({
    requirejs: {
      compile: {
        "options": {
          "baseUrl": "./",
          "paths": {
            "$": "src/zepto",
            "_": "src/underscore",
            "B": "src/backbone",
            "Test": "src/Test01"
          },
          "include": [
            "$",
            "_",
            "B",
            "Test"
          ],
          "out": "dest/libs.js"
        }
      }
    }
  });
  grunt.loadNpmTasks('grunt-contrib-requirejs');
}

这样配置后,会将include里面的文件打包为out对应的文件,paths的本身意义不大,就是用于配置include里面的指向
这个时候我们来加个name看看有神马作用:
module.exports = function (grunt) {
  grunt.initConfig({
    requirejs: {
      compile: {
        "options": {
          "baseUrl": "./",
          "name": 'src/test02.js',
          "paths": {
            "$": "src/zepto",
            "_": "src/underscore",
            "B": "src/backbone",
            "Test": "src/Test01"
          },
          "include": [
            "$",
            "_",
            "B",
            "Test"
          ],
          "out": "dest/libs.js"
        }
      }
    }
  });
  grunt.loadNpmTasks('grunt-contrib-requirejs');
}
这样的话,会将name对应文件压缩到压缩文件的最前面,但是具体是干什么的,还是不太清楚,其英文注释说是单个文件或者其依赖项优化,不知道优化什么啊。。。囧!!!
requireJS基本的用法就是这样了,其详细信息,我们过段时间再来看看,下面说一下requireJS的其它用法
我们这里将requireJS的配置信息放在外面,而Gruntfile采用自定义任务的方式完成上面的功能
配置文件/cfg.json
{requirejs: {
  "options": {
    "baseUrl": "./",
    "paths": {
      "$": "src/zepto",
      "_": "src/underscore",
      "B": "src/backbone",
      "Test": "src/Test01"
    },
    "include": [
      "$",
      "_",
      "B",
      "Test"
    ],
    "out": "dest/libs.js"
  }
}}
然后,这里我们便不是有initConfig的做法了,直接使用自定义任务
module.exports = function (grunt) {

  grunt.loadNpmTasks('grunt-contrib-requirejs');

  grunt.registerTask('build', 'require demo', function () {

    //第一步,读取配置信息
    var cfg = grunt.file.readJSON('cfg.json');
    cfg = cfg.requirejs;
    grunt.config.set('requirejs', { test: cfg });

    //第二步,设置参数
    grunt.log.debug('参数:' + JSON.stringify(grunt.config()));

    //第三步跑任务
    grunt.task.run(['requirejs']);

  });

}
$ grunt build --debug
Running "build" task
[D] Task source: d:\grunt\Gruntfile.js
[D] 参数:{"requirejs":{"test":{"options":{"baseUrl":"./","paths":{"$":"src/zept
o","_":"src/underscore","B":"src/backbone","Test":"src/Test01"},"include":["$","
_","B","Test"],"out":"dest/libs.js"}}}}

Running "requirejs:test" (requirejs) task
[D] Task source: d:\grunt\node_modules\grunt-contrib-requirejs\tasks\requirejs.j
s
>> Tracing dependencies for: d:/grunt/dest/libs.js
>> Uglifying file: d:/grunt/dest/libs.js
>> d:/grunt/dest/libs.js
>> ----------------
>> d:/grunt/src/zepto.js
>> d:/grunt/src/underscore.js
>> d:/grunt/src/backbone.js
>> d:/grunt/src/Test01.js
效果还是有的,最后我们介绍下requireJS打包模板文件
require与模板文件
我们知道,模板文件一般都是html,比如我们这里的demo01.html,对于这个文件我们应该怎么打包呢?其实很简单......
需要干两件事情:
① 引入require.text
② 加入模板文件
{
  "requirejs": {
    "options": {
      "baseUrl": "./",
      "paths": {
        "$": "src/zepto",
        "_": "src/underscore",
        "B": "src/backbone",
        "test": "src/test01",
        "text": "src/require.text"

      },
      "include": [
        "$",
        "_",
        "B",
        "test",
        "text!src/demo01.html"
      ],
      "out": "dest/libs.js"
    }
  }
}
于是,我们便成功将模板打入了
$ grunt build --debug
Running "build" task
[D] Task source: d:\grunt\Gruntfile.js
[D] 参数:{"requirejs":{"test":{"options":{"baseUrl":"./","paths":{"$":"src/zept
o","_":"src/underscore","B":"src/backbone","test":"src/test01","text":"src/requi
re.text"},"include":["$","_","B","test","text!src/demo01.html"],"out":"dest/libs
.js"}}}}

Running "requirejs:test" (requirejs) task
[D] Task source: d:\grunt\node_modules\grunt-contrib-requirejs\tasks\requirejs.j
s
>> Tracing dependencies for: d:/grunt/dest/libs.js
>> Uglifying file: d:/grunt/dest/libs.js
>> d:/grunt/dest/libs.js
>> ----------------
>> d:/grunt/src/zepto.js
>> d:/grunt/src/underscore.js
>> d:/grunt/src/backbone.js
>> d:/grunt/src/test01.js
>> d:/grunt/src/require.text.js
>> text!src/demo01.html
在文件中我们引用方式是:
"text!src/demo01.html" => '具体文件'
打包样式文件
样式文件的打包方式与js不太一样,这里我们下载css-min插件,并且在package.json中新增依赖项
{
  "name": "demo",
  "version":         "0.1.0",
  "description":     "demo",
  "license":         "MIT",
  "devDependencies": {
    "grunt":                   "~0.4.1",
    "grunt-contrib-jshint":    "~0.6.3",
    "grunt-contrib-concat":    "~0.3.0",
    "grunt-contrib-uglify":    "~0.2.1",
    "grunt-contrib-requirejs": "~0.4.1",
    "grunt-contrib-copy":      "~0.4.1",
    "grunt-contrib-clean":     "~0.5.0",
    "grunt-strip":             "~0.2.1",
    "grunt-contrib-watch": "~0.6.0",
    "grunt-contrib-cssmin": "~0.5.0"
  },
  "dependencies":    {
    "express": "3.x"
  }
}
module.exports = function (grunt) {
  grunt.initConfig({
    cssmin: {
      compress: {
        files: {
          'dest/car.min.css': [
          "src/car.css",
          "src/car01.css"
        ]
        }
      }
    }
  });

  grunt.loadNpmTasks('grunt-contrib-cssmin');

}
如此一来我们便可以压缩合并CSS文件了:
$ grunt cssmin --debug
Running "cssmin:compress" (cssmin) task
[D] Task source: d:\grunt\node_modules\grunt-contrib-cssmin\tasks\cssmin.js
File dest/car.min.css created.
下集预告
今天,我们一起来学习了一些grunt打包的基础知识,明天我们就进行下面的学习,简单结束这一轮grunt相关的知识
1 移动打包文件
我们的开发版本与使用版本可能不在一个位置哦
2 分支处理
不同分支打包
3 native包与HTML5包
在HTML5嵌入webview的时代,我们当然存在一次打包既要形成网站文件也要形成app文件
4 分频道打包
当然可能存在分频道分分支打包的情况
今日到此为止,待续......


 浙公网安备 33010602011771号