Centos7 安装配置Elasticsearch
安装之前先检查jdk的版本建议1.8的
1、安装Elasticsearch,进入ES官网,选择合适的版本网址,进行下载
以下是5.6.3 版本的网址
wget https://artifacts.elastic.co/downloads/elasticsearch/elasticsearch-5.6.3.tar.gz

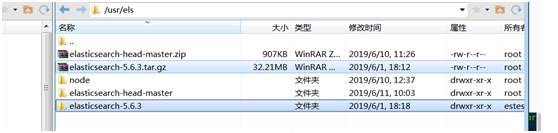
在/usr目录下新建一个文件夹名为els,并将下载的压缩包解压到/usr/els/目录下,
2、新建账号
因为使用root用户执行ES程序,将会出现错误;
[WARN ][o.e.b.ElasticsearchUncaughtExceptionHandler] [] uncaught exception in thread [main]org.elasticsearch.bootstrap.StartupException: java.lang.RuntimeException: can not run elasticsearch as root
所以这里需要创建单独的用户去执行ES 文件;命令如下:
useradd estest --添加账号
chown -R estest:estest elasticsearch-5.6.3 --为新增账号赋予文档目录的权限
su estest ---切换账号
3、修改limits.conf与sysctl.conf文件的系统参数,如下图所示

a、编辑 limits.conf 文件并添加内容:
[root@aubin2 ~]# vim /etc/security/limits.conf
root soft nofile 65535
root hard nofile 65535
# estest
estest soft nofile 65536
estest hard nofile 65536
* soft nofile 65535
* hard nofile 65535
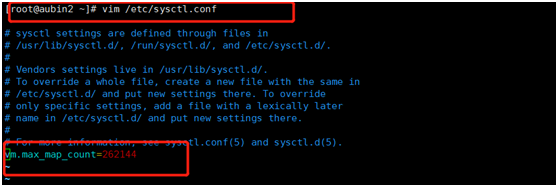
b、编辑 sysctl.conf 文件并添加内容
[root@aubin2 ~]# vim /etc/sysctl.conf
vm.max_map_count=262144
c、最后执行如下命令:
sysctl -p
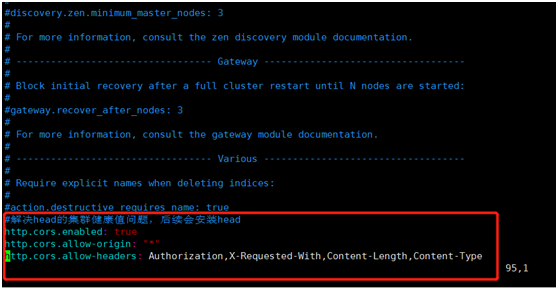
4、进入/usr/els/elasticsearch-5.6.3/config目录,编辑elasticsearch.yml文件。该文件配置需要注意!!!将下述代码中标红的改为自己的IP地址,添加配置时需注意配置文件":"后要有空格。如下所示。
[root@aubin2 ~]# vim /usr/els /elasticsearch-5.6.3/config/elasticsearch.yml

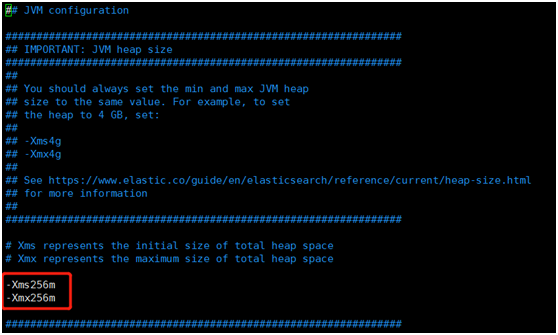
注意:若服务器运行内存不大,也可能还有一个错误是关于Jvm内存分配的问题,需要修改Jvm配置。如下所示。
[root@aubin2 ~]# vim /usr/els /elasticsearch-5.6.3/config/jvm.options
启动与测试
上述安装配置均是在root用户下进行的,下面将切换至estest用户,来启动ElasticSearch,即运行bin目录下的elasticsearch文件,若看到[node1] started表示启动成功。
[root@aubin2 ~]# su estest
[estest@aubin2 root]$ /usr/els/elasticsearch-5.6.3/bin/elasticsearch -d --启动bin目录下的ela...(后面加 -d就是后台运行)

执行[estest@aubin2 root]$ ps -ef|grep elasticsearch 是查看进程,可使用kill -9 19244杀死这个进程。
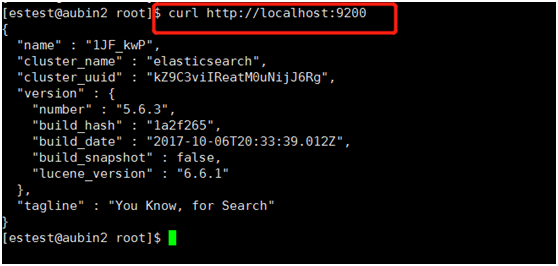
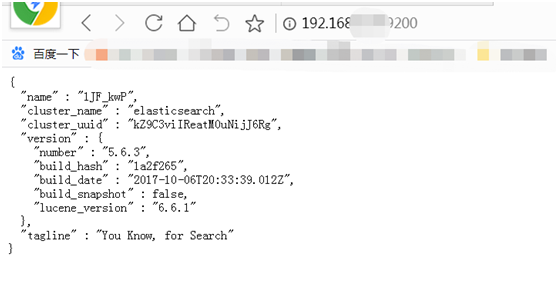
下面是测试是否有如下提示,或在浏览器中查看,输入:服务器IP地址:9200:
下一篇介绍elasticsearch安装head插件。

 浙公网安备 33010602011771号