sonarqube添加一条自定义规则,扫描文件中出现的username和password,方法一
假设你已经有了sonarqube-java源码,并且已经把sonarqube部署到电脑上; 因为我的代码是基于SonarSource / sonar-java源码中示例项目docs/java-custom-rules-example
1、在check 里面创建文件 MyTxtBlockCheck.java
package org.sonar.samples.java.checks;

import org.sonar.check.Rule;
import org.sonar.plugins.java.api.IssuableSubscriptionVisitor;
import org.sonar.plugins.java.api.tree.LiteralTree;
import org.sonar.plugins.java.api.tree.Tree;
import org.sonar.plugins.java.api.tree.Tree.Kind;

import java.util.Collections;
import java.util.List;

@Rule(key = "MyTxtBlockCheck")
public class MyTxtBlockCheck extends IssuableSubscriptionVisitor {
@Override
public List<Tree.Kind> nodesToVisit() {
return Arrays.asList(Tree.Kind.STRING_LITERAL);
}
@Override
public void visitNode(Tree tree) {
if (tree.is(Tree.Kind.STRING_LITERAL)) {
LiteralTree stringLiteral = (LiteralTree) tree;
String value = stringLiteral.value().toLowerCase();
for (String keyword : SENSITIVE_KEYWORDS) {
if (value.contains(keyword)) {
reportIssue(tree, "Avoid hardcoding sensitive information such as " + keyword);
}
}
}
}
}
执行完你可能发现,此时只找出了字符串文本的敏感字符问题;
是由于Tree.Kind.STRING_LITERAL,只能找出来用双引号括起来的文本;
关于Tree.Kind.STRING_LITERAL 、Tree.Kind.IDENTIFIER、Tree.Kind.TEXT_BLOCK等各个区别,请参考:
Tree.Kind.STRING_LITERAL 、Tree.Kind.IDENTIFIER、Tree.Kind.TEXT_BLOCK 区别 - yxchun - 博客园 (cnblogs.com)
针对3种类型,识别username、password关键字,具体代码,请参考:
2、在resouces/org.sonar.I10n.rules.java创建 MyTxtBlockCheck.json 和MyTxtBlockCheck.html
MyTxtBlockCheck.html如下
<!DOCTYPE html>
<html>
<head>
  <title>Sensitive Information Rule TXT TXT</title>
</head>
<body>
<h1>Sensitive Information Rule TXT TXT</h1>
<p>This rule detects hardcoded sensitive information such as 'username' or 'password' in the code.</p>

<h2>Rule Description</h2>
<p>Hardcoding sensitive information can lead to security vulnerabilities and is considered a bad practice. This rule helps identify such cases in your codebase.</p>

<h2>Examples</h2>
<h3>Non-compliant Code</h3>
<pre>
    private static final String username = "myUsername";
    private static final String password = "myPassword";
    </pre>

<h3>Compliant Code</h3>
<pre>
    private static final String someValue = "value"; // Use configuration files or environment variables
    </pre>

<h2>Best Practices</h2>
<ul>
  <li>Do not hardcode sensitive information in your codebase.</li>
  <li>Use configuration files or environment variables to manage sensitive data securely.</li>
</ul>
</body>
</html>
MyTxtBlockCheck.json 如下
{
"title": "Sensitive Information Rule txt txt",
"type": "Bug",
"status": "ready",
"tags": [
"bugs",
"gandalf",
"magic"
],
"defaultSeverity": "Critical"
}

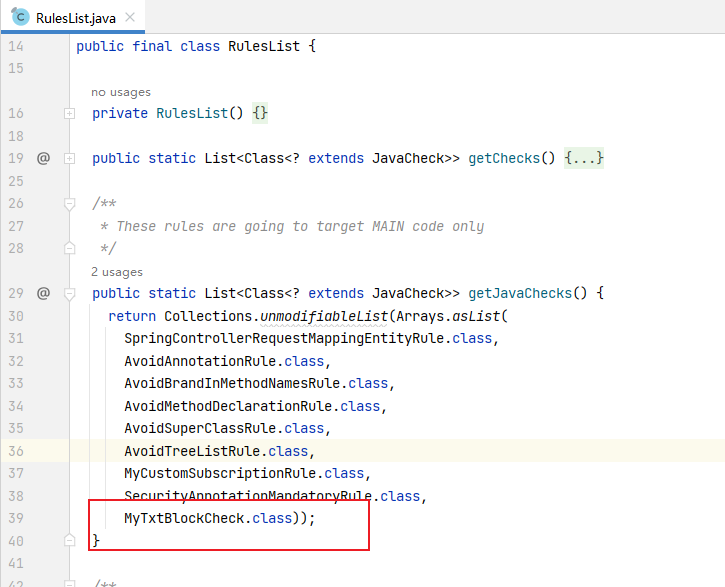
3、将MyTxtBlockCheck添加到RulesList.java
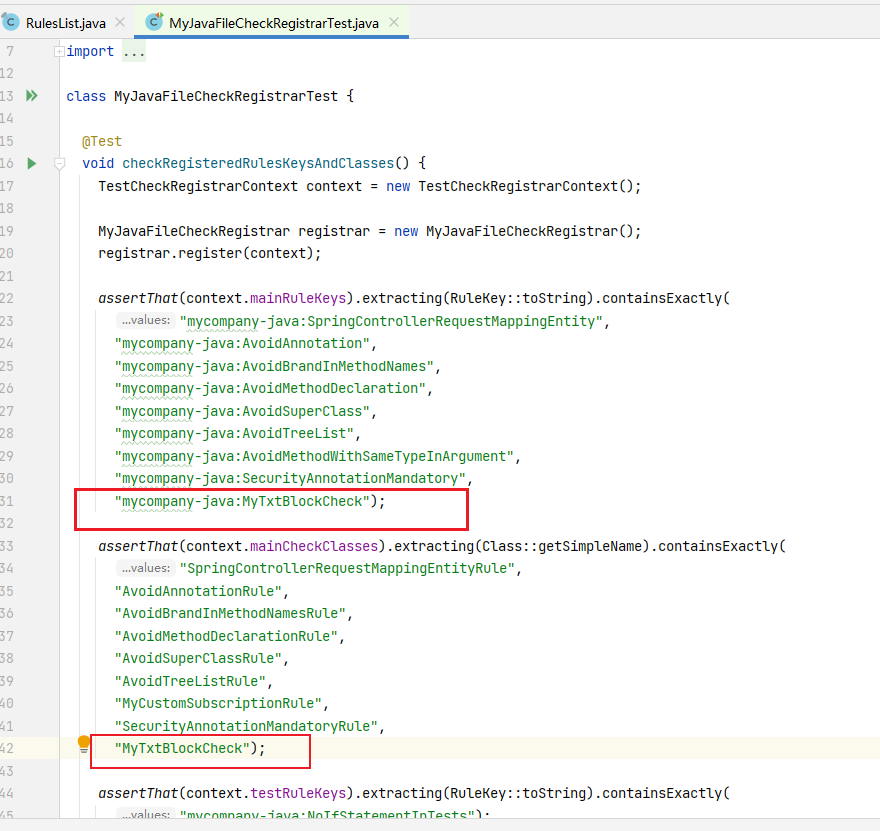
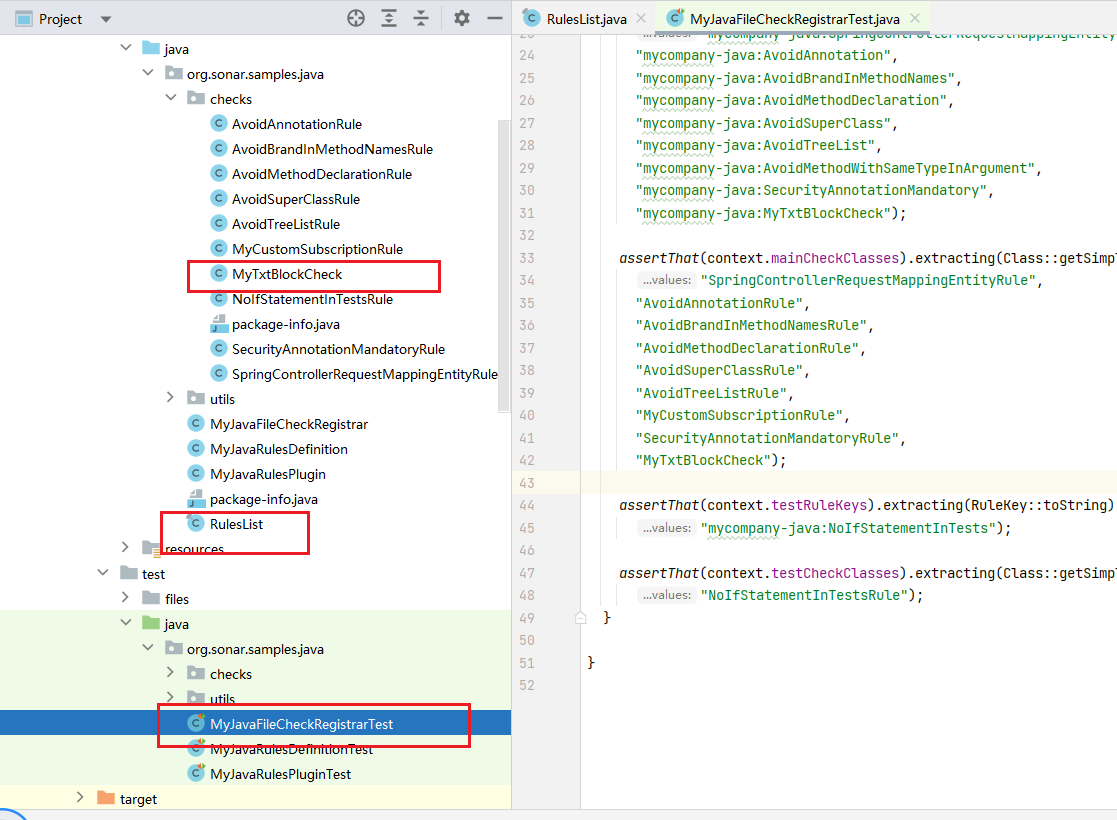
4、在测试文件中加入新规则MyTxtBlockCheck,测试文件:MyJavaFileCheckRegistrarTest.java
目录
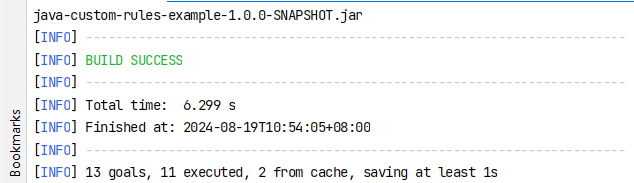
5、代码到此写好;开始构建
进入pom文件所在文件夹
使用命令:
mvn clean install -f .\pom_SQ_9_9_LTS.xml
构建成功
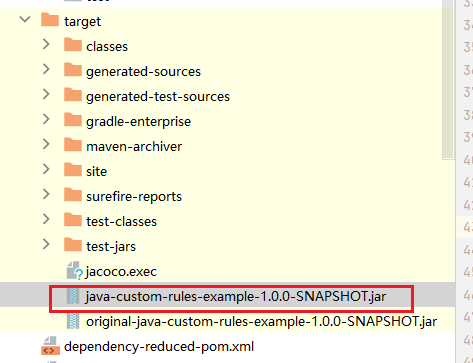
6、拿到构建好的jar
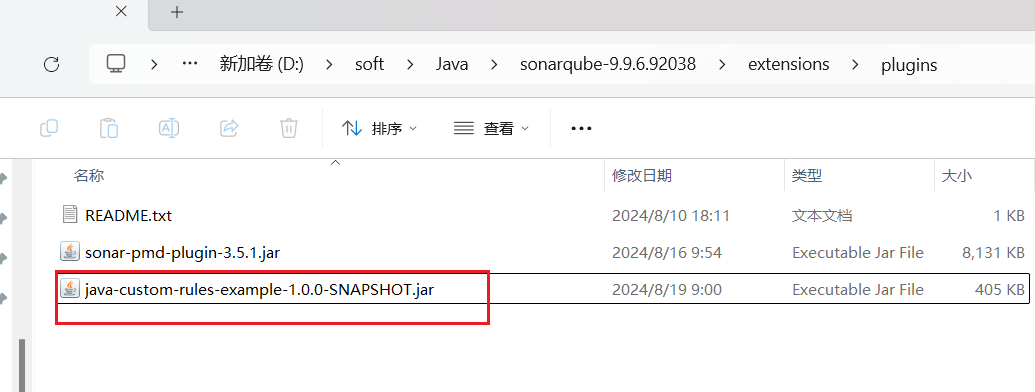
7、将jar放到 sonarqube-安装目录\extensions\plugins中
8、重启项目
9、进入http://localhost:9000/
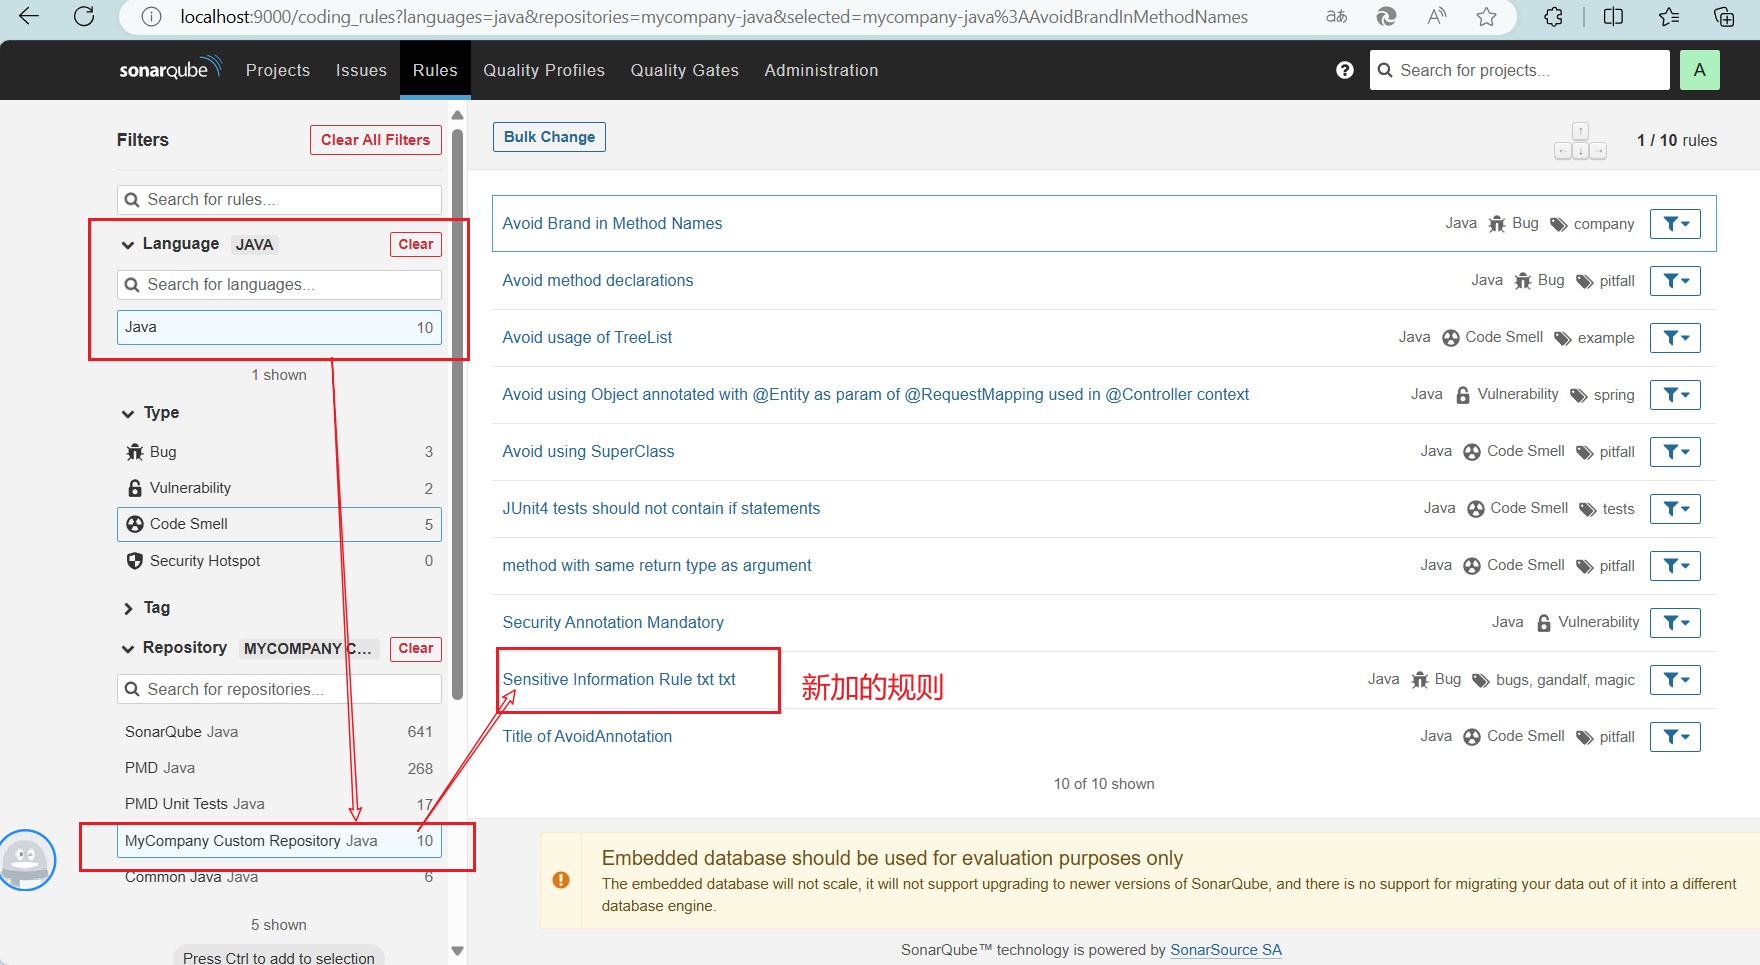
添加新加的规则进行扫描
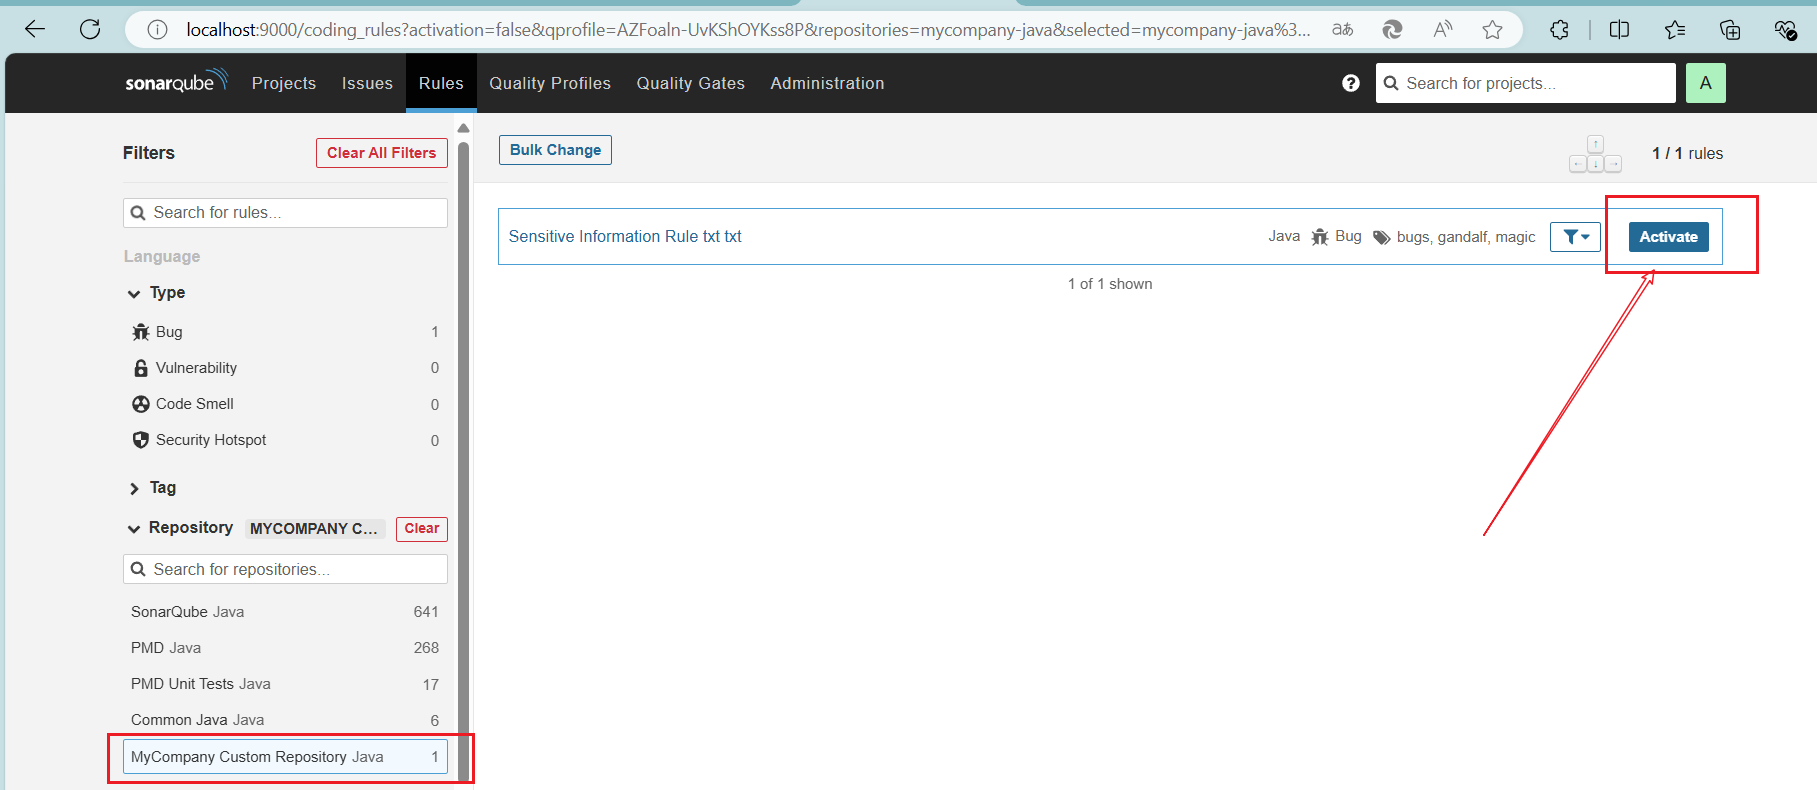
使用默认规则文件,激活新规则

加入新规则
使用新规则进行扫描请参考:
sonarqube如何创建maven项目进行扫描 - yxchun - 博客园 (cnblogs.com)

 浙公网安备 33010602011771号