CentOS7 安装Docker
1、安装
step 1: 安装必要的一些系统工具
yum install -y yum-utils device-mapper-persistent-data lvm2
Step 2: 添加软件源信息
yum-config-manager --add-repo http://mirrors.aliyun.com/docker-ce/linux/centos/docker-ce.repo
Step 3: 更新yum索引列表并安装Docker引擎
yum makecache fast
yum索引列表没有更新可以直接使用yum makecache
yum install docker-ce
Step 4: 开启Docker服务
service docker start
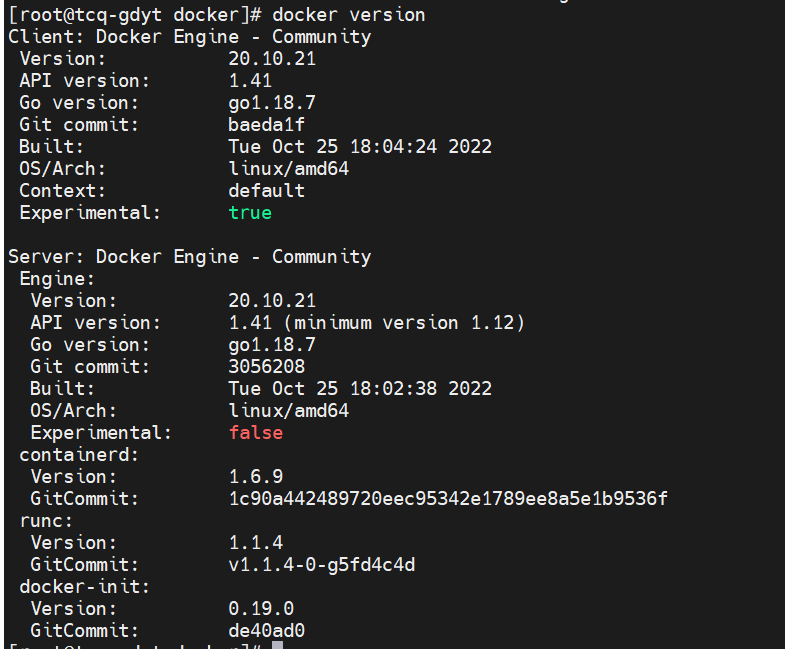
2、测试是否安装成功
docker version
3、配置下载docker镜像的仓库
step 1:进入aliyun.com,点击控制台,登录

step 2: 搜索 ‘容器镜像服务’

step 3:找到镜像加速器
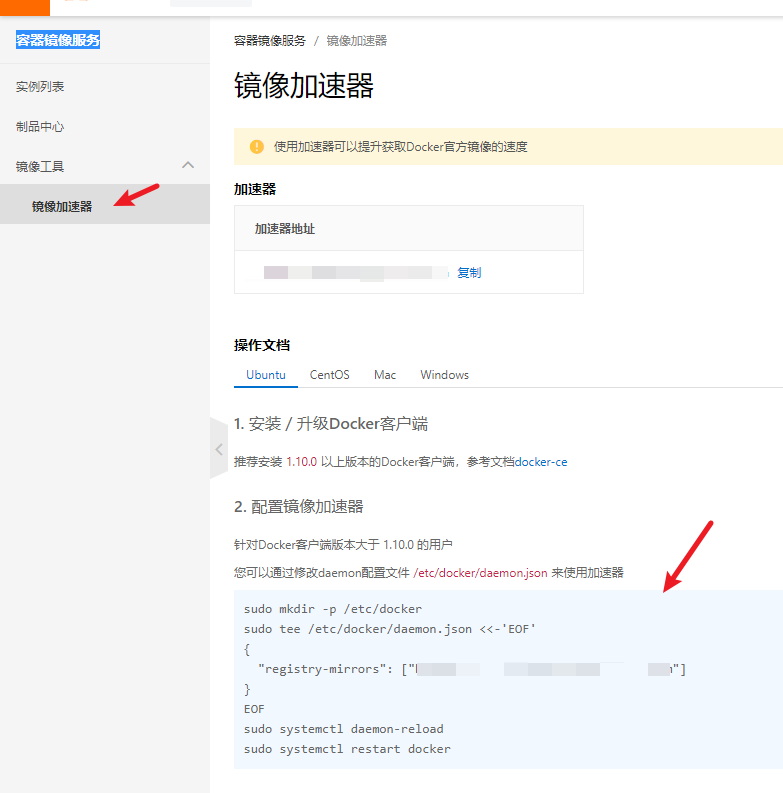
step 4:回到linux控制台
输入
sudo mkdir -p /etc/docker
sudo tee /etc/docker/daemon.json <<-'EOF'
{
  "registry-mirrors": ["https://你自己的,每个人不一样.mirror.aliyuncs.com"]
}
EOF
sudo systemctl daemon-reload
sudo systemctl restart docker
4、测试HelloWorld镜像
[root@tcq-gdyt docker]# docker run hello-world
Unable to find image 'hello-world:latest' locally
latest: Pulling from library/hello-world
2db29710123e: Pull complete
Digest: sha256:2498fce14358aa50ead0cc6c19990fc6ff866ce72aeb5546e1d59caac3d0d60f
Status: Downloaded newer image for hello-world:latest

Hello from Docker!
This message shows that your installation appears to be working correctly.

To generate this message, Docker took the following steps:
 1. The Docker client contacted the Docker daemon.
 2. The Docker daemon pulled the "hello-world" image from the Docker Hub.
    (amd64)
 3. The Docker daemon created a new container from that image which runs the
    executable that produces the output you are currently reading.
 4. The Docker daemon streamed that output to the Docker client, which sent it
    to your terminal.

To try something more ambitious, you can run an Ubuntu container with:
 $ docker run -it ubuntu bash

Share images, automate workflows, and more with a free Docker ID:
 https://hub.docker.com/

For more examples and ideas, visit:
 https://docs.docker.com/get-started/

[root@tcq-gdyt docker]#
[root@tcq-gdyt docker]# ps -ef | grep docker
root     18362     1  0 10:00 ?        00:00:00 /usr/bin/dockerd -H fd:// --containerd=/run/containerd/containerd.sock
root     21371 22728  0 10:07 pts/3    00:00:00 grep --color=auto docker
[root@tcq-gdyt docker]# docker images;
REPOSITORY    TAG       IMAGE ID       CREATED         SIZE
hello-world   latest    feb5d9fea6a5   13 months ago   13.3kB
5、docker数据目录迁移(修改文件存储位置)(此步可以需要时再做)
step 1: 查看docker原文件目录,并停掉docker 服务
[root@tcq-gdyt docker]# docker info
Client:
 Context:    default
 Debug Mode: false
 Plugins:
  app: Docker App (Docker Inc., v0.9.1-beta3)
  buildx: Docker Buildx (Docker Inc., v0.9.1-docker)
  scan: Docker Scan (Docker Inc., v0.21.0)

Server:
 Containers: 1
  Running: 0
  Paused: 0
  Stopped: 1
 Images: 2
 Server Version: 20.10.21
 Storage Driver: overlay2
  Backing Filesystem: xfs
  Supports d_type: true
  Native Overlay Diff: true
  userxattr: false
 Logging Driver: json-file
 Cgroup Driver: cgroupfs
 Cgroup Version: 1
 Plugins:
  Volume: local
  Network: bridge host ipvlan macvlan null overlay
  Log: awslogs fluentd gcplogs gelf journald json-file local logentries splunk syslog
 Swarm: inactive
 Runtimes: io.containerd.runc.v2 io.containerd.runtime.v1.linux runc
 Default Runtime: runc
 Init Binary: docker-init
 containerd version: 1c90a442489720eec95342e1789ee8a5e1b9536f
 runc version: v1.1.4-0-g5fd4c4d
 init version: de40ad0
 Security Options:
  seccomp
   Profile: default
 Kernel Version: 3.10.0-1127.el7.x86_64
 Operating System: CentOS Linux 7 (Core)
 OSType: linux
 Architecture: x86_64
 CPUs: 4
 Total Memory: 7.795GiB
 Name: tcq-gdyt.grgit.com
 ID: QN6B:LBRO:ILLU:7Z7Y:RFKW:RKCM:VCHN:R5F5:4IZ6:FRHS:LJJ5:5G5A
 Docker Root Dir: /var/lib/docker
 Debug Mode: false
 Registry: https://index.docker.io/v1/
 Labels:
 Experimental: false
 Insecure Registries:
  127.0.0.0/8
 Registry Mirrors:
  https://qfq51k37.mirror.aliyuncs.com/
 Live Restore Enabled: false
停掉服务
service docker stop
step2: 创建新的存储位置
mkdir -p /home/dockerRoot
将数据复制到新目录
cp -a /var/lib/docker /home/dockerRoot/
备份原目录
mv -u /var/lib/docker/ /var/lib/docker.bak
step3:修改配置文件
vim /etc/docker/paemon.json
{
  "registry-mirrors": ["https://你只自己的.mirror.aliyuncs.com"],
  "data-root":"/home/dockerRooot/docker"
}
step4:重启docker
service docker start
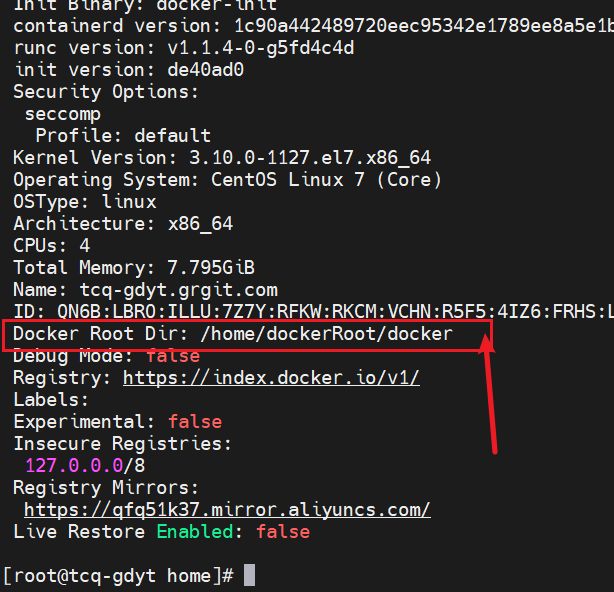
查看是否修改成功
docker info
查看 docker root dir
docker下载链接(Centos7) https://download.docker.com/linux/centos/7/x86_64/stable/Packages/
参考:https://blog.csdn.net/m0_51338272/article/details/122801639

 浙公网安备 33010602011771号