SpringBoot监控~
1、创建监控的服务端server
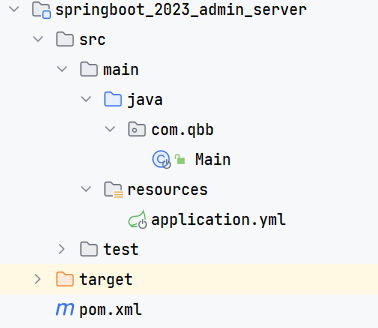
导入依赖
    <dependencies>
        <dependency>
            <groupId>org.springframework.boot</groupId>
            <artifactId>spring-boot-starter-web</artifactId>
        </dependency>

        <dependency>
            <groupId>de.codecentric</groupId>
            <artifactId>spring-boot-admin-starter-server</artifactId>
            <version>2.7.3</version>
        </dependency>
    </dependencies>
在主启动类上开启监控
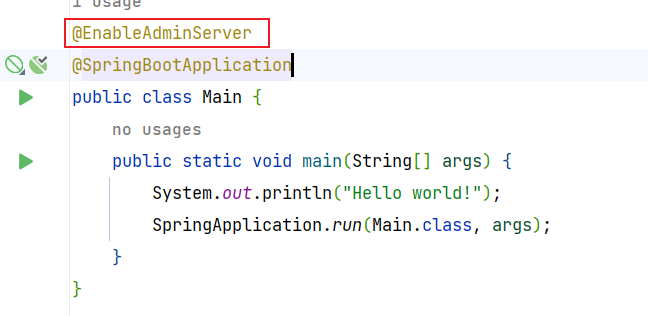
这样为我们访问localhost:8080就可以进入监控平台了
2、创建需要监控的application客户端client
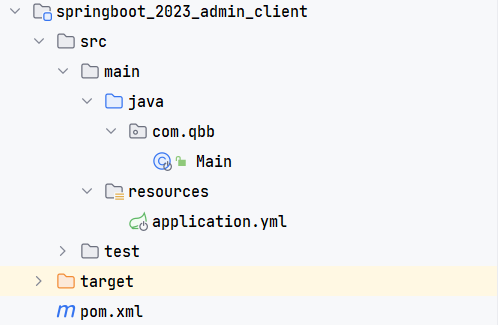
导入依赖
 <dependencies>
	 <dependency>
		 <groupId>org.springframework.boot</groupId>
		 <artifactId>spring-boot-starter-web</artifactId>
	 </dependency>

	 <dependency>
		 <groupId>de.codecentric</groupId>
		 <artifactId>spring-boot-admin-starter-client</artifactId>
		 <version>2.7.3</version>
	 </dependency>
</dependencies>
修改配置文件
spring:
  boot:
    admin:
      client:
        # 配置server端地址
        url: http://localhost:8080

server:
  port: 9000
management:
  endpoints:
    web:
      exposure:
        include: "*" # "*" :包含全部监控信息
  endpoint:
    health:
      show-details: always # 配置健康状况
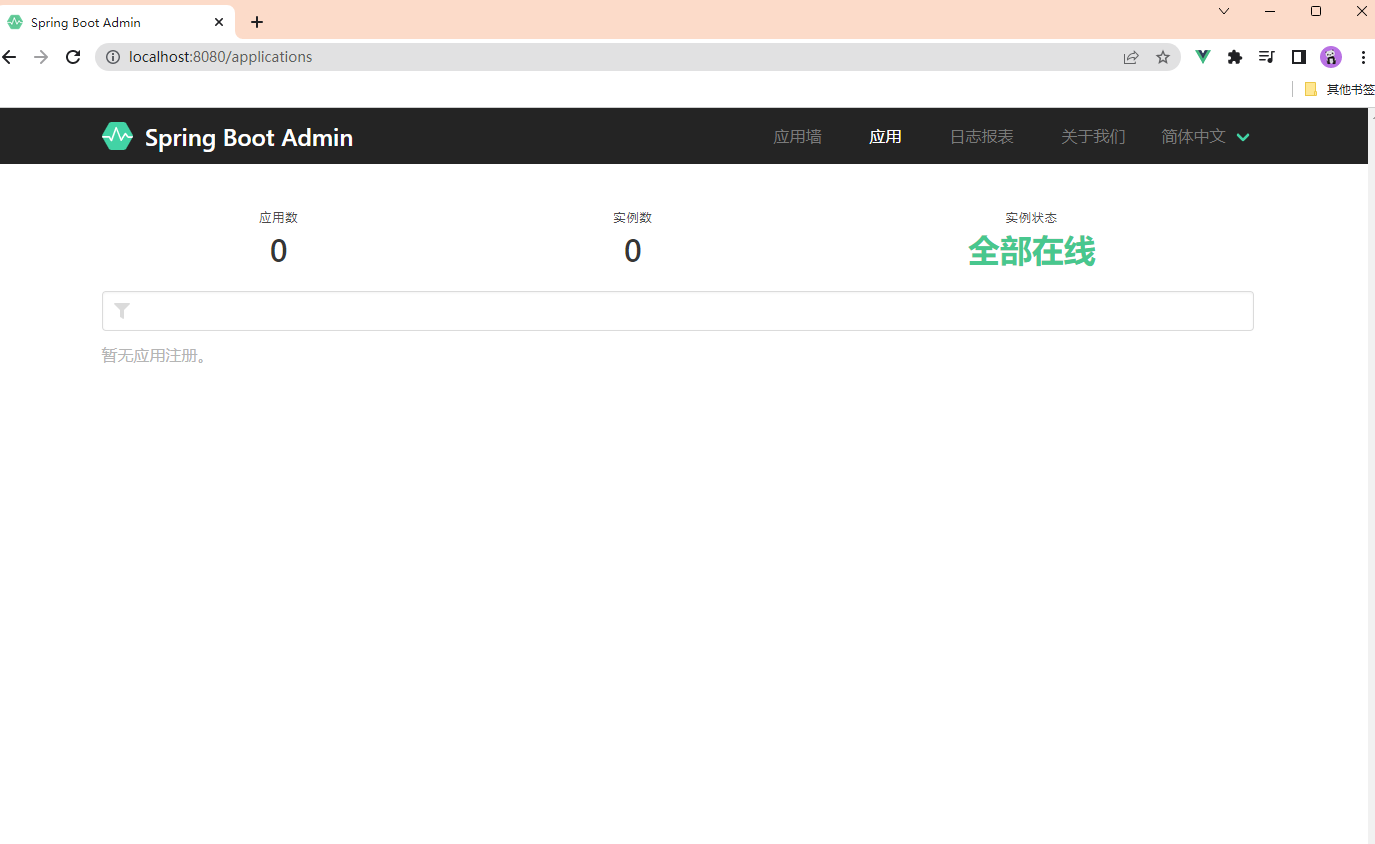
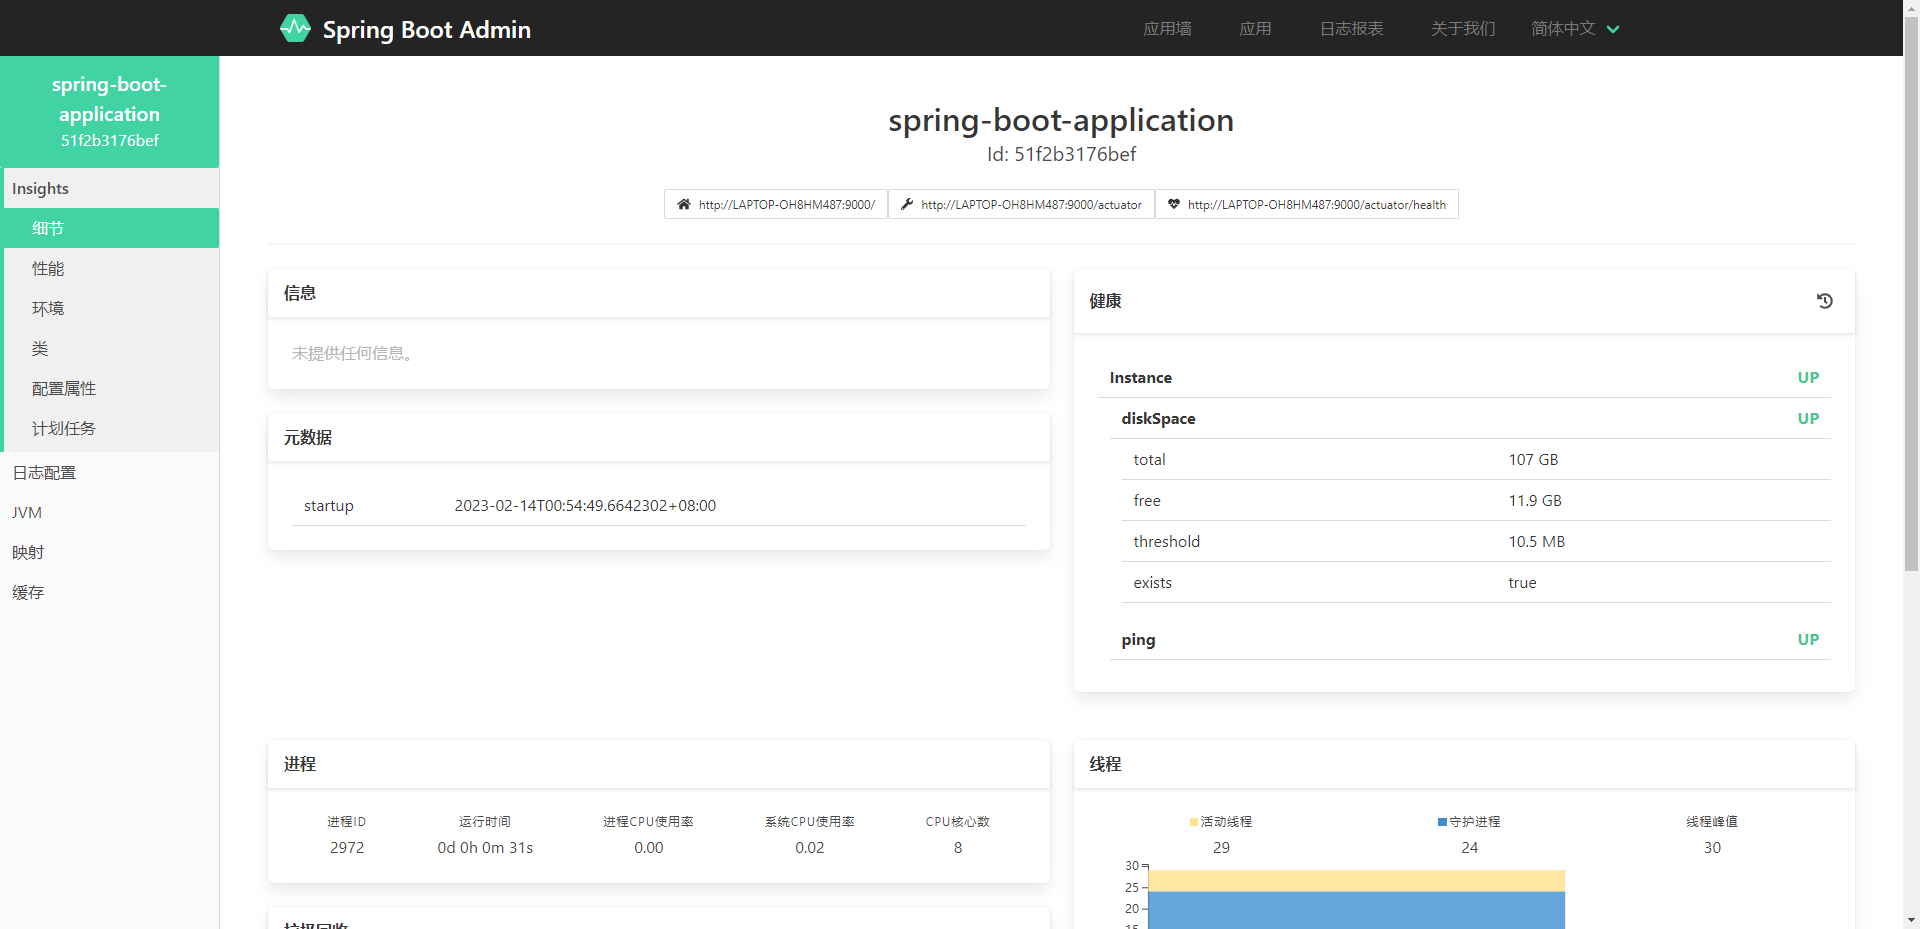
我们再次访问localhost:8080就可看到如下界面
3、actuator获取端点信息
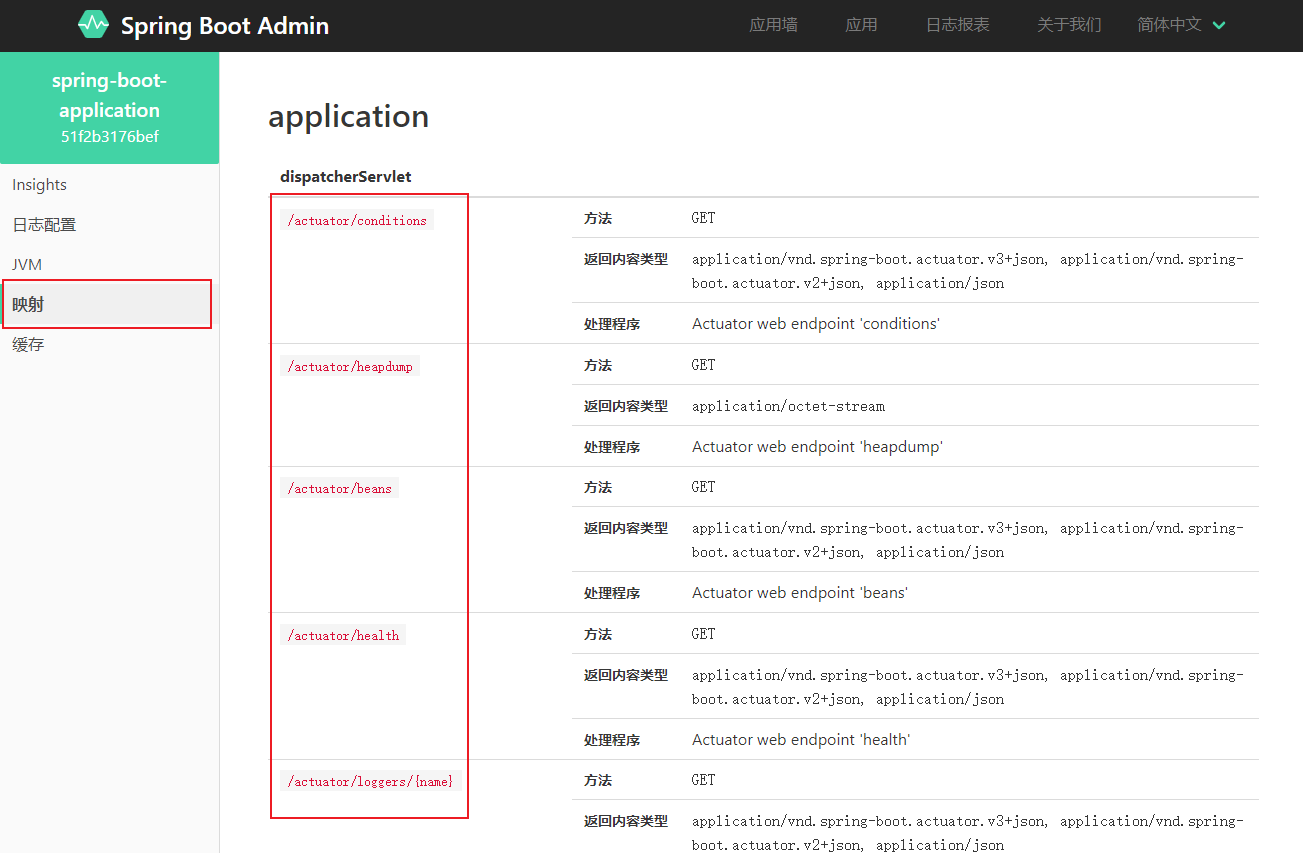
例如:http://localhost:9000/actuator/beans 他就会获取我们系统加载的所有的bean

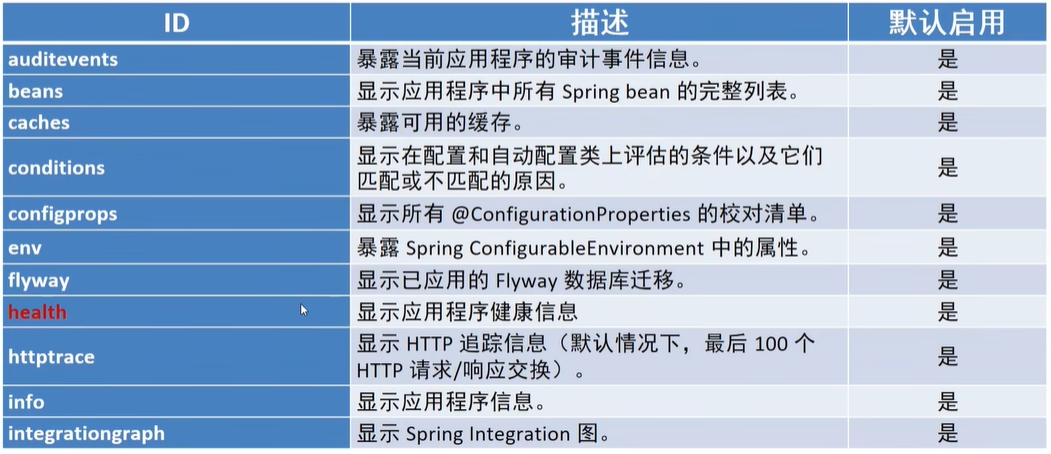
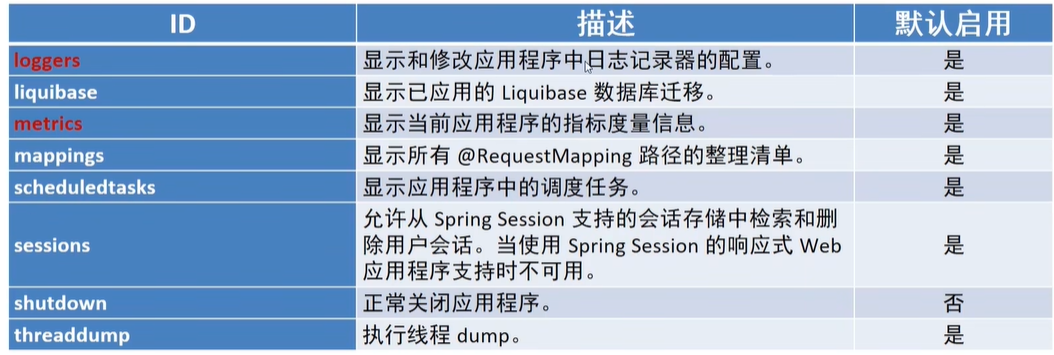
springboot给我们提供了如下的监控端点
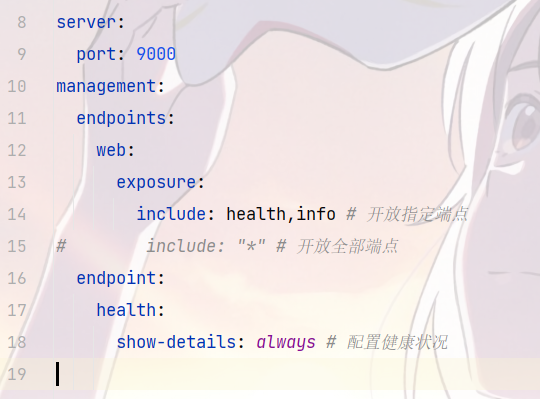
开放指定的端点
management:
  # web端是否能访问控制,不显示 postman也可以请求~
  endpoints:
    web:
      exposure:
        include: health,info # 开放指定端点
#        include: "*" # 开放全部端点
  # 是否开启info health 等等的端点的功能
  endpoint:
    health:
      show-details: always # 配置健康状况
    info:
      enabled: false # 关闭info端点
4、info端点指标控制
简单说明信息配置
management:
info:
env:
enabled: true
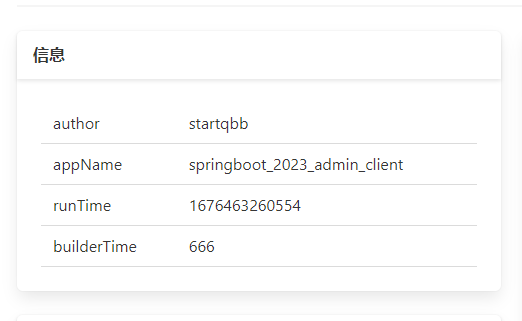
info:
author: startqbb
appName: @project.artifactId@
复杂说明信息配置
/**
 * @author startqbb (个人博客:https://www.cnblogs.com/qbbit)
 * @date 2023-02-15  20:12
 * @tags 喜欢就去努力的争取
 */
@Configuration
public class InfoConfig  implements InfoContributor {
    @Override
    public void contribute(Info.Builder builder) {
        builder.withDetail("runTime", System.currentTimeMillis());
        Map infoMap = new HashMap();
        infoMap.put("builderTime", 666);
        builder.withDetails(infoMap);
     }
}
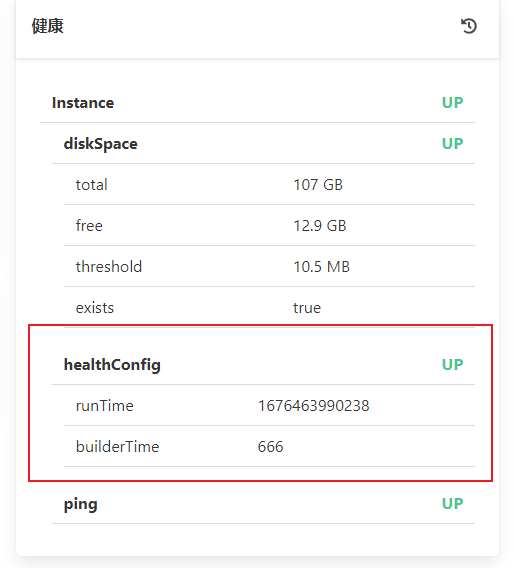
5、health健康指标监控
package com.qbb.config;

import org.springframework.boot.actuate.health.AbstractHealthIndicator;
import org.springframework.boot.actuate.health.Health;
import org.springframework.boot.actuate.health.Status;
import org.springframework.context.annotation.Configuration;

import java.util.HashMap;
import java.util.Map;

/**
 * @author startqbb (个人博客:https://www.cnblogs.com/qbbit)
 * @date 2023-02-15  20:24
 * @tags 喜欢就去努力的争取
 */
@Configuration
public class HealthConfig extends AbstractHealthIndicator {
    @Override
    protected void doHealthCheck(Health.Builder builder) throws Exception {
        // 指定服务健康状态
        builder.status(Status.UP);
        builder.withDetail("runTime", System.currentTimeMillis());
        Map infoMap = new HashMap();
        infoMap.put("builderTime", 666);
        builder.withDetails(infoMap);
    }
}
6、性能指标端点
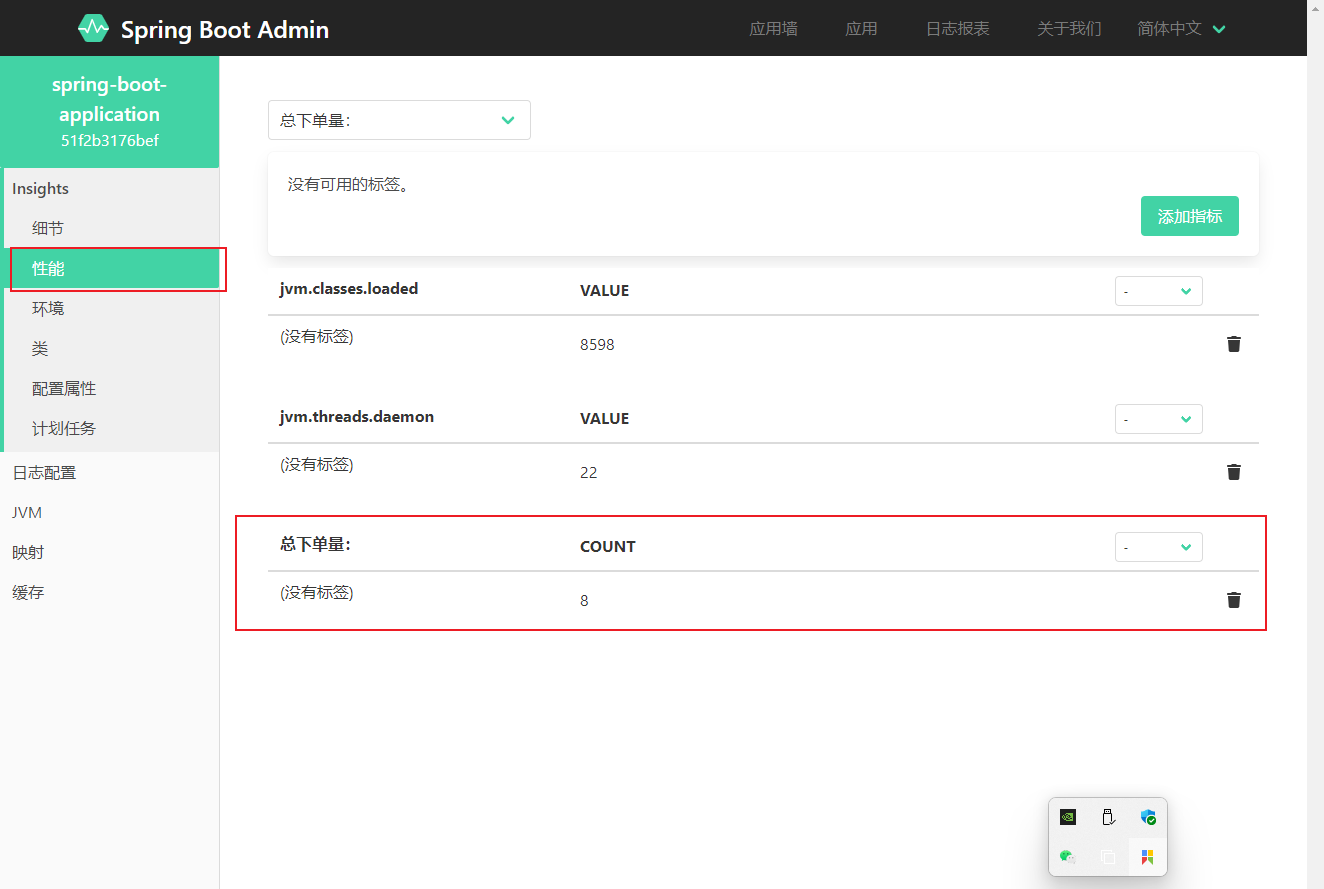
假设一个场景,模拟下单,然后统计下单量
package com.qbb.controller;

import io.micrometer.core.instrument.Counter;
import io.micrometer.core.instrument.MeterRegistry;
import org.springframework.web.bind.annotation.GetMapping;
import org.springframework.web.bind.annotation.RestController;

/**
 * @author startqbb (个人博客:https://www.cnblogs.com/qbbit)
 * @date 2023-02-15  21:26
 * @tags 喜欢就去努力的争取
 */
@RestController
public class OrderController {

    private Counter counter;

    public OrderController(MeterRegistry registry) {
        this.counter = registry.counter("总下单量:");
    }

    @GetMapping("/order")
    public String order() {
        // 统计下单次数
        counter.increment();
        return "下单成功~" + counter.count();
    }
}
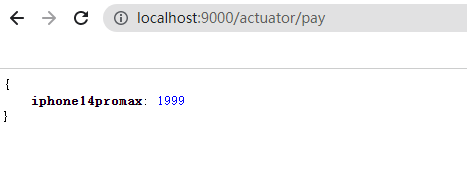
7、自定义监控端点
package com.qbb.actuator;

import org.springframework.boot.actuate.endpoint.annotation.Endpoint;
import org.springframework.boot.actuate.endpoint.annotation.ReadOperation;
import org.springframework.stereotype.Component;

import java.util.Map;

/**
 * @author startqbb (个人博客:https://www.cnblogs.com/qbbit)
 * @date 2023-02-15  21:53
 * @tags 喜欢就去努力的争取
 */
@Component
@Endpoint(id = "pay", enableByDefault = true) // 声明这是一个端点
public class PayEndpoint {

    @ReadOperation // 声明端点的操作
    public Map pay() {
        System.out.println("pay run ......");
        return Map.of("iphone14promax", 1999);
    }
}

我们访问一下~

 浙公网安备 33010602011771号