如何在ASP.NET 5上搭建基于TypeScript的Angular2项目
2016-04-05 11:27 y-z-f 阅读(5951) 评论(12) 收藏 举报一、前言
就在上月,公司的一个同事建议当前的前端全面改用AngularJs进行开发,而我们采用的就是ASP.NET 5项目,原本我的计划是采用TypeScript直接进行Angular2开发。所以借用这段时间来写下如何在ASP.NET 5下搭建基于TypeScript的Angualr2的项目,下面我们就进入正题。
二、环境配置
如果读者直接按照Angular.io上的方式搭建是无法通过的,所以下面我们的教程基本跟Angular.io上的类似,只是其中的配置会有所不同,并且也会多出一些步骤。
1.创建一个空的ASP.NET 5项目
读者必须安装有VS2015,通过“文件”-》“新建”-》“项目”,然后选中如下图中的项目:
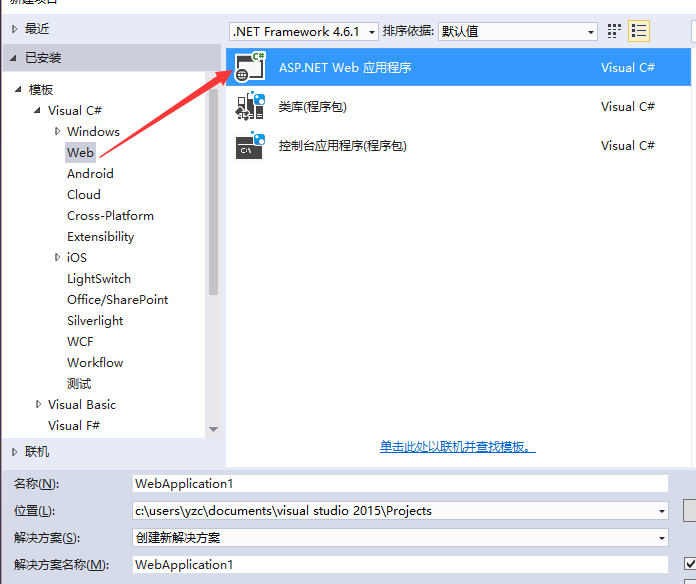
其中项目名称读者可以随意取一个,如果读者不想考虑可以命名为“AngularWeb”。接着我们点击确定,继续选中这个:
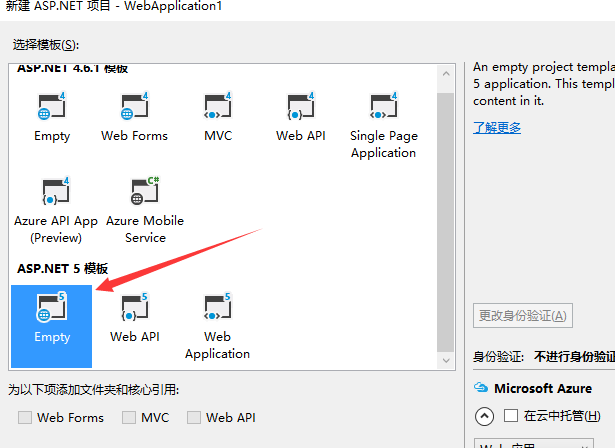
这样一个空的ASP.NET 5项目就搭建完成了。
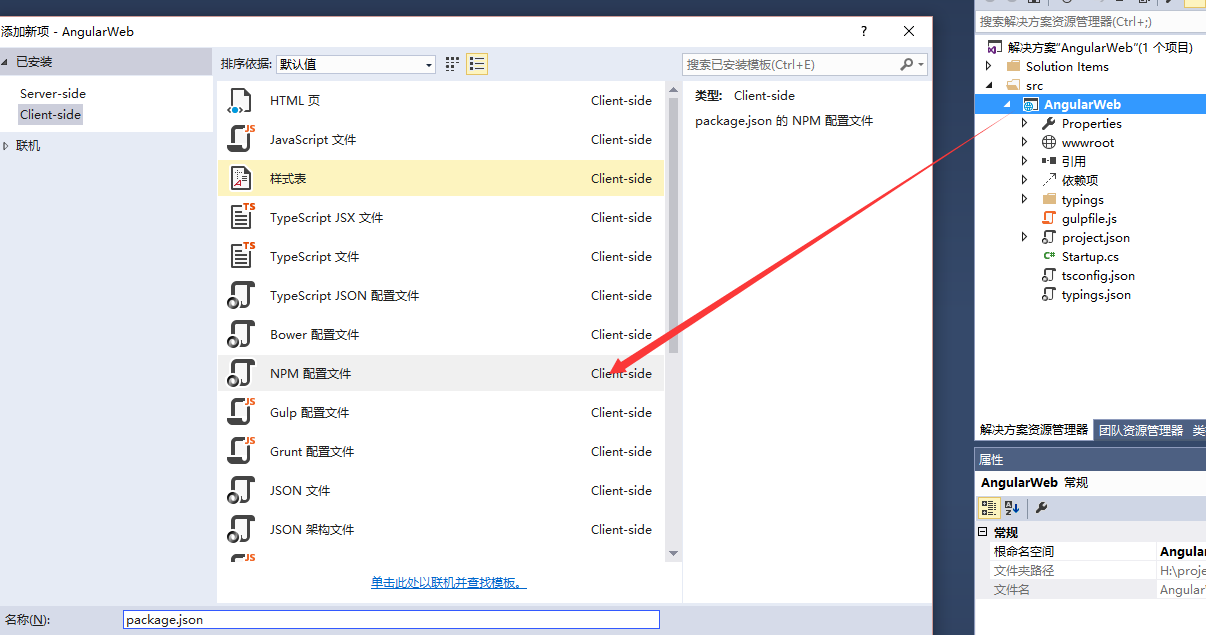
2.加载Angular2
因为默认的空项目是没有npm的配置文件,所以我们要新建一个,首先我们右击项目添加一个项,如下图所示(不需要修改文件名):
新建好了之后我们可以看到依赖项下就有npm了,这个时候我们右击这个npm,然后按照如下图所示点击箭头所指的那个项:
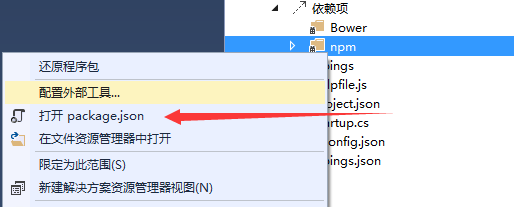
打开之后我们在其中输入一下内容:
{
  "name": "angular2-quickstart",
  "version": "1.0.0",
  "scripts": {
    "start": "concurrently \"npm run tsc:w\" \"npm run lite\" ",
    "tsc": "tsc",
    "tsc:w": "tsc -w",
    "lite": "lite-server",
    "typings": "typings",
    "postinstall": "typings install"
  },
  "license": "ISC",
  "dependencies": {
    "angular2": "2.0.0-beta.13",
    "systemjs": "0.19.25",
    "es6-shim": "^0.35.0",
    "reflect-metadata": "0.1.2",
    "rxjs": "5.0.0-beta.2",
    "zone.js": "0.6.6"
  },
  "devDependencies": {
    "concurrently": "^2.0.0",
    "lite-server": "^2.1.0",
    "typescript": "^1.8.9",
    "typings": "^0.7.11",
    "gulp": "^3.9.1"
  }
}
这部分基本和Angular.io上一样,添加完这些内容后保存下,vs2015会自动会恢复npm引用。
3.TypeScript配置
跟新建npm配置文件一样,我们还需要新建一个TypeScript的配置文件,这个时候我们依然还是右击项目通过新建项来创建,如下图所示,对应的文件名不需要更改:

新建完成之后我们打开这个文件,然后输入以下的内容,用来配置TS,这样才能保证我们开发过程中能够使用的到Angular模块以及其他的模块,具体的内容如下所示:
{
  "compilerOptions": {
    "emitDecoratorMetadata": true,
    "experimentalDecorators": true,
    "module": "system",
    "moduleResolution": "node",
    "noEmitOnError": true,
    "noImplicitAny": false,
    "outDir": "./wwwroot/app/",
    "removeComments": false,
    "sourceMap": true,
    "target": "es5"
  },
  "exclude": [
    "node_modules",
    "typings/main",
    "typings/main.d.ts"
  ]
}
读者注意了,其中我们采用的是system的模块管理,如果这里改用了其他的值就会导致运行的时候出现某些函数不存在。配置完以上的还没有结束,我们还需要依赖其他的配置,这个时候我们依然按照上面的部分新建TypeScript配置文件,只是这个时候我们需要修改下对应的文件名,改成“typings.json”,然后讲一下内容复制到其中:
{
  "ambientDependencies": {
    "es6-shim": "github:DefinitelyTyped/DefinitelyTyped/es6-shim/es6-shim.d.ts#7de6c3dd94feaeb21f20054b9f30d5dabc5efabd",
    "jasmine": "github:DefinitelyTyped/DefinitelyTyped/jasmine/jasmine.d.ts#7de6c3dd94feaeb21f20054b9f30d5dabc5efabd"
  }
}
当然这一步骤也是官方所需要的,到此为止关于TypeScript的配置就结束了。
4.Gulp配置
因为我们开发的项目都在wwwroot下,但是我们需要引用TypeScript编译好的js文件,而这个过程我们不能通过手动的方式,所以我们需要借用gulp来自动化这一步骤,下面我们新建一个gulp配置文件:
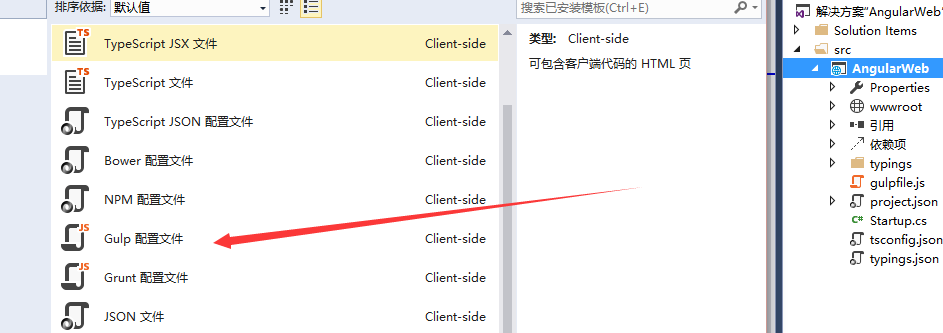
文件名依然是默认,然后在其中输入以下内容,主要就是负责将node_module中我们需要的文件复制到wwwroot下的libs文件夹中:
/// <binding AfterBuild='moveToLibs' />
var gulp = require('gulp');

gulp.task('moveToLibs', function (done) {
    gulp.src([
      'node_modules/angular2/bundles/js',
      'node_modules/angular2/bundles/angular2.*.js*',
      'node_modules/angular2/bundles/angular2-polyfills.js',
      'node_modules/angular2/bundles/http.*.js*',
      'node_modules/angular2/bundles/router.*.js*',
      'node_modules/es6-shim/es6-shim.min.js*',
      'node_modules/angular2/es6/dev/src/testing/shims_for_IE.js',
      'node_modules/systemjs/dist/*.*',
      'node_modules/jquery/dist/jquery.*js',
      'node_modules/bootstrap/dist/js/bootstrap*.js',
      'node_modules/rxjs/bundles/Rx.js'
    ]).pipe(gulp.dest('./wwwroot/libs/'));

    gulp.src([
      'node_modules/bootstrap/dist/css/bootstrap.css'
    ]).pipe(gulp.dest('./wwwroot/libs/css'));
});
这样我们需要用到gulp的部分就结束了。
5.项目配置
为了网站能够正常使用,所以我们还需要对项目本身进行一些调整,首先我们打开project.json文件,在其中加入一个新的模块,并且加上一些自动化脚本:
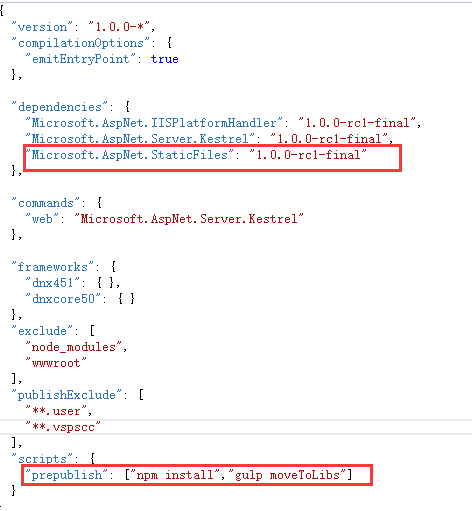
这样我们的项目就配置完成了,读者可以生成下项目,如果没有错误我们就继续往下走,如果读者出现了无法解决的问题可以在下方留言。
三、示例开发
如果读者完成了上面的初始化工作,我们就可以完成一个小的工程来验证我们的环境是否单间成功了,首先我们打开wwwroot文件夹,在其中新一个app文件夹。
1.app.component.ts开发
在app文件夹中新建该文件,然后在其中输入一下内容:
import {Component} from 'angular2/core';

@Component({
    selector: 'my-app',
    template: '<h1>My First Angular 2 App</h1>'
})
export class AppComponent { }
这样我们就完成了一个组件的开发。
2.main.ts开发
在app文件夹中新建该文件,我们的入口文件夹将使用以下文件,并且其中会使用到我们上面创建的那个组件。
import {bootstrap}    from 'angular2/platform/browser';
import {AppComponent} from './app.component';

bootstrap(AppComponent);
3.style.css开发
为了能够让我们的结果具有比较良好的样式,所以这里我们在wwwroot下新建该样式文件,然后在其中输入以下内容:
/* Master Styles */
h1 {
  color: #369;
  font-family: Arial, Helvetica, sans-serif;
  font-size: 250%;
}
h2, h3 {
  color: #444;
  font-family: Arial, Helvetica, sans-serif;
  font-weight: lighter;
}
body {
  margin: 2em;
}
body, input[text], button {
  color: #888;
  font-family: Cambria, Georgia;
}
4.index.html开发
我们在wwwroot下新建该文件,我们将在其中使用以上开发的内容,并且显示最终的效果,具体的内容如下所示:
<html>
<head>
    <title>Angular 2 QuickStart</title>
    <meta name="viewport" content="width=device-width, initial-scale=1">
    <link rel="stylesheet" href="styles.css">
    <script src="libs/es6-shim.min.js"></script>
    <script src="libs/system-polyfills.js"></script>
    <script src="libs/shims_for_IE.js"></script>
    <script src="libs/angular2-polyfills.js"></script>
    <script src="libs/system.js"></script>
    <script src="libs/Rx.js"></script>
    <script src="libs/angular2.dev.js"></script>


    <script>
      System.config({
        packages: {
          app: {
            format: 'register',
            defaultExtension: 'js'
          }
        }
      });
      System.import('app/main')
            .then(null, console.error.bind(console));
    </script>
</head>

<body>
    <my-app>Loading...</my-app>
</body>
</html>
如果libs下没有自动将我们需要的js文件复制到其中,我们可以通过cmd调整当项目的根目录下通过“gulp moveToLibs”命令手动执行。
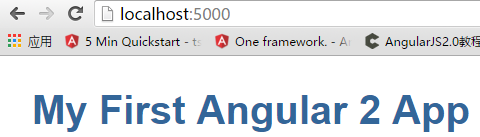
最终效果:

 浙公网安备 33010602011771号