

springboot任务
1.异步任务
1.1 编写一个service
package com.yao.service;

import org.springframework.scheduling.annotation.Async;
import org.springframework.stereotype.Service;

@Service
public class AsyncService {


    public void hello(){
        try {
            Thread.sleep(3000);
        } catch (InterruptedException e) {
            e.printStackTrace();
        }
        System.out.println(" 数据正在处理");
    }
}
1.2编写一个controller
package com.yao.controller;

import com.yao.service.AsyncService;
import org.springframework.beans.factory.annotation.Autowired;
import org.springframework.web.bind.annotation.RequestMapping;
import org.springframework.web.bind.annotation.RestController;

@RestController
public class AsyncController {

    @Autowired
    AsyncService asyncService;

    @RequestMapping("/hello")
    public String hello(){
        asyncService.hello();//  停止三秒
        return "ok";
    }


}
那么通过以上
@Async,在main方法上加@EnableAsync
package com.yao.service;

import org.springframework.scheduling.annotation.Async;
import org.springframework.stereotype.Service;

@Service
public class AsyncService {

    //告诉spring这个是一个异步的方法
    @Async
    public void hello(){
        try {
            Thread.sleep(3000);
        } catch (InterruptedException e) {
            e.printStackTrace();
        }
        System.out.println(" 数据正在处理");
    }
}
package com.yao;

import org.springframework.boot.SpringApplication;
import org.springframework.boot.autoconfigure.SpringBootApplication;
import org.springframework.scheduling.annotation.EnableAsync;

//开启异步注解功能
@EnableAsync
@SpringBootApplication
public class Springboot09TestApplication {

    public static void main(String[] args) {
        SpringApplication.run(Springboot09TestApplication.class, args);
    }

}
2.邮件任务
2.1导入相关依赖:
<!--javax.mail-->
<dependency>
            <groupId>org.springframework.boot</groupId>
            <artifactId>spring-boot-starter-mail</artifactId>
        </dependency>
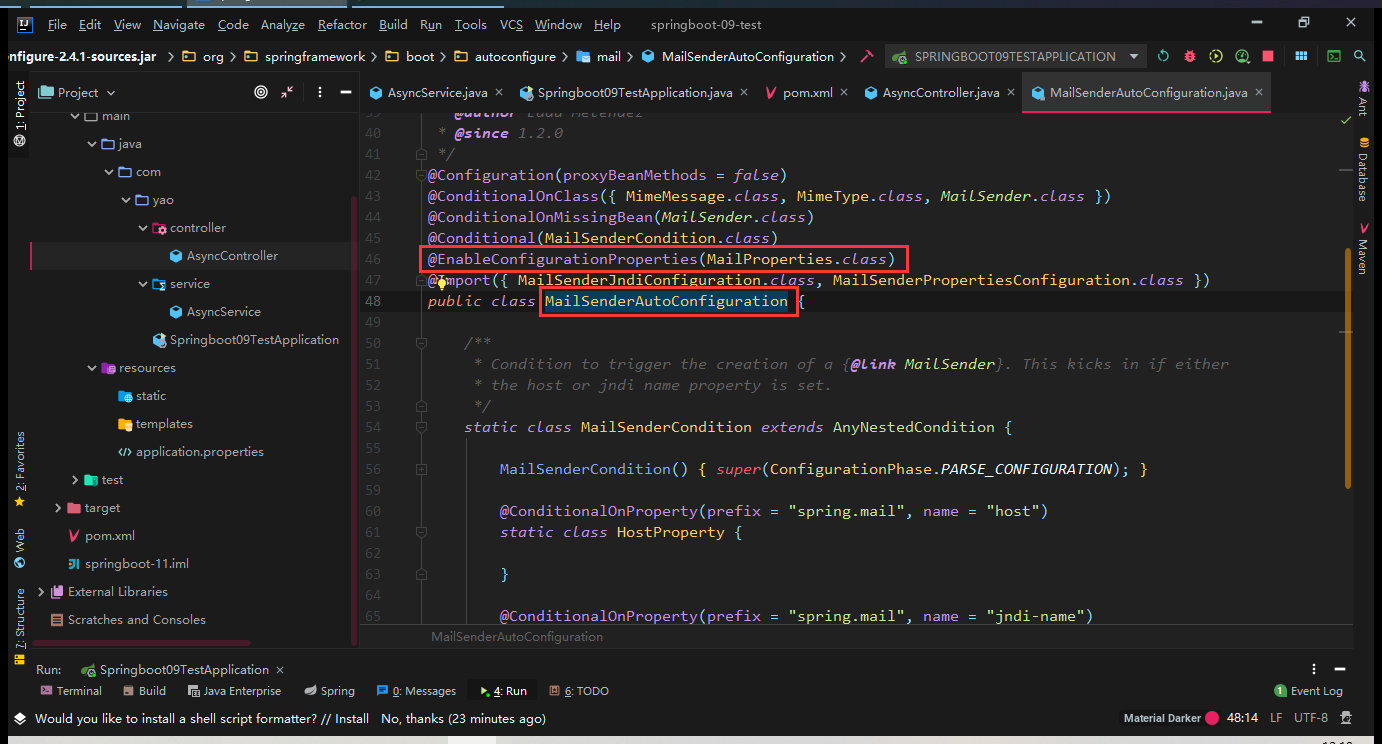
同样我们双击shift搜索可以看到
2.2打开你的pops3/SMTP协议打开
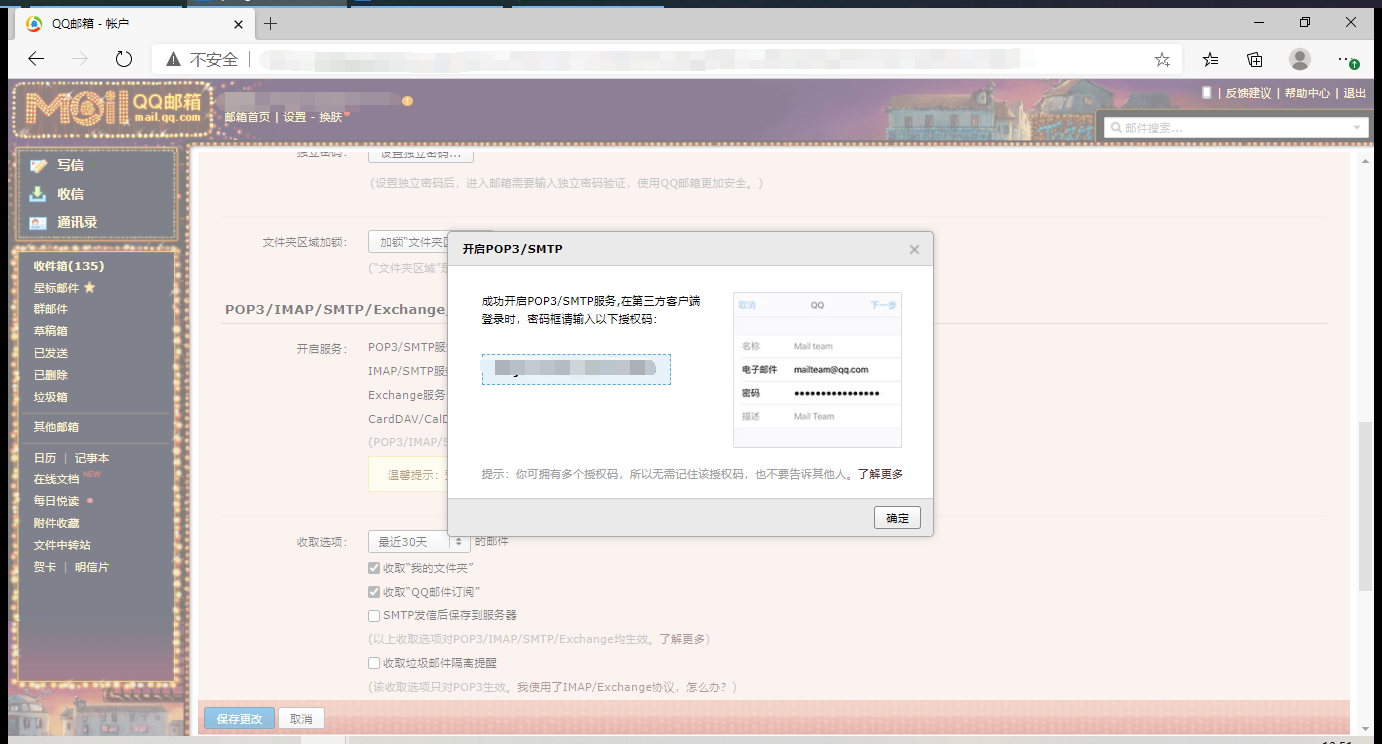
这个码一定要获得,下面的password需要用到
我们可以看到上面有个关于properties的配置,所以我们可以去配置这个properties,在application.properties中
spring.mail.username=892095368@qq.com
spring.mail.password=drjefooaypscbdib
spring.mail.post=smtp.qq.com
# 开启加密验证 下面是qq特有的,ssl加密
spring.mail.properties.mail.smtp.ssl.enable=true
在测试单元中进行相关信息的配置
package com.yao;

import org.junit.jupiter.api.Test;
import org.springframework.beans.factory.annotation.Autowired;
import org.springframework.boot.test.context.SpringBootTest;
import org.springframework.mail.SimpleMailMessage;
import org.springframework.mail.javamail.JavaMailSenderImpl;

import javax.annotation.Resource;

@SpringBootTest
class Springboot09TestApplicationTests {
    //这里是一个自动实现类
    @Resource
    JavaMailSenderImpl mailSender;

    @Test
    void contextLoads() {

        SimpleMailMessage mailMessage = new SimpleMailMessage();
        mailMessage.setSubject("通知。。。");
        mailMessage.setText("谢谢你");
        mailMessage.setTo("892095368@qq.com");
        mailMessage.setFrom("892095368@qq.com");
        mailSender.send(mailMessage);
    }

}
上面引入的是一个自动配置类,不需要你去管他,然后运行这个测试就可以看到邮件发送成功了
2.2.2复杂邮件的提交,可以添加附件,同时text内容也可以识别html
 @Test
    void contextLoads2() throws MessagingException {
        //复杂的邮件
        MimeMessage mimeMessage = mailSender.createMimeMessage();
        // 组装
        MimeMessageHelper helper = new MimeMessageHelper(mimeMessage,true);
        helper.setSubject("????");
        helper.setText("<p style='color:red'>谢谢你</p>",true);

        //附件
        helper.addAttachment("1.jpg",new File("D:\\画画\\0014.jpg"));

        helper.setTo("892095368@qq.com");
        helper.setFrom("892095368@qq.com");
        mailSender.send(mimeMessage);
    }
3.定时任务
写一个service
package com.yao.service;

import org.springframework.scheduling.annotation.Scheduled;
import org.springframework.stereotype.Service;

@Service
public class ScheduledService {

    //在一个特定的时间执行这个方法 Timer
    //cron 表达式
    //秒 分 时 日 月 周几,这就是下面星星的代表内容
    @Scheduled(cron = "0 51 14,18 ? * 0-7")//每个月的周一到周日的14和18时51分0秒会执行,*代表任何一个值,?只代表月或者日
    public void hello(){
        System.out.println("hello...");
    }
}
在main中开启这个定时任务
package com.yao;

import org.springframework.boot.SpringApplication;
import org.springframework.boot.autoconfigure.SpringBootApplication;
import org.springframework.scheduling.annotation.EnableAsync;
import org.springframework.scheduling.annotation.EnableScheduling;

@EnableScheduling//开启定时功能的注解
@SpringBootApplication
public class Springboot09TestApplication {

    public static void main(String[] args) {
        SpringApplication.run(Springboot09TestApplication.class, args);
    }

}

 浙公网安备 33010602011771号