架构师成长之路-PXE+Kickstart安装部署
架构师成长之路-PXE+Kickstart安装部署
系统测试环境:
- 实验环境:VMware Workstation 12
- 系统平台:CentOS Linux release 7.5.1804 (Core)
- 网络模式:NAT模式(共享主机的IP地址)
DHCP / TFTP IP:192.168.80.128
HTTP / FTP / NFS IP:192.168.80.128
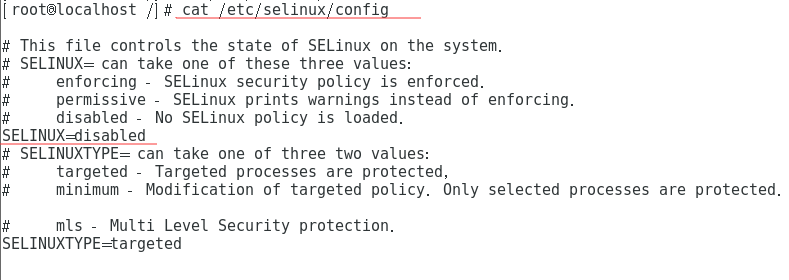
1.关闭selinux和firewalld
一定要关闭,否则安装一定会出问题。
vi /etc/selinux/config #将SELINUX=enforcing改为SELINUX=disabled 设置后需要重启才能生效

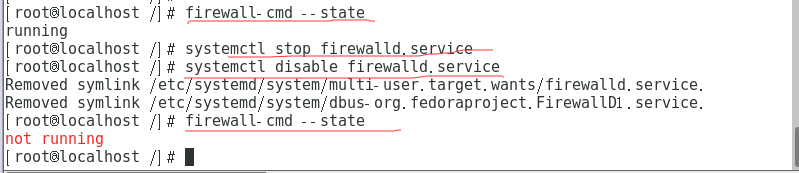
firewall-cmd --state    #查看默认防火墙状态,关闭后显示not running,开启后显示running
systemctl stop firewalld.service    #临时关闭firewall
systemctl disable firewalld.service #禁止firewall开机启动
2. 生成ks.cfg 文件
有使用安装最小系统,需要此步骤。
生成ks.cfg 文件需要system-config-kickstart 工具,而此工具依赖于X Windows,所以我们需要安装X Windows 和Desktop 并重启系统 。
yum groupinstall "X Window System"
yum groupinstall Desktop
reboot
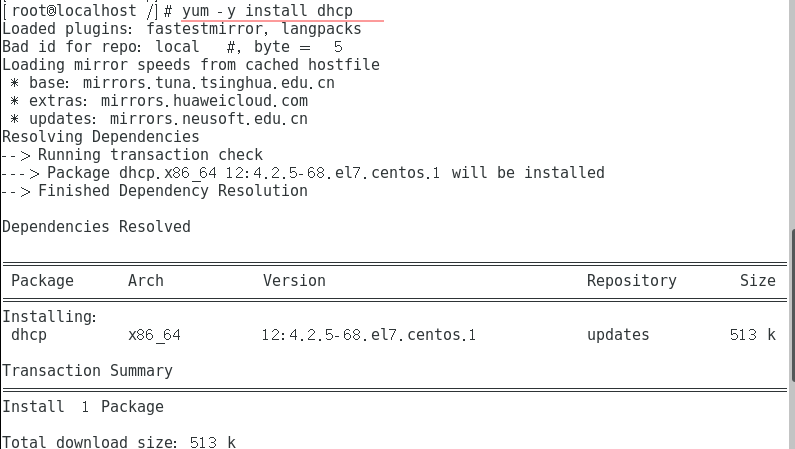
3. 部署DHCP
yum -y install dhcp #安装dhcp软体
DHCP主要是提供客户端网络参数与TFTP的位置,以及boot loader的文件名。
同时,我们仅针对内网来告知TFTP的相关位置,所以可以编辑/etc/dhcp/dhcpd.conf在subnet的区块内加入两个参数即可。
其中PXE上专门为PXE客户端下载的boot loader文件名称为pxelinux.0。
cp /usr/share/doc/dhcp-4.2.5/dhcpd.conf.example /etc/dhcpd.conf


# dhcpd.conf
#
# Sample configuration file for ISC dhcpd
#

# option definitions common to all supported networks...
option domain-name "example.org";
option domain-name-servers ns1.example.org, ns2.example.org;

default-lease-time 600;
max-lease-time 7200;

# Use this to enble / disable dynamic dns updates globally.
#ddns-update-style none;

# If this DHCP server is the official DHCP server for the local
# network, the authoritative directive should be uncommented.
#authoritative;

# Use this to send dhcp log messages to a different log file (you also
# have to hack syslog.conf to complete the redirection).
log-facility local7;

# No service will be given on this subnet, but declaring it helps the
# DHCP server to understand the network topology.

subnet 10.152.187.0 netmask 255.255.255.0 {
}

# This is a very basic subnet declaration.

subnet 10.254.239.0 netmask 255.255.255.224 {
  range 10.254.239.10 10.254.239.20;
  option routers rtr-239-0-1.example.org, rtr-239-0-2.example.org;
}

# This declaration allows BOOTP clients to get dynamic addresses,
# which we don't really recommend.

subnet 10.254.239.32 netmask 255.255.255.224 {
  range dynamic-bootp 10.254.239.40 10.254.239.60;
  option broadcast-address 10.254.239.31;
  option routers rtr-239-32-1.example.org;
}

# A slightly different configuration for an internal subnet.
subnet 192.168.0.0 netmask 255.255.255.0 {
  range 192.168.0.1 192.168.0.100;
  option domain-name-servers ns1.internal.example.org;
  option domain-name "internal.example.org";
  default-lease-time 600;
  max-lease-time 7200;
  next-server 192.168.0.128; #告知客户端TFTP服务器的iPhone地址
  file.name "/pxelinux.0"     #告知客户端从TFTP根目录下载pxelinux.0文件
}

# Hosts which require special configuration options can be listed in
# host statements.   If no address is specified, the address will be
# allocated dynamically (if possible), but the host-specific information
# will still come from the host declaration.

host passacaglia {
  hardware ethernet 0:0:c0:5d:bd:95;
  filename "vmunix.passacaglia";
  server-name "toccata.fugue.com";
}

# Fixed IP addresses can also be specified for hosts.   These addresses
# should not also be listed as being available for dynamic assignment.
# Hosts for which fixed IP addresses have been specified can boot using
# BOOTP or DHCP.   Hosts for which no fixed address is specified can only
# be booted with DHCP, unless there is an address range on the subnet
# to which a BOOTP client is connected which has the dynamic-bootp flag
# set.
host fantasia {
  hardware ethernet 08:00:07:26:c0:a5;
  fixed-address fantasia.fugue.com;
}

# You can declare a class of clients and then do address allocation
# based on that.   The example below shows a case where all clients
# in a certain class get addresses on the 10.17.224/24 subnet, and all
# other clients get addresses on the 10.0.29/24 subnet.

class "foo" {
  match if substring (option vendor-class-identifier, 0, 4) = "SUNW";
}

shared-network 224-29 {
  subnet 10.17.224.0 netmask 255.255.255.0 {
    option routers rtr-224.example.org;
  }
  subnet 10.0.29.0 netmask 255.255.255.0 {
    option routers rtr-29.example.org;
  }
  pool {
    allow members of "foo";
    range 10.17.224.10 10.17.224.250;
  }
  pool {
    deny members of "foo";
    range 10.0.29.10 10.0.29.230;
  }
}
重启dhcp:
service dhcpd restart

4.部署TFTP
boot loader文件pxelinux.0以及内核相关的配置文件(目录pxelinux.cfg下)主要都是由TFTP来提供的!
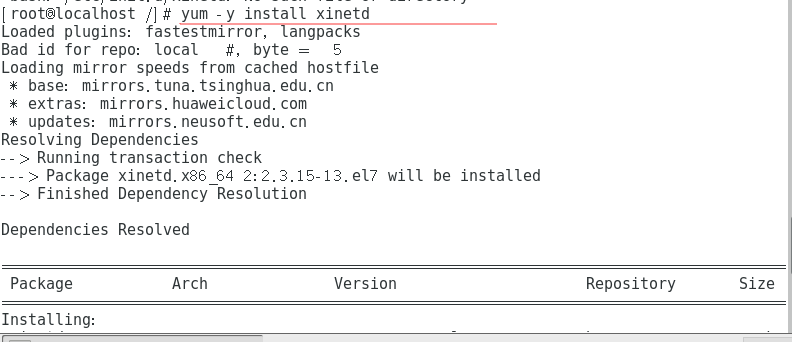
TFTP的安装很简单,直接使用yum即可。不过要告诉客户端TFTP的根目录在哪里,这样客户端才能找到相关文件。另外要注意,TFTP是由xinetd这个super daemon所管理的,因此设定好TFTP之后,要启动的是xinetd。
yum install tftp-server

yum -y install xinetd
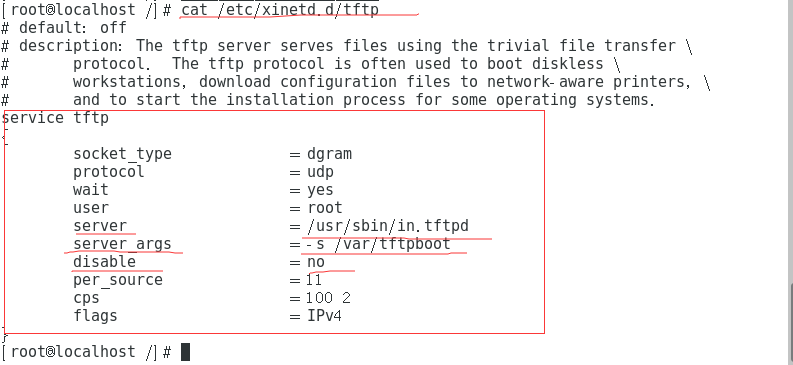
默认TFTP服务的根目录是/var/lib/tftpboot/,为了少写些字母,将tftp的根目录修改为/tftpboot/。修改tftp的配置文件,主要是TFTP的根目录。
vim /etc/xinetd.d/tftp
# default: off
# description: The tftp server serves files using the trivial file transfer \
#       protocol.  The tftp protocol is often used to boot diskless \
#       workstations, download configuration files to network-aware printers, \
#       and to start the installation process for some operating systems.
service tftp
{
        socket_type             = dgram
        protocol                = udp
        wait                    = yes
        user                    = root
        server                  = /usr/sbin/in.tftpd
        server_args             = -s /var/lib/tftpboot   #重点在这里!修改tftp的根目录
        disable                 = no     #由原来yes变成no
        per_source              = 11
        cps                     = 100 2
        flags                   = IPv4
}
mkdir /tftpboot # 创建根目录

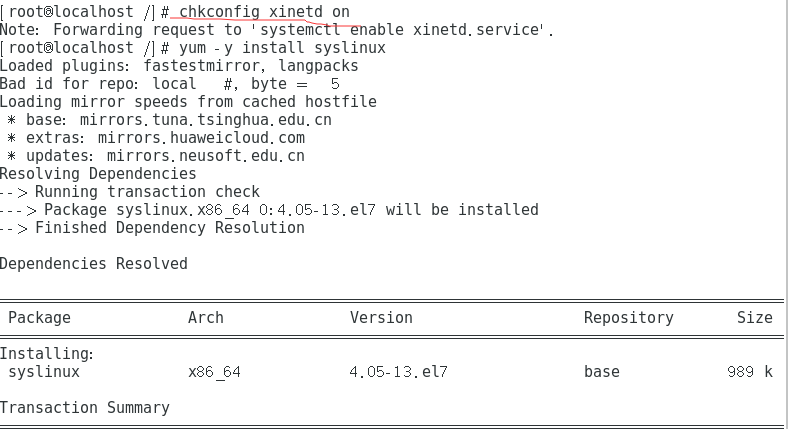
systemctl start tftp      #启动tftp
netstat -tulnp | grep xinetd  # 观察tftp

5. 提供pxe的bootloader和相关配置文件
如果要使用PXE的开机引导的话,需要使用CentOS提供的syslinux包,从中copy两个文件到tftp的根目录/tftpboot下即可。整个过程如下:
yum -y install syslinux
cp -a /usr/share/syslinux/{menu.c32,vesamenu.c32,pxelinux.0}  /tftpboot/
mkdir /tftpboot/pxelinux.cfg
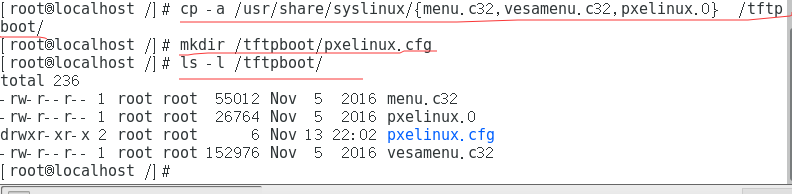
menu.c32      # 提供图形化菜单功能
pxelinux.0    # boot loader文件
pxelinux.cfg  # 开机的菜单设定在这里
vesamenu.c32  # 也是提供图形化菜单功能,但界面和menu.c32不同
- pxelinux.cfg是个目录,可以放置默认的开机选项,也可以针对不同的客户端主机提供不同的开机选项。一般来说,可以在pxelinux.cfg目录内建立一个名为default的文件来提供默认选项。
- 如果没有menu.c32或vesamenu.c32时,菜单会以纯文字模式一行一行显示。
- 如果使用menu.c32或vesamenu.c32时,就会有类似反白效果出现,此时可以使用上下键来选择选项,而不需要看着屏幕去输入数字键来选择开机选项。经过测试,使用vesamenu.c32比menu.c32更加好看些。
- 这部分设定完毕后,就是内核相关的设定了。
6.从安装镜像获取Linux内核文件
要安装Linux系统,必须提供内核文件,这里以64位版本的CentOS 7.5为例。
这里计划将内核相关文件放在/tftpboot/centos7.5/目录下。
既然要从安装镜像中获取内核相关文件,首先得要挂载镜像。

mkdir /test
mount /dev/cdrom /test

mkdir /tftpboot/CentOS7.5
cp /test/isolinux/{vmlinuz,initrd.img} /tftpboot/CentOS7.5
cp /test/isolinux/isolinux.cfg /tftpboot/pxelinux.cfg/default


其实仅需要vmlinuz和initrd.img两个文件即可,不过这里还将isolinux.cfg这个文件拷贝出来了,主要这个文件里提供了开机选项,可以以它作为修改开机选项和菜单的模板。
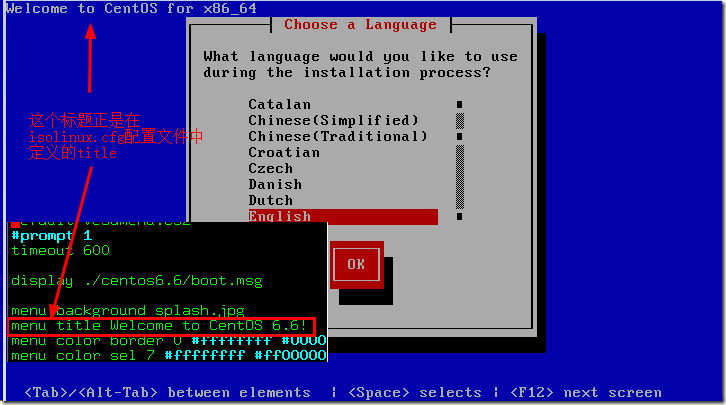
7.设置开机菜单并提供系统安装文件
修改开机配置文件isolinux.cfg。由于拷贝它的时候重命名为default,所以修改default即可。
cat /tftpboot/pxelinux.cfg/default
default vesamenu.c32   #这是必须项,或者使用menu.c32。。。。默认启动lable vesamenu.c32中标记的启动内核
timeout 600            #超时等待时间,60s内不曹组将自动选择默认的菜单来加载

display boot.msg      # 显示某个文件的内容,注意文件的路径。默认在/var/lib/tftpboot 目录

# Clear the screen when exiting the menu, instead of leaving the menu displayed.
# For vesamenu, this means the graphical background is still displayed without
# the menu itself for as long as the screen remains in graphics mode.
menu clear
menu background splash.png   #背景图片
menu title CentOS 7          #大标题
menu vshift 8
menu rows 18
menu margin 8
#menu hidden
menu helpmsgrow 15
menu tabmsgrow 13

# Border Area
menu color border * #00000000 #00000000 none

# Selected item
menu color sel 0 #ffffffff #00000000 none

# Title bar
menu color title 0 #ff7ba3d0 #00000000 none

# Press [Tab] message
menu color tabmsg 0 #ff3a6496 #00000000 none

# Unselected menu item
menu color unsel 0 #84b8ffff #00000000 none

# Selected hotkey
menu color hotsel 0 #84b8ffff #00000000 none

# Unselected hotkey
menu color hotkey 0 #ffffffff #00000000 none

# Help text
menu color help 0 #ffffffff #00000000 none

# A scrollbar of some type? Not sure.
menu color scrollbar 0 #ffffffff #ff355594 none

# Timeout msg
menu color timeout 0 #ffffffff #00000000 none
menu color timeout_msg 0 #ffffffff #00000000 none

# Command prompt text
menu color cmdmark 0 #84b8ffff #00000000 none
menu color cmdline 0 #ffffffff #00000000 none

# Do not display the actual menu unless the user presses a key. All that is displayed is a timeout message.

menu tabmsg Press Tab for full configuration options on menu items.

menu separator # insert an empty line
menu separator # insert an empty line

label linux  #lable指定你在“boot:”提示符下输入关键字 比如boot:linux[ENTER]这个会启动“lable linux”标记下的kernel和initrd.img文件
  menu label ^Install CentOS 7   # 菜单文字
  kernel vmlinuz  #kernel参数指定要启动的内核,注意相对路径是从tftp的根路径/tftpboot,所以要改成“./CentOS7.5/vmlinux”
  append initrd=initrd.img inst.stage2=hd:LABEL=CentOS\x207\x20x86_64 quiet
                  #append指定追加给内核的参数,其中的initrd路径要改成“./CentOS7.5/initrd.img”
                  #stage2的路径放在ftp的路径下,改成inst.stage2=ftp://192.168.0.128 quiet
label check
  menu label Test this ^media & install CentOS 7
  menu default
  kernel vmlinuz
  append initrd=initrd.img inst.stage2=hd:LABEL=CentOS\x207\x20x86_64 rd.live.check quiet

menu separator # insert an empty line

# utilities submenu    #子菜单项的设置方法
menu begin ^Troubleshooting
  menu title Troubleshooting

label vesa
  menu indent count 5
  menu label Install CentOS 7 in ^basic graphics mode
  text help
	Try this option out if you're having trouble installing
	CentOS 7.
  endtext
  kernel vmlinuz
  append initrd=initrd.img inst.stage2=hd:LABEL=CentOS\x207\x20x86_64 xdriver=vesa nomodeset quiet

label rescue
  menu indent count 5
  menu label ^Rescue a CentOS system
  text help
	If the system will not boot, this lets you access files
	and edit config files to try to get it booting again.
  endtext
  kernel vmlinuz
  append initrd=initrd.img inst.stage2=hd:LABEL=CentOS\x207\x20x86_64 rescue quiet

label memtest
  menu label Run a ^memory test
  text help
	If your system is having issues, a problem with your
	system's memory may be the cause. Use this utility to
	see if the memory is working correctly.
  endtext
  kernel memtest

menu separator # insert an empty line

label local
  menu label Boot from ^local drive
  localboot 0xffff

menu separator # insert an empty line
menu separator # insert an empty line

label returntomain
  menu label Return to ^main menu
  menu exit

menu
主要修改: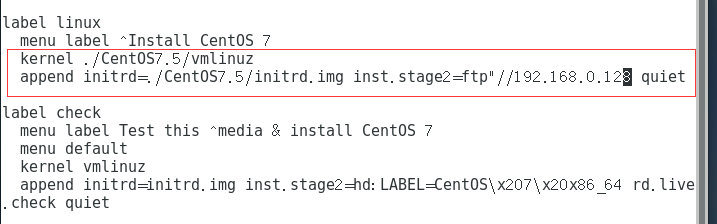
8 从网卡安装系统——开机测试
设置Bios从网卡启动。
关闭客户机——〉在VMware的界面菜单上点击“虚拟机”——〉电源——〉打开电源时进入固件。
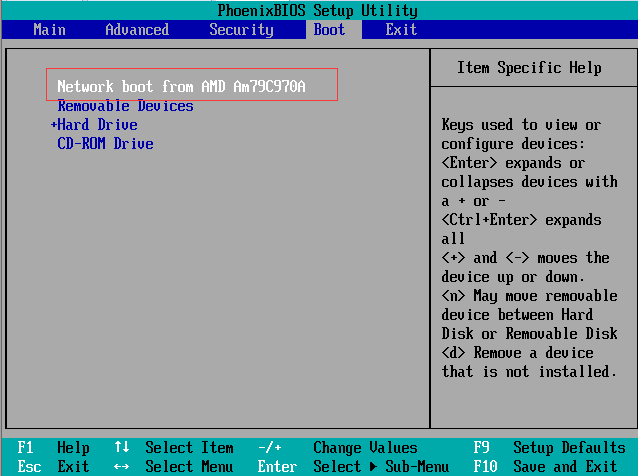
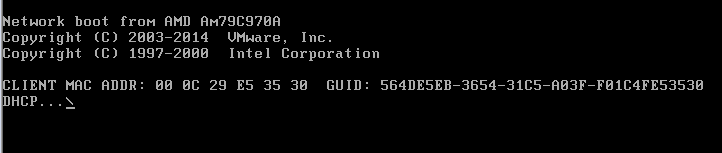
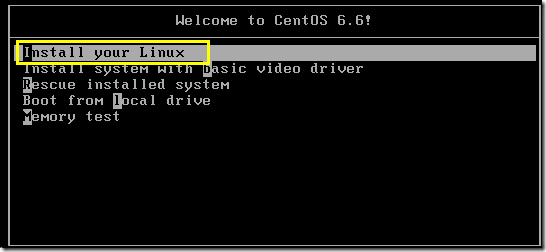
设置从网卡启动。将首先搜索DHCP服务器,找到DHCP后搜索bootloader文件,启动菜单设置文件等,然后进入启动菜单等待选择要启动的项。
如下:
以下图示为之前同事测试存档记录:

8.1 由于到这里他之前还没有提供Linux的安装文件,所以选择URL从互联网来获取系统安装。
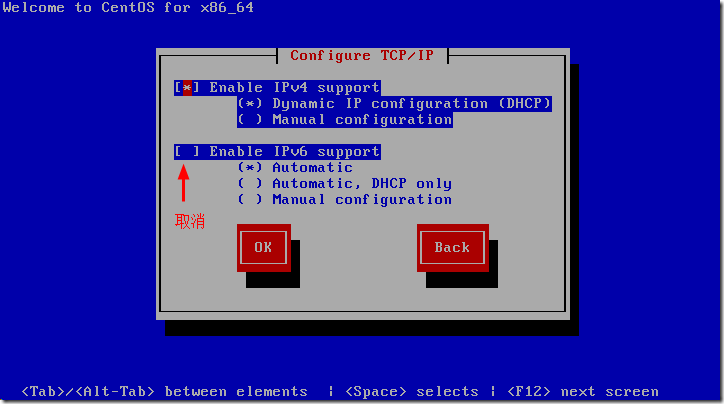
由于要从互联网上获取系统安装文件,所以需要设置IP等网络参数,但要注意,这里的网络参数和前面设置的PXE网络参数是无关的,这里设置的IP仅是为了联上互联网。由于已经配置了DHCP,所以这里选择DHCP。
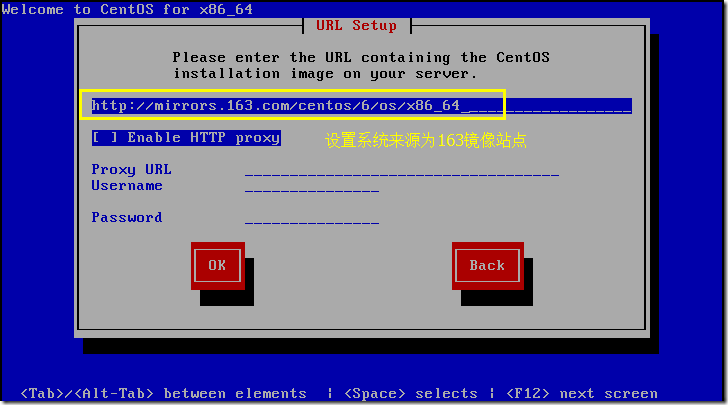
设置一个获取Linux系统的站点。上图设置的是163的站点。
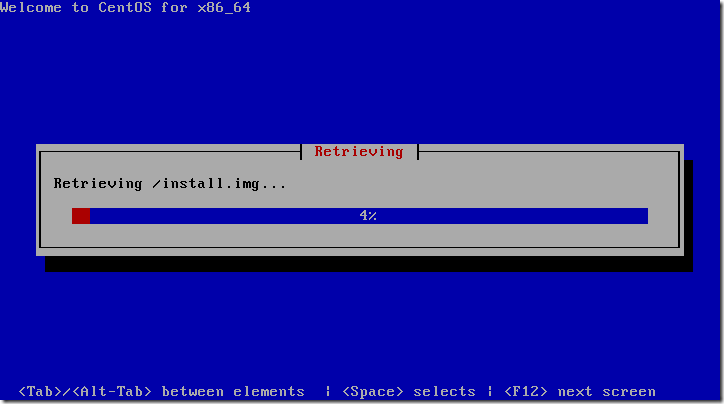
如果没什么问题,到这里就开始进行安装直到完成了。以下是进度图片。
8.2 通过http/ftp/nfs来提供系统安装文件
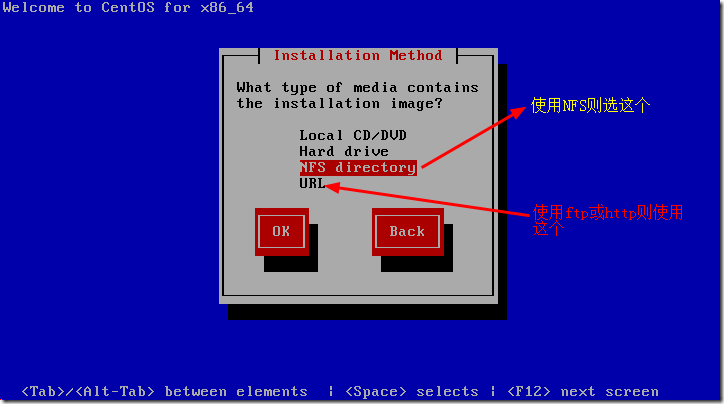
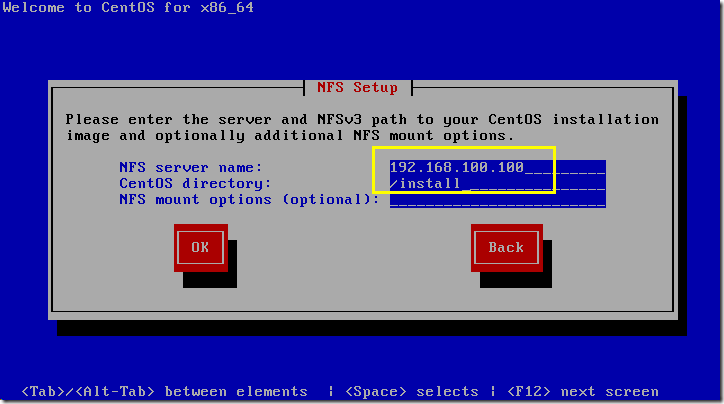
然后就会进入安装画面,但是这样还是有些地方需要手动指定的。
无法实现非交互时无人值守的方式安装。
下节介绍kickstart实现无人值守的方式。
.........
作者:CARLOS_CHIANG
出处:http://www.cnblogs.com/yaoyaojcy/
本文版权归作者和博客园共有,欢迎转载,但未经作者同意必须保留此段声明,且在文章页面明显位置给出原文链接。
posted on 2018-11-13 13:58 CARLOS_KONG 阅读(651) 评论(0) 收藏 举报

 浙公网安备 33010602011771号