第二节:ShardingSphere-Proxy数据分片算法(固定容量、时间区间算法)、分库分表、读写分离
一. 数据分片算法补充
1. 固定容量算法
(1). 配置文件
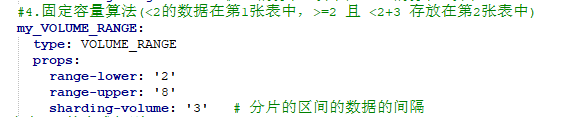
说明:VOLUME_RANGE为固定容量算法,<2的数据在第1张表中,>=2 且 <2+3 存放在第2张表中(这里sharding-volume=3,表示分片区间的数据间隔)。
查看代码
 # 1. 声明proxy中的代理数据库名称
schemaName: shopDB_Proxy

#2. 连接mysql
dataSources:
  myDBStr_0:
    url: jdbc:mysql://localhost:3306/shopdb?serverTimezone=UTC&useSSL=false
    username: root
    password: 123456
    connectionTimeoutMilliseconds: 30000
    idleTimeoutMilliseconds: 60000
    maxLifetimeMilliseconds: 1800000
    maxPoolSize: 50
    minPoolSize: 1

#3. 分片规则
rules:
- !SHARDING
  tables:
    # 表1
    test1_tb:
      actualDataNodes: myDBStr_0.test1_tb_${0..1}
      tableStrategy:
        standard:
          shardingColumn: classId
          shardingAlgorithmName: my_MOD
     # 表2
    test2_tb:
      actualDataNodes: myDBStr_0.test2_tb_${0..1}
      tableStrategy:
        standard:
          shardingColumn: classId
          shardingAlgorithmName: my_VOLUME_RANGE
      keyGenerateStrategy:
        column: id
        keyGeneratorName: snowflake
  #定义分片算法
  shardingAlgorithms:
    #1. int类型取模算法
    my_MOD:
      type: MOD
      props:
        sharding-count: 2   #代表数据分片到两张表,与上述的actualDataNodes中定义的表个数需要对应
    #2.字符串取模算法(hash取模)
    my_HASH_MOD:
      type: HASH_MOD
      props:
        sharding-count: '2'
    #3.范围算法
    my_BOUNDARY_RANGE:
      type: BOUNDARY_RANGE
      props:
        sharding-ranges: 5    # <5的分在0表中, >=5的分在1表中
    #4.固定容量算法(<2的数据在第1张表中,>=2 且 <2+3 存放在第2张表中)
    my_VOLUME_RANGE:
      type: VOLUME_RANGE
      props:
        range-lower: '2'
        range-upper: '8'
        sharding-volume: '3'   # 分片的区间的数据的间隔
  #定义key的生成规则
  keyGenerators:
    snowflake:
      type: SNOWFLAKE
      props:
        worker-id: 00000000
(2). 操作
对test2_tb表执行下面的SQL语句
-- 存在第1张表
INSERT INTO `test2_tb`(`userName`, `userAge`, `classId`, `addTime`) VALUES ('ypf1', 18, 0, '2021-11-01 00:00:00');
INSERT INTO `test2_tb`(`userName`, `userAge`, `classId`, `addTime`) VALUES ('ypf1', 18, 1, '2021-11-01 00:00:00');
-- 存在第2张表
INSERT INTO `test2_tb`(`userName`, `userAge`, `classId`, `addTime`) VALUES ('ypf2', 18, 2, '2021-11-01 00:00:00');
INSERT INTO `test2_tb`(`userName`, `userAge`, `classId`, `addTime`) VALUES ('ypf3', 18, 3, '2021-11-01 00:00:00');
INSERT INTO `test2_tb`(`userName`, `userAge`, `classId`, `addTime`) VALUES ('ypf4', 18, 4, '2021-11-01 00:00:00');
-- 插入失败
INSERT INTO `test2_tb`(`userName`, `userAge`, `classId`, `addTime`) VALUES ('ypf5', 18, 5, '2021-11-01 00:00:00');
INSERT INTO `test2_tb`(`userName`, `userAge`, `classId`, `addTime`) VALUES ('ypf6', 18, 6, '2021-11-01 00:00:00');
剖析:
classId等于0,1存在第1张表中,classId等于2,3,4存在第2张表中,classId=5,6的超过分片区间间隔,插入失败。
2. 时间区间分片算法
(1). 配置文件

AUTO_INTERVAL为时间分片算法, 如上小于 2022-01-01 在第1张表中, >=2022-01-01 + 365天,在第2张表中
查看代码
 # 1. 声明proxy中的代理数据库名称
schemaName: shopDB_Proxy

#2. 连接mysql
dataSources:
  myDBStr_0:
    url: jdbc:mysql://localhost:3306/shopdb?serverTimezone=UTC&useSSL=false
    username: root
    password: 123456
    connectionTimeoutMilliseconds: 30000
    idleTimeoutMilliseconds: 60000
    maxLifetimeMilliseconds: 1800000
    maxPoolSize: 50
    minPoolSize: 1

#3. 分片规则
rules:
- !SHARDING
  tables:
    # 表1
    test1_tb:
      actualDataNodes: myDBStr_0.test1_tb_${0..1}
      tableStrategy:
        standard:
          shardingColumn: classId
          shardingAlgorithmName: my_MOD
     # 表2
    test2_tb:
      actualDataNodes: myDBStr_0.test2_tb_${0..1}
      tableStrategy:
        standard:
          shardingColumn: addTime
          shardingAlgorithmName: my_AUTO_INTERVAL
      keyGenerateStrategy:
        column: id
        keyGeneratorName: snowflake
  #定义分片算法
  shardingAlgorithms:
    #1. int类型取模算法
    my_MOD:
      type: MOD
      props:
        sharding-count: 2   #代表数据分片到两张表,与上述的actualDataNodes中定义的表个数需要对应
    #2.字符串取模算法(hash取模)
    my_HASH_MOD:
      type: HASH_MOD
      props:
        sharding-count: '2'
    #3.范围算法
    my_BOUNDARY_RANGE:
      type: BOUNDARY_RANGE
      props:
        sharding-ranges: 5    # <5的分在0表中, >=5的分在1表中
    #4.固定容量算法2022-01-01
    my_VOLUME_RANGE:
      type: VOLUME_RANGE
      props:
        range-lower: '2'
        range-upper: '8'
        sharding-volume: '3'   # 分片的区间的数据的间隔
    #5. 时间分片算法(小于 2022-01-01 在第1张表中, >=2022-01-01 + 365天,在第2张表中)
    my_AUTO_INTERVAL:
      type: AUTO_INTERVAL
      props:
        datetime-lower: '2022-01-01 00:00:00'
        datetime-upper: '2028-01-01 00:00:00'
        # 以1年度为单位进行划分
        sharding-seconds: '31536000'
        # 以1个月为单位进行划分
        #sharding-seconds: '2678400'
        # 以1天为单位进行划分
        #sharding-seconds: '86400'

  #定义key的生成规则
  keyGenerators:
    snowflake:
      type: SNOWFLAKE
      props:
        worker-id: 00000000
(2). 操作
向代理库中的test2_tb表中插入下面SQL语句,
addTime= 2021-11-01、2021-12-01,存在test2_tb0表中,小于: datetime-lower: '2022-01-01 00:00:00'
addTime=2022-02-01、2022-11-01、2022-12-01,存在test2_tb1表中,大于2022-01-01,小于2022-01-01+365天
addTime=2023-01-03、2023-02-01,插入失败, 大于2022-01-01+365天
-- 存在第1张表
INSERT INTO `test2_tb`(`userName`, `userAge`, `classId`, `addTime`) VALUES ('ypf1', 18, 0, '2021-11-01 00:00:00');
INSERT INTO `test2_tb`(`userName`, `userAge`, `classId`, `addTime`) VALUES ('ypf1', 18, 1, '2021-12-01 00:00:00');
-- 存在第2张表
INSERT INTO `test2_tb`(`userName`, `userAge`, `classId`, `addTime`) VALUES ('ypf2', 18, 2, '2022-02-01 00:00:00');
INSERT INTO `test2_tb`(`userName`, `userAge`, `classId`, `addTime`) VALUES ('ypf3', 18, 3, '2022-11-01 00:00:00');
INSERT INTO `test2_tb`(`userName`, `userAge`, `classId`, `addTime`) VALUES ('ypf4', 18, 4, '2022-12-01 00:00:00');
-- 插入失败
INSERT INTO `test2_tb`(`userName`, `userAge`, `classId`, `addTime`) VALUES ('ypf5', 18, 5, '2023-01-03 00:00:00');
INSERT INTO `test2_tb`(`userName`, `userAge`, `classId`, `addTime`) VALUES ('ypf6', 18, 6, '2023-02-01 00:00:00');
二. 分库+分表
1. 单纯分库
(1). 目标
有两个数据库:shopdb1、shopdb2, 二者都有test3_tb表,现在需要根据addTime字段,利用时间分区算法,在数据库层面进行数据分片。
(2). 核心配置
查看代码
# 1. 声明proxy中的代理数据库名称
schemaName: shopDB_Proxy

#2. 连接mysql
dataSources:
  myDBStr_0:
    url: jdbc:mysql://localhost:3306/shopdb?serverTimezone=UTC&useSSL=false
    username: root
    password: 123456
    connectionTimeoutMilliseconds: 30000
    idleTimeoutMilliseconds: 60000
    maxLifetimeMilliseconds: 1800000
    maxPoolSize: 50
    minPoolSize: 1
  myDBStr_1:
    url: jdbc:mysql://localhost:3306/shopdb1?serverTimezone=UTC&useSSL=false
    username: root
    password: 123456
    connectionTimeoutMilliseconds: 30000
    idleTimeoutMilliseconds: 60000
    maxLifetimeMilliseconds: 1800000
    maxPoolSize: 50
    minPoolSize: 1
  myDBStr_2:
    url: jdbc:mysql://localhost:3306/shopdb2?serverTimezone=UTC&useSSL=false
    username: root
    password: 123456
    connectionTimeoutMilliseconds: 30000
    idleTimeoutMilliseconds: 60000
    maxLifetimeMilliseconds: 1800000
    maxPoolSize: 50
    minPoolSize: 1

#3. 分片规则
rules:
- !SHARDING
  tables:
    #表1
    test1_tb:
      actualDataNodes: myDBStr_0.test1_tb_${0..1}
      tableStrategy:
        standard:
          shardingColumn: classId
          shardingAlgorithmName: my_MOD
    #表2
    test2_tb:
      actualDataNodes: myDBStr_0.test2_tb_${0..1}
      tableStrategy:
        standard:
          shardingColumn: addTime
          shardingAlgorithmName: my_AUTO_INTERVAL
      keyGenerateStrategy:
        column: id
        keyGeneratorName: snowflake
    #表3
    test3_tb:
      actualDataNodes: myDBStr_${1..2}.test3_tb
      #分表策略(需要关闭)
      # tableStrategy:
        # standard:
          # shardingColumn: classId
          # shardingAlgorithmName: my_MOD
      #分库策略
      databaseStrategy:
        standard:
          shardingColumn: addTime
          shardingAlgorithmName: my_AUTO_INTERVAL
      keyGenerateStrategy:
        column: id
        keyGeneratorName: snowflake
  #定义分片算法
  shardingAlgorithms:
    #1. int类型取模算法
    my_MOD:
      type: MOD
      props:
        sharding-count: 2   #代表数据分片到两张表,与上述的actualDataNodes中定义的表个数需要对应
    #2.字符串取模算法(hash取模)
    my_HASH_MOD:
      type: HASH_MOD
      props:
        sharding-count: '2'
    #3.范围算法
    my_BOUNDARY_RANGE:
      type: BOUNDARY_RANGE
      props:
        sharding-ranges: 5    # <5的分在0表中, >=5的分在1表中
    #4.固定容量算法2022-01-01
    my_VOLUME_RANGE:
      type: VOLUME_RANGE
      props:
        range-lower: '2'
        range-upper: '8'
        sharding-volume: '3'   # 分片的区间的数据的间隔
    #5. 时间分片算法(小于 2022-01-01 在第1张表中, >=2022-01-01 + 365天,在第2张表中)
    my_AUTO_INTERVAL:
      type: AUTO_INTERVAL
      props:
        datetime-lower: '2022-01-01 00:00:00'
        datetime-upper: '2028-01-01 00:00:00'
        # 以1年度为单位进行划分
        sharding-seconds: '31536000'
        # 以1个月为单位进行划分
        #sharding-seconds: '2678400'
        # 以1天为单位进行划分
        #sharding-seconds: '86400'

  #定义key的生成规则
  keyGenerators:
    snowflake:
      type: SNOWFLAKE
      props:
        worker-id: 00000000
(3). 操作
在3307代理库中向test3_tb表中执行下面sql语句
CREATE TABLE `test3_tb`  (
  `id` varchar(255) CHARACTER SET utf8mb4 COLLATE utf8mb4_general_ci NOT NULL,
  `userName` varchar(255) CHARACTER SET utf8mb4 COLLATE utf8mb4_general_ci NULL DEFAULT NULL,
  `userAge` int(255) NULL DEFAULT NULL,
  `classId` int(11) NULL DEFAULT NULL,
  `addTime` datetime(0) NULL DEFAULT NULL,
  PRIMARY KEY (`id`) USING BTREE
) ENGINE = InnoDB CHARACTER SET = utf8mb4 COLLATE = utf8mb4_general_ci ROW_FORMAT = Dynamic;

-- truncate table test3_tb
-- 插入失败
INSERT INTO `test3_tb`(`userName`, `userAge`, `classId`, `addTime`) VALUES ('ypf1', 18, 0, '2021-11-01 00:00:00');
INSERT INTO `test3_tb`(`userName`, `userAge`, `classId`, `addTime`) VALUES ('ypf1', 18, 1, '2021-12-01 00:00:00');
-- 存在第shopdb1中的test3_tb表
INSERT INTO `test3_tb`(`userName`, `userAge`, `classId`, `addTime`) VALUES ('ypf2', 18, 2, '2022-02-01 00:00:00');
INSERT INTO `test3_tb`(`userName`, `userAge`, `classId`, `addTime`) VALUES ('ypf3', 18, 3, '2022-11-01 00:00:00');
INSERT INTO `test3_tb`(`userName`, `userAge`, `classId`, `addTime`) VALUES ('ypf4', 18, 4, '2022-12-01 00:00:00');
-- 存在第shopdb2中的test3_tb表
INSERT INTO `test3_tb`(`userName`, `userAge`, `classId`, `addTime`) VALUES ('ypf5', 18, 5, '2023-01-03 00:00:00');
INSERT INTO `test3_tb`(`userName`, `userAge`, `classId`, `addTime`) VALUES ('ypf6', 18, 6, '2023-02-01 00:00:00');
剖析:
addTime= 2021-11-01、2021-12-01,插入失败
addTime= 2022-02-01、2022-11-01、2022-12-01,存在第shopdb1中的test3_tb表
addTime=2023-01-03、2023-02-01,存在第shopdb2中的test3_tb表中。
2. 分库+分表
(1). 目标
有两个数据库:shopdb1、shopdb2, 二者都对test4_tb表进行分表,分别包含test4_tb_0、test4_tb_1,
A. 现在需要根据addTime字段,利用时间分区算法,在数据库层面进行数据分片;
B. 根据classId字段根据取模算法,进行表层次的数据分片。
(2). 核心配置
查看代码
# 1. 声明proxy中的代理数据库名称
schemaName: shopDB_Proxy

#2. 连接mysql
dataSources:
  myDBStr_0:
    url: jdbc:mysql://localhost:3306/shopdb?serverTimezone=UTC&useSSL=false
    username: root
    password: 123456
    connectionTimeoutMilliseconds: 30000
    idleTimeoutMilliseconds: 60000
    maxLifetimeMilliseconds: 1800000
    maxPoolSize: 50
    minPoolSize: 1
  myDBStr_1:
    url: jdbc:mysql://localhost:3306/shopdb1?serverTimezone=UTC&useSSL=false
    username: root
    password: 123456
    connectionTimeoutMilliseconds: 30000
    idleTimeoutMilliseconds: 60000
    maxLifetimeMilliseconds: 1800000
    maxPoolSize: 50
    minPoolSize: 1
  myDBStr_2:
    url: jdbc:mysql://localhost:3306/shopdb2?serverTimezone=UTC&useSSL=false
    username: root
    password: 123456
    connectionTimeoutMilliseconds: 30000
    idleTimeoutMilliseconds: 60000
    maxLifetimeMilliseconds: 1800000
    maxPoolSize: 50
    minPoolSize: 1

#3. 分片规则
rules:
- !SHARDING
  tables:
    #表1
    test1_tb:
      actualDataNodes: myDBStr_0.test1_tb_${0..1}
      tableStrategy:
        standard:
          shardingColumn: classId
          shardingAlgorithmName: my_MOD
    #表2
    test2_tb:
      actualDataNodes: myDBStr_0.test2_tb_${0..1}
      tableStrategy:
        standard:
          shardingColumn: addTime
          shardingAlgorithmName: my_AUTO_INTERVAL
      keyGenerateStrategy:
        column: id
        keyGeneratorName: snowflake
    #表3(单纯分库)
    test3_tb:
      actualDataNodes: myDBStr_${1..2}.test3_tb
      #分表策略(需要关闭)
      # tableStrategy:
        # standard:
          # shardingColumn: classId
          # shardingAlgorithmName: my_MOD
      #分库策略
      databaseStrategy:
        standard:
          shardingColumn: addTime
          shardingAlgorithmName: my_AUTO_INTERVAL
      keyGenerateStrategy:
        column: id
        keyGeneratorName: snowflake
    #表4(分库+分表)
    test4_tb:
      actualDataNodes: myDBStr_${1..2}.test4_tb_${0..1}
      #分表策略
      tableStrategy:
        standard:
          shardingColumn: classId
          shardingAlgorithmName: my_MOD
      #分库策略
      databaseStrategy:
        standard:
          shardingColumn: addTime
          shardingAlgorithmName: my_AUTO_INTERVAL
      keyGenerateStrategy:
        column: id
        keyGeneratorName: snowflake
  #定义分片算法
  shardingAlgorithms:
    #1. int类型取模算法
    my_MOD:
      type: MOD
      props:
        sharding-count: 2   #代表数据分片到两张表,与上述的actualDataNodes中定义的表个数需要对应
    #2.字符串取模算法(hash取模)
    my_HASH_MOD:
      type: HASH_MOD
      props:
        sharding-count: '2'
    #3.范围算法
    my_BOUNDARY_RANGE:
      type: BOUNDARY_RANGE
      props:
        sharding-ranges: 5    # <5的分在0表中, >=5的分在1表中
    #4.固定容量算法2022-01-01
    my_VOLUME_RANGE:
      type: VOLUME_RANGE
      props:
        range-lower: '2'
        range-upper: '8'
        sharding-volume: '3'   # 分片的区间的数据的间隔
    #5. 时间分片算法(小于 2022-01-01 在第1张表中, >=2022-01-01 + 365天,在第2张表中)
    my_AUTO_INTERVAL:
      type: AUTO_INTERVAL
      props:
        datetime-lower: '2022-01-01 00:00:00'
        datetime-upper: '2028-01-01 00:00:00'
        # 以1年度为单位进行划分
        sharding-seconds: '31536000'
        # 以1个月为单位进行划分
        #sharding-seconds: '2678400'
        # 以1天为单位进行划分
        #sharding-seconds: '86400'

  #定义key的生成规则
  keyGenerators:
    snowflake:
      type: SNOWFLAKE
      props:
        worker-id: 00000000
(3). 操作
在3307代理库中向test4_tb表中执行下面sql语句
CREATE TABLE `test4_tb`  (
  `id` varchar(255) CHARACTER SET utf8mb4 COLLATE utf8mb4_general_ci NOT NULL,
  `userName` varchar(255) CHARACTER SET utf8mb4 COLLATE utf8mb4_general_ci NULL DEFAULT NULL,
  `userAge` int(255) NULL DEFAULT NULL,
  `classId` int(11) NULL DEFAULT NULL,
  `addTime` datetime(0) NULL DEFAULT NULL,
  PRIMARY KEY (`id`) USING BTREE
) ENGINE = InnoDB CHARACTER SET = utf8mb4 COLLATE = utf8mb4_general_ci ROW_FORMAT = Dynamic;


-- truncate table test4_tb
-- 插入失败
INSERT INTO `test4_tb`(`userName`, `userAge`, `classId`, `addTime`) VALUES ('ypf1', 18, 0, '2021-11-01 00:00:00');
INSERT INTO `test4_tb`(`userName`, `userAge`, `classId`, `addTime`) VALUES ('ypf1', 18, 1, '2021-12-01 00:00:00');
-- 在shopdb1中
-- 其中classId=2,4 存在表test4_tb_0中,classId=3 存在表test4_tb_1中
INSERT INTO `test4_tb`(`userName`, `userAge`, `classId`, `addTime`) VALUES ('ypf2', 18, 2, '2022-02-01 00:00:00');
INSERT INTO `test4_tb`(`userName`, `userAge`, `classId`, `addTime`) VALUES ('ypf3', 18, 3, '2022-11-01 00:00:00');
INSERT INTO `test4_tb`(`userName`, `userAge`, `classId`, `addTime`) VALUES ('ypf4', 18, 4, '2022-12-01 00:00:00');
-- 在shopdb2中
-- 其中classId=6 存在表test4_tb_0中,classId=5 存在表test4_tb_1中
INSERT INTO `test4_tb`(`userName`, `userAge`, `classId`, `addTime`) VALUES ('ypf5', 18, 5, '2023-01-03 00:00:00');
INSERT INTO `test4_tb`(`userName`, `userAge`, `classId`, `addTime`) VALUES ('ypf6', 18, 6, '2023-02-01 00:00:00');
剖析:
addTime= 2021-11-01、2021-12-01,插入失败
addTime= 2022-02-01、2022-11-01、2022-12-01,存在第shopdb1中, 其中classId=2,4 存在表test4_tb_0中,classId=3 存在表test4_tb_1中
addTime=2023-01-03、2023-02-01,存在第shopdb2中,其中classId=6 存在表test4_tb_0中,classId=5 存在表test4_tb_1中
三. 读写分离+分库+分表
1. 前提
三个MySQL实例,一主两从,3006端口为写库,3008、3009端口为读库。
对test1_tb表进行分表,数据分片。
2. 核心配置如下
查看代码
# 1. 声明proxy中的代理数据库名称
schemaName: shopDB_Proxy

#2. 连接mysql(一主两从)
dataSources:
  #写连接
  myDBStr_0:
    url: jdbc:mysql://localhost:3306/shopdb?serverTimezone=UTC&useSSL=false
    username: root
    password: 123456
    connectionTimeoutMilliseconds: 30000
    idleTimeoutMilliseconds: 60000
    maxLifetimeMilliseconds: 1800000
    maxPoolSize: 50
    minPoolSize: 1
  #读连接1
  myDBStr_1_read1:
    url: jdbc:mysql://localhost:3308/shopdb?serverTimezone=UTC&useSSL=false
    username: root
    password: 123456
    connectionTimeoutMilliseconds: 30000
    idleTimeoutMilliseconds: 60000
    maxLifetimeMilliseconds: 1800000
    maxPoolSize: 50
    minPoolSize: 1
  #读连接2
  myDBStr_1_read2:
    url: jdbc:mysql://localhost:3309/shopdb?serverTimezone=UTC&useSSL=false
    username: root
    password: 123456
    connectionTimeoutMilliseconds: 30000
    idleTimeoutMilliseconds: 60000
    maxLifetimeMilliseconds: 1800000
    maxPoolSize: 50
    minPoolSize: 1

#3. 分片规则
rules:
- !READWRITE_SPLITTING
  #读写分离配置
  dataSources:
    pr_ds0:
      writeDataSourceName: myDBStr_0
      readDataSourceNames:
        - myDBStr_1_read1
        - myDBStr_1_read2
      loadBalancerName: My_ROUND_ROBIN
  # 负载均衡算法配置
  loadBalancers:
    My_ROUND_ROBIN: # 负载均衡算法别名
      type: ROUND_ROBIN
- !SHARDING
  tables:
    #表1
    test1_tb:
      actualDataNodes: myDBStr_0.test1_tb_${0..1}
      tableStrategy:
        standard:
          shardingColumn: classId
          shardingAlgorithmName: my_MOD
      keyGenerateStrategy:
        column: id
        keyGeneratorName: snowflake
  #定义分片算法
  shardingAlgorithms:
    #1. int类型取模算法
    my_MOD:
      type: MOD
      props:
        sharding-count: 2   #代表数据分片到两张表,与上述的actualDataNodes中定义的表个数需要对应
  #定义key的生成规则
  keyGenerators:
    snowflake:
      type: SNOWFLAKE
      props:
        worker-id: 00000000
!
- 作 者 : Yaopengfei(姚鹏飞)
- 博客地址 : http://www.cnblogs.com/yaopengfei/
- 声 明1 : 如有错误,欢迎讨论,请勿谩骂^_^。
- 声 明2 : 原创博客请在转载时保留原文链接或在文章开头加上本人博客地址,否则保留追究法律责任的权利。

 浙公网安备 33010602011771号