第一节:项目创建和各种配置规范(editorconfig、prettier、eslint、.browserslistrc、tsconfig、git等)
一. 项目创建
1. 搭建步骤
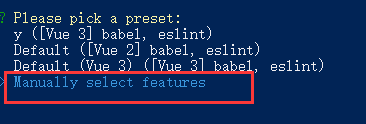
(1). 输入指令【vue create vue3_cms01】,创建项目,进行如下选择。
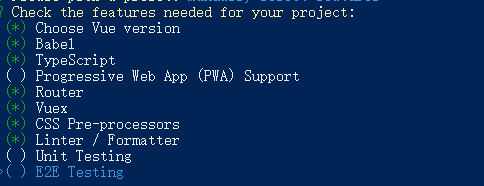
(2). 选择项目包含的内容,如下图所示,babel、ts、vue-router、vuex、css处理器、Linter都集成进去。
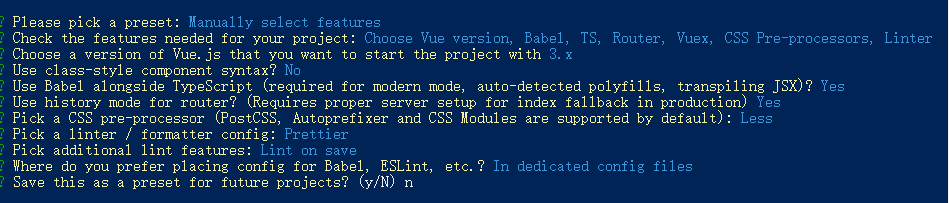
(3). 对集成进去的类库进行选择,如下图:
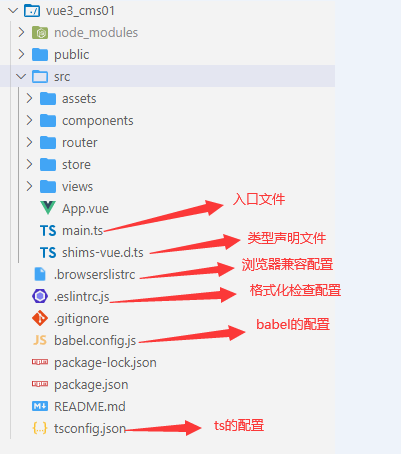
(4). 创建成功,项目目录如下:
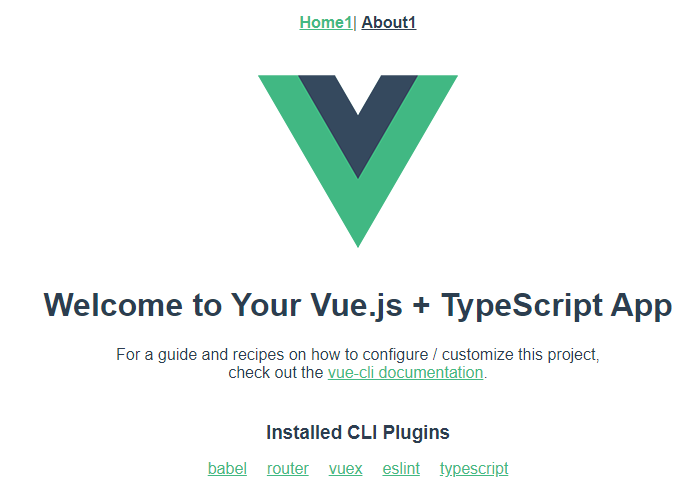
(5). 运行指令【npm run serve】,然后访问地址: http://localhost:8080/
2. vue-router测试
在src/router/index.ts,进行相关配置,默认导入的代码如下


import { createRouter, createWebHistory, RouteRecordRaw } from 'vue-router';
import Home from '../views/Home.vue';

const routes: Array<RouteRecordRaw> = [
    {
        path: '/',
        name: 'Home',
        component: Home,
    },
    {
        path: '/about',
        name: 'About',
        component: () =>
            import(/* webpackChunkName: "about" */ '../views/About.vue'),
    },
];

const router = createRouter({
    history: createWebHistory(process.env.BASE_URL),
    routes,
});

export default router;
引用代码如下:
import { createApp } from 'vue';
import App from './App.vue';
import router from './router';
import store from './store';

const app = createApp(App);
app.use(router); //引入vue-router插件
app.use(store); //引入vuex插件

app.mount('#app');
3. vuex测试
在src/store/index.ts,进行相关配置,默认导入代码如下
import { createStore } from 'vuex';

export default createStore({
    state: {},
    mutations: {},
    actions: {},
    modules: {},
});
引用代码如下:
import { createApp } from 'vue';
import App from './App.vue';
import router from './router';
import store from './store';

const app = createApp(App);
app.use(router); //引入vue-router插件
app.use(store); //引入vuex插件

app.mount('#app');
二. 代码规范配置
1. 集成editorconfig配置
(1). editorConfig 有助于为不同 IDE 编辑器上处理同一项目的多个开发人员维护一致的编码风格。 在项目的根目录下新建 .editorconfig 文件,内容如下:
官网: http://editorconfig.org
# http://editorconfig.org

root = true

[*] # 表示所有文件适用
charset = utf-8 # 设置文件字符集为 utf-8
indent_style = space # 缩进风格(tab | space)
indent_size = 2 # 缩进大小
end_of_line = lf # 控制换行类型(lf | cr | crlf)
trim_trailing_whitespace = true # 去除行首的任意空白字符
insert_final_newline = true # 始终在文件末尾插入一个新行

[*.md] # 表示仅 md 文件适用以下规则
max_line_length = off
trim_trailing_whitespace = false
(2). 安装vscode的相关插件
EditorConfig for VS Code

2. 使用prettier工具
Prettier 是一款强大的代码格式化工具,支持 JavaScript、TypeScript、CSS、SCSS、Less、JSX、Angular、Vue、GraphQL、JSON、Markdown 等语言,基本上前端能用到的文件格式它都可以搞定,是当下最流行的代码格式化工具。
详见官网:https://www.prettier.cn/
(1). 基于项目依赖进行安装,运行指令【npm install prettier -D】
(2). 根目录下新建文件 .prettierrc,格式为json格式,代码如下:
{
    "useTabs": true,
    "tabWidth": 2,
    "printWidth": 80,
    "singleQuote": true,
    "trailingComma": "all",
    "semi": true,
    "vueIndentScriptAndStyle": true
}
注意: 这种格式有个问题,就是不能写注释!!!!
含义剖析:
-
-
tabWidth:tab是空格的情况下,是几个空格,选择2个;
-
printWidth:当行字符的长度,推荐80,也有人喜欢100或者120;
-
singleQuote:使用单引号还是双引号,选择true,使用单引号;
-
trailingComma:在多行输入的尾逗号是否添加,不需要添加设置为
none,需要添加设置为 all; -
semi:语句末尾是否要加分号,默认值true,选择false表示不加;
-
vueIndentScriptAndStyle: 表示.vue文件中,<script>和<style>
推荐:由于.prettierrc不能写注释,这里推荐使用 .prettierrc.js,通过module.export进行导出,就可以尽情的写注释了
module.exports = {
    //使用tab缩进还是空格缩进,false表示空格缩进;
    useTabs: true,
    //tab是空格的情况下,是几个空格,选择2个;
    tabWidth: 2,
    //当行字符的长度,推荐80,也有人喜欢100或者120;
    printWidth: 80,
    //使用单引号还是双引号,选择true,使用单引号;
    singleQuote: true,
    //在多行输入的尾逗号是否添加,不需要添加设置为 `none`,需要添加设置为 all;
    trailingComma: 'all',
    //语句末尾是否要加分号,默认值true,选择false表示不加;
    semi: true,
    //表示.vue文件中,<script>和<style>标签中的代码缩进两个单元格
    vueIndentScriptAndStyle: true,
};
(3). 忽略文件配置,新建 .prettierignore,里面的内容不进行prettierrc格式配置
/dist/*
.local
.output.js
/node_modules/**

**/*.svg
**/*.sh

/public/*
(4). VSCode插件配置
Prettier - Code formatter
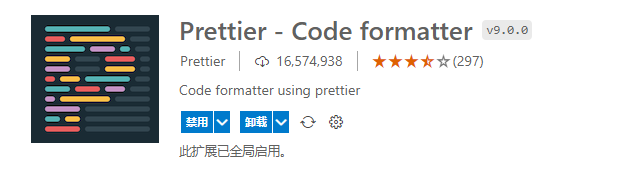
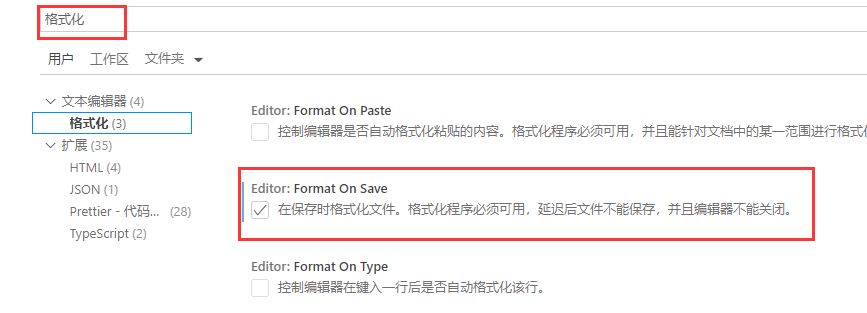
安装完以后,执行格式化快捷键【ctrl+k+d】,当前页面的就格式化了,如果想【ctrl+s】的时候进行格式化,需要在设置里勾选Format On Save。
(5). 通过指令进行全局修复
运行指令【npx prettier --write .】,可以进行全局格式修复,不含忽略文件中的内容
或者在package.json中进行如下配置,然后运行指令 【npm run prettier】进行全局格式修复,原理同上
    "scripts": {
        "serve": "vue-cli-service serve",
        "build": "vue-cli-service build",
        "lint": "vue-cli-service lint",
        "prettier": "prettier --write ."
    },
3. 使用ESLint检测
在前面创建项目的时候,我们就选择了ESLint,所以Vue会默认帮助我们配置需要的ESLint环境,主要用于检查代码格式是否准确。
常用配置查询:
http://eslint.cn/docs/rules/
https://eslint.vuejs.org/rules/
(1). 安装vscode插件
ESLint

(2). 解决eslint和prettier冲突的问题
A. 运行指令【npm i eslint-plugin-prettier eslint-config-prettier -D】进行安装
B. 在.eslintrc.js进行如下配置
module.exports = {
    root: true,
    env: {
        node: true,
    },
    extends: [
        'plugin:vue/vue3-essential',
        'eslint:recommended',
        '@vue/typescript/recommended',
        '@vue/prettier',
        '@vue/prettier/@typescript-eslint',
        // 处理eslint和prettier的冲突问题
        'plugin:prettier/recommended',
    ],
    parserOptions: {
        ecmaVersion: 2020,
    },
    rules: {
        'no-console': process.env.NODE_ENV === 'production' ? 'warn' : 'off',
        'no-debugger': process.env.NODE_ENV === 'production' ? 'warn' : 'off',
        // 关闭vueIndentScriptAndStyle在.vue文件中的格式验证
        forceConsistentCasingInFileNames: 'off',
    },
};
(3). eslint的忽略文件
.eslintignore 内容如下:
*.sh
node_modules
lib
*.md
*.scss
*.woff
*.ttf
.vscode
.idea
dist
mock
public
bin
build
config
index.html
src/assets
4. .browserslistrc
主要是用来配置浏览器兼容性的,详见:https://cli.vuejs.org/zh/guide/browser-compatibility.html https://github.com/browserslist/browserslist
下面文件的含义:市场份额大于1%的浏览器,最新两个版本,正在维护的浏览器
> 1%
last 2 versions
not dead
5. tsconfig.json
(详细配置见:https://www.typescriptlang.org/tsconfig)
tsconfig.json
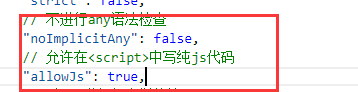
{
    "compilerOptions": {
        // 目标代码(ts -> js(es5/6/7))
        "target": "esnext",
        // 目标代码需要使用的模块化方案(commonjs require/module.exports/   esmodule import/export)
        "module": "esnext",
        // 一些严格的检查(如:any)
        "strict": false,
        // 不进行any语法检查
        "noImplicitAny": false,
        // 对jsx进行怎么样的处理
        "jsx": "preserve",
        // 辅助的导入功能
        "importHelpers": true,
        // 按照node的方式去解析模块 import "/index.node"
        "moduleResolution": "node",
        // 跳过一些库的类型检测 (axios -> 类型/ lodash -> @types/lodash / 其他的第三方)
        // import { Person } from 'axios'
        "skipLibCheck": true,
        // export default/module.exports = {}
        //表示允许同时使用: es module 和 commonjs
        "esModuleInterop": true,
        "allowSyntheticDefaultImports": true,
        // 要不要生成映射文件(ts -> js)
        "sourceMap": true,
        // 文件路径在解析时, 基本url
        "baseUrl": ".",
        // 指定具体要解析使用的类型
        "types": ["webpack-env"],
        // 路径解析(类似于webpack alias)
        "paths": {
            "@/*": ["src/*"],
            "components/*": ["src/components/*"]
        },
        // 可以指定在项目中可以使用哪里库的类型(Proxy/Window/Document)
        "lib": ["esnext", "dom", "dom.iterable", "scripthost"],
        // 允许在<script>中写纯js代码
        "allowJs": true
    },
    "include": ["src/**/*.js", "src/**/*.ts", "src/**/*.tsx", "src/**/*.vue", "tests/**/*.ts", "tests/**/*.tsx"],
    "exclude": ["node_modules"]
}
补充:ts项目中允许js代码,需要修改以下几个位置

6. 配置git Husky
(1). 说明
husky是一个git hook工具,可以帮助我们触发git提交的各个阶段:pre-commit、commit-msg、pre-push,它的作用是 git commit的时候,把所有代码都按照eslint的规范进行自动修正一下,然后再提交。
(2). 步骤
A. 运行指令【npx husky-init && npm install】 或者 powershell中 【npx husky-init '&&' npm install】
自动做了以下3件事:
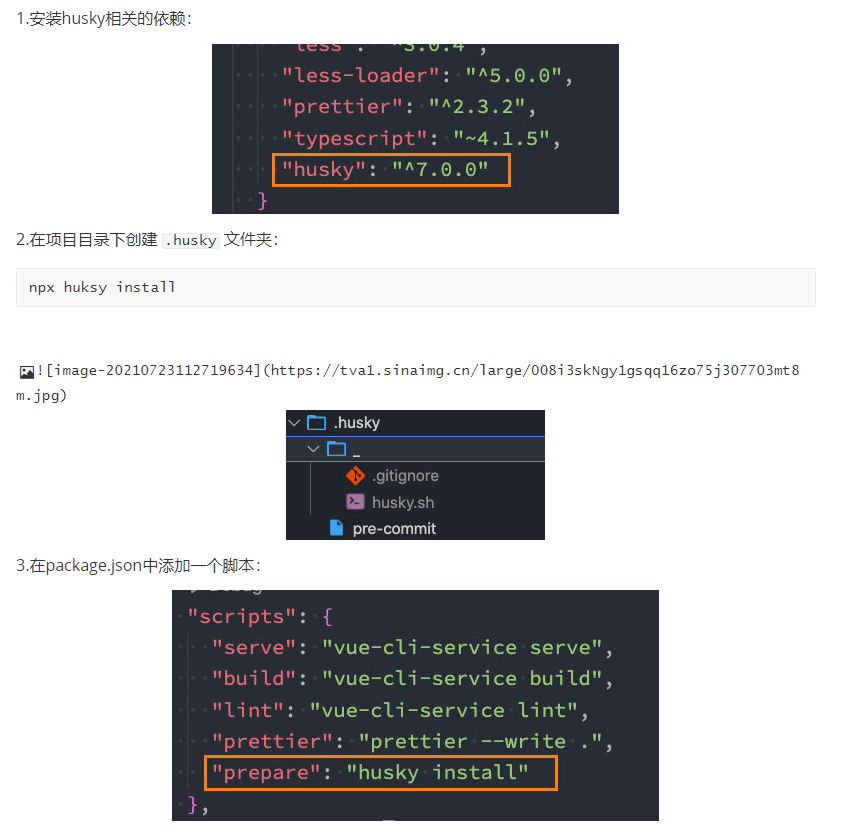
B. 在.husky文件夹下的pre-commit中,将里面的指令改为 【npm run lint】
#!/bin/sh
. "$(dirname "$0")/_/husky.sh"

npm run lint
C. 当运行 git commit提交指令的时候,会先执行一下代码规范调整。
!
- 作 者 : Yaopengfei(姚鹏飞)
- 博客地址 : http://www.cnblogs.com/yaopengfei/
- 声 明1 : 如有错误,欢迎讨论,请勿谩骂^_^。
- 声 明2 : 原创博客请在转载时保留原文链接或在文章开头加上本人博客地址,否则保留追究法律责任的权利。

 浙公网安备 33010602011771号