linux运维、架构之路-Zabbix监控

一、监控常用命令
1、物理服务器监控命令
①添加yum源
wget -O /etc/yum.repos.d/CentOS-Base.repo  http://mirrors.aliyun.com/repo/Centos-6.repo
wget -O /etc/yum.repos.d/epel.repo http://mirrors.aliyun.com/repo/epel-6.repo
②安装
yum -y install OpenIPMI ipmitool
[root@xenserver7-01 ~]# ipmitool sdr type Temperature #查看温度
Temp             | 01h | ns  |  3.1 | Disabled
Temp             | 02h | ns  |  3.2 | Disabled
Temp             | 05h | ns  | 10.1 | Disabled
Temp             | 06h | ns  | 10.2 | Disabled
Ambient Temp     | 0Eh | ok  |  7.1 | 20 degrees C
Planar Temp      | 0Fh | ns  |  7.1 | Disabled
IOH THERMTRIP    | 5Dh | ns  |  7.1 | Disabled
CPU Temp Interf  | 76h | ns  |  7.1 | Disabled
Temp             | 0Ah | ns  |  8.1 | Disabled
Temp             | 0Bh | ns  |  8.1 | Disabled
Temp             | 0Ch | ns  |  8.1 | Disabled
2、cpu常用监控命令
lscpu
top:z加颜色  x高亮排序列 < > 左右移动
uptime
htop:top的升级版,支持鼠标
3、内存、硬盘监控命令
free -h、free -m、df -h、iotop
4、网络监控命令
yum -y install iftop nethogs
iftop:查看主机间的流量,指定网卡查看 iftop -i eth1
nethogs:查看进程使用的流量
smokeing
二、Zabbix监控
1、介绍
Zabbix是一个企业级的、开源的、分布式的监控套件,Zabbix可以监控网络和服务的监控状况. Zabbix利用灵活的告警机制,允许用户对事件发送基于Email的告警. 这样可以保证快速的对问题作出相应. Zabbix可以利用存储数据提供杰出的报告及图形化方式. 这一特性将帮助用户完成容量规划。是目前生产环境非常流行的一个zabbix监控软件了
2、Zabbix架构图形

3、安装部署
①部署环境
[root@m01 tools]# cat /etc/redhat-release
CentOS release 6.9 (Final)
[root@m01 tools]# uname -r
2.6.32-696.el6.x86_64
[root@m01 tools]# getenforce
Disabled
[root@m01 tools]# /etc/init.d/iptables status
iptables: Firewall is not running.
②服务器规划
管理机m01
[root@m01 tools]# hostname -I
10.0.0.61 172.16.1.61
web01
[root@web01 ~]# hostname -I
10.0.0.8 172.16.1.8
③服务端安装配置
#上传定制好的rpm包解压
tar xfP zabbix3.0.9_yum.tar.gz
#快速安装LAMP环境
yum -y --nogpgcheck -C install httpd zabbix-web zabbix-server-mysql zabbix-web-mysql zabbix-get mysql-server php55w php55w-mysql php55w-common php55w-gd php55w-mbstring php55w-mcrypt php55w-devel php55w-xml php55w-bcmath zabbix-get zabbix-java-gateway wqy-microhei-fonts net-snmp net-snmp-utils
#配置mysql
\cp /usr/share/mysql/my-medium.cnf /etc/my.cnf
/etc/init.d/mysqld start
mysql -e 'create database zabbix character set utf8 collate utf8_bin;'
mysql -e "grant all on zabbix.* to zabbix@'localhost' identified by 'zabbix';"
zcat /usr/share/doc/zabbix-server-mysql-3.0.9/create.sql.gz |mysql -uzabbix -pzabbix zabbix
#配置PHP
egrep -n "^post_max_size|^max_execution_time|^max_input_time|^date.timezone" /etc/php.ini
sed -i 's#max_execution_time = 30#max_execution_time = 300#;s#max_input_time = 60#max_input_time = 300#;s#post_max_size = 8M#post_max_size = 16M#;910a date.timezone = Asia/Shanghai' /etc/php.ini
#配置zabbix-server连接数据库
sed -i '115a DBPassword=zabbix' /etc/zabbix/zabbix_server.conf
#配置zabbix网页及授权
cp -R /usr/share/zabbix/ /var/www/html/
chmod -R 755 /etc/zabbix/web
chown -R apache.apache /etc/zabbix/web
#启动zabbix服务
echo "ServerName 127.0.0.1:80">>/etc/httpd/conf/httpd.conf
/etc/init.d/httpd start
/etc/init.d/zabbix-server start
#加入开机自启动
cat>>/etc/rc.local<<EOF
/etc/init.d/mysqld start
/etc/init.d/httpd start
/etc/init.d/zabbix-server start
EOF
④客户端安装配置
rpm -ivh http://mirrors.aliyun.com/zabbix/zabbix/3.0/rhel/6/x86_64/zabbix-agent-3.0.9-1.el6.x86_64.rpm
sed -i 's#Server=127.0.0.1#Server=172.16.1.61#' /etc/zabbix/zabbix_agentd.conf
/etc/init.d/zabbix-agent start
Starting Zabbix agent:                                     [  OK  ]
CentOS7
rpm -ivh http://mirrors.aliyun.com/zabbix/zabbix/3.0/rhel/7/x86_64/zabbix-agent-3.0.9-1.el7.x86_64.rpm
sed -i 's#Server=127.0.0.1#Server=172.16.1.61#' /etc/zabbix/zabbix_agentd.conf
systemctl start zabbix-agent.service
systemctl enable zabbix-agent.service
⑤浏览器输入http://10.0.0.61/zabbix/


⑥解决web页面显示乱码问题
\cp /usr/share/fonts/wqy-microhei/wqy-microhei.ttc /usr/share/fonts/dejavu/DejaVuSans.ttf
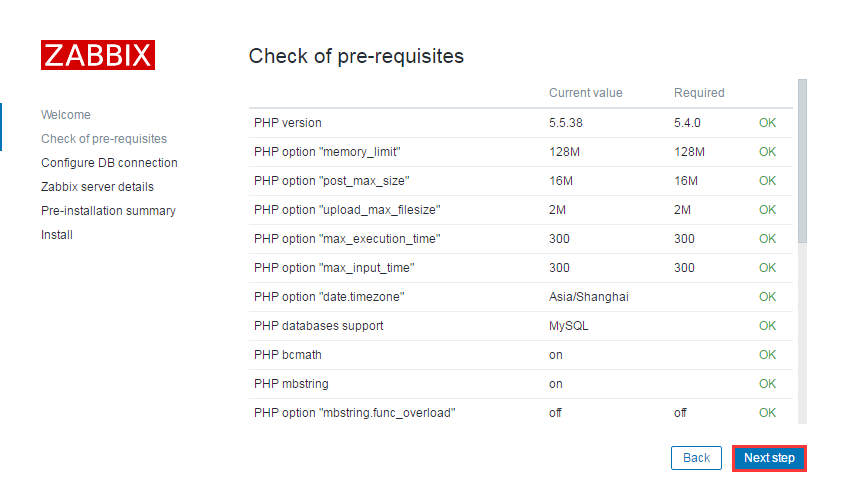
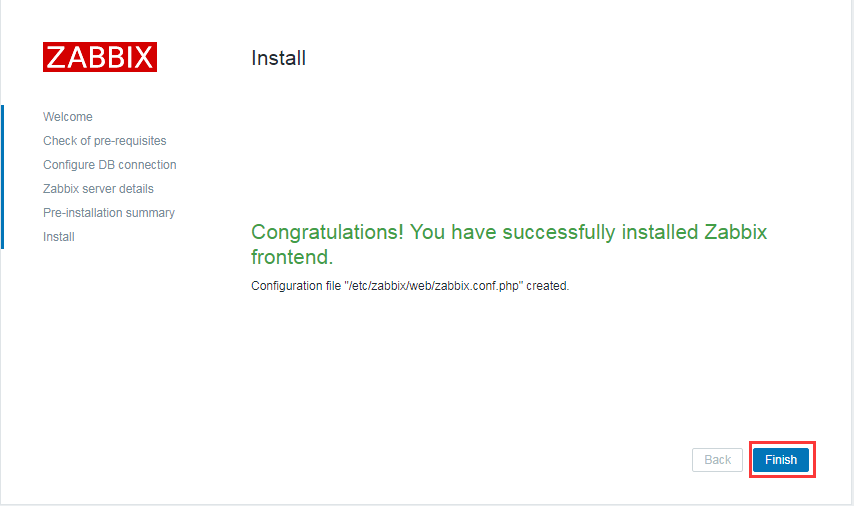
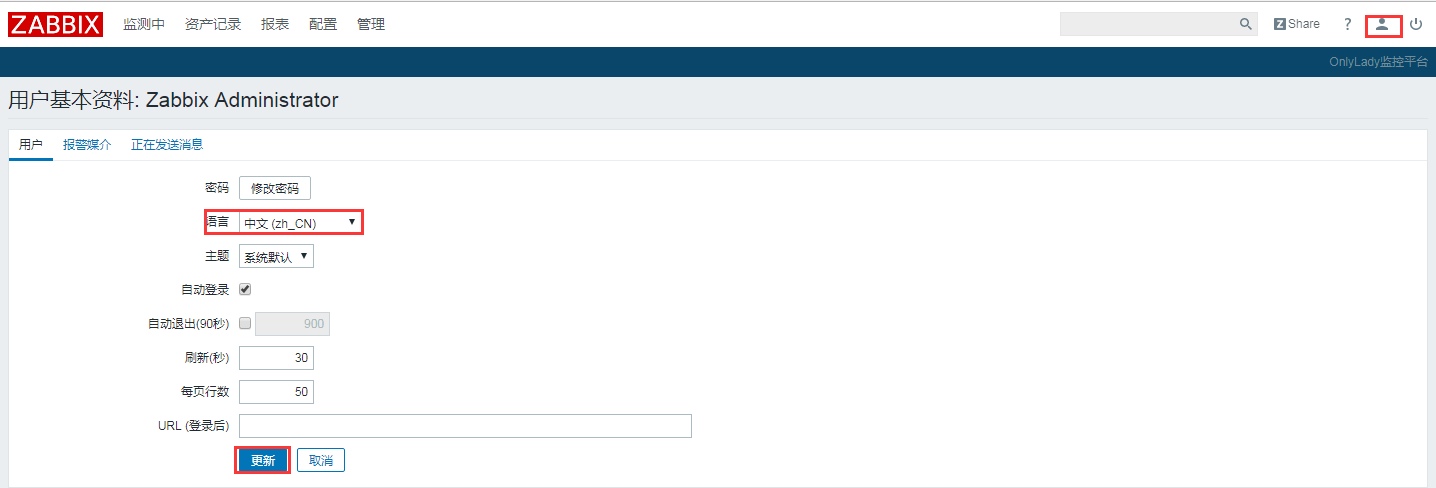
到此Zabbix网页端安装完毕
4、网页添加一个被监控客户端web01

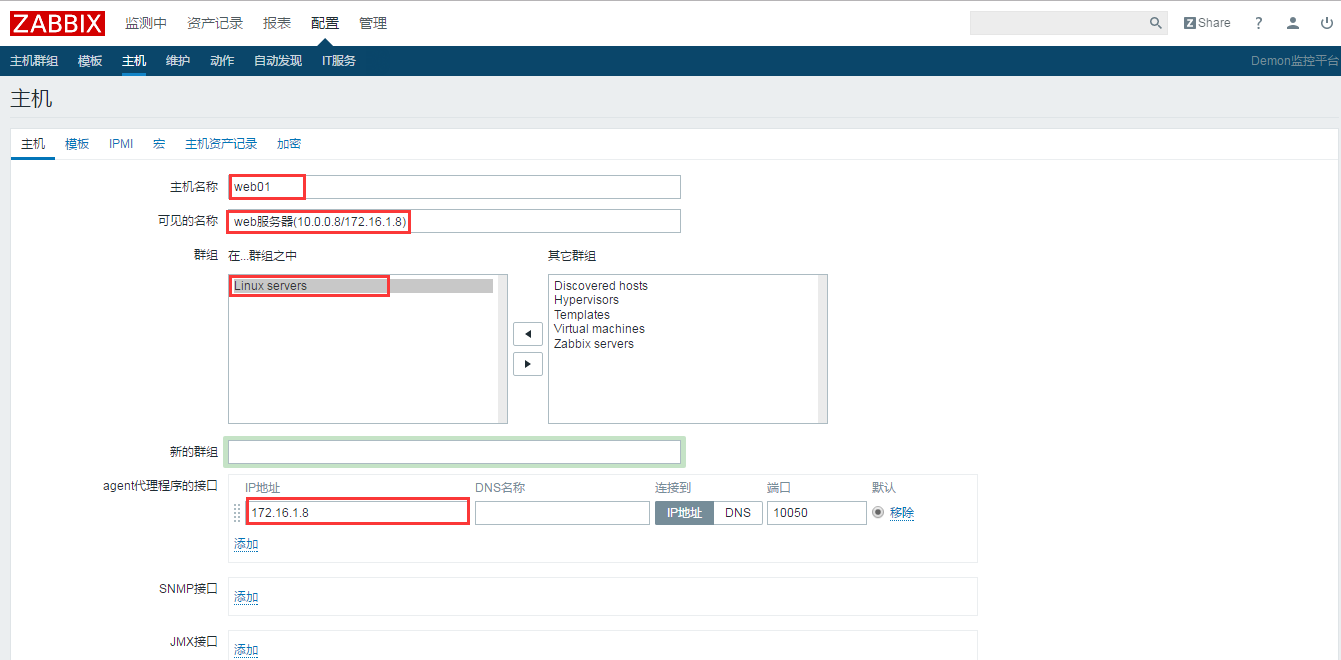

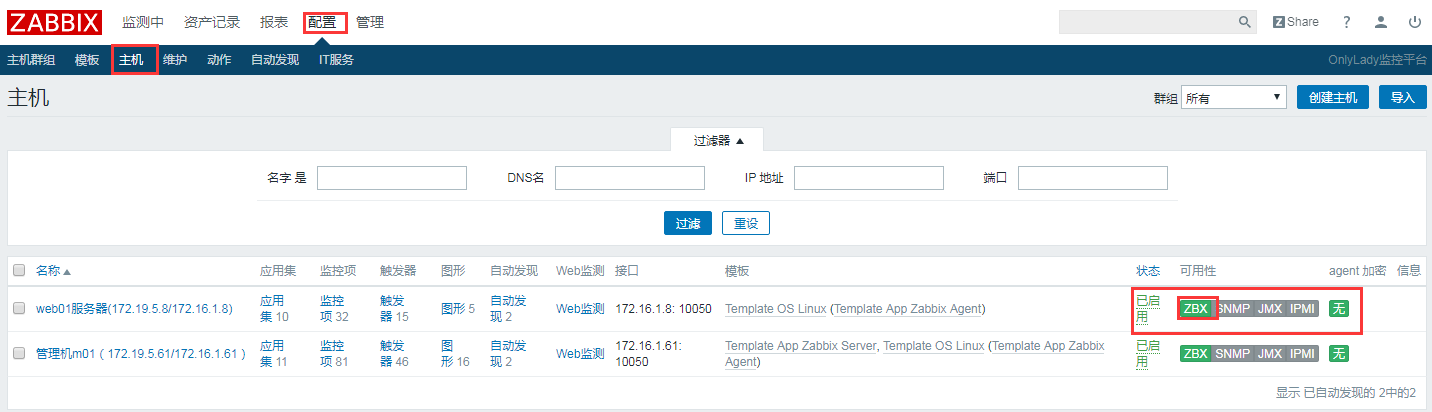
如上图所示,说明监控项已添加成功
成功最有效的方法就是向有经验的人学习!

 浙公网安备 33010602011771号