ELK概述及Elasticsearch 7.7部署
什么是ELK?
ELK是一套开源的日志分析系统, 由 elasticsearch + logstash + kibana 组成.
- elasticsearch: 分布式搜索引擎.
- logstash: 日志收集过滤.
- kibana: 图形化展示.
官网介绍: https://www.elastic.co/cn/downloads
elasticsearch简介
Elasticsearch(简称:ES)是一个开源的分布式搜索引擎, Elasticsearch 还是一个分布式文档数据库.并提供了大量数据的存储功能快速的搜索与分析功能.
起源于 Lucene, 基于 Java 语言开发的搜索引擎类库, 创建于 1999 年, 2005 年成为 Apache 顶级开源项目.Lucene 具有高性能, 以扩展的优点,
主要功能
- 分布式搜索引擎
- 大数据近实时分析引擎
- 高性能
- 容易使用/容易扩展
- 聚合功能
- 分布式存储及集群管理
Elasticsearch个版本特性
5x版本(2016-10)
- Lucene 6x,性能提升,默认打分机制从 TF-IDF 改为 BM 25.
- 支持 Ingest 节点 / Painless Scripting / Completion suggested 支持/ 原生的 Java REST 客户端
- Type 标记成 deprecated, 支持 Keyword 的类型
- 性能优化
- 内部引擎移除了避免同一文档并发更新的竞争锁, 带来 15% - 20% 的性能提升.
- Istan aggregation, 支持分片上聚合的缓存.
- 新增了 Profile API.
6X版本(2017-10)
- Lucene 7X
- 新功能
- 跨集群复制(CCR)
- 索引生命周期管理
- SQL 的支持
- 更友好的升级及数据迁移
- 在主要版本之间的迁移更为简单,体验升级.
- 全新的基于操作的数据复制框架,可加速恢复数据.
- 性能优化
- 有效存储稀疏字段的新方法,降低了存储成本.
- 在索引时进行排序,可加快排序的查询性能.
7X版本(2019-4)
- Lucene 8.0
- 重大改进 - 正式废除单个索引下多 Type 的支持.
- 7.1开始, Security 功能免费试用.
- ECK - Elasticsearch Operator on Kubernetes
- 新功能
- 新的集群协调机制.
- 功能完整的 REST 客户端.
- Script Score Query.
- 性能优化
- 默认的 Primary Shard 数从 5 改为 1, 避免 Ober Sharding.
- 性能优化,更快的 TOP k.
部署elasticsearch
下载地址:https://www.elastic.co/cn/downloads/elasticsearch
elasticsearch7X版本自带JDK环境,之前版本需要安装JDK.
通用环境配置
1. 关闭防火墙和selinux
[root@node6 ~]# setenforce 0
[root@node6 ~]# cat /etc/selinux/config
SELINUX=disabled

[root@node6 ~]# systemctl stop firewalld
[root@node6 ~]# systemctl disable firewalld

2. 修改系统打开最大文件句柄
[root@node6 ~]# cat /etc/security/limits.conf
# End of file
*       soft   nofile       655350
*       hard   nofile       655350
*       soft    nproc       20000
*       hard    nproc       20000

3. 修改内核参数
[root@node6 ~]# cat /etc/sysctl.conf
# For more information, see sysctl.conf(5) and sysctl.d(5).
fs.file-max=419430
net.ipv4.tcp_syncookies = 1
net.ipv4.tcp_syn_retries = 1
net.ipv4.tcp_tw_recycle = 1
net.ipv4.tcp_tw_reuse = 1
net.ipv4.tcp_fin_timeout = 1
net.ipv4.tcp_keepalive_time = 1200
net.ipv4.ip_local_port_range = 10000 65535
net.ipv4.tcp_max_syn_backlog = 16384
net.ipv4.tcp_max_tw_buckets = 36000
net.ipv4.route.gc_timeout = 100
net.ipv4.tcp_syn_retries = 1
net.ipv4.tcp_synack_retries = 1
net.core.somaxconn = 16384
net.core.netdev_max_backlog = 16384
net.ipv4.tcp_max_orphans = 16384
net.ipv4.tcp_rmem = 4096 4096 16777216
net.ipv4.tcp_wmem = 4096 4096 16777216
net.ipv4.tcp_mem = 786432 2097152 3145728
#kernel.pty.max = 4
vm.max_map_count=262144

[root@node6 ~]# sysctl -p

4. 创建用户
[root@node6 ~]# useradd elasticsearch -M -s /sbin/nologin

5. 创建数据及日志目录
[root@node3 ~]# mkdir /data/elasticsearch/{data,logs} -p
[root@node3 ~]# chown elasticsearch:elasticsearch -R /data/elasticsearch/
下载并安装elasticsearch
[root@node6 ~]# wget https://artifacts.elastic.co/downloads/elasticsearch/elasticsearch-7.7.0-linux-x86_64.tar.gz

[root@node6 ~]# rpm -ivh elasticsearch-7.7.0-x86_64.rpm
目录说明
| 目录 | 主要配置文件 | 描述 |
| /usr/share/elasticsearch/bin/ | elasticsearch | 脚本文件存放目录,包括 elasticesearch,安装插件.运行统计数据等. |
|
/etc/elasticsearch/ |
elasticsearch.yml | 集群配置文件,jvm配置文件 |
| /usr/share/elasticsearch/jdk/ | java | java运行环境 |
| /data/elasticsearch/ | 日志和数据目录 | 数据文件及日志目录 |
| /usr/share/elasticsearch/lib/ | java类库 | |
|
/usr/share/elasticsearch/modules/ |
包含所有ES模块 | |
| /usr/share/elasticsearch/plugins/ | 包含所有已安装的插件 | |
主配置文件
[root@node6 ~]# cat /etc/elasticsearch/elasticsearch.yml
# ---------------------------------- Cluster -----------------------------------
# 集群名称
cluster.name: es-cluster
# ------------------------------------ Node ------------------------------------
# 节点 name
node.name: node-6

# 节点是否参加 master 选举
node.master: true

# 是否为数据节点
node.data: true

# ----------------------------------- Paths ------------------------------------
# 数据目录
path.data: /data/elasticsearch/data

# 日志文件存储路径
path.logs: /data/elasticsearch/logs
# ----------------------------------- Memory -----------------------------------
# 是否启动时锁定内存
bootstrap.memory_lock: true
# ---------------------------------- Network -----------------------------------
# 监听地址
network.host: 0.0.0.0

# 监听端口
http.port: 9200
# --------------------------------- Discovery ----------------------------------
# 自动发现节点
discovery.seed_hosts: ["172.16.0.206", "172.16.0.204","172.16.0.203"]

# Bootstrap the cluster using an initial set of master-eligible nodes:
# 初始化引导集群节点
cluster.initial_master_nodes: ["172.16.0.206", "172.16.0.204","172.16.0.203"]
JVM配置
配置建议:
官网配置建议: https://www.elastic.co/cn/blog/a-heap-of-trouble
- Xms 和 Xmx 设置成一样
- Xmx 不要超过机器内存的 50 %.
- 不要超过 30G.
vim /etc/elasticsearch/jvm.options
-Xms2g
-Xmx2g
启动并检查集群状态
# 启动服务并设为开机自启
[root@node6 ~]# systemctl start elasticsearch
[root@node6 ~]# systemctl enable elasticsearch
# 查看集群状态
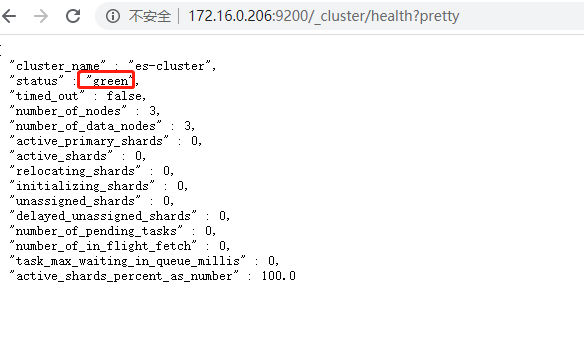
[root@node6 ~]# curl http://172.16.0.206:9200/_cluster/health?pretty
{
"cluster_name" : "es-cluster",
"status" : "green",
"timed_out" : false,
"number_of_nodes" : 3,
"number_of_data_nodes" : 3,
"active_primary_shards" : 0,
"active_shards" : 0,
"relocating_shards" : 0,
"initializing_shards" : 0,
"unassigned_shards" : 0,
"delayed_unassigned_shards" : 0,
"number_of_pending_tasks" : 0,
"number_of_in_flight_fetch" : 0,
"task_max_waiting_in_queue_millis" : 0,
"active_shards_percent_as_number" : 100.0
}
# 查看各nodes 数据和主节点
[root@node6 ~]# curl http://172.16.0.206:9200/_cat/nodes?v
ip heap.percent ram.percent cpu load_1m load_5m load_15m node.role master name
172.16.0.203 59 96 1 0.12 0.06 0.05 dilmrt - node-3
172.16.0.204 26 95 1 0.05 0.07 0.06 dilmrt * node-4
172.16.0.206 36 78 0 0.01 0.04 0.05 dilmrt - node-6
elasticsearch状态说明
- green:表示每个index的shard和replica都是活跃状态的。
- yellow:表示每个index的shard是活跃状态的,replica是不可用状态的。
- red:表示索引中有些shard是不可用状态,导致数据丢失。
elasticsearch-head
elasticsearch-head 是集群管理, 数据可视化, 增删改查, 查询语句可视化工具. 从 ES5 版本后安装方式 和 ES2 以上版本有所不同. ES2 可使用安装插件方式进行安装, 但是从 ES5 之后需要使用 NodeJs来启动.
官网地址: https://github.com/mobz/elasticsearch-head
安装部署
git clone git://github.com/mobz/elasticsearch-head.git
cd elasticsearch-head
yum install npm
npm config set registry https://mirrors.huaweicloud.com/repository/npm/
npm install

修改配置文件
修改默认监听地址
配置文件路径: path/elasticsearch-head/Gruntfile.js
在server下options选项中添加:  hostname: '0.0.0.0',
                connect: {
                        server: {
                                options: {
                                        hostname: '0.0.0.0', # 新添加内容
                                        port: 9100,
                                        base: '.',
                                        keepalive: true
                                }
                        }
                }

修改默认连接地址
配置文件: path/elasticsearch-head/_site/app.js
# 修改http://localhost:9200 为 http://es-ip:9200
this.base_uri = this.config.base_uri || this.prefs.get("app-base_uri") || "http://172.16.0.206:9200";
cerebro
cerebro 和 elasticsearch-head 类似.是一款基于Web的ElasticSearch管理监控工具 图形化比elasticsearch-head更加友好.
项目地址: https://github.com/lmenezes/cerebro
安装软件
wget https://github.com/lmenezes/cerebro/releases/download/v0.9.1/cerebro-0.9.1.tgz
tar xf cerebro-0.9.1.tgz
cd cerebro-0.9.1/
修改配置文件
vim /usr/local/cerebro-0.9.1/conf/application.conf
hosts = [
  {
    host = "http://172.16.0.206:9200"
    name = "es-cluster"
  }
]
启动程序
# 默认监听 0.0.0.0
bin/cerebro
# 也可指定监听ip和端口号
bin/cerebro -Dhttp.port=1234 -Dhttp.address=127.0.0.1

作者:闫世成
出处:http://cnblogs.com/yanshicheng

 浙公网安备 33010602011771号