

实用指南:Qt 实现白天黑夜模式切换开关源码分享
Qt实现白天黑夜模式切换开关源码分享
一、效果展示

二、源码分享
1、dayNightSwitch.h
#ifndef DAYNIGHTSWITCH_H
#define DAYNIGHTSWITCH_H
#include <QObject>
  #include <QWidget>
    #include <QPainter>
      #include <QPainterPath>
        #include <QEvent>
          #include <QPropertyAnimation>
            #include <QVariantAnimation>
              class DayNightSwitch : public QWidget
              {
              Q_OBJECT
              Q_PROPERTY(QColor indicatorColor READ getIndicatorColor WRITE setIndicatorColor)
              signals:
              public:
              explicit DayNightSwitch(QWidget *parent = nullptr);
              QColor getIndicatorColor() const
              {
              return this->indicatorColor;
              }
              void setIndicatorColor(const QColor &newIndicatorColor)
              {
              if (indicatorColor == newIndicatorColor)
              return;
              indicatorColor = newIndicatorColor;
              }
              protected:
              void paintEvent(QPaintEvent *e) override;
              void mouseReleaseEvent(QMouseEvent *e) override;
              private:
              void controlInit();
              private:
              QColor backgroundColor = QColor("#3d85ba");
              QColor indicatorColor = QColor("#ffce08");
              uint16_t indicatorXPos = 5;
              uint16_t cloudBackgroundYPos = 5, cloudFrontgroundYPos = 20;
              int16_t starsYPos = -100;
              bool isDay = true;
              QVariantAnimation* animIndicatorXPos = nullptr;
              QVariantAnimation* animCloudYPos = nullptr;
              QVariantAnimation* animStarsYPos = nullptr;
              QPropertyAnimation* animIndicatorColor = nullptr;
              };
              #endif // DAYNIGHTSWITCH_H
2、dayNightSwitch.cpp
#include "dayNightSwitch.h"
DayNightSwitch::DayNightSwitch(QWidget *parent)
: QWidget{parent}
{
this->controlInit();
this->installEventFilter(this);
}
void DayNightSwitch::controlInit()
{
this->animIndicatorXPos = new QVariantAnimation(this);
this->animIndicatorXPos->setDuration(500);
this->animIndicatorXPos->setEasingCurve(QEasingCurve::OutQuad);
connect(this->animIndicatorXPos,&QVariantAnimation::valueChanged,this,
[this](const QVariant &value)
{
this->indicatorXPos = value.toInt();
this->update();
});
this->animCloudYPos = new QVariantAnimation(this);
this->animCloudYPos->setDuration(500);
this->animCloudYPos->setEasingCurve(QEasingCurve::OutQuad);
connect(this->animCloudYPos,&QVariantAnimation::valueChanged,this,
[this](const QVariant &value)
{
this->cloudBackgroundYPos = value.toInt();
this->cloudFrontgroundYPos = this->cloudBackgroundYPos+this->height()/6.6;
});
this->animStarsYPos = new QVariantAnimation(this);
this->animStarsYPos->setDuration(500);
this->animStarsYPos->setEasingCurve(QEasingCurve::OutQuad);
connect(this->animStarsYPos,&QVariantAnimation::valueChanged,this,
[this](const QVariant &value)
{
this->starsYPos = value.toInt();
});
this->animIndicatorColor = new QPropertyAnimation(this,"indicatorColor",this);
this->animIndicatorColor->setDuration(500);
this->animIndicatorColor->setEasingCurve(QEasingCurve::OutQuad);
}
void DayNightSwitch::paintEvent(QPaintEvent *e)
{
QPainter p(this);
p.setRenderHints(QPainter::Antialiasing | QPainter::TextAntialiasing |QPainter::SmoothPixmapTransform);
QPainterPath path;
path.addRoundedRect(this->rect(),this->height()/2,this->height()/2);
p.setClipPath(path);
//绘制背景颜色
p.setBrush(backgroundColor);
p.drawRoundedRect(this->rect(),this->height()/2,this->height()/2);
//绘制云
QRect cloudsBackgroundRect(5,cloudBackgroundYPos,this->width()+10,this->height()+10);
p.drawImage(cloudsBackgroundRect,QImage(":/image/clouds-background.png"));
cloudsBackgroundRect.setX(this->width()/3.3);
cloudsBackgroundRect.setY(cloudFrontgroundYPos);
p.drawImage(cloudsBackgroundRect,QImage(":/image/clouds-front.png"));
//绘制星星
QRect starsRect(0,starsYPos,this->width()/2,this->height()/3*2);
p.drawImage(starsRect,QImage(":/image/stars.png"));
//绘制指引
p.setBrush(indicatorColor);
p.drawEllipse(indicatorXPos,5,this->height()-10,this->height()-10);
//绘制背景图片
p.drawImage(this->rect(),QImage(":/image/shadow-frame.png"));
}
void DayNightSwitch::mouseReleaseEvent(QMouseEvent *e)
{
if(this->animIndicatorXPos->state() == QVariantAnimation::Running)
return;
if(isDay)
{
isDay = false;
this->animIndicatorXPos->setStartValue(this->indicatorXPos);
this->animIndicatorXPos->setEndValue(this->width() - this->height()+5);
this->animIndicatorXPos->start();
this->animCloudYPos->setStartValue(5);
this->animCloudYPos->setEndValue(this->height() + this->height()+10);
this->animCloudYPos->start();
this->animStarsYPos->setStartValue(-(this->height()/3*2));
this->animStarsYPos->setEndValue(0);
this->animStarsYPos->start();
backgroundColor = QColor("#1e2232");
this->animIndicatorColor->setStartValue(QColor("#ffce08"));
this->animIndicatorColor->setEndValue(QColor("#bcbcbc"));
this->animIndicatorColor->start();
}
else
{
isDay = true;
this->animIndicatorXPos->setStartValue(this->indicatorXPos);
this->animIndicatorXPos->setEndValue(5);
this->animIndicatorXPos->start();
this->animCloudYPos->setStartValue(this->height() + this->height()+10);
this->animCloudYPos->setEndValue(5);
this->animCloudYPos->start();
this->animStarsYPos->setStartValue(0);
this->animStarsYPos->setEndValue(-(this->height()/3*2));
this->animStarsYPos->start();
backgroundColor = QColor("#3d85ba");
this->animIndicatorColor->setStartValue(QColor("#bcbcbc"));
this->animIndicatorColor->setEndValue(QColor("#ffce08"));
this->animIndicatorColor->start();
}
}
3、使用方法
放置一个QWidget,然后提升为这个类就OK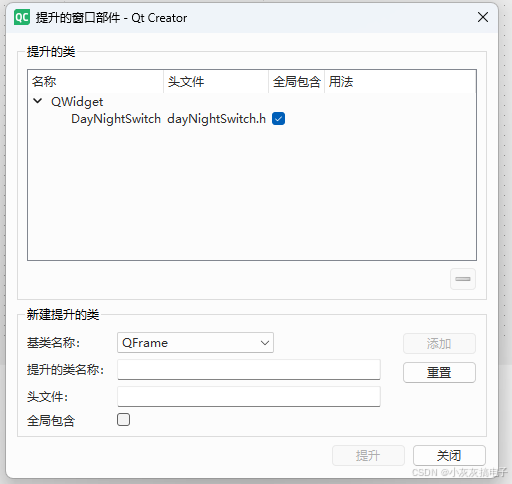
三、实现原理
在paintEvent中使用QPainter进行绘制。
1、paintEvent详解
在 Qt 框架中,paintEvent 是一个关键函数,用于处理窗口部件(widget)的绘制事件。它属于 QWidget 类的虚函数,当部件需要重绘时(如窗口首次显示、大小改变或被遮挡后恢复),系统会自动调用此函数。开发者通过重写 paintEvent 来自定义绘制逻辑,例如绘制图形、文本或自定义 UI。
1.1、paintEvent 的作用和调用时机
- 作用:
paintEvent是绘制事件的处理入口,允许开发者使用QPainter对象在部件上进行绘图操作。所有可视化内容(如背景、图形、文本)都应在其中实现。 - 调用时机:当以下情况发生时,Qt 事件循环会触发
paintEvent:- 部件首次显示或变为可见。
- 部件大小改变(例如用户调整窗口)。
- 部件被其他窗口遮挡后重新暴露。
- 开发者显式调用
update()或repaint()方法请求重绘。
- 注意:
paintEvent是事件驱动的,不应手动调用;而是通过update()来异步触发,以避免性能问题。
1.2、函数签名和参数
paintEvent的函数签名如下:void paintEvent(QPaintEvent *event) override;- 参数
event是一个QPaintEvent对象,包含重绘区域的信息(例如脏区域矩形),可用于优化绘制(只重绘变化部分)。 - 开发者必须重写此函数(使用
override关键字),并在其中实现绘图逻辑。
- 参数
1.3、如何重写 paintEvent
重写 paintEvent 的基本步骤如下:
- 步骤 1: 创建一个
QPainter对象,并传入当前部件(this)作为绘制设备。 - 步骤 2: 使用
QPainter的方法设置画笔、画刷、字体等属性。 - 步骤 3: 调用绘图指令(如
drawRect,drawText)来绘制内容。 - 步骤 4: 结束后,
QPainter对象会自动释放资源(不需手动删除)。 - 关键点:绘图操作必须在
paintEvent内部完成;外部调用update()来触发重绘。
示例:绘制一个简单的矩形和文本。
- 坐标系统:Qt 使用笛卡尔坐标系,原点在部件左上角,x 轴向右为正,y 轴向下为正。例如,矩形左上角坐标 ( x , y ) (x, y) (x,y),宽度 w w w,高度 h h h。
- 数学表示:矩形的位置和大小可描述为参数 ( x , y , w , h ) (x, y, w, h) (x,y,w,h)。
1.4、代码示例
以下是一个完整的 C++ 示例,展示如何自定义一个 widget 并重写 paintEvent 来绘制一个红色矩形和文本。
#include <QWidget>
  #include <QPainter>
    #include <QPaintEvent>
      #include <QString>
        class CustomWidget : public QWidget {
        public:
        CustomWidget(QWidget *parent = nullptr) : QWidget(parent) {}
        protected:
        void paintEvent(QPaintEvent *event) override {
        // 创建 QPainter 对象,绑定到当前 widget
        QPainter painter(this);
        // 设置画刷颜色为红色,用于填充矩形
        painter.setBrush(Qt::red);
        // 绘制一个矩形:左上角坐标 (50, 50),宽度 100,高度 100
        painter.drawRect(50, 50, 100, 100);
        // 设置文本颜色和字体
        painter.setPen(Qt::blue);
        painter.setFont(QFont("Arial", 12));
        // 绘制文本:位置 (50, 30)
        painter.drawText(50, 30, "Hello, Qt!");
        // 可选:使用 event 参数优化绘制(例如只重绘脏区域)
        // QRect dirtyRect = event->rect();
        // painter.drawRect(dirtyRect); // 示例:绘制脏区域边界
        }
        };
        // 在 main 函数中使用 CustomWidget
        int main(int argc, char *argv[]) {
        QApplication app(argc, argv);
        CustomWidget widget;
        widget.resize(400, 300); // 设置窗口大小
        widget.show();
        return app.exec();
        }
1.5、注意事项和最佳实践
- 性能优化:
- 避免在
paintEvent中执行耗时操作(如文件 I/O 或复杂计算),因为它在 GUI 事件循环中运行,可能导致界面卡顿。 - 使用
event->rect()获取脏区域,只重绘必要部分(例如,只绘制变化区域)。 - 调用
update()而非repaint():update()是异步的,会合并多个重绘请求;repaint()是同步的,可能引起性能问题。
- 避免在
- 常见错误:
- 忘记调用父类的
paintEvent:通常不需要,但如果有父类实现,可调用QWidget::paintEvent(event)以保留默认行为。 - 在
paintEvent外创建QPainter:QPainter必须在paintEvent内实例化,否则会引发错误。 - 坐标错误:确保坐标值在部件范围内,否则绘制内容可能不可见。
- 忘记调用父类的
- 高级用法:
- 结合
QPainterPath绘制复杂路径。 - 使用双缓冲(
setAttribute(Qt::WA_PaintOnScreen))减少闪烁。 - 在自定义部件中,重写
sizeHint()提供建议大小。
- 结合
2、QPainter详解
QPainter 是 Qt 框架中用于执行 2D 图形绘制的核心类,可在多种设备(窗口部件、图像、打印机等)上实现高效绘图。以下是关键特性和使用指南:
2.1、核心功能
绘图设备支持:
QWidget(窗口部件)QPixmap(像素图)QImage(图像缓冲区)QPrinter(打印输出)QOpenGLPaintDevice(OpenGL 上下文)
基本绘图操作:
QPainter painter(this); // 绑定到当前窗口
painter.drawLine(0, 0, 100, 100);   // 直线
painter.drawRect(10, 10, 80, 60);    // 矩形
painter.drawEllipse(50, 50, 100, 50);// 椭圆
painter.drawText(20, 30, "Hello Qt");// 文本
2.2、坐标系系统
逻辑坐标系:
- 默认左上角为原点 ( 0 , 0 ) (0,0) (0,0)
- 支持坐标变换:
painter.translate(100, 50);  // 平移
painter.rotate(45);          // 旋转
painter.scale(0.5, 2.0);     // 缩放
视图-窗口映射:
painter.setWindow(-50, -50, 100, 100); // 逻辑坐标系范围
painter.setViewport(0, 0, width(), height()); // 物理像素范围
2.3、绘图属性控制
画笔 (QPen):
QPen pen(Qt::red);          // 红色画笔
pen.setWidth(3);            // 3像素宽
pen.setStyle(Qt::DashLine); // 虚线样式
painter.setPen(pen);
画刷 (QBrush):
QBrush brush(Qt::blue, Qt::Dense4Pattern); // 蓝色填充图案
painter.setBrush(brush);
字体 (QFont):
QFont font("Arial", 12, QFont::Bold);
painter.setFont(font);
2.4、高级特性
抗锯齿渲染:
painter.setRenderHint(QPainter::Antialiasing); // 开启抗锯齿路径绘制 (QPainterPath):
QPainterPath path; path.moveTo(20, 30); path.lineTo(80, 90); path.cubicTo(50, 50, 100, 50, 120, 100); // 贝塞尔曲线 painter.drawPath(path);图像合成模式:
painter.setCompositionMode(QPainter::CompositionMode_Xor); // XOR混合模式
2.5、最佳实践
绘制位置:
- 在
QWidget::paintEvent()中创建 QPainter - 避免在构造函数或非绘图事件中使用
- 在
资源管理:
void MyWidget::paintEvent(QPaintEvent*) { QPainter painter(this); // 自动管理资源 // 绘图操作... } // 析构时自动结束绘制性能优化:
- 批量操作:使用
drawPolygon()替代多次drawLine() - 预渲染:复杂图形绘制到 QPixmap 缓存
- 局部更新:使用
QPaintEvent::region()进行区域重绘
- 批量操作:使用
2.6、典型应用场景
自定义控件绘制:
void CustomButton::paintEvent(QPaintEvent*) { QPainter p(this); p.drawRoundedRect(rect(), 10, 10); // 圆角按钮 p.drawText(rect(), Qt::AlignCenter, "Click Me"); }图表绘制:
# PyQt 示例:绘制柱状图 def paintEvent(self, event): painter = QPainter(self) for i, value in enumerate(data): painter.fillRect(i*bar_width, height-value, bar_width, value, QColor("#3498db"))图像处理:
QImage image("input.png");
QPainter painter(&image);
painter.drawImage(0, 0, watermark); // 添加水印
image.save("output.png");
2.7、注意事项
坐标系变换后需恢复状态:
painter.save();    // 保存当前状态
painter.translate(100, 100);
painter.drawRect(0, 0, 50, 50);
painter.restore(); // 恢复原始状态
避免在绘图过程中修改被绘制的对象
高刷新率场景使用 QOpenGLWidget 替代
通过 QPainter 可实现从简单图形到复杂数据可视化的各类 2D 绘图需求,是 Qt GUI 开发的核心工具之一。实际开发中建议结合 Qt 的 Graphics View Framework 处理复杂场景。


 浙公网安备 33010602011771号