Android自动化-元素定位
一、元素定位需要使用到第三方工具以及操作方法
1. Appium Server软件自带的定位工具
-
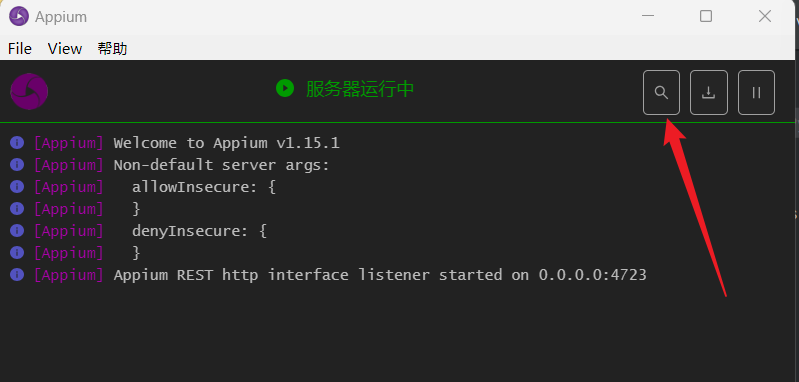
启动Appium Server服务器,启动成功后点击这个放大镜
-
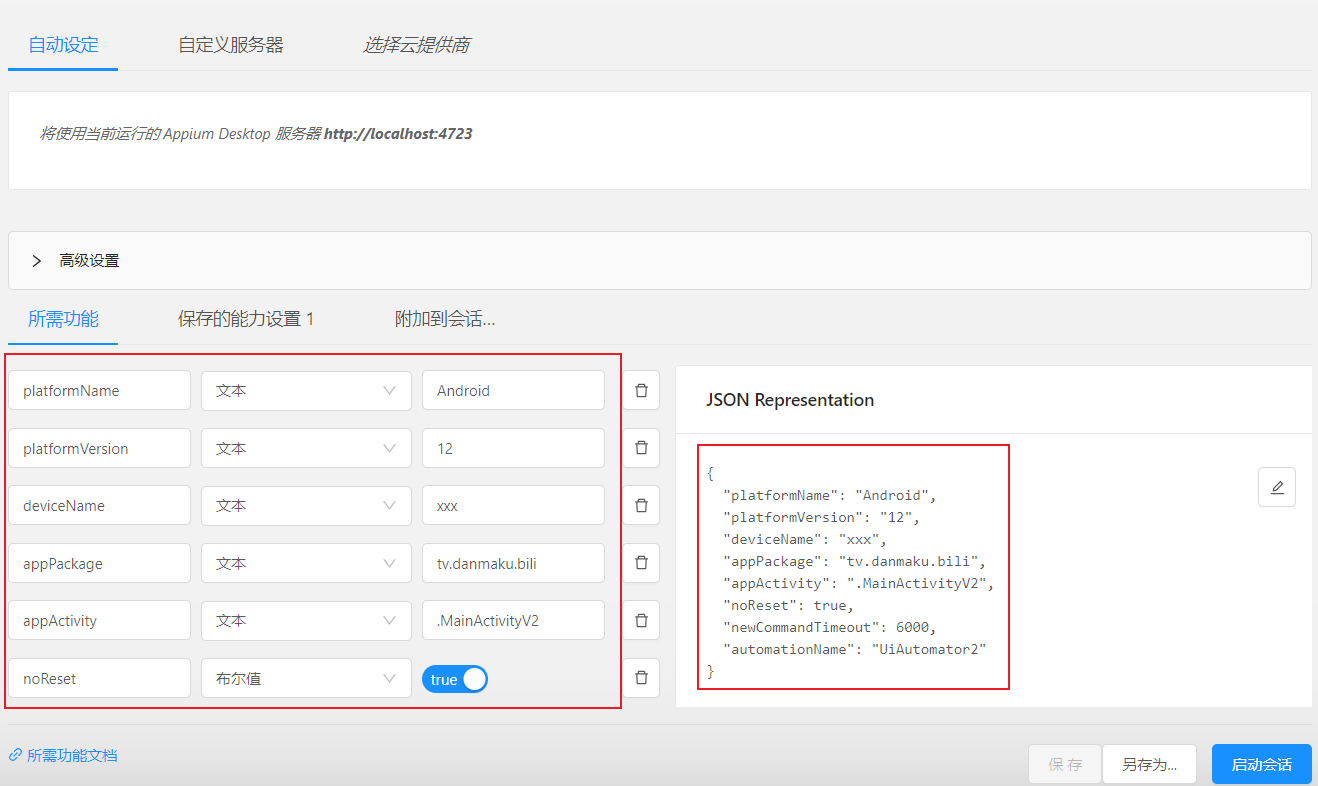
在新弹出的窗口输入对应的参数配置,输入完成后点击启动会话即可
-
启动成功后的界面如下图所示,此时即可定位手机app页面用的元素了

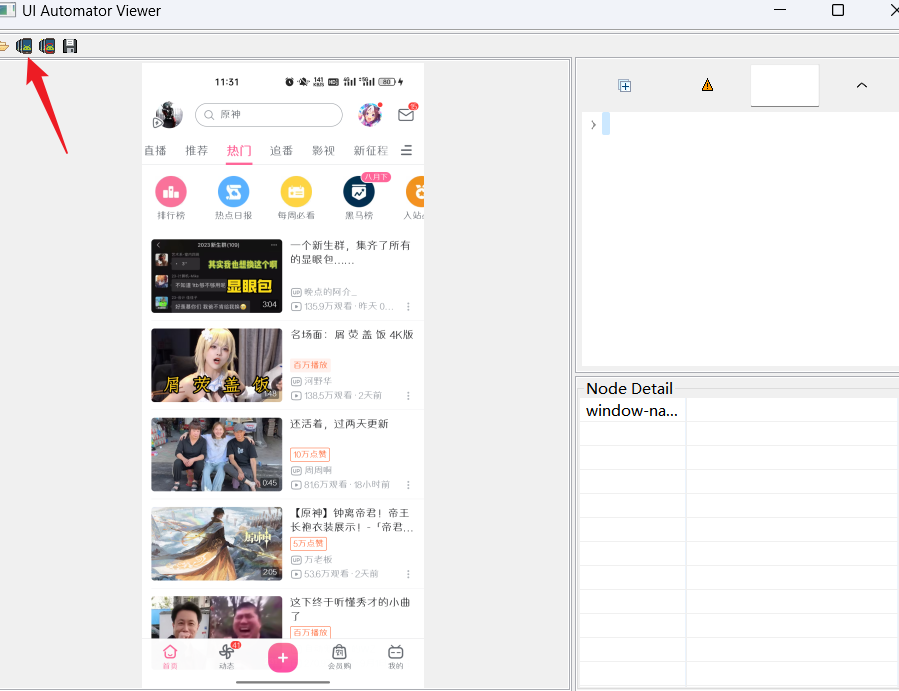
2. 通过下载的androidsdk中的uiautomatorviewer.bat查看元素定位
相对路径如下:androidsdk\tools\bin\uiautomatorviewer.bat
注:与Appium Server的定位工具冲突,需要在Appium Server定位工具关闭的情况下才能正常使用。
-
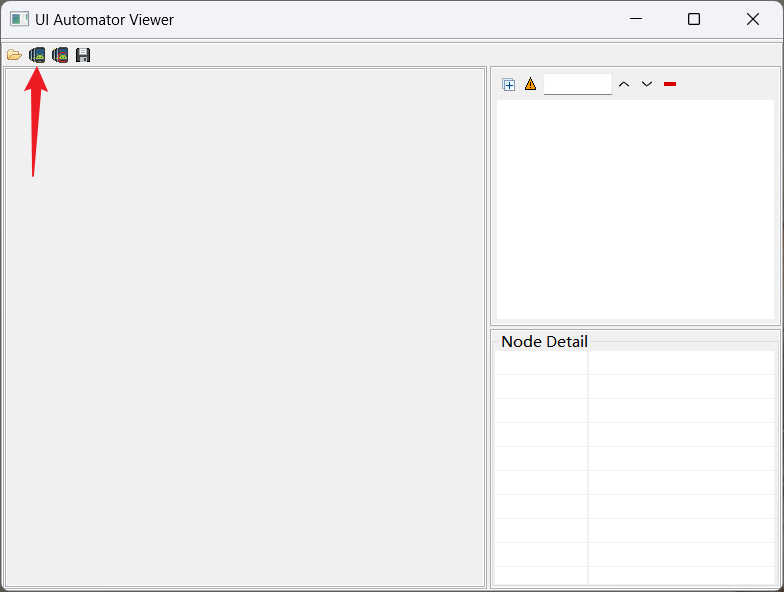
点击启动后的界面如下:
-
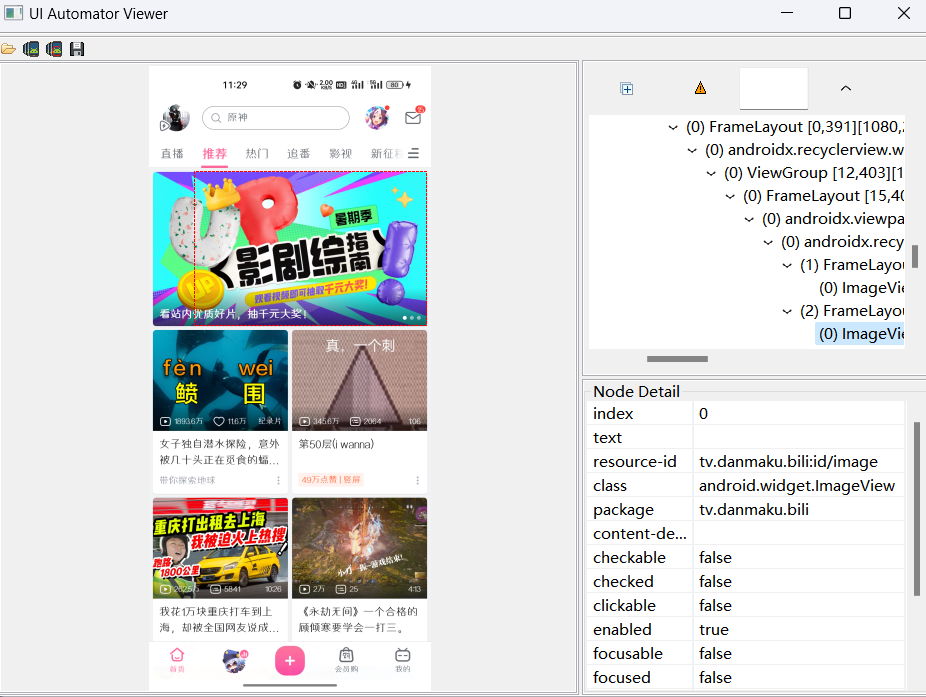
点击这个按钮后的页面如下,如此即可开始定位app页面元素了
-
当手机切换页面后,同样需要点击此按钮重新获取手机页面
二、python自动化代码对元素的定位
链接并启动手机app程序
import time
from appium import webdriver
from selenium.webdriver.common.by import By
from appium.webdriver.common.appiumby import AppiumBy
from appium.webdriver.common.touch_action import TouchAction
from appium.webdriver.extensions.android.nativekey import AndroidKey


desired_caps = {
    'platformName': 'Android',  # 被测手机-安卓
    'platformVersion': '12',    # Android版本
    'deviceName': 'xxx',        # 设备名称
    'appPackage': 'tv.danmaku.bili',    # 启动APP Package名称
    'appActivity': '.MainActivityV2',  # 启动Activity名称
    # 'unicodeKeyboard': True,    # 使用自带输入法,输入中文是填True,输入中文时需要
    # 'resetKeyboard': True,      # 执行完程序恢复原来的输入法,输入中文时需要
    'noReset': True,            # 不重置App,【重要】
    'newCommandTimeout': 6000,
    'automationName': 'UiAutomator2'
}

# 连接Appium Server,初始化自动化环境
driver = webdriver.Remote('http://127.0.0.1:4723/wd/hub', desired_capabilities=desired_caps)

# 设置缺省等待时间
driver.implicitly_wait(10)
注:以下的id和class均是通过上述第一小节中的定位工具中获取的
1. 根据id定位
driver.find_element(By.ID, 'expand_search')
2. 根据class
driver.find_element(By.CLASS_NAME, 'expand_search')
3. 根据ACCESSIBILITY ID
from appium.webdriver.common.appiumby import AppiumBy

driver.find_element(AppiumBy.ACCESSIBILITY_ID, '找人')
4. Xpath
注:每个节点的名称需要写全
from appium.webdriver.common.appiumby import AppiumBy

driver.find_element(AppiumBy.XPATH, '//ele1/ele2[@attr="value"]')
5. 通过UIAutomator
优点:可以通过多个属性值定位元素,这里的属性值也需要写全,不能省略
参考 谷歌安卓官方文档介绍: https://developer.android.google.cn/training/testing/ui-automator
对应的方法文档:https://developer.android.google.cn/reference/androidx/test/uiautomator/UiSelector
from appium.webdriver.common.appiumby import AppiumBy

# 文本内容为"热门",且class=android.widget.TextView的元素
code = 'new UiSelector().text("热门").className("android.widget.TextView")'

# content-desc = "推荐,6之2,标签" 的元素
code = 'new UiSelector().description("推荐,6之2,标签")'

# resource-id = "tv.danmaku.bili:id/video_layout"
code = 'new UiSelector().resourceId("tv.danmaku.bili:id/video_layout")'

# 通过文本模糊查询
code = 'new UiSelector().textContains("推荐")'

# 通过文本精准查询
code = 'new UiSelector().text("推荐")'

# 通过文本正则
code = 'new UiSelector().textMatches("^/d+$")'

# 通过索引定位
code = 'new UiSelector().index(1)'

# 获取查询到的元素集合中的第几个元素,从0开始
code = 'new UiSelector().textContains("推荐").instance(4)'

# 通过父节点找子节点,类似与xpath中的 //,但有个bug->只能返回第一个child
code = 'new UiSelector().resourceId("tv.danmaku.bili:id/recycler_view").childSelector(new UiSelector().className("android.widget.TextView"))'

driver.find_element(AppiumBy.ANDROID_UIAUTOMATOR, code)
6. 滑动页面
from appium.webdriver.common.touch_action import TouchAction

# 获取屏幕宽度和高度
screen_size = driver.get_window_size()
width = screen_size['width']
height = screen_size['height']

# 定义滑动起始和结束坐标
start_x = int(width * 0.5)
start_y = int(height * 0.8)
end_x = int(width * 0.5)
end_y = int(height * 0.2)

# 创建 TouchAction 对象并进行滑动操作
action = TouchAction(driver)
action.press(x=start_x, y=start_y).wait(1000).move_to(x=end_x, y=end_y).release().perform()
7. 通过坐标点击元素
driver.tap([(1020, 1358)])
time.sleep(0.5)
以上为学习白月黑羽大佬文档后的总结,原文链接:https://www.byhy.net/tut/auto/appium/01/

 浙公网安备 33010602011771号