IdentityServer4(9)- 使用OpenID Connect添加用户身份验证(implicit)
在本快速入门中,我们希望通过 OpenID Connect 协议向我们的 IdentityServer 添加对用户认证交互的支持。
我们将创建一个将使用 IdentityServer 进行身份认证的MVC应用程序。
添加UI
OpenID Connect 所需的所有协议支持都已内置到 IdentityServer 中。您需要为提供必要的UI部件:登录,注销,同意授权和错误页面。
根据业务场景的不同对 IdentityServer 的实现也有所不同,但我们提供了一个基于 MVC 的示例UI,您可以将其用作起步。
可以在快速入门UI仓库中找到此UI。 您可以克隆或下载此repo,并将Controller,View,Model和CSS放入IdentityServer Web 应用程序中。
或者,您可以使用.NET CLI(从 src/IdentityServer 文件夹中运行命令):
dotnet new is4ui添加 MVC UI 后,您还需要在 DI 系统和管道中启用 MVC。 当您查看Startup.cs时,您将在 ConfigureServices 和 Configure 方法中找到有关如何启用MVC的注释。
运行IdentityServer应用程序,您现在应该看到一个主页。
花一些时间检查控制器和模型,您越了解它们,就越容易掌握以便修改。 大多数代码使用“feature folder”样式存在于“Quickstart”文件夹中。 如果此样式不适合您,请随意以您想要的任何方式组织代码。
创建 MVC 客户端
接下来,您将向您的解决方案添加MVC应用程序。 使用 ASP.NET Core “Web Application” (即 MVC) 模板。 不要在向导中配置“Authentication"设置 - 您将在此快速入门中手动执行此操作。 创建项目后,将应用程序配置为在端口5002上运行。
要将对 OpenID Connect 身份认证的支持添加到MVC应用程序,请在Startup中将以下内容添加到ConfigureServices :
public void ConfigureServices(IServiceCollection services)
{
    services.AddMvc();

    JwtSecurityTokenHandler.DefaultInboundClaimTypeMap.Clear();

    services.AddAuthentication(options =>
        {
            options.DefaultScheme = "Cookies";
            options.DefaultChallengeScheme = "oidc";
        })
        .AddCookie("Cookies")
        .AddOpenIdConnect("oidc", options =>
        {
            options.Authority = "http://localhost:5000";
            options.RequireHttpsMetadata = false;

            options.ClientId = "mvc";
            options.SaveTokens = true;
        });
}AddAuthentication将身份认证服务添加到 DI。 我们使用 cookie 来本地登录用户(通过“Cookies”作为DefaultScheme),我们将 DefaultChallengeScheme 设置为“oidc”,因为当我们需要用户登录时,我们将使用OpenID Connect 协议。
然后,我们使用 AddCookie 添加可以处理 cookie 的处理程序。
最后,AddOpenIdConnect用于配置执行 OpenID Connect 协议的处理程序。Authority表明我们信任的 IdentityServer 地址。然后我们通过ClientId。识别这个客户端。 SaveTokens用于在 cookie 中保留来自IdentityServer 的令牌(稍后将需要它们)。
同样,我们已经关闭了 JWT Claim类型映射,以允许常用的Claim(例如'sub'和'idp')。
JwtSecurityTokenHandler.DefaultInboundClaimTypeMap.Clear();然后要确保认证服务执行对每个请求的验证,加入UseAuthentication到Configure中:
public void Configure(IApplicationBuilder app, IHostingEnvironment env)
{
    if (env.IsDevelopment())
    {
        app.UseDeveloperExceptionPage();
    }
    else
    {
        app.UseExceptionHandler("/Home/Error");
    }

    app.UseAuthentication();

    app.UseStaticFiles();
    app.UseMvcWithDefaultRoute();
}
应在管道中的MVC之前添加认证中间件。
最后一步是触发身份认证。为此,请转到 Controller 并添加[Authorize]特性到其中一个Action。还要修改主视图以显示用户的Claim以及cookie属性:
@using Microsoft.AspNetCore.Authentication

<h2>Claims</h2>

<dl>
    @foreach (var claim in User.Claims)
    {
        <dt>@claim.Type</dt>
        <dd>@claim.Value</dd>
    }
</dl>

<h2>Properties</h2>

<dl>
    @foreach (var prop in (await Context.AuthenticateAsync()).Properties.Items)
    {
        <dt>@prop.Key</dt>
        <dd>@prop.Value</dd>
    }
</dl>
如果您现在使用浏览器访问该控制器,将会被重定向到IdentityServer - 这将导致错误,因为MVC客户端尚未注册。
添加 OpenID Connect Identity Scope
与OAuth 2.0类似,OpenID Connect也使用Scope概念。同样,Scope代表您想要保护的内容以及客户端想要访问的内容。与OAuth相比,OIDC中的Scope不仅代表API资源,还代表用户ID,姓名或电子邮件地址等身份资源。
通过修改Config.cs 中的 GetIdentityResources 方法,添加对标准 openid(subject id)和profile (名字,姓氏等)Scope的支持:
public static IEnumerable<IdentityResource> GetIdentityResources()
{
    return new List<IdentityResource>
    {
        new IdentityResources.OpenId(),
        new IdentityResources.Profile(),
    };
}所有标准Scope及其相应的Claim都可以在OpenID Connect规范中找到。
添加OpenID Connect简化流程客户端
最后一步是将MVC客户端的配置信息添加到 IdentityServer。
基于OpenID Connect的客户端与我们目前添加的OAuth 2.0客户端非常相似。但由于OIDC中的流程始终是交互式的,因此我们需要在配置中添加一些重定向URL。
将以下内容添加到客户端配置中:
public static IEnumerable<Client> GetClients()
{
    return new List<Client>
    {
        // other clients omitted...

        // OpenID Connect implicit flow client (MVC)
        new Client
        {
            ClientId = "mvc",
            ClientName = "MVC Client",
            AllowedGrantTypes = GrantTypes.Implicit,

            // 登录成功回调处理地址,处理回调返回的数据
            RedirectUris = { "http://localhost:5002/signin-oidc" },

            // where to redirect to after logout
            PostLogoutRedirectUris = { "http://localhost:5002/signout-callback-oidc" },

            AllowedScopes = new List<string>
            {
                IdentityServerConstants.StandardScopes.OpenId,
                IdentityServerConstants.StandardScopes.Profile
            }
        }
    };
}
测试客户端
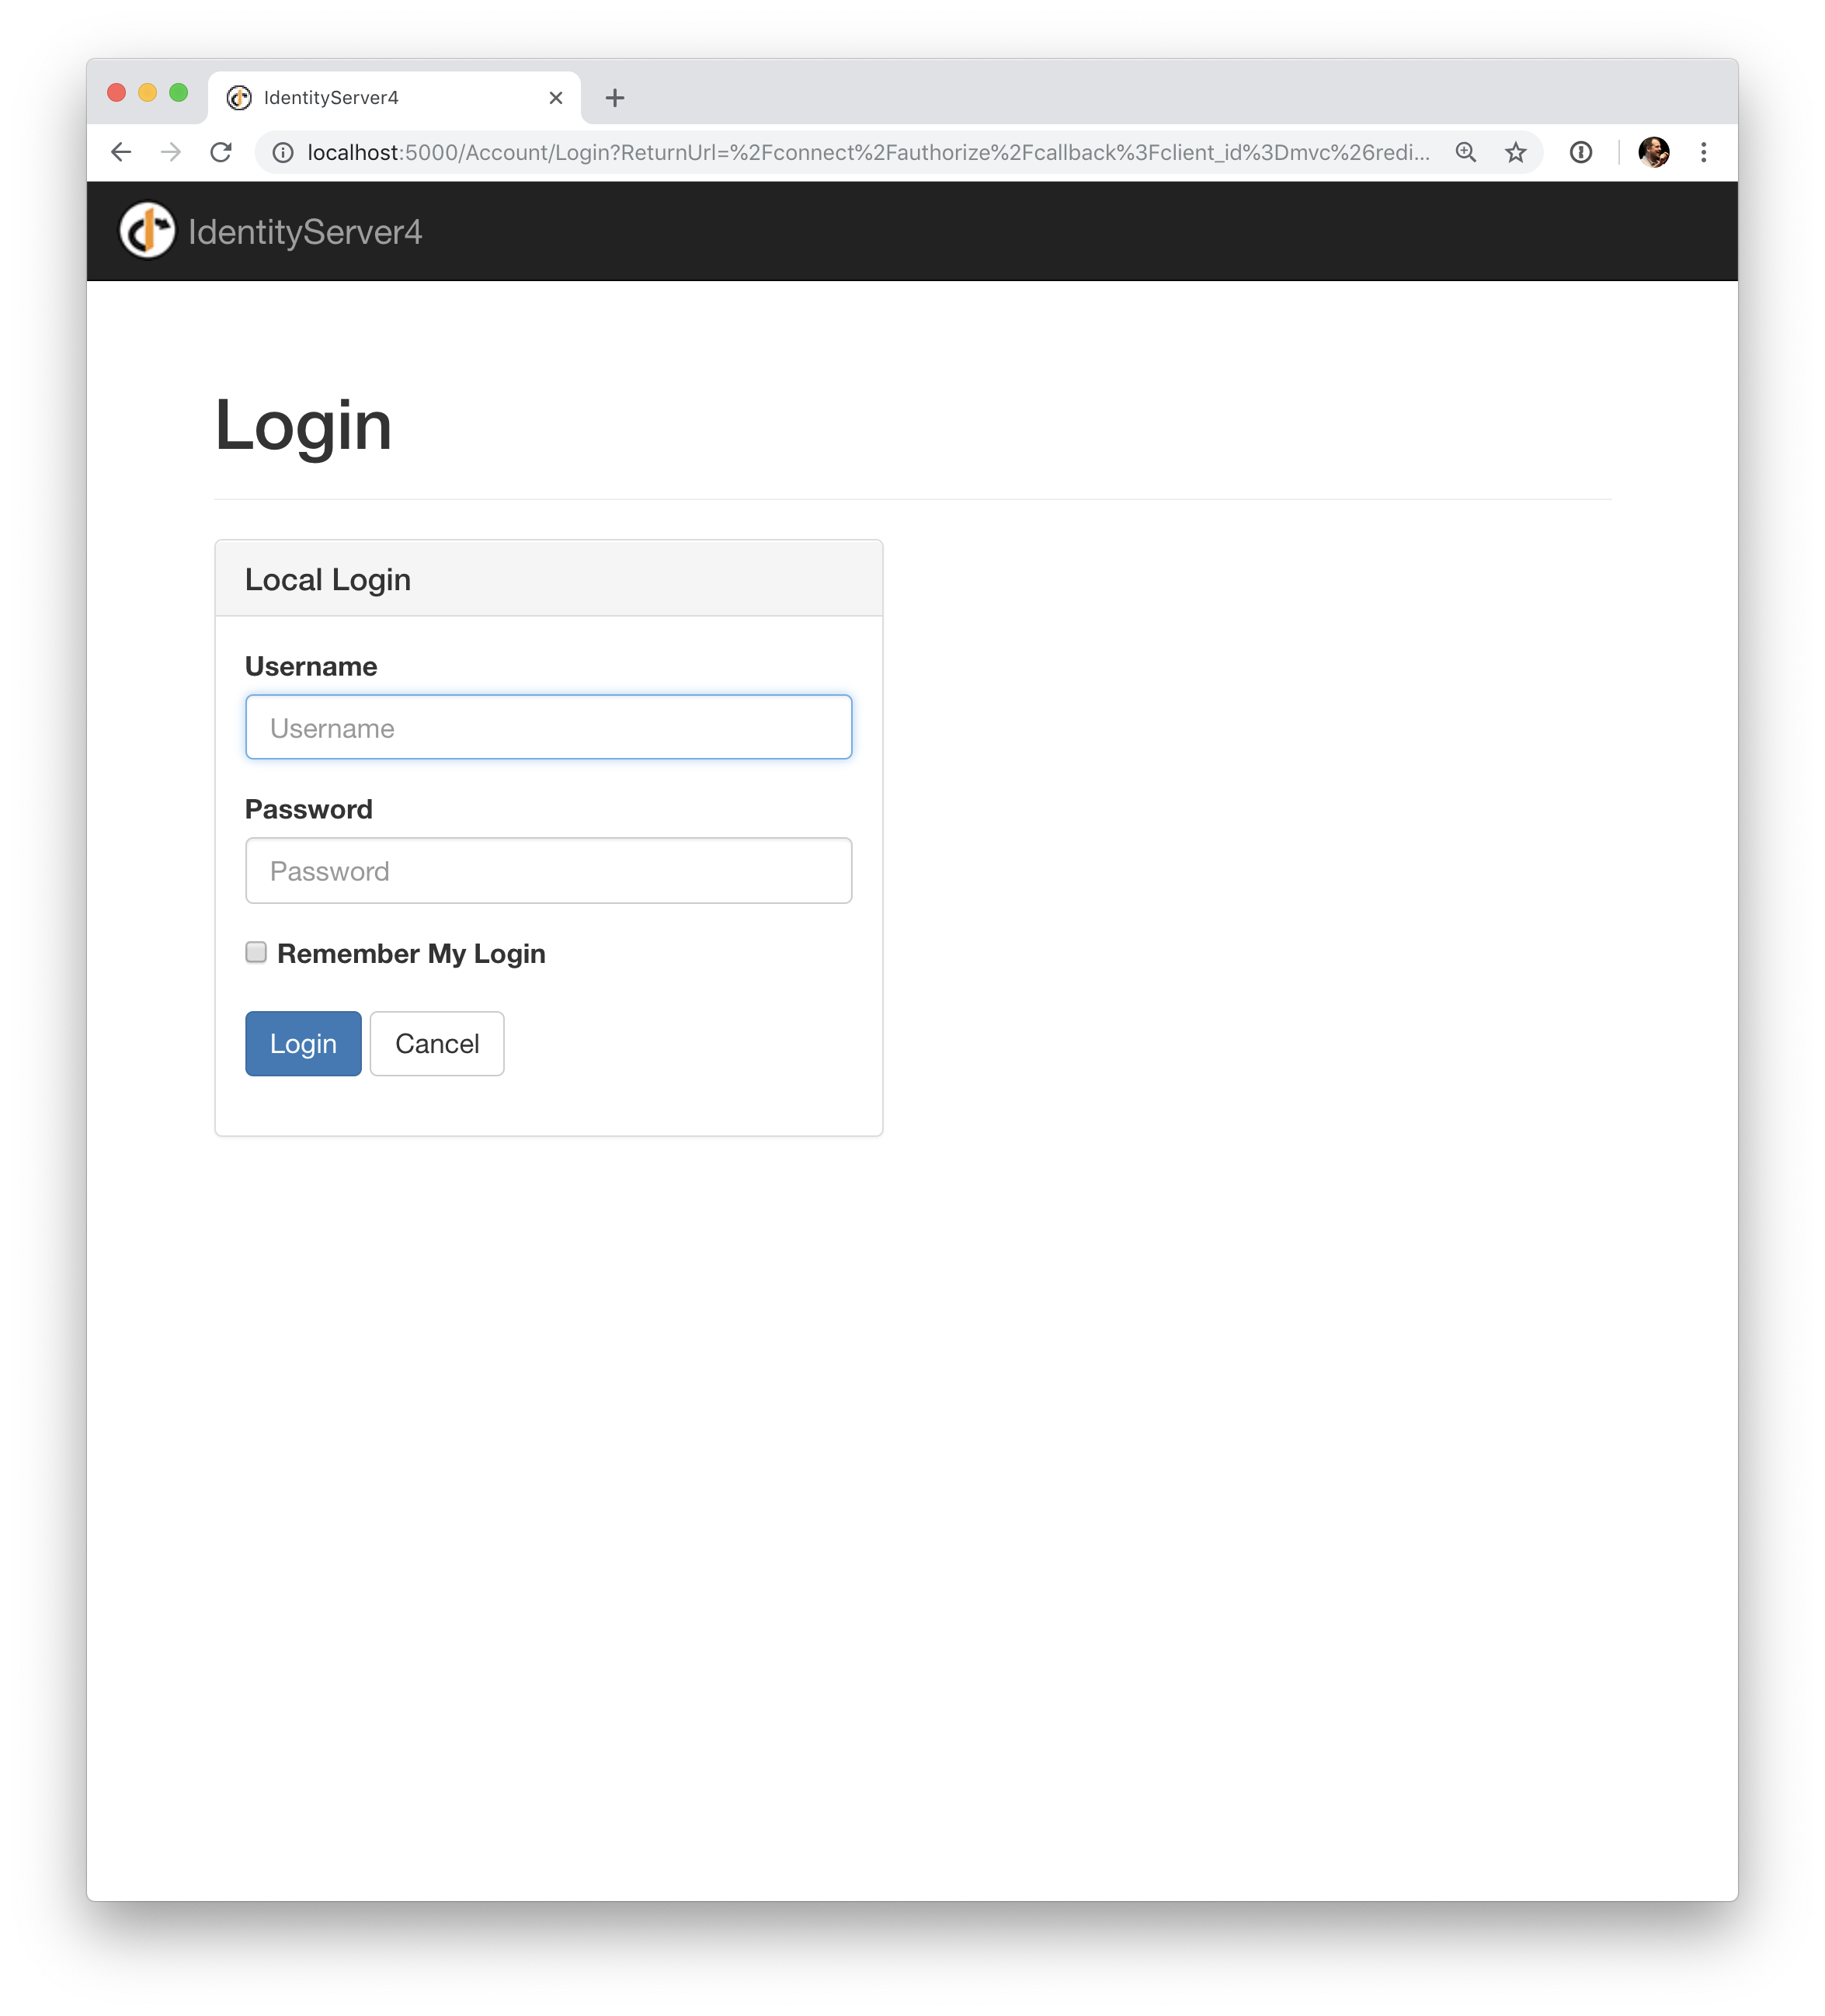
通过访问到受保护的Controller操作来触发身份认证。您应该会看到重定向到IdentityServer的登录页面。
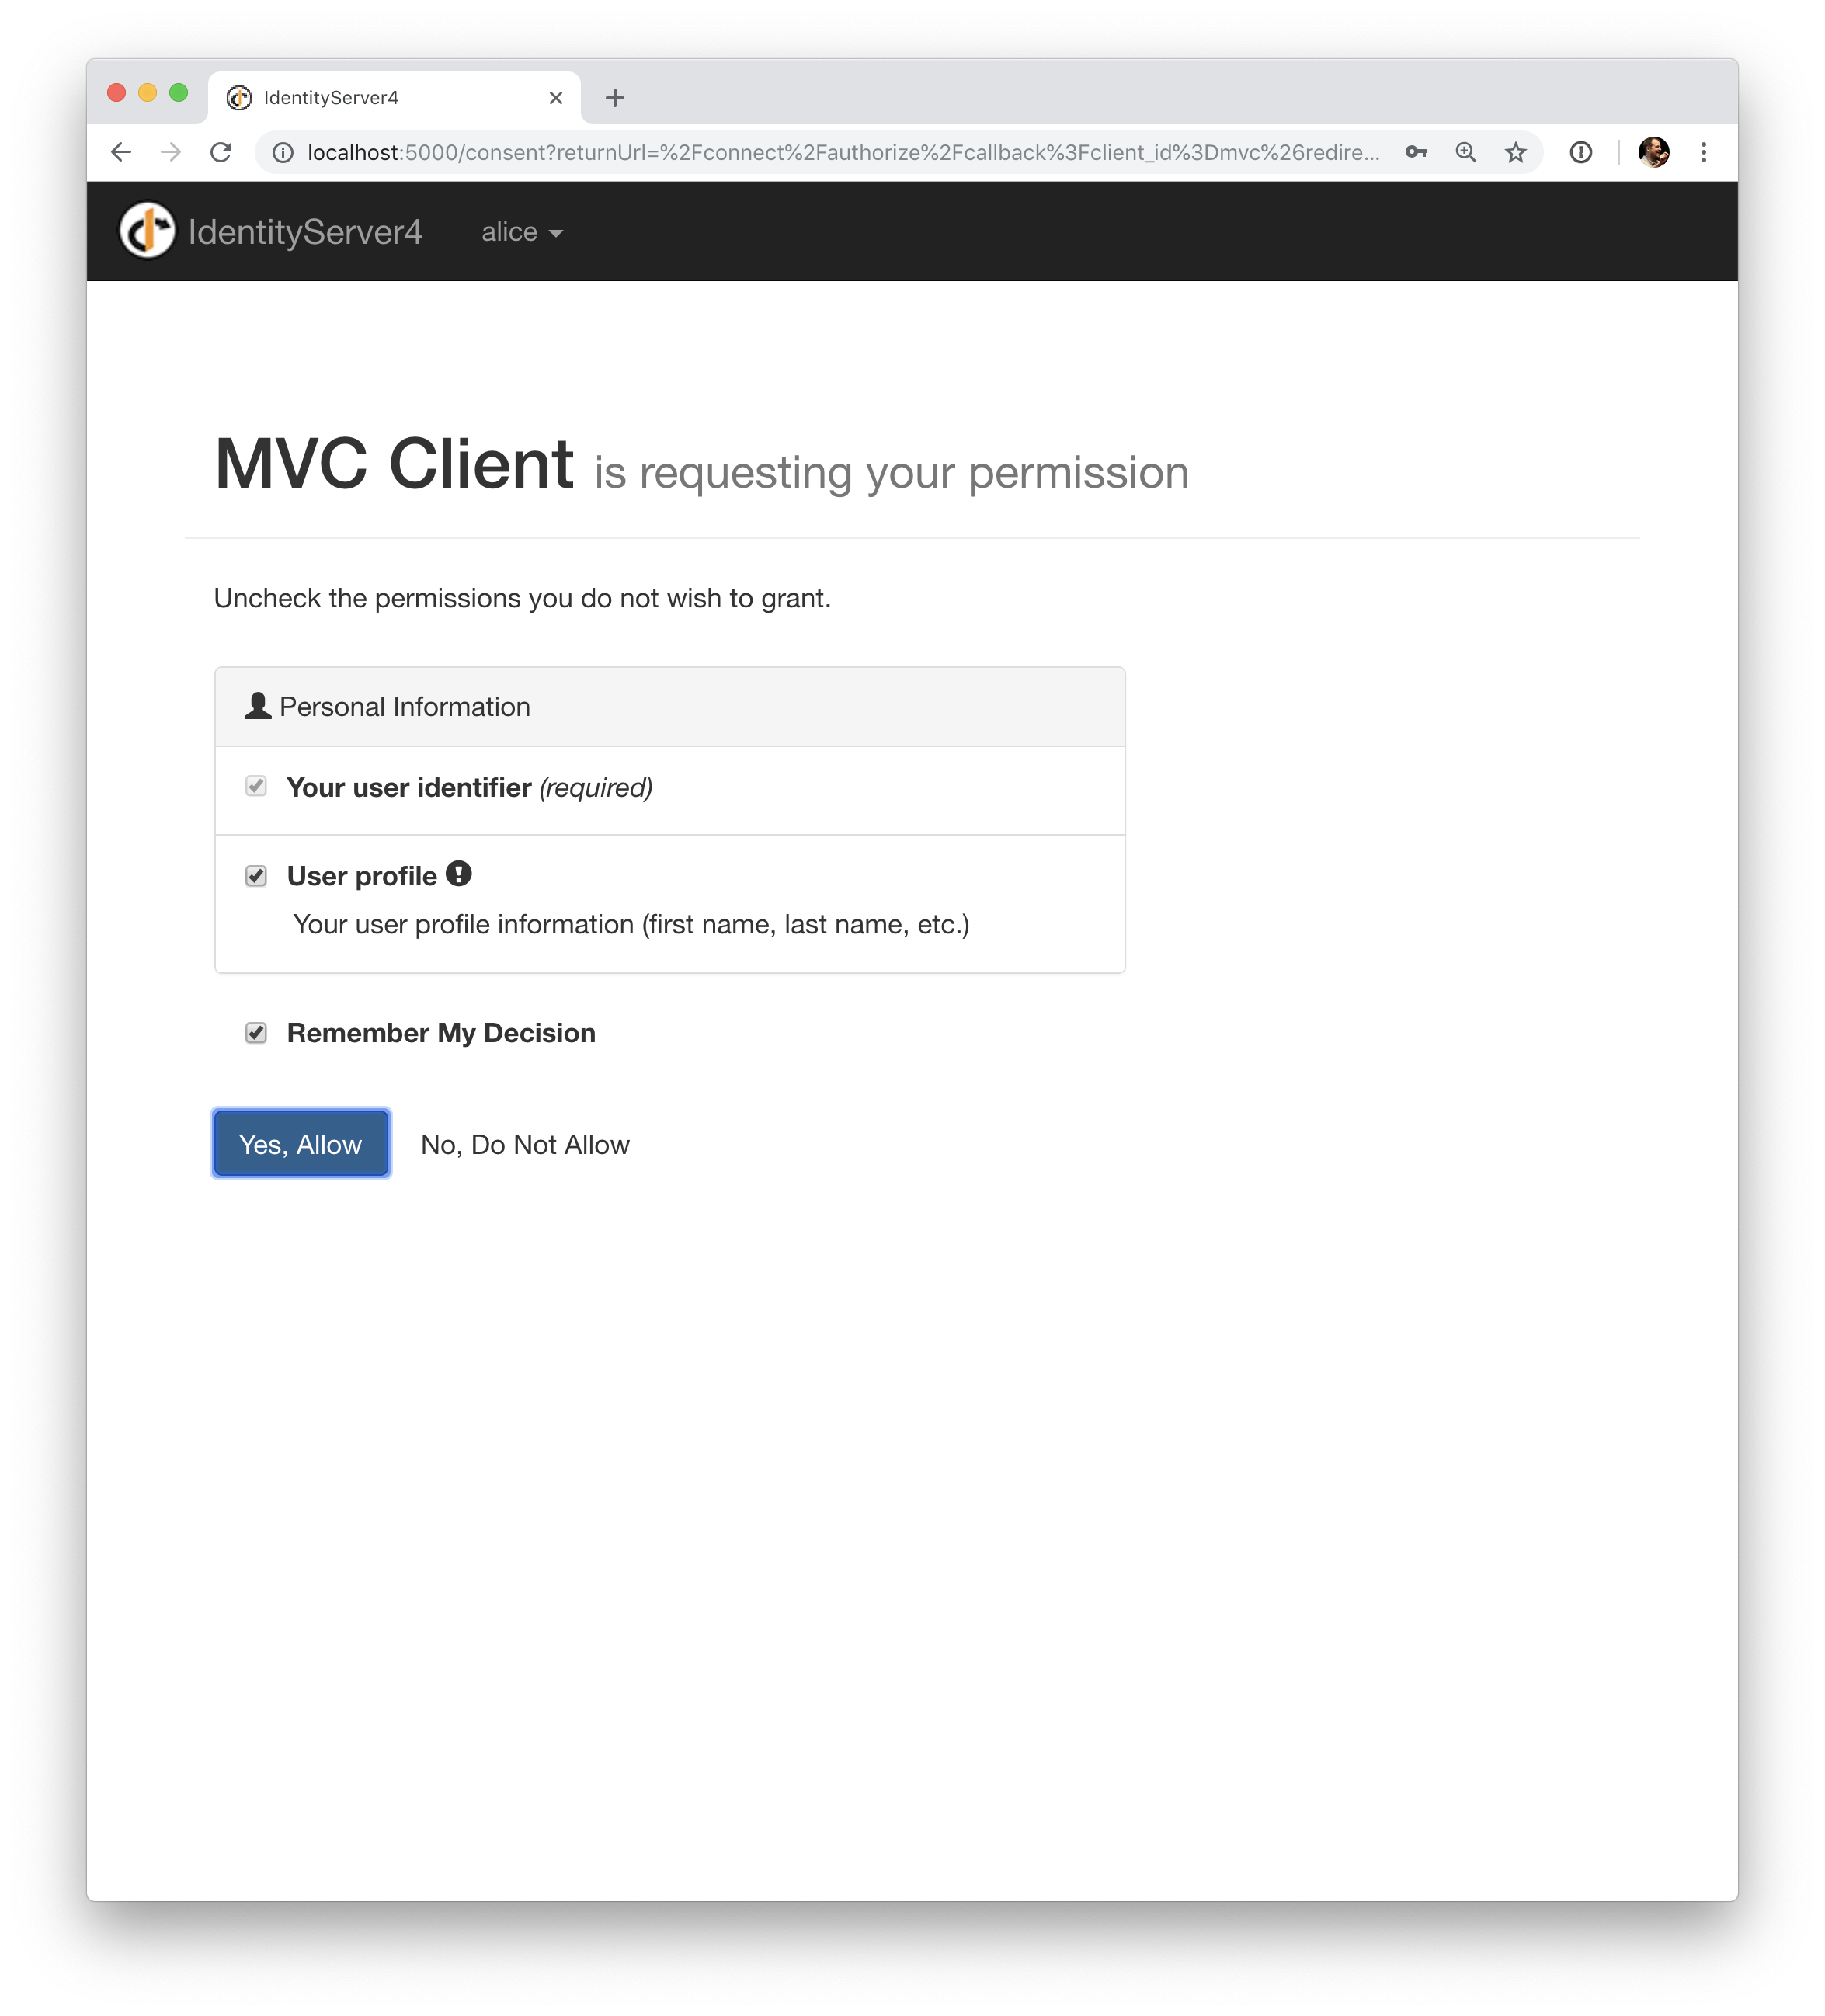
成功登录后,将向用户显示同意授权页面。在这里,用户可以决定是否要将他的身份信息发布到客户端应用程序。
可以使用客户端配置上
RequireConsent的属性关闭同意授权页面。
之后,IdentityServer将重定向回MVC客户端,其中OpenID Connect身份认证处理程序处理响应并通过设置 cookie 在本地登录用户。最后,MVC视图将显示cookie的内容。

如您所见,cookie 包含两部分,即用户的Claim和一些元数据。此元数据还包含IdentityServer发出的原始令牌。可以将此令牌复制到jwt.io以检查其内容。
添加注销
后一步是向MVC客户端添加注销。
使用IdentityServer等身份认证服务,仅清除本地应用程序cookie是不够的。此外,您还需要向IdentityServer进行往返交互以清除中央单点登录会话。
确切的协议步骤在OpenID Connect处理程序中实现,只需将以下代码添加到某个控制器即可触发注销:
public IActionResult Logout()
{
    return SignOut("Cookies", "oidc");
}
这将清除本地cookie,然后重定向到IdentityServer。IdentityServer将清除其cookie,然后为用户提供返回MVC应用程序的链接。
进一步的实验
如上所述,OpenID Connect处理程序默认要求 profile scope。此Scope还包括 name 或者 website。
让我们将这些Claim添加到用户信息中,以便IdentityServer可以将它们放入 identity token:
public static List<TestUser> GetUsers()
{
    return new List<TestUser>
    {
        new TestUser
        {
            SubjectId = "1",
            Username = "alice",
            Password = "password",

            Claims = new []
            {
                new Claim("name", "Alice"),
                new Claim("website", "https://alice.com")
            }
        },
        new TestUser
        {
            SubjectId = "2",
            Username = "bob",
            Password = "password",

            Claims = new []
            {
                new Claim("name", "Bob"),
                new Claim("website", "https://bob.com")
            }
        }
    };
}
下次进行身份认证时,您的Claim页面现在会显示这些Claim。
添加更多Claim - 以及更多Scope。OpenID Connect中间件上的Scope属性是您配置在身份认证期间将哪些Scope发送到IdentityServer。
值得注意的是,对令牌Claim的检索是一个可扩展点--IProfileService。 由于我们使用的是AddTestUsers,因此默认使用TestUserProfileService。 您可以在此处检查源代码以查看其工作原理,以便实现自定义Claim检索。

 浙公网安备 33010602011771号