
pm2实现git仓库代码一键配置部署到线上服务器
原文地址:https://www.cnblogs.com/yalong/p/13932980.html
第一步 先实现 ssh的免密登录远程服务器:
mac上配置 ssh 免密登录远程服务器教程看这里 https://www.cnblogs.com/yalong/p/13897370.html
第二步 初始化项目, 并把项目部署到git仓库
下面用几个最简单的项目做演示, 项目目录下面就这个三个文件

把项目部署到git仓库,记住git仓库地址 比如 git@github.com:xxxxx.git
app.js 文件内容如下:(记得安装 http 模块):


const http = require('http')

const homePage = `
  <!DOCTYPE html>
  <html>
    <head>
      <meta charset="utf-8">
      <title>Node.js 静态网站/API 部署上线示例</title>
      <style>
        h1 {
          text-align: center;
          color: #ff6600;
        }
      </style>
    </head>
    <body>
      <h1>Node.js 静态网站/API 部署上线示例</h1>
    </body>
  </html>
`

http.createServer((req, res) => {
  res.statusCode = 200
  res.setHeader('Content-Type', 'text/html')
  res.end(homePage)
}).listen(5000, () => {
  console.log('Server running at 5000')
})
ecosystem.yaml 文件内容如下:
apps:
  - script: app.js
    name: NodeDeployStatic
    env:
      COMMON_VARIABLE: true
    env_production:
      NODE_ENV: production
deploy:
  production:
    user: root
    host:
      - 12.12.12.12
    port: '12'
    ref: origin/master
    repo: git@github.com:xxxxx.git
    path: /root/www/node-deploy-static/production
    ssh_options: StrictHostKeyChecking=no
    pre-deploy: git fetch --all
    post-deploy: 'npm i && pm2 startOrRestart ecosystem.yaml --env production'
    env:
      NODE_ENV: production
package.json 文件内容如下:
{
  "name": "deploy-static",
  "version": "1.0.0",
  "description": "练习pm2 的 node静态部署",
  "main": "app.js",
  "scripts": {
    "test": "echo \"Error: no test specified\" && exit 1"
  },
  "repository": {
    "type": "git",
    "url": ""
  },
  "author": "",
  "license": "ISC",
  "dependencies": {},
  "devDependencies": {
    "http": "0.0.1-security"
  }
}
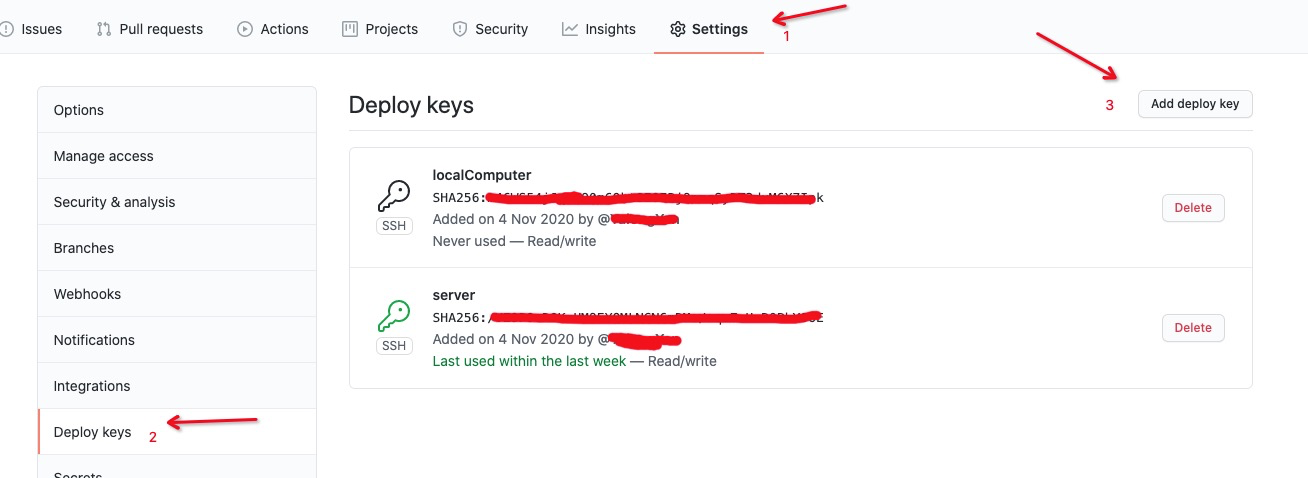
第三步 把本地的 id_rsa 的公钥被配置到git仓库里
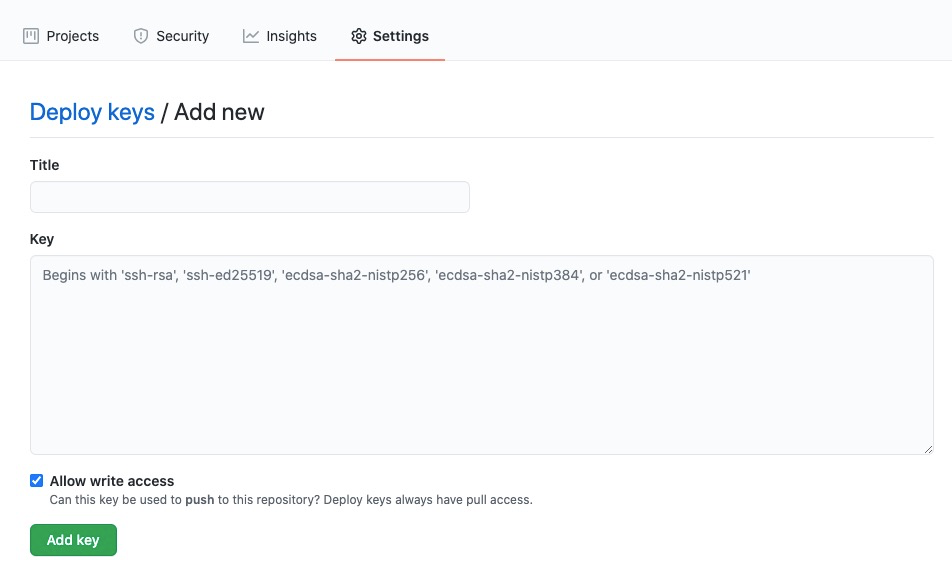
在本地 cat 一下 .ssh/id_rsa.pub 这公钥,全部选中,然后复制下来,来到 Git 的个人配置后台,找到 Deploy keys 设置,然后,粘贴进去,提交。
第四步 把服务器的的 id_rsa 的公钥被配置到git仓库里
在服务器上 cat 一下 .ssh/id_rsa.pub 这公钥,全部选中,然后复制下来,来到 Git 的个人配置后台,找到 Deploy keys 设置,然后,粘贴进去,提交(添加公钥方式同第三步)
服务上记得也要安装 git Ubuntu 下安装 git 方式: sudo apt-get install git
安装完成 git 并且将服务器上的 .ssh/id_rsa.pub 配置到git仓库的后台之后,我们在服务器上随便新建一个文件夹temp/, 并且 cd 进去然后执行:
# git clone 你的线上私有仓库的地址
git clone git@git.xxxxx.git
中间会询问你是否要继续,输入 yes 继续即可,这样我们就把从本地上传到线上仓库的代码给 clone 到了服务器。
第五步 配置 PM2 一键部署项目目录
上面,我们把本地的项目都推送到了私有仓库,并且服务器也能下载到了私有仓库的项目代码,
那这个时候我们就需要有一个傻瓜式的管理代码更新和服务运行的工具,
帮助我们完成“同步代码更新”以及“服务的重启”之类的工作,这个傻瓜式的工具就是 PM2。
PM2常用命令大全看这里 https://www.cnblogs.com/yalong/p/13931999.html
在本地命令行执行
pm2 deploy ecosystem.yaml production setup 注意: 首次部署 需要使用 setup, 第一次成功之后就不用使用了
在服务器自动创建对应的目录,以及把目录分配好,为正式发布做环境准备,如果不能读取和克隆远端的分支,
这个原因是,Git 仓库的分支 clone 的时候会校验可信任的 IP,我们只需要在服务器上先 clone 一下就好了。
Host key verification failed.
fatal: Could not read from remote repository.
Please make sure you have the correct access rights
and the repository exists.
  failed to clone
Deploy failed
首先来到服务器的命令下面,把这个分支随便 clone 一个地方
git clone git@xxxxx.git
clone 的时候,可能会有提醒说是否想要继续链接,输入 yes 回车就可以了,然后再切回到本地的命令行窗口,重新执行一下
pm2 deploy ecosystem.json production setup
就可以了,这就把部署的目录和仓库都弄好了。我们可以来看下这个目录组成,首先在 node-deploy-static 下面生成了一个 production 的文件夹,然后在它内部又创建了 3 个子文件夹:

当前的服务所运行的文件夹,source 是 clone 下来的源码,shared 里面是日志文件和 pid 之类,其中 current 是 source 的软连接,两者是一样的代码
注意 第一次部署的时候 必须加上setup
pm2 deploy ecosystem.json production setup
之后在部署的时候 就不用加了
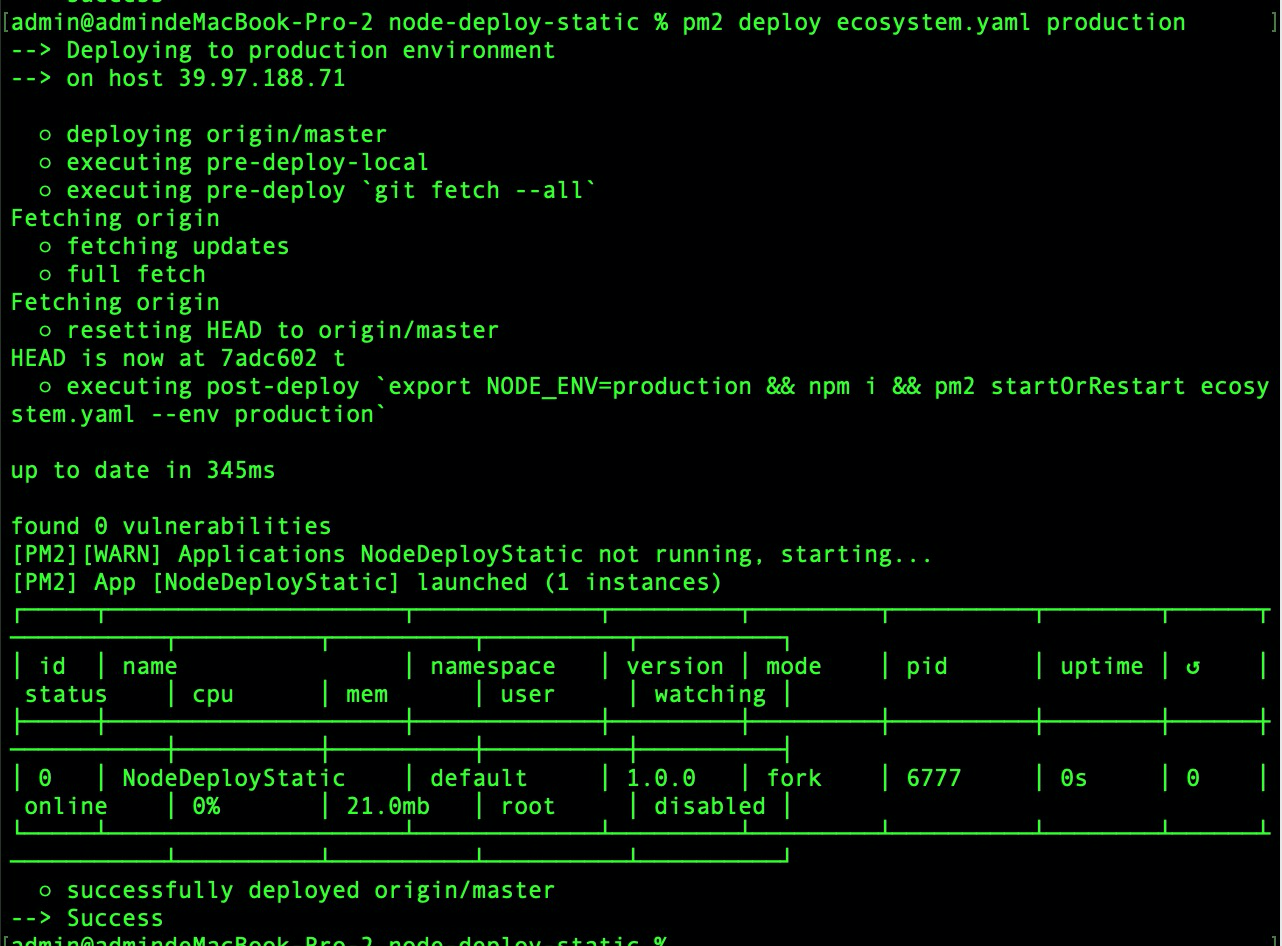
pm2 deploy ecosystem.json production
部署成功如下所示:
更多 deploy的 命令可以输入 pm2 deploy help 进行查看
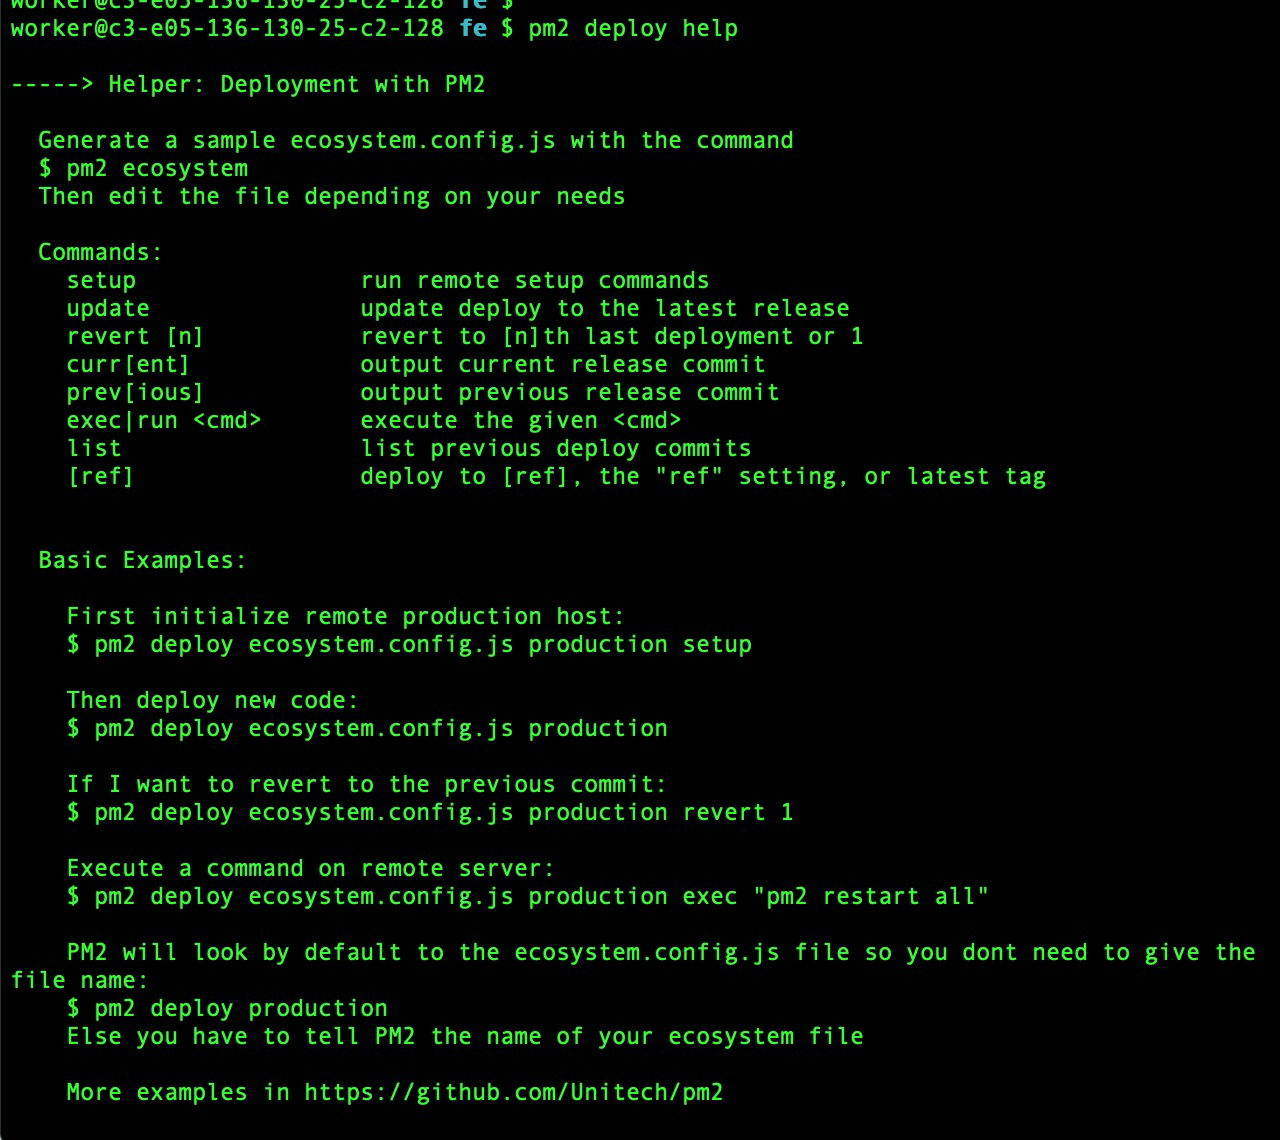
相关命令的解释如下:
 setup                初始化(第一次部署才會用到)
  update               更新到最新的 commit
  revert [n]           回复到上一次的 deployment
  curr[ent]            输出目前上线中的 commit
  prev[ious]           输出上一次部署的 commit
  exec|run <cmd>       执行指定的指令
  list                 列出包含目前,以及之前所部署的 commit
  [ref]                部署到指定的 ref
遇到的问题:
一. pm2自动部署的时候报错 提示npm/pm2 command not found post-deploy hook failed Deploy failed 1
可以查看这个链接 https://www.cnblogs.com/yalong/p/13935503.html

 浙公网安备 33010602011771号