
Spring框架学习
一.Spring框架的基本概念
Spring框架是java众多开源项目中的一个,是基于分层思想的javaEE应用一站式轻量级开源框架.其主要核心是IOC/DI(控制反转/依赖注入)和AOP(面向切面)两大技术,使其在java开发中能够使项目轻松解耦,提高开发效率.
二.环境搭建
1.坐标依赖添加
<!-- spring 核心jar -->
    <dependency>
      <groupId>org.springframework</groupId>
      <artifactId>spring-context</artifactId>
      <version>4.3.2.RELEASE</version>
    </dependency>
2.bean的编写
public class HelloService {
    public void hello(String test){
        System.out.println("Hello Spring!" + test);
    }
3.Spring配置文件的编写
<?xml version="1.0" encoding="UTF-8"?>
<beans xmlns="http://www.springframework.org/schema/beans"
       xmlns:xsi="http://www.w3.org/2001/XMLSchema-instance"
       xsi:schemaLocation="http://www.springframework.org/schema/beans
http://www.springframework.org/schema/beans/spring-beans.xsd">
    <!--
    xmlns 即 xml namespace xml 使用的命名空间
    xmlns:xsi 即 xml schema instance xml 遵守的具体规范
    xsi:schemaLocation 本文档 xml 遵守的规范 官方指定
    -->
    <bean id="helloService" class="com.back.service.HelloService"></bean>
</beans>
4.编写测试类
public class TestSpring {
    @Test
    public void test01(){
        ApplicationContext context = new ClassPathXmlApplicationContext("Spring.xml");
        HelloService helloService = (HelloService) context.getBean("helloService");

        helloService.hello("zhangsan");
    }
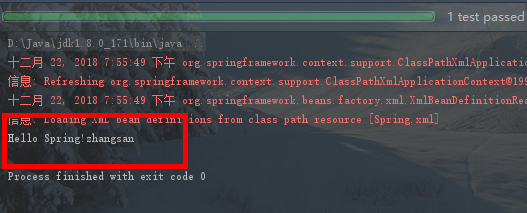
5.运行测试,打印输出

三.简单模拟Spring框架
1.定义bean 工厂接口,提供获取bean方法
public interface ApplicationContext {
    public Object getBean(String id);
}
2.编写实体类
public class Bean {
    private String id;
    private String clazz;

    public String getId() {
        return id;
    }

    public void setId(String id) {
        this.id = id;
    }

    public String getClazz() {
        return clazz;
    }

    public void setClazz(String clazz) {
        this.clazz = clazz;
    }

    @Override
    public String toString() {
        return "Bean{" +
                "id='" + id + '\'' +
                ", clazz='" + clazz + '\'' +
                '}';
    }
3.定义bean工厂接口实现类
public class RelApplicationContext implements ApplicationContext {

    /***
     * 1. 读取xml配置文件
     * 2. 生成bean实例
     * 3. 取出bean实例
     * */

    private String path;// xml配置路径

    private List<Bean> beanList = new ArrayList<>();// 存放bean配置信息

    private Map<String, Object> beanMap = new HashMap<>();// 存放bean实例,以及映射

    public RelApplicationContext(String path) {
        this.path = path;
        //1. xml解析
        parseXml(path);
        //2. 创建bean实例
        createBean();
    }

    /**
     * 2. 创建bean实例
     */
    private void createBean() {
        /***
         * 循环变量beanList ,生成bean
         * */
        if(beanList!=null && beanList.size()>0){
            for(Bean sxtBean : beanList){
                try {
                    beanMap.put(sxtBean.getId(), Class.forName(sxtBean.getClazz()).newInstance());
                } catch (InstantiationException e) {
                    e.printStackTrace();
                } catch (IllegalAccessException e) {
                    e.printStackTrace();
                } catch (ClassNotFoundException e) {
                    e.printStackTrace();
                }
            }
        }
    }

    /**
     * 解析xml
     * @param path
     */
    private void parseXml(String path){
        SAXReader reader = new SAXReader();
        if(null!=path && !"".equals(path)){

            try {
                //URL url = new URL(path);
                URL url = this.getClass().getClassLoader().getResource(path);
                Document document = reader.read(url);

                List<Element> list = document.selectNodes("//beans/bean");
                for (Element ele : list){
                    System.out.println(ele.attributeValue("id") + " : " + ele.attributeValue("class"));

                    Bean sxtBean = new Bean();
                    sxtBean.setId(ele.attributeValue("id"));
                    sxtBean.setClazz(ele.attributeValue("class"));
                    beanList.add(sxtBean);
                }
            } catch (DocumentException e) {
                e.printStackTrace();
            }

        }else{
            System.err.println("文件不存在");
        }

    }

    @Override
    public Object getBean(String id) {
        return beanMap.get(id);
    }
}
4.实现获取bean 方法,测试
 @Test
    public void test02(){
        ApplicationContext context = new ClassPathXmlApplicationContext("Spring.xml");
        HelloService helloService = (HelloService) context.getBean("helloService");

        helloService.hello("lisi");

    }
五.SpringIoc实例化bean对象的三种方式
1.构造器的方式实例化 bean 对象(常用方式)
 <!-- 1.构造器方式 -->
    <bean id="userDao" class="com.back.dao.UserDao"></bean>
2.静态工厂方式实例化bean对象
<!-- 2.静态工厂方式 -->
    <bean id="accountDao" class="com.back.factory.StaticFactory" factory-method="createAccountDao"></bean>
3.实例化工厂方式实例化bean对象
<!-- 3.实例化工厂方式 -->
    <bean id="instanceFactory" class="com.back.factory.InstanceFactory"></bean>
    <bean id="helloDao" factory-bean="instanceFactory" factory-method="createHelloDao"></bean>
六.Spring依赖注入(DI)
1.set注入(常用方式)
<bean id="userServiceImpl" class="com.back.service.impl.UserServiceImpl"> <property name="userDao" ref="userDao"></property> </bean> <bean id="userDao" class="com.back.dao.UserDao"></bean
2.构造器注入
<bean id="userDao" class="com.back.dao.UserDao"></bean> <bean id="userServiceImpl2" class="com.back.service.impl.UserServiceImpl2"> <constructor-arg ref="userDao"></constructor-arg> </bean>
3.静态工厂注入
<bean id="userDao" class="com.back.factory.StaticFactory" factorymethod="createUserDao"></bean> <bean id="userService" class="com.back.service.UserService"> <property name="userDao" ref="userDao"></property> </bean>
4.实例化工厂注入
<bean id="BeanFactory" class="com.back.factory.BeanFactory" > <bean id="instanceFactory" class="com.back.factory.InstanceFactory"></bean>
5.IOC集合类型注入
1.list集合注入
<bean id="userServiceImpl" class="com.back.service.impl.UserServiceImpl">
   <property name="list">
      <list>
         <value>河南烩面</value>
         <value>南方臊子面</value>
         <value>油泼面</value>
         <value>方便面</value>
      </list>
   </property>
</bean>
2.set集合注入
<bean id="userServiceImpl" class="com.back.service.impl.UserServiceImpl">
  <property name="set">
     <set>
        <value>快乐小馒头</value>
        <value>北方馒头</value>
        <value>天津麻花</value>
        <value>新疆大饼</value>
      </set>
   </property>
</bean>
3.map类型属性注入
<property name="map">
   <map>
     <entry>
      <key><value>西安</value></key>
        	<value>兵马俑</value>
       </entry>
       <entry>
         <key><value>上海</value></key>
       		<value>陆家嘴</value>
        </entry>

        <entry>
          <key><value>北京</value></key>
             <value>长城</value>
      </entry>
    </map>
</property>
4.properties属性注入
<property name="properties">
   <props>
      <prop key="北京">天安门</prop>
      <prop key="上海">东方明珠</prop>
      <prop key="广州">小蛮腰</prop>
      <prop key="深圳">世界之窗</prop>
   </props>
</property>
6.注解注入
1.加入spring-aop jar包 spring-aop-4.3.2.RELEASE.jar
2.Xml 配置: 加入context命名空间 和xsd地址
<?xml version="1.0" encoding="UTF-8"?>
<beans xmlns="http://www.springframework.org/schema/beans"
       xmlns:xsi="http://www.w3.org/2001/XMLSchema-instance"
       xmlns:context="http://www.springframework.org/schema/context"
       xmlns:aop="http://www.springframework.org/schema/aop"
       xsi:schemaLocation="http://www.springframework.org/schema/beans
        http://www.springframework.org/schema/beans/spring-beans.xsd
        http://www.springframework.org/schema/context
        http://www.springframework.org/schema/context/spring-context.xsd
        http://www.springframework.org/schema/aop
        http://www.springframework.org/schema/aop/spring-aop.xsd">

    <context:component-scan base-package="com.back"/>
</beans>
3.添加context:annotation-config/ 配置
<dependency>
   <groupId>org.springframework</groupId>
   <artifactId>spring-aop</artifactId>
   <version>4.3.9.RELEASE</version>
</dependency>
@Resource 属性字段上或set 方法上(由J2EE提供)
@Autowired 属性字段或set 方法上 (由Spring框架提供)
七.Spring IOC容器自动扫描管理bean
<context:component-scan base-package="com.back"/>

 浙公网安备 33010602011771号