[SpringMVC]3.使用注解构建SpringMVC项目
1.在web.xml中配置DispatcherServlet
(与之前一样)
点击查看代码
<?xml version="1.0" encoding="UTF-8"?>
<web-app xmlns="http://xmlns.jcp.org/xml/ns/javaee"
         xmlns:xsi="http://www.w3.org/2001/XMLSchema-instance"
         xsi:schemaLocation="http://xmlns.jcp.org/xml/ns/javaee http://xmlns.jcp.org/xml/ns/javaee/web-app_4_0.xsd"
         version="4.0">
    <servlet>
        <servlet-name>springmvc</servlet-name>
        <servlet-class>org.springframework.web.servlet.DispatcherServlet</servlet-class>
        <!-- 配置初始化参数,用于读取 SpringMVC 的配置文件 -->
        <init-param>
            <param-name>contextConfigLocation</param-name>
            <param-value>classpath:springmvc-servlet.xml</param-value>
        </init-param>
        <!-- 配置 servlet 的对象的创建时间点:应用加载时创建。
        取值只能是非 0 正整数,表示启动顺序 -->
        <load-on-startup>1</load-on-startup>
    </servlet>
    <servlet-mapping>
        <servlet-name>springmvc</servlet-name>
        <url-pattern>/</url-pattern>
    </servlet-mapping>
</web-app>
2.在springmvc-servlet.xml中配置
<beans xmlns="http://www.springframework.org/schema/beans"
       xmlns:xsi="http://www.w3.org/2001/XMLSchema-instance"
       xmlns:context="http://www.springframework.org/schema/context"
       xmlns:mvc="http://www.springframework.org/schema/mvc"
       xsi:schemaLocation="http://www.springframework.org/schema/beans
        https://www.springframework.org/schema/beans/spring-beans.xsd
        http://www.springframework.org/schema/context
        https://www.springframework.org/schema/context/spring-context.xsd
        http://www.springframework.org/schema/mvc
        https://www.springframework.org/schema/mvc/spring-mvc.xsd
">
    <context:component-scan base-package="com.wang.controller"/>
<!--    让springMVC不处理静态资源-->
    <mvc:default-servlet-handler/>
<!--    开启注解驱动,并自动注入HandlerMapping的实现类和HandlerAdapter的实现类-->
    <mvc:annotation-driven/>

    <bean id="internalResourceViewResolver" class="org.springframework.web.servlet.view.InternalResourceViewResolver">
        <property name="prefix" value="/WEB-INF/jsp/"/>
        <property name="suffix" value=".jsp"/>
    </bean>
</beans>
与之前不同的点:不需要手动装配HandlerMapping和HandlerAdapter了,mvc:annotation-driven标签自动帮我们装配了DefaultAnnotationHandlerMapping与AnnotationMethodHandlerAdapter 两个bean。
3.写controller类
package com.wang.controller;
import org.springframework.stereotype.Controller;
import org.springframework.ui.Model;
import org.springframework.web.bind.annotation.RequestMapping;
@Controller
@RequestMapping("/hello")
public class HelloController {
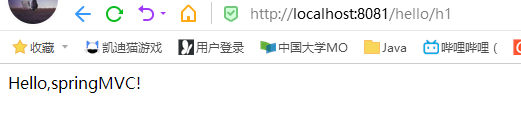
@RequestMapping("/h1")
public String hello(Model model){
model.addAttribute("msg","Hello,springMVC!");
return "hello";
}
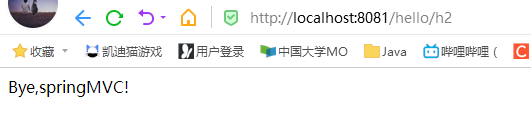
@RequestMapping("/h2")
public String bye(Model model){
model.addAttribute("msg","Bye,springMVC!");
return "bye";
}
}
@Controller注解可以将类装配到spring,并定义一个控制器类。
@RequestMapping()可以将请求url映射到控制器的对应方法上。
比如localhost:8080/hello/h1就映射到了HelloController的hello方法上。
建议类名上不要使用@RequestMapping(),而是直接在方法名上写死,不然容易漏写。
Model用来装数据,返回的String交给视图解析器处理。
运行结果:

 浙公网安备 33010602011771号