起因:之前在*C*S*D*N上面发了一篇通过frp和二级域名,将2个摄像头监控服务聚合到一起的文章,觉得一般私有服务应用还可以。后来因为想增加一个piwigo相册,在用到app的时候,必须填写https地址,所以研究了一下如何通过frp透传https服务,遂有了以下纪录。
1. 我参考一下我自己的文章: 通过二级域名与frp实现不同web服务的聚合透传_lggirls的博客-CSDN博客_frp web 域名
2.frps,也就是服务器端的设置
在本例中,nginx和frps服务器端是安装在一起的。
主域名:test333.com www.test333.com (这是购买的带有ipv4和ipv6的外域服务器)
远程服务: camera.test333.com (公司的摄像头) home.test333.com (家中的摄像头) photos.test333.com (新增加的piwigo相册)
3. 增加二级域名、解析到服务器上、通过安装certbot为每一个域名申请CA证书。
这一部分可以自行搜索一番,下面主要是CA证书的申请
certbot --nginx -d photos.xykjservice.com ##可以多添加几个 -d 将几个域名合并到一个证书中
申请成功后,会出现证书位置的相关信息,把他们复制保存起来,以便后期使用
CA证书格式的转换:
cd /etc/letsencrypt/live/photos.test333.com.com/
openssl x509 -in fullchain.pem -out fullchain.crt
openssl rsa -in privkey.pem -out privkey.key
CA证书的撤销
certbot revoke --cert-path /etc/letsencrypt/live/photos.test333.com.com/cert.pem
--cert-path 后面跟证书的路径,要撤销哪个,就写哪个。注意最后的文件是cert.pem,
建议:最好单独为每个二级域名申请证书,主要是方便使用。尽管泛域名证书看上去管理更简单,但是使用比较麻烦,我还没有找到好的解决思路,没有验证出来。
4. frp服务端和客户端的配置。和http一样,没有差别
4.1 服务端 frps.ini
vim /etc/frp/frps.ini
#frps.ini的内容
[common]
bind_port = 54321
vhost_http_port = 8080
4.2 客户端 frpc.ini 这里采用了简单的配置法,和http模式一样。 主要是通过服务器上的nginx进行转发和重写
# 公司摄像头客户端frpc.ini 内容
[common]
server_addr = www.test333.com
server_port = 54321
[web-1]
type = http
local_ip = 127.0.0.1
local_port = 80
custom_domains = camera.test333.com

# 家中摄像头客户端frpc.ini 内容
[common]
server_addr = www.test333.com
server_port = 54321
[web-2]
type = http
local_ip = 127.0.0.1
local_port = 80
custom_domains = home.test333.com

# piwigo相册客户端frpc.ini 内容
[common]
server_addr = www.test333.com
server_port = 54321
[web-3]
type = http
local_ip = 127.0.0.1
local_port = 80
custom_domains = photos.test333.com
5. 反向代理服务器 nginx的配置。 关键步骤
vim /etc/nginx/nginx.conf
# 这里仅对新的photos.test333.com的配置段进行举例,测试时仅申请了一个域名的CA证书。其相关配置内容如下:
server {
  server_name photos.test333.com ;
  location / {
   proxy_pass http://127.0.0.1:8080;  ##将本地8080端口(frps所服务的端口)所获得的内容作为该域名的内容,nginx会根据域名进行自动匹配和转跳
   proxy_redirect http://$host/ http://$http_host/;
   proxy_set_header X-Real-IP $remote_addr;
   proxy_set_header X-Frowarded-Proto https;
   proxy_set_header Host $host;
  }

### SSL功能的开启和证书的配置
    listen 443 ssl; # managed by Certbot
    ssl_certificate /etc/letsencrypt/live/photos.test333.com/fullchain.pem; # managed by Certbot
    ssl_certificate_key /etc/letsencrypt/live/photos.test333.com/privkey.pem; # managed by Certbot
    include /etc/letsencrypt/options-ssl-nginx.conf; # managed by Certbot
    ssl_dhparam /etc/letsencrypt/ssl-dhparams.pem; # managed by Certbot
}

##将http转跳为 https
server {
    if ($host = photos.test333.com) {
        return 301 https://$host$request_uri;
    } # managed by Certbot

  listen 80;
  server_name photos.test333.com ;
    return 404; # managed by Certbot
}
6. 后端frpc所在远程服务的 nginx配置
vim /etc/nginx/sites-enabled/default
## 内容如下
server {
        listen 80 default_server;
        listen [::]:80 default_server;
     root /var/www/html;
        # Add index.php to the list if you are using PHP
     index index.html index.php index.htm index.nginx-debian.html;
########下面的 SSL配置可以不做,因为主要是通过frps所在服务的nginx实现的http → https。这里是因为想在局域网下也用https才将证书拷贝过来的。
        # SSL configuration
        #
         listen 443 ssl default_server;
         listen [::]:443 ssl default_server;
         ssl_certificate /home/live/photos.test333.com/fullchain.crt
         ssl_certificate_key /home/live/photos.test333.com//privkey.key

        server_name _;

        location / {
                # First attempt to serve request as file, then
                # as directory, then fall back to displaying a 404.
                try_files $uri $uri/ =404;
        }
        # pass PHP scripts to FastCGI server
        #
        location ~ \.php$ {
                include snippets/fastcgi-php.conf;

                # With php-fpm (or other unix sockets):
                fastcgi_pass unix:/run/php/php8.1-fpm.sock;
                # With php-cgi (or other tcp sockets):
                #fastcgi_pass 127.0.0.1:9000;
        }
}
7.重启服务。
先检查一下nginx配置是否有错: nginx -t 。 根据错误提示进行需改
##在服务端上
systemctl restart frps
systemctl restart nginx

##在客户端上
systemctl restart frpc
systemctl restart nginx
8. 展示结果
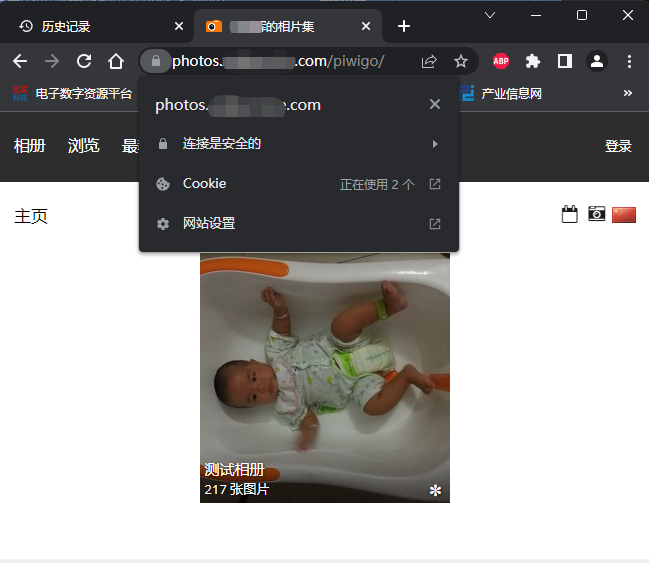
先清除一下历史记录和cookie。 输入: http://photos.test333.com 看是否能正常打开。若打开正常,则将地址栏的地址复制一下,粘贴到txt文档中,看网址前缀知否变成了https, 如果是,则说明配置是成功的。


 浙公网安备 33010602011771号