
实验四《Android程序设计》实验报告封面
课程:Java程序设计
班级:1753班
姓名:许钰玮
学号:20175329
指导教师:娄嘉鹏
实验日期:2019年5月13日
实验时间:13:45 - 15:25
实验序号:21
实验名称:Android程序设计
一.实验内容
1. Android Stuidio的安装测试
2. Activity测试
3. UI测试
4.布局测试
5.事件处理测试
二.实验步骤
- 第一部分: Android Stuidio的安装测试
- 要求:
- 参考《Java和Android开发学习指南(第二版)(EPUBIT,Java for Android 2nd)》第二十四章:
- 参考 http://www.cnblogs.com/rocedu/p/6371315.html#SECANDROID ,安装 Android Stuidio
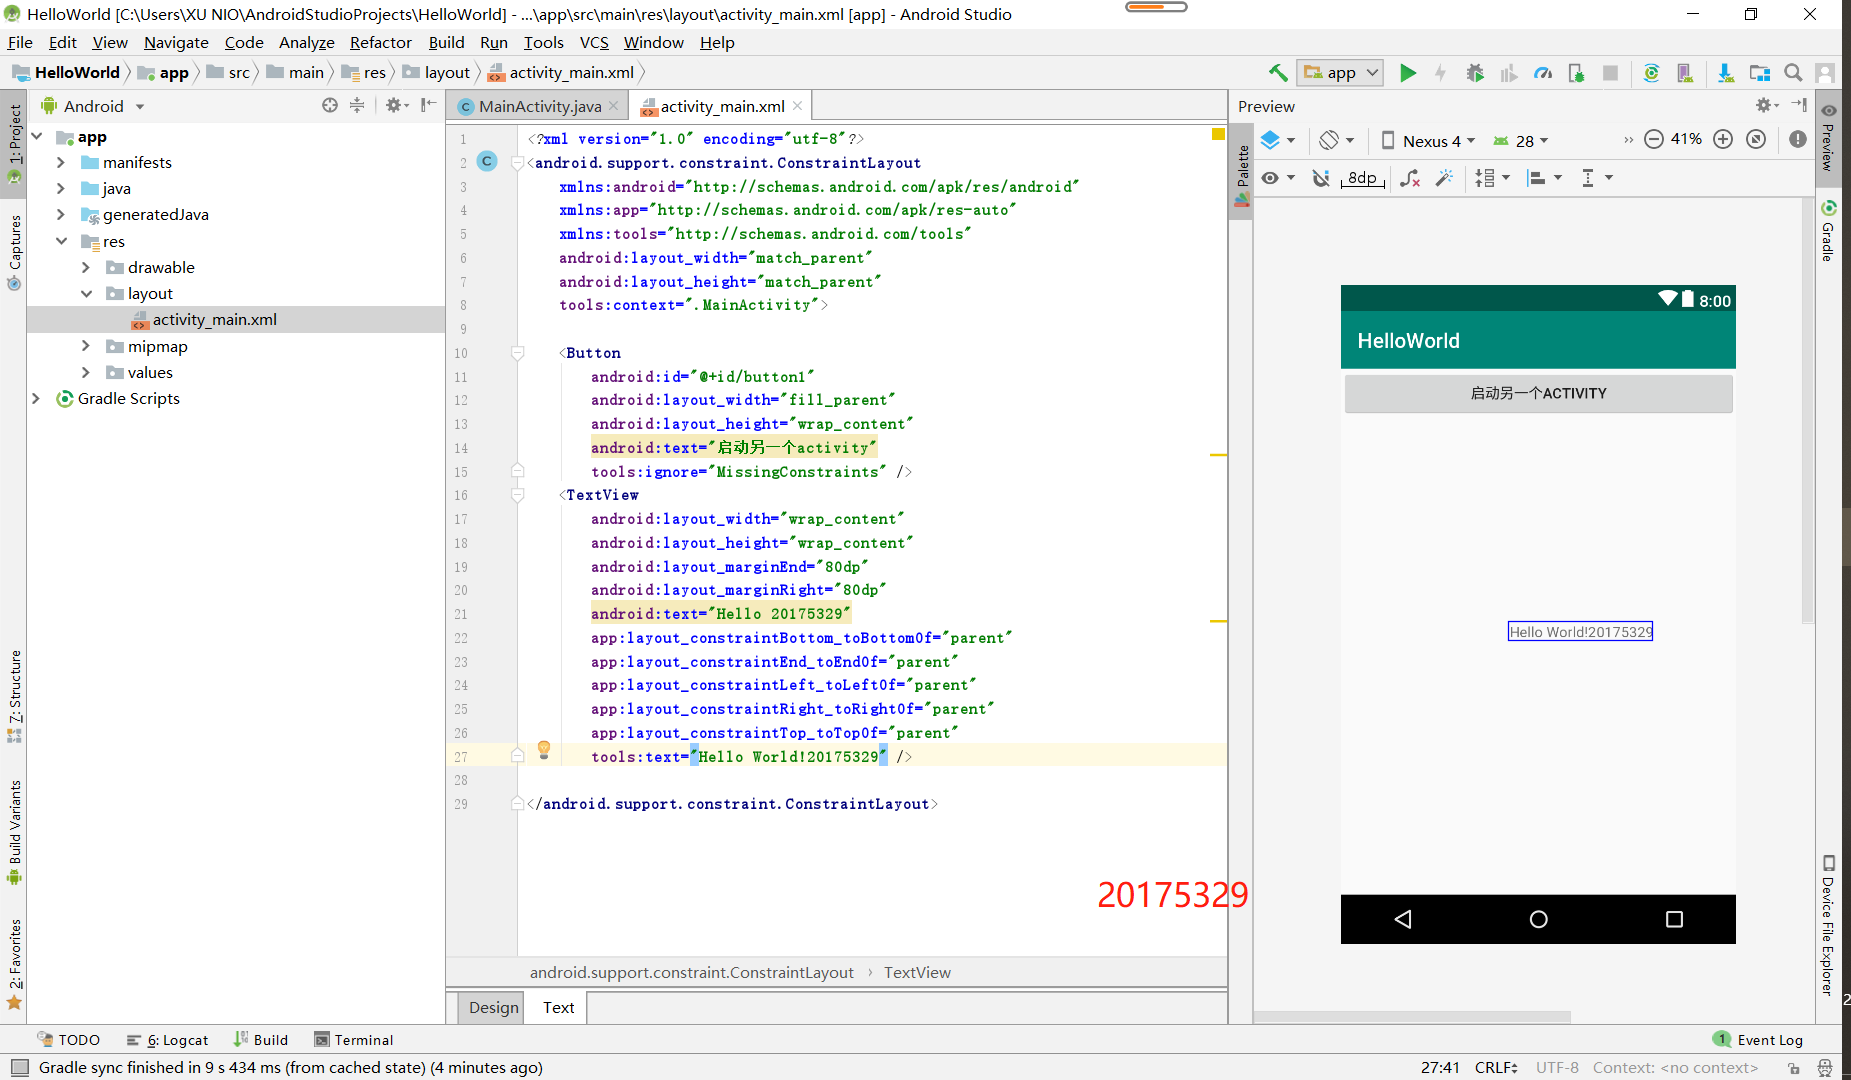
- 完成Hello World, 要求修改res目录中的内容,Hello World后要显示自己的学号,自己学号前后一名同学的学号,提交代码运行截图和码云Git链接,截图没有学号要扣分
- 学习Android Stuidio调试应用程序
具体操作
- Android Studio下载后安装比较简单,你要注意Android SDK的安装位置。
- 此时你可以看到Android Studio的欢迎页已经出来了,就像下面这样:
![]()
左侧的Recent Projects将会显示你在这里编辑做的最近项目。右侧的Quick Start则是快速开始选项。
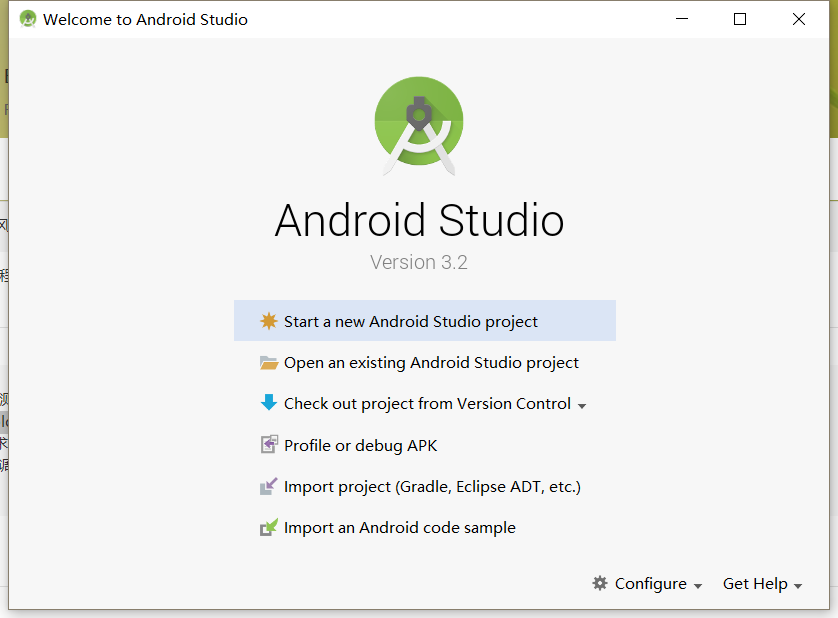
红色方框选中的Start a new Android Studio project选项通常是我们课程里最常使用的,用于创建一个新的Android项目。
在此介绍一下其他的选项:
1.Open an existing Android Studio Project:打开已有的Android Studio项目。在经历一段时间的学习后,如果你想继续编辑之前的项目,或者打开一个从网上下载的例子,你可以点击此选项。
2.Check out project from Version Control:从版本控制库中获取项目。对于团队开发来说,版本控制是必不可少的工具。此选项允许你从GitHub、Google Cloud以及TortoiseSVN等处同步项目。事实上,Android Studio对于这些版本控制工具的支持也是很好的,你可以在设置中进行设定。
3.Import project(Eclipse ADT, Gradle, etc.):导入其他开发环境中的项目。通过该选项你可以将在Eclipse等处生成的项目迁移到Android Studio的开发环境中。
4.Import an Android code sample:导入Android代码样例。该功能将从Google及其合作伙伴那里读取示例的列表,你可以下载并查看一些优秀的项目并继续编辑它们。
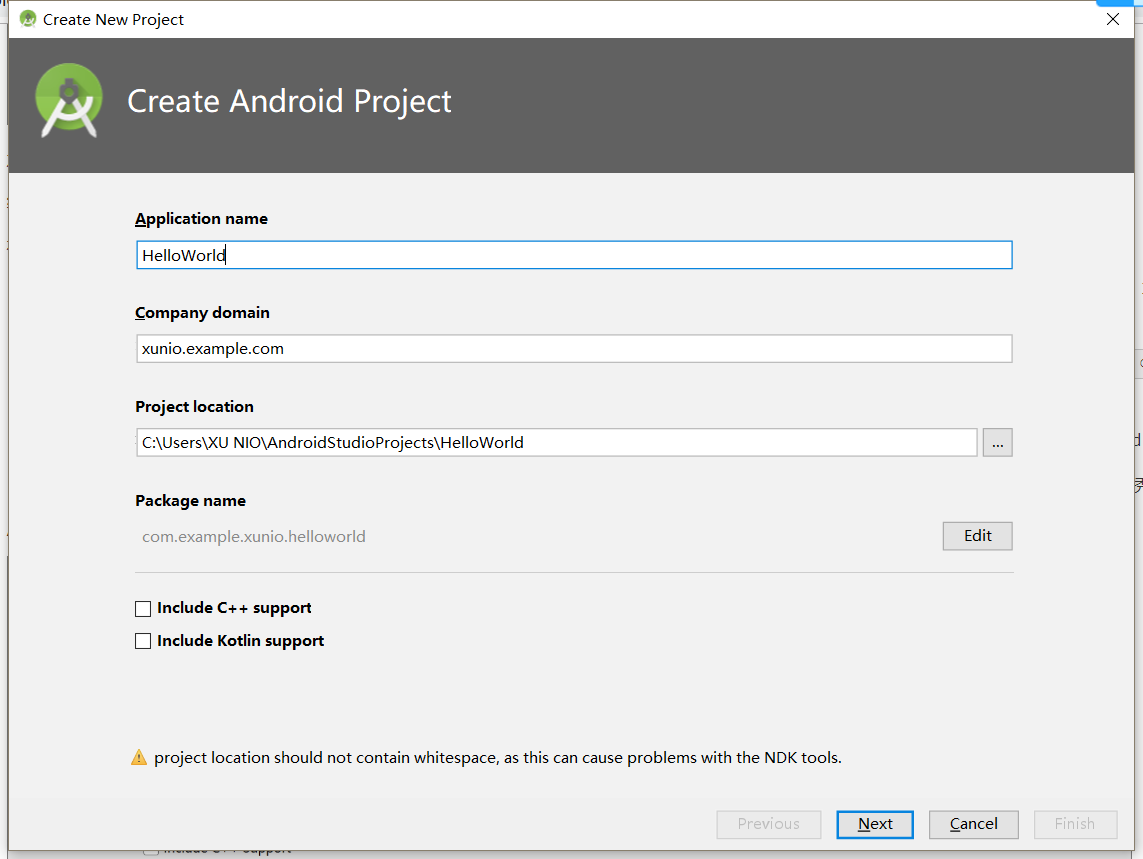
在该对话框中你需要填写待创建的项目名称、公司域名和项目的存放位置。
在填写时,有以下事项你需要注意:
应用的命名应采用驼峰命名法,首字母必须要大写。
此处的Company Domain在商业开发中是常用的,目的是便于归档。对于初学者而言,你可以理解为下面的Package name是域名的反转,比如我的域名可能是ljp.is.besti.edu.cn, 包名最好是cn.edu.besti.is.ljp(上图中没倒过来)
根据实际情况,你可以设置Project location,也就是项目的位置。通常情况下我们使用默认值就行。
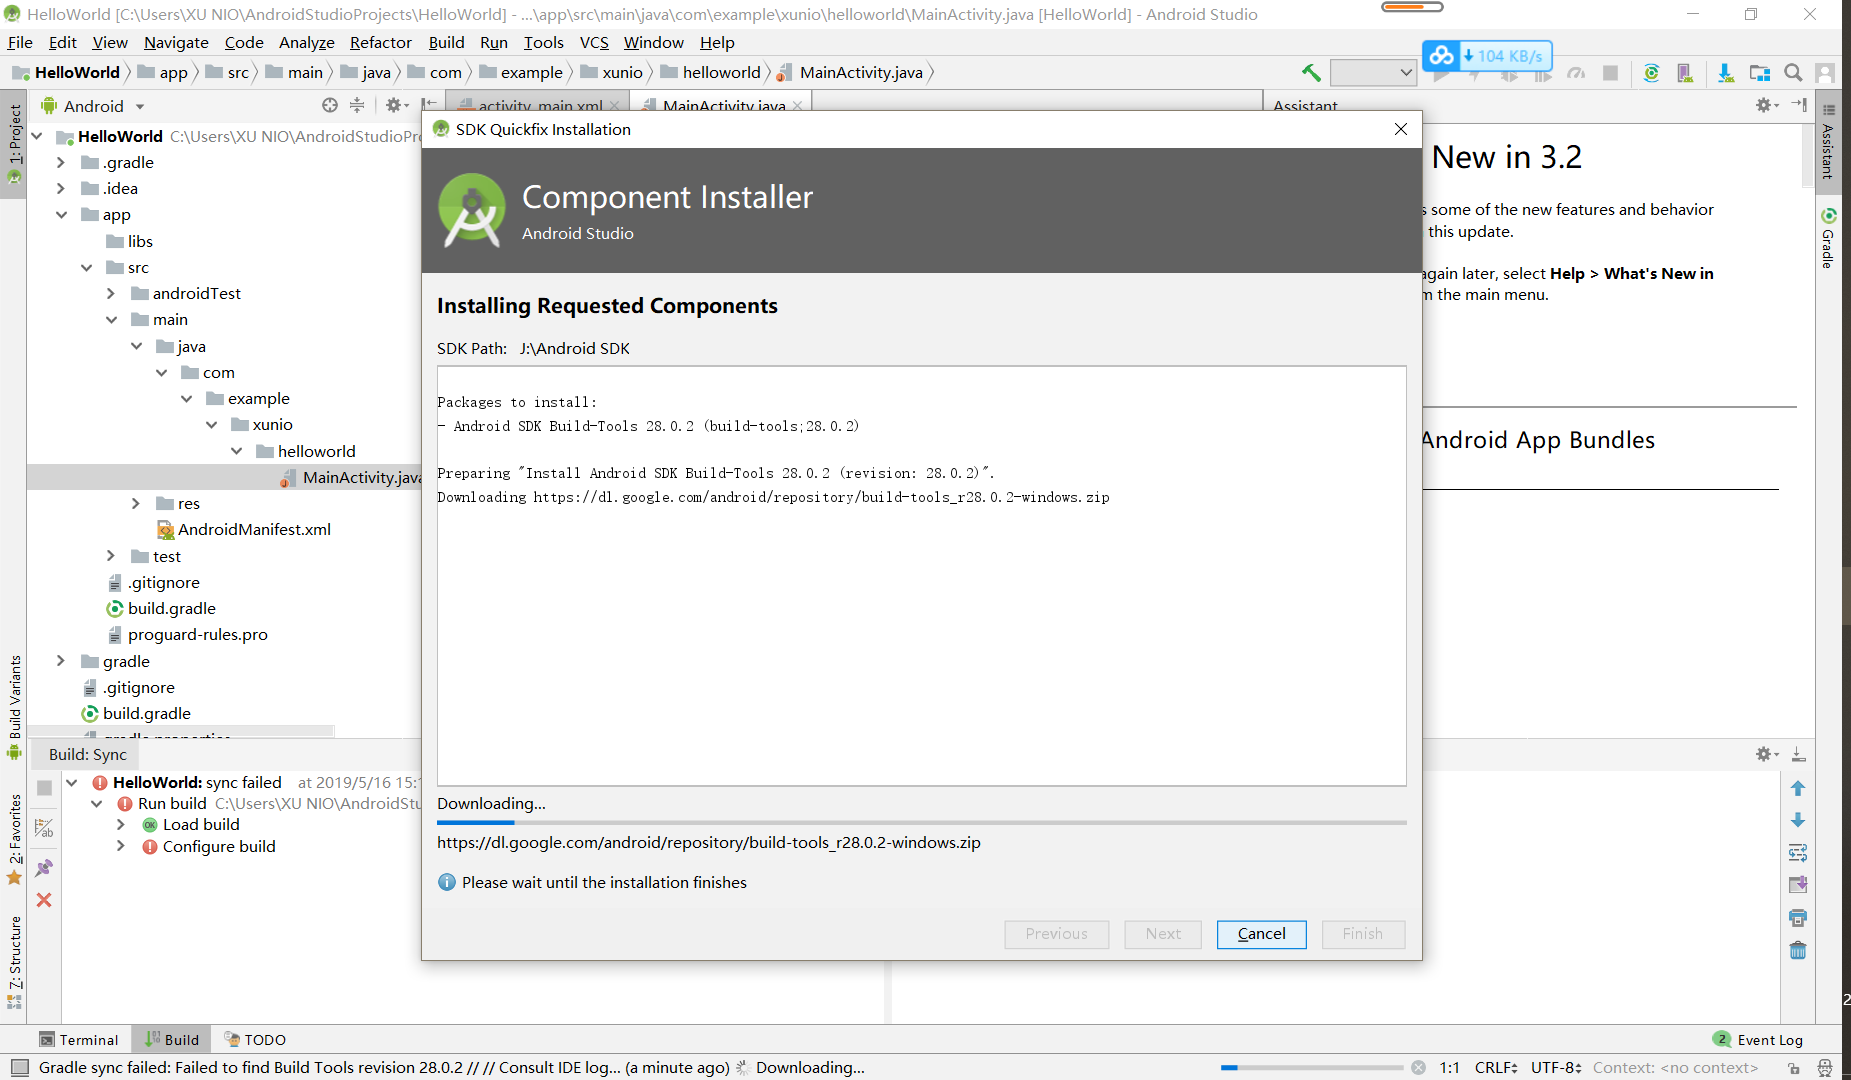
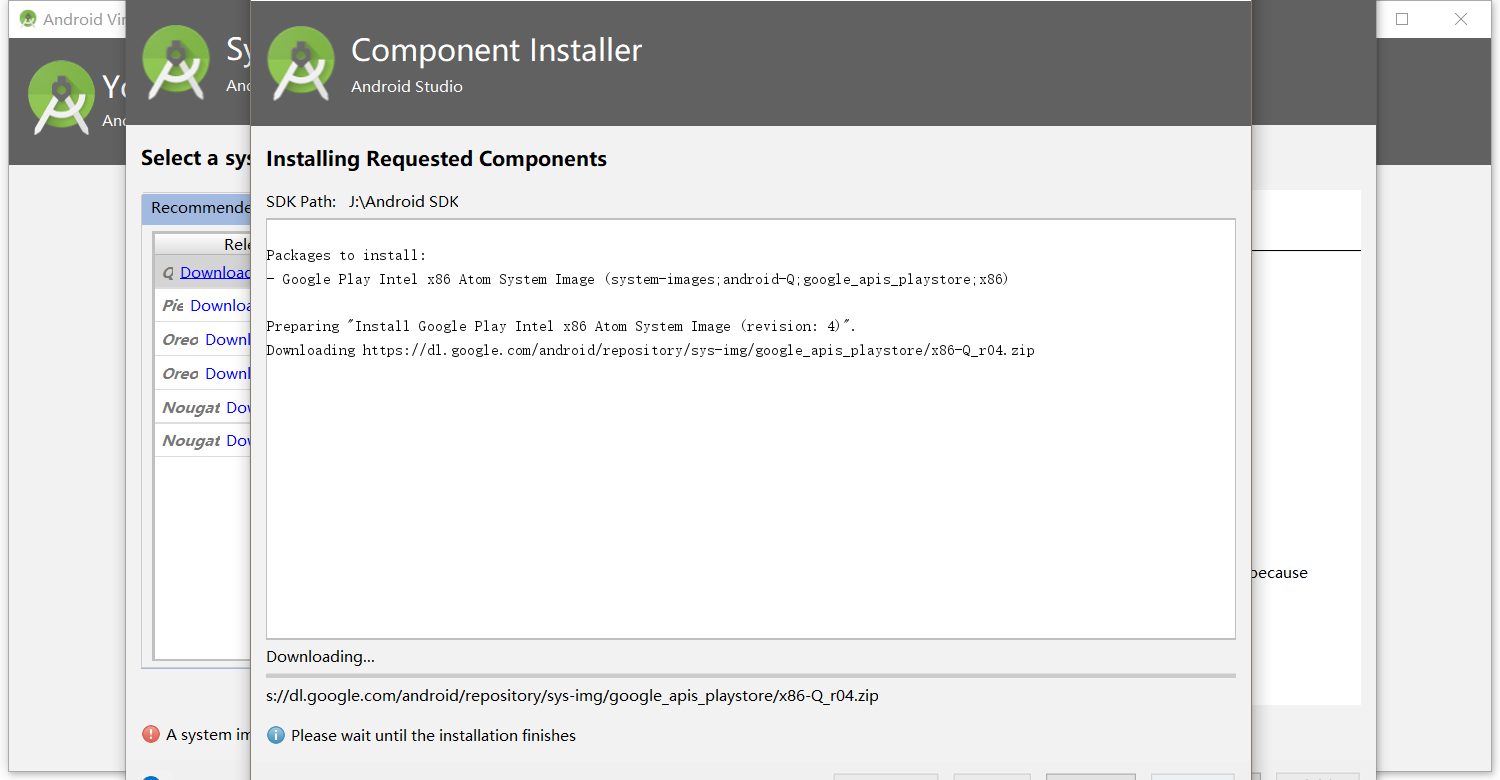
- 打开后一直是源源不断的下载....
![]()
- 每个Activity都对应一个xml布局文件(layout),布局文件在项目的
res/layout文件夹中可以找到。
设置好后,点击Finish按钮完成项目的创建工作。
Android Studio会根据这些信息来创建项目,耐心等候它自动创建项目并进入主界面。这时你会在下图所示的对话框中看到一些关于Gradle的信息。
Gradle是一款获业界高度评价自动化构建工具,它的用处很多,比如引入外部库等等。你可以访问Gradle官网了解更多信息。
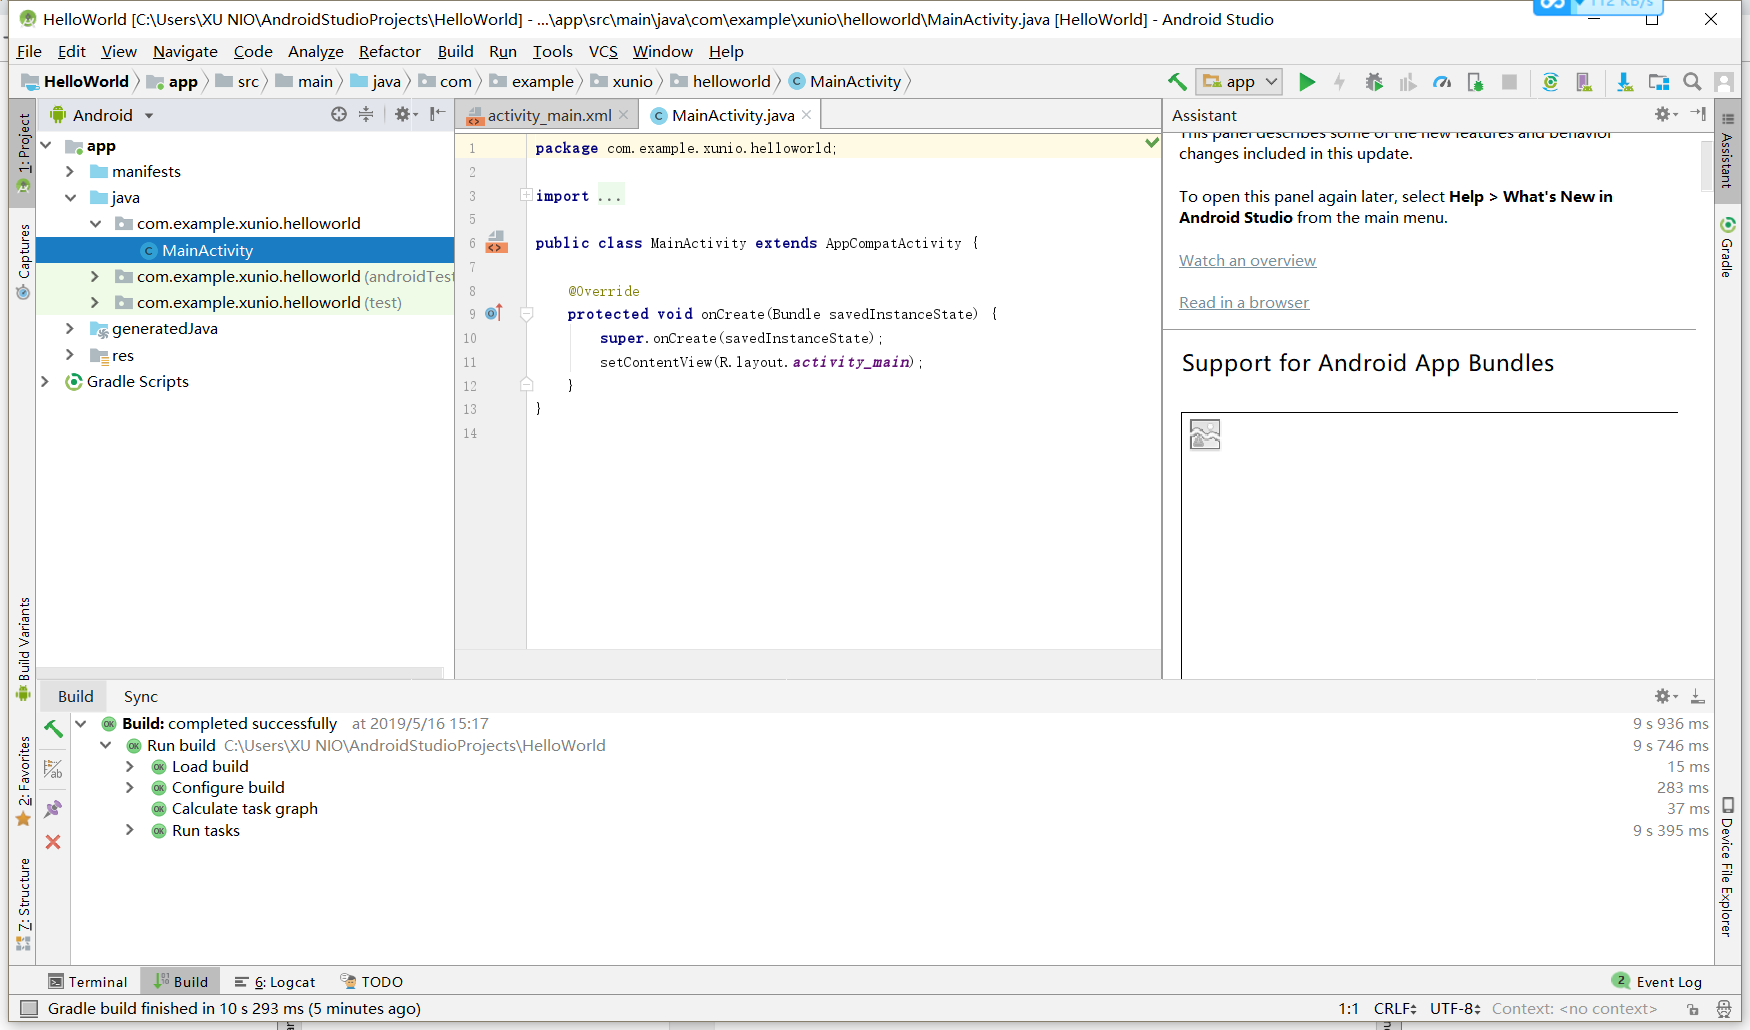
稍候一会儿,你便能看到Android Studio的主界面了,如下图所示。
- 又是源源不断地下载...
![]()

配置和启动模拟器
Android模拟器是可以运行在电脑上的虚拟设备,可以让你不需使用物理设备即可预览、开发和测试Android应用程序。当你身边并没有合适的Android设备时,模拟器就是一个不错的选择。
那么如何使用Android模拟器呢?
在Android Studio的主界面上方的工具栏中,你可以看到一个名为AVD Manager的按钮,点击它你就能打开Android虚拟设备管理器(AVD: Android Virtual Device)。
我们常说某个Android手机是4.1或5.0的系统,这里的4.1或5.0就是指系统镜像的版本。同样,对于模拟器而言,也需要为其配置某个版本的系统镜像。你可以看到这里只有3个镜像可供选择,请选择第一项——发布名为Lolipop的Android 5.1.1镜像。
如果你需要其他版本的系统,你可以在Android SDK Manager中下载对应的系统镜像包,再进入AVD Manager就能看到它们了。
接着,点击右下角的Next按钮,进入到确认配置的一步。

项目的编译与运行
-
编译模拟运行如下
![]()
-
第二部 创建 ThirdActivity
-
相关知识:
Activity是包含了用户界面组件的一个窗口。一个典型的Android应用程序,都是从启动一个Activity开始的。应用程序所创建的第一个窗口,叫做主活动。
启动一个Activity涉及到的方法:
onCreat()onPause()onStart()onResume()onStop()onRestart()onDestory()
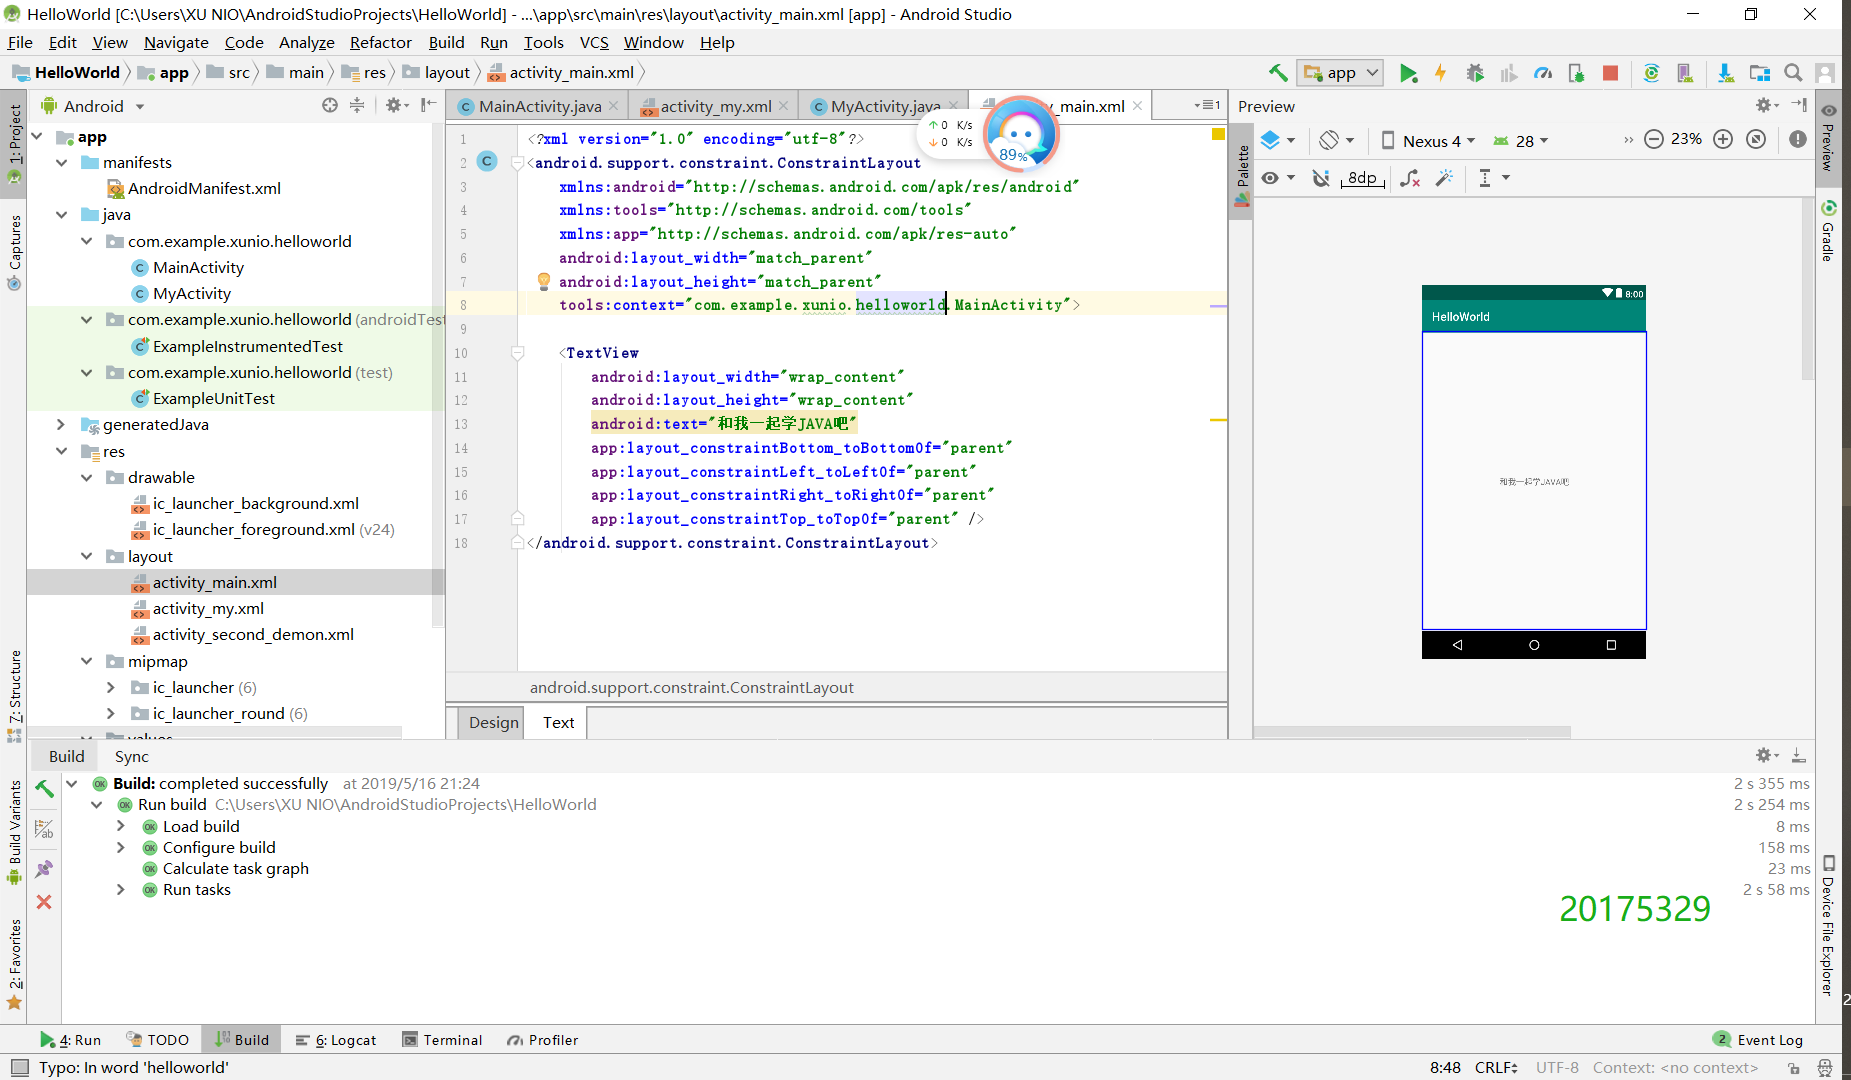
MyActivity.java代码如下
package cn.edu.besti.is.myapplication;

import android.support.v7.app.AppCompatActivity;
import android.os.Bundle;

public class MyActivity extends AppCompatActivity {

    @Override
    protected void onCreate(Bundle savedInstanceState) {
        super.onCreate(savedInstanceState);
        setContentView(R.layout.activity_my);
    }
}
activity_my.xml代码如下
<?xml version="1.0" encoding="utf-8"?>
<android.support.constraint.ConstraintLayout
    xmlns:tools="http://schemas.android.com/tools"
    xmlns:android="http://schemas.android.com/apk/res/android"
    android:layout_width="match_parent"
    android:layout_height="match_parent"
    android:orientation="vertical">

    <TextView
        android:id="@+id/textView"
        android:text="20175329 许钰玮"
        android:layout_width="200dp"
        android:layout_height="132dp"
        tools:layout_editor_absoluteX="255dp"
        tools:layout_editor_absoluteY="255dp"
        tools:ignore="MissingConstraints" />
</android.support.constraint.ConstraintLayout>
-
运行效果
![]()
-
第三部分:UI测试
-
Toast是一个弹窗,用于显示一条消息,作为给用户的反馈。
-
修改
MainActivity.java代码

package cn.edu.besti.is.myapplication;
import android.support.v7.app.AppCompatActivity;
import android.os.Bundle;
import android.widget.Toast;
public class MainActivity extends AppCompatActivity {

    @Override
    protected void onCreate(Bundle savedInstanceState) {
        super.onCreate(savedInstanceState);
        setContentView(R.layout.activity_main);
        Toast toast = Toast.makeText(MainActivity.this, "20175221曾祥杰", Toast.LENGTH_LONG);
        toast.show();
    }
}
- 修改
activity_main.xml代码
<?xml version="1.0" encoding="utf-8"?>
<android.support.constraint.ConstraintLayout
    xmlns:android="http://schemas.android.com/apk/res/android"
    xmlns:tools="http://schemas.android.com/tools"
    xmlns:app="http://schemas.android.com/apk/res-auto"
    android:layout_width="match_parent"
    android:layout_height="match_parent"
    tools:context="cn.edu.besti.is.myapplication.MainActivity">

    <TextView
        android:layout_width="wrap_content"
        android:layout_height="wrap_content"
        android:text="欢迎!"
        app:layout_constraintBottom_toBottomOf="parent"
        app:layout_constraintLeft_toLeftOf="parent"
        app:layout_constraintRight_toRightOf="parent"
        app:layout_constraintTop_toTopOf="parent" />
</android.support.constraint.ConstraintLayout>
实验截图
- **第四部分: **
- 修改
activity_main.xml代码
<FrameLayout
    xmlns:android="http://schemas.android.com/apk/res/android"
    xmlns:app="http://schemas.android.com/apk/res-auto"
    android:orientation="vertical"
    android:layout_width="match_parent"
    android:layout_height="match_parent">

    <Button
        android:text="20175221"
        android:layout_width="wrap_content"
        android:layout_height="wrap_content"
        android:layout_marginTop="400dp"
        android:layout_marginLeft="160dp" />
    <Button
        android:text="曾祥杰"
        android:layout_width="wrap_content"
        android:layout_height="wrap_content"
        android:layout_marginTop="450dp"
        android:layout_marginLeft="160dp" />
    <ImageButton
        android:src="@android:drawable/btn_star_big_on"
        android:background="@android:color/black"
        android:alpha="0.55"
        android:layout_width="wrap_content"
        android:layout_height="wrap_content"
        android:layout_marginTop="160dp"
        android:layout_marginLeft="183dp" />
    <ImageView
        android:src="@android:drawable/presence_audio_away"
        android:background="@android:color/holo_blue_bright"
        android:alpha="0.70"
        android:layout_width="120dp"
        android:layout_height="120dp"
        android:layout_marginTop="200dp"
        android:layout_marginLeft="140dp"
        android:padding="4dp"
        android:id="@+id/imageView"
        android:layout_centerHorizontal="true" />

    <TableRow
        android:layout_width="match_parent"
        android:layout_height="match_parent">

        <Space
            android:layout_width="wrap_content"
            android:layout_height="wrap_content" />

        <ImageView
            android:id="@+id/imageView2"
            android:layout_width="wrap_content"
            android:layout_height="wrap_content"
            app:srcCompat="@android:drawable/arrow_down_float" />

        <Switch
            android:id="@+id/switch1"
            android:layout_width="wrap_content"
            android:layout_height="wrap_content"
            android:text="Switch" />
    </TableRow>


</FrameLayout>
运行如下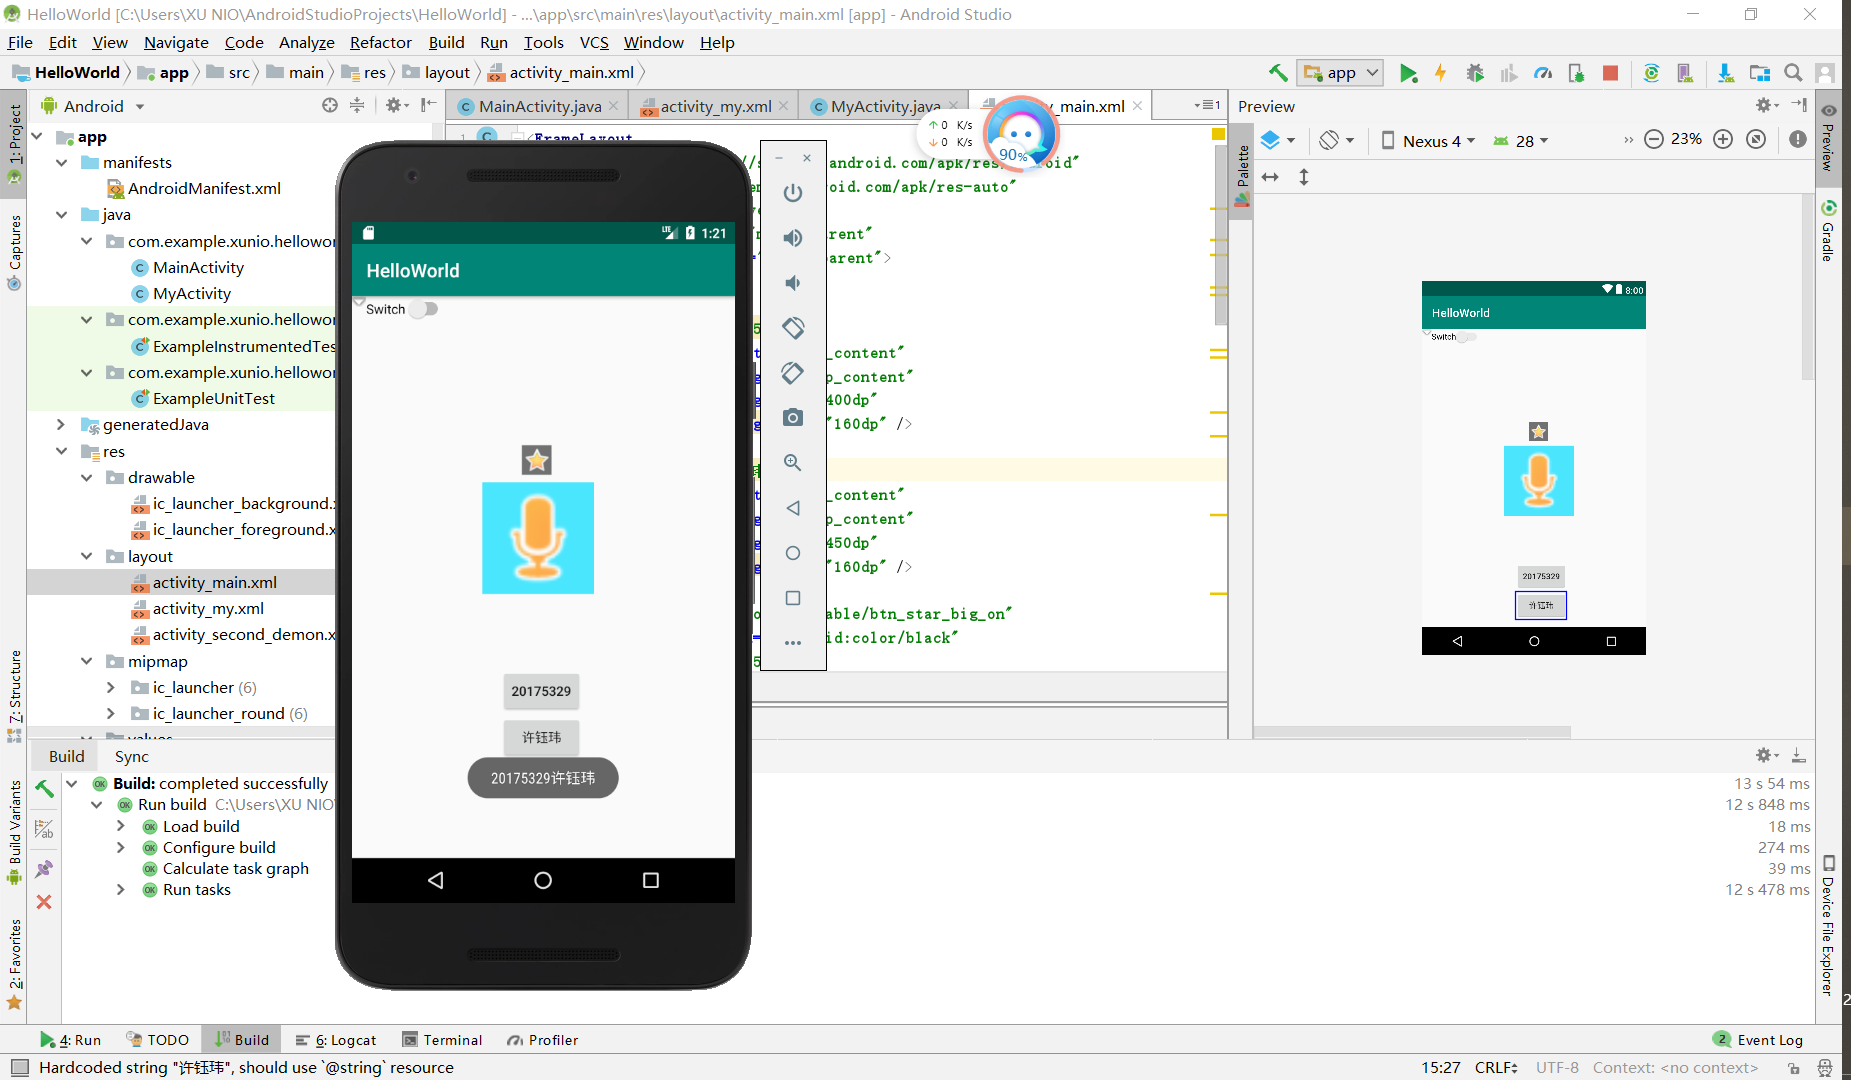
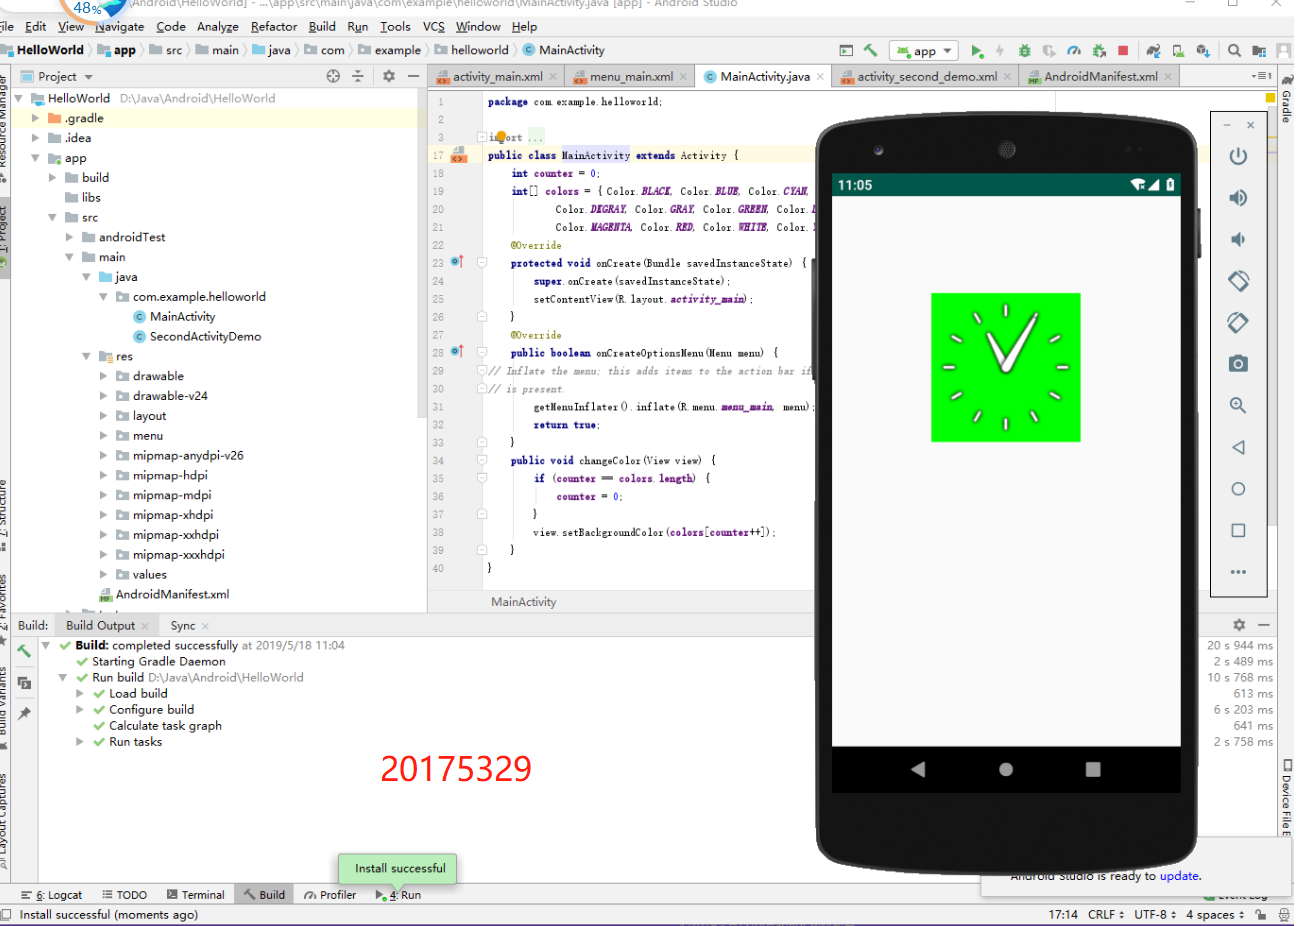
- 第五部分:事件处理测试
- 修改
MainActivity.java中代码
package cn.edu.besti.is.myapplication;
import android.app.Activity;
import android.graphics.Color;
import android.os.Bundle;
import android.view.Menu;
import android.view.View;
public class MainActivity extends Activity {
    int counter = 0;
    int[] colors = { Color.BLACK, Color.BLUE, Color.CYAN,
            Color.DKGRAY, Color.GRAY, Color.GREEN, Color.LTGRAY,
            Color.MAGENTA, Color.RED, Color.WHITE, Color.YELLOW };
    @Override
    protected void onCreate(Bundle savedInstanceState) {
        super.onCreate(savedInstanceState);
        setContentView(R.layout.activity_main);
    }
    @Override
    public boolean onCreateOptionsMenu(Menu menu) {
        // Inflate the menu; this adds items to the action bar if it
// is present.
        getMenuInflater().inflate(R.menu.menu_main, menu);
        return true;
    }
    public void changeColor(View view) {
        if (counter == colors.length) {
            counter = 0;
        }
        view.setBackgroundColor(colors[counter++]);
    }
}
修改activity_main.xml
<?xml version="1.0" encoding="utf-8"?>
<RelativeLayout
    xmlns:android="http://schemas.android.com/apk/res/android"
    xmlns:tools="http://schemas.android.com/tools"
    android:layout_width="match_parent"
    android:layout_height="match_parent"
    android:paddingBottom="@dimen/activity_vertical_margin"
    android:paddingLeft="@dimen/activity_horizontal_margin"
    android:paddingRight="@dimen/activity_horizontal_margin"
    android:paddingTop="@dimen/activity_vertical_margin"
    tools:context=".MainActivity">
    <AnalogClock
        android:id="@+id/analogClock1"
        android:layout_width="wrap_content"
        android:layout_height="wrap_content"
        android:layout_alignParentTop="true"
        android:layout_centerHorizontal="true"
        android:layout_marginTop="90dp"
        android:onClick="changeColor" />
    <TextView
        android:layout_width="match_parent"
        android:layout_height="match_parent"
        android:text="20175329 许钰玮"
        android:textSize="30dp"
        android:layout_marginLeft="90dp"
        android:layout_marginTop="290dp"
        android:textColor="#bbbb57"/>

</RelativeLayout>
实验效果如下

 浙公网安备 33010602011771号