

vue+mongoose+node.js项目总结第四篇_实现左右滑动功能
一、前言
下面这个功能也是比较常见的一个炫酷的功能,vue配合移动端滑动事件实现左右滑动的效果

二、主要内容
1.第一步:组件准备
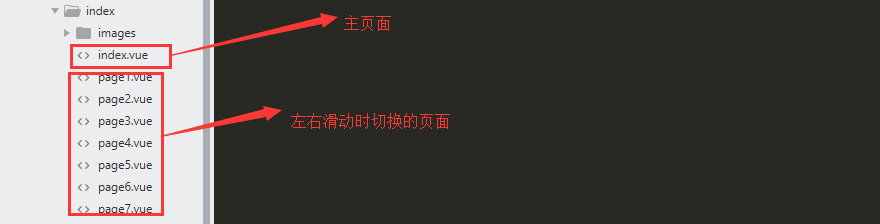
导航条使用的是一个公共组件NavBar.vue

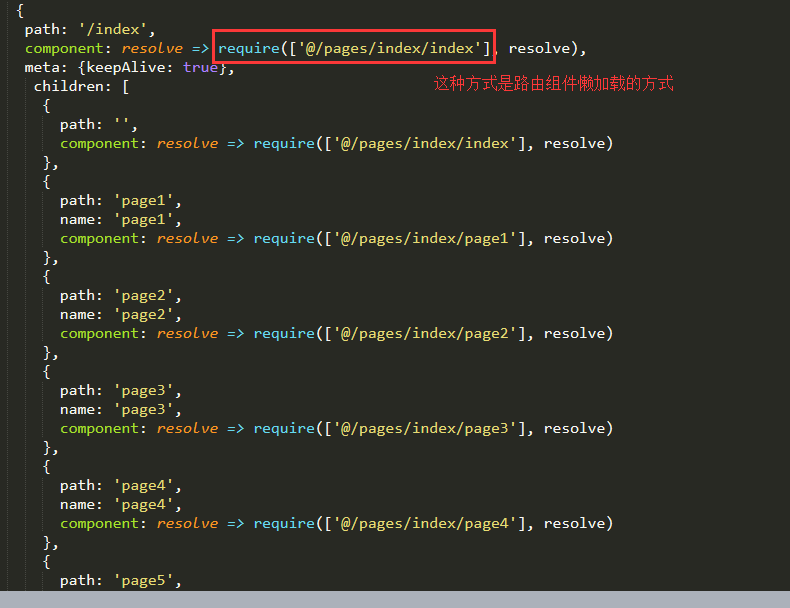
2.第二步:router中的路由配置,将切换的路由添加到router里面
3.第三步:因为项目中需要用到v-touch所以需要安装v-touch
(1)参考文档:https://github.com/vuejs/vue-touch/tree/next
(2)需要注意的是vue2.0之后需要用到next分支才行
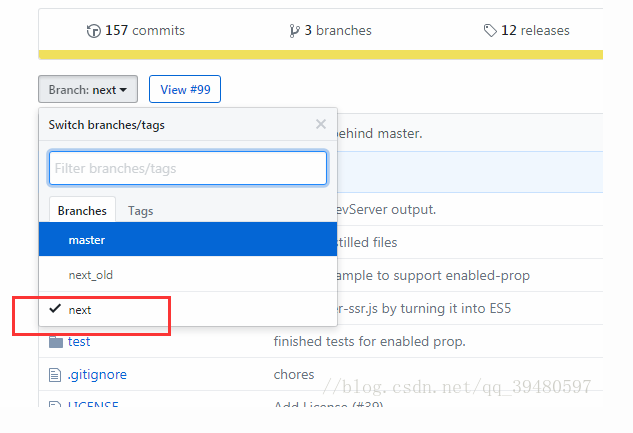
(3)安装:npm insall vue-touch@next --save
(4)在脚手架中的main.js中引入:
import VueTouch from 'vue-touch'
Vue.use(VueTouch, {name: 'v-touch'})
(5)使用:

4.具体实现
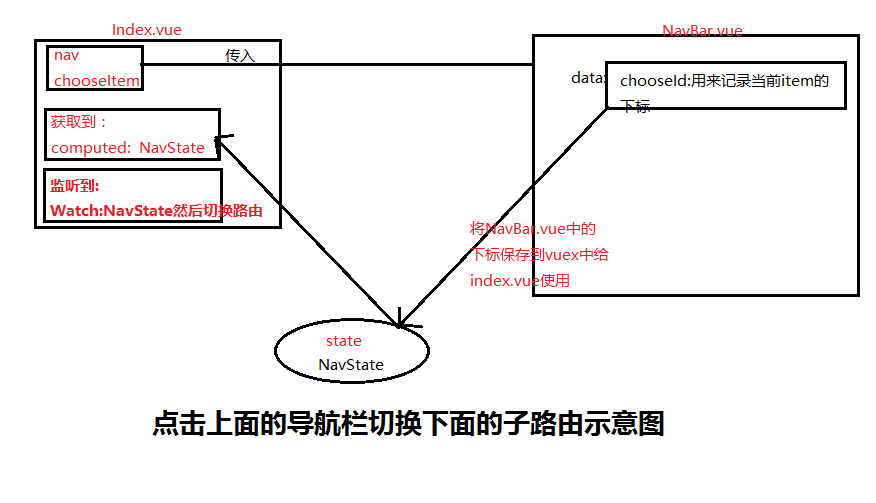
4.1点击上面的导航条实现切换
(1)将导航条上的item分类数组传到NavBar.vue组件中

(2)在NavBar.vue组件中需要完成以下几个功能
NavBar.vue-事件1: 组件创建之后设置左右滚动的轮播图
NavBar.vue-事件2:默认应该让第一个高亮
NavBar.vue-事件3:点击切换时高亮改变为当前点击的,并且下面的子组件跟随改变
NavBar.vue-事件1:组件创建之后设置左右滚动的轮播图,并且默认第一个高亮

NavBar.vue-事件2:在NavBar.vue中点击,在index.vue中切换
在index.vue中监听到NavBar.vue中传到state中的navState实现切换功能
 computed: {
   //获取到从NavBar.vue点击的时候保存的当前项的下标
    getNavState () {
      return this.$store.state.navState
    }
  },
  watch: {//监听当前项的下标,一旦有变化就切换路由
    // 监听计算属性 并且它来自vuex中状态
    getNavState(state){
      var index = state + 1
      // 跳转子页面 this.$router.push()
      this.$router.push('/index/page' + index)
    }
}
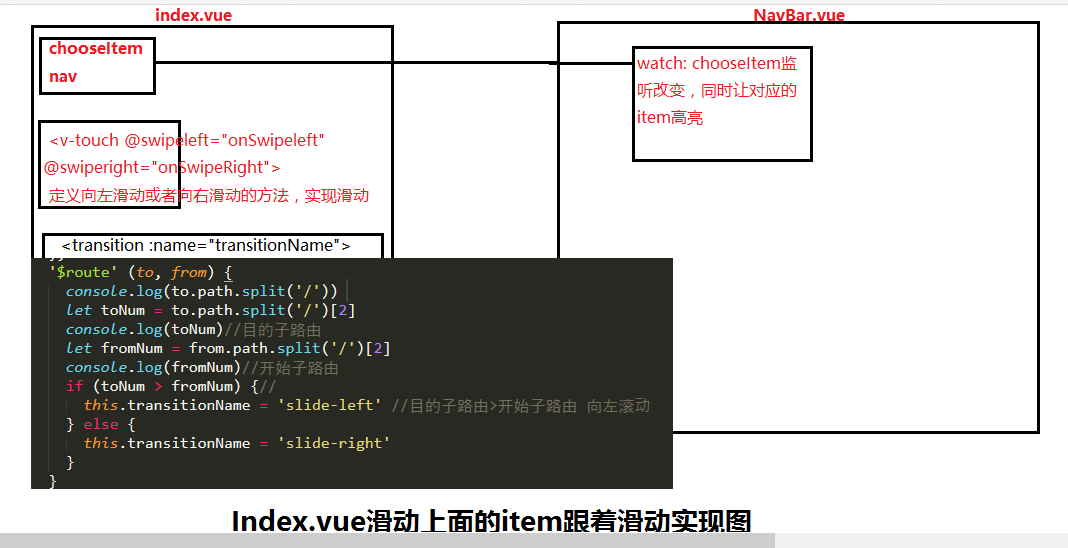
4.2滑动的时候实现切换
(1)滑动的事件是在index.vue组件中,需要完成如下几个事件
index.vue事件1:用户左右滑动
index.vue事件2:上面的导航会根据滑动到当前的地方,在当前的nav item显示高亮
index.vue事件3:滑动的加上滑动的动画
index.vue事件1:向左右滑动的事件
onSwipeleft () {
      let index = 1 //默认index为1,显示第一个page
      let next = ""
      if(this.$route.name != null) { //子路由"pagex",如果子路由不为空
        index =  +this.$route.name[4]//将this.$route.name[4]转化为数字
       //如果当前的index<页面最大的标号,表示可以向左滑动,修改滑动的路由,
        index < 8  ?  (next = "page" + (index + 1)) &&(this.chooseItem = index + 1) && (this.chooseItem = +index + 1)
       : (next="page8") && (this.chooseItem = 7)
       this.$router.push('/index/' + next)
      }
    },
    onSwipeRight () {
      // this.$router.back(-1)
      let index = 1
      let back = ""
      if(this.$route.name != null) {
        index =  +this.$route.name[4]
        index > 1  ?  (back = "page" + (index - 1)) &&(this.chooseItem = index - 1) && (this.chooseItem = +index - 1)
       : (back="page1") && (this.chooseItem = 1)
       this.$router.push('/index/' + back)
      } else {
        this.$router.push('/index/' + "page6")
      }

    }
index.vue事件3:滑动的加上滑动的动画, 添加滑动动画需要监听route的改变
使用vue中的transition包裹路由组件出口
参考资料:https://cn.vuejs.org/v2/guide/transitions.html#%E8%BF%87%E6%B8%A1%E7%9A%84%E7%B1%BB%E5%90%8D

watch中监听route的变化,判断是应该做向右滑动的动画还是向左滑动的动画
 '$route' (to, from) {
      console.log(to.path.split('/'))
      let toNum = to.path.split('/')[2] //[index, pagex]
      console.log(toNum)//目的子路由
      let fromNum = from.path.split('/')[2]
      console.log(fromNum)//开始子路由
      if (toNum > fromNum) {//
        this.transitionName = 'slide-left' //目的子路由>开始子路由 向左滚动
      } else {
        this.transitionName = 'slide-right'//在向右滚动
      }
    }
style里面为了实现过渡效果定义的动画如下所示:
 .Router{
    width: 100%;
    transition: all .4s ease;
  }

  .slide-left-enter, .slide-right-leave-active{
    opacity: 0;
    transform: translateX(100%);
  }

  .slide-left-leave-active, .slide-right-enter{
    opacity: 0;
    transform: translateX(-100%);
  }
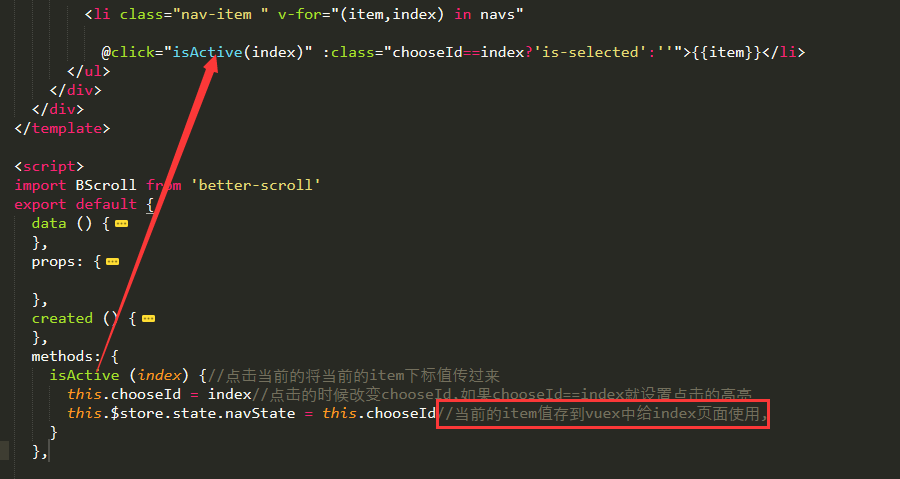
(3)滑动的时候上面导航栏也要跟着高亮:直接在Navbar.vue中监听传来的chooseItem是否变化
 watch: {
    "chooseItem" () {
      this.chooseId = this.chooseItem-1
    }
  },
三、总结
第一部分:点击上面的导航切换下面的自卤藕
第二部分:左右切换上面的导航跟着高亮
第三部分关键组件代码


<template lang="html">
  <div class="page">
    <div class="header">
      <div class="left" @click="goback()">
        <i>返回</i>
      </div>

      <input class="search"  type="" name="" placeholder="搜你想搜的地方,过你想要的生活">

      <div class="right">

      </div>
    </div>


    <navbar :navs="navs" :chooseItem="chooseItem"></navbar>
    <v-touch @swipeleft="onSwipeleft" @swiperight="onSwipeRight" :priority="1">
      <transition :name="transitionName">
        <keep-alive>
          <router-view class="Router"></router-view>
        </keep-alive>
      </transition>
    </v-touch>

  </div>

</template>

<script>
import navbar from '@/components/NavBar/NavBar.vue'
export default {
  data () {
    return {
      navs: ['登山','看海','农家乐','小酒馆','赏月','红色景点','名人寒舍'],
      transitionName: 'slide-right', //默认向右滑动
      chooseItem: 0//默认显示的是第一个page

    }
  },
  components: {
    navbar
  },
  computed: {
    getNavState () {
      return this.$store.state.navState
    }
  },
  watch: {
    // 监听计算属性 并且它来自vuex中状态
    getNavState(state){
      var index = state + 1
      // 跳转子页面 this.$router.push()
      this.$router.push('/index/page' + index)
    },
    '$route' (to, from) {
      console.log(to.path.split('/'))
      let toNum = to.path.split('/')[2]
      console.log(toNum)//目的子路由
      let fromNum = from.path.split('/')[2]
      console.log(fromNum)//开始子路由
      if (toNum > fromNum) {//
        this.transitionName = 'slide-left' //目的子路由>开始子路由 向左滚动
      } else {
        this.transitionName = 'slide-right'
      }
    }
  },
  created () {
    // 初始化
    this.$router.push('/index/page1')
  },
  methods: {
    //返回
    goback(){
      return this.$router.push('/home')
    },
    onSwipeleft () {
      let index = 1 //默认index为1,显示第一个page
      let next = ""
      if(this.$route.name != null) { //子路由"pagex",如果子路由不为空
        index =  +this.$route.name[4]//将this.$route.name[4]转化为数字
        index < 8  ?  (next = "page" + (index + 1)) &&(this.chooseItem = index + 1) && (this.chooseItem = +index + 1)
       : (next="page8") && (this.chooseItem = 7)
       this.$router.push('/index/' + next)
      }
    },
    onSwipeRight () {
      // this.$router.back(-1)
      let index = 1
      let back = ""
      if(this.$route.name != null) {
        index =  +this.$route.name[4]
        index > 1  ?  (back = "page" + (index - 1)) &&(this.chooseItem = index - 1) && (this.chooseItem = +index - 1)
       : (back="page1") && (this.chooseItem = 1)
       this.$router.push('/index/' + back)
      } else {
        this.$router.push('/index/' + "page6")
      }

    }

  }
}
</script>


<style type="text/css">
  .header{
    background: #1fab89;
    height: 50px;
  }
  .left{
    display: inline-block;
    margin-top: 10px;
    margin-right: 8px;
    padding-left: 10px;
  }

  .search{
    height: 30px;
    width: 280px;
    border-radius: 10px;
  }

  .Router{
    width: 100%;
    transition: all .4s ease;
  }

  .slide-left-enter, .slide-right-leave-active{
    opacity: 0;
    transform: translateX(100%);
  }

  .slide-left-leave-active, .slide-right-enter{
    opacity: 0;
    transform: translateX(-100%);
  }


</style>
<template lang="html">
  <div class="nav">
    <div class="nav-wrapper" ref="navWrapper">
      <ul>
        <li class="nav-item " v-for="(item,index) in navs"

          @click="isActive(index)" :class="chooseId==index?'is-selected':''">{{item}}</li>
      </ul>
    </div>
  </div>
</template>

<script>
import BScroll from 'better-scroll'
export default {
  data () {
    return {
      chooseId: '0',
    }
  },
  props: {
    navs: Array,//父组件中接收到的导航数组
    chooseItem: Number,

  },
  created () {
    this.$nextTick(() => {
      this.navScroll = new BScroll(this.$refs.navWrapper, {
        click: true,
        scrollX: true,
        eventPassthrough: 'vertical'
      })

      this.isActive(0)
    })
  },
  methods: {
    isActive (index) {//点击当前的将当前的item下标值传过来
      this.chooseId = index//点击的时候改变chooseId,如果chooseId==index就设置点击的高亮
      this.$store.state.navState = this.chooseId//当前的item值存到vuex中给index页面使用,
    }
  },

  watch: {
    "chooseItem" () {
      this.chooseId = this.chooseItem-1
    }
  },


}
</script>

<style type="text/css">
  .nav-wrapper{
    overflow: hidden;
    width: 100%;
  }

  .nav-wrapper ul{
    min-width: 118%;
    white-space: nowrap;
    margin: 5px ;

  }

  .nav-wrapper ul .nav-item{
    display: inline-block;
    font-size: 18px;
    min-width: 20px;
    color: #000;
    height: 20px;
    margin-right: 5px;
  }

  .is-selected{
    color: red;
    padding-bottom: -2px;
    border-bottom: 2px solid #fe4070;
  }
</style>

 浙公网安备 33010602011771号