Electron 中使用 TCP 和 WebSocket 通信
在上一篇文章《Electron与工业CCD通过TCP Server协议连接通讯》中,当时为了实现需求,草率的实验成功了,但是发现里面还有很多瑕疵,经过今天一上午的学习研究,我想再优化一下,补充的更加完善一点。在昨天的文章里,我们是在Electron的主进程中实现TCP连接的,这样是很不方便的,这次我们把TCP连接直接放到渲染进程中实现,并对其简单封装一下。
具体 API 参考资料:http://nodejs.cn/api/net.html#net_event_close_1
1、Electron 中使用 TCP 通信
把上篇文章中主进程中关于TCP连接的代码注释掉,或者直接去掉,我们在渲染进程中实现TCP连接。渲染进程是无法直接使用主进程中net模块的,所以第一步我们将net模块引入到渲染进程的页面中。
// 引入 net 模块
const net = window.require("net");
在Home.vue中:
<template>
<div class="home">
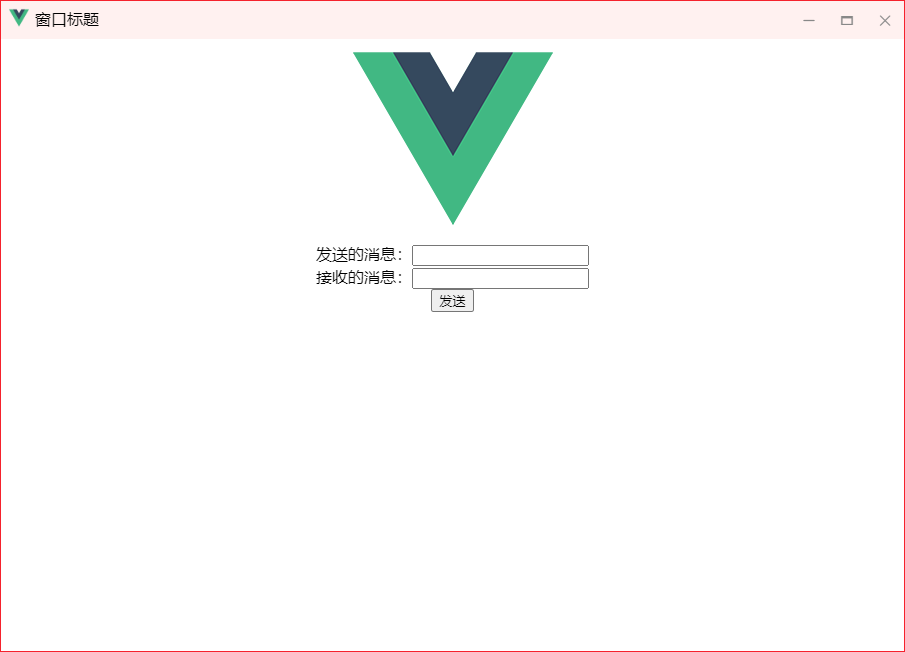
<img alt="Vue logo" src="../assets/logo.png" />
<div>发送的消息:<input type="text" v-model="msg" /></div>
<div>接收的消息:<input type="text" v-model="msg2" /></div>
<div>
<button @click="tcpClick">发送</button>
</div>
<!-- <HelloWorld msg="Welcome to Your Vue.js App" /> -->
</div>
</template>
<script>
// 引入 net 模块
const net = window.require("net");
// @ is an alias to /src
import HelloWorld from "@/components/HelloWorld.vue";
export default {
name: "Home",
components: {
HelloWorld,
},
data() {
return {
client: null,
HOST: "127.0.0.1",
PORT: 7899,
msg: "",
msg2: "",
};
},
created() {},
mounted() {
// console.log(net);
this.initTcp();
this.connect(this.PORT, this.HOST);
this.data();
this.close()
// this.tcpClicent(this.PORT,this.HOST,'hellow TCP')
},
destroyed() {},
methods: {
// 初始化TCP连接
initTcp() {
this.client = new net.Socket();
},
// 当一个 socket 连接成功建立的时候触发该事件。
connect(PORT, HOST) {
this.client.connect(PORT, HOST, () => {
console.log("连接成功: " + HOST + ":" + PORT);
// 建立连接后立即向服务器发送数据,服务器将收到这些数据
this.sendMsgToTcp('hellow TCP,Fuck you!')
});
},
// 当接收到数据的时触发该事件。
data() {
this.client.on("data", (data) => {
console.log("DATA: " + data);
this.msg2 = data;
this.destroyTcp();
});
},
// 一旦 socket 完全关闭就发出该事件, 监听连接关闭事件
close() {
this.client.on("close", function () {
console.log("关闭连接");
});
},
// 向服务器发送数据,服务器将收到这些数据
sendMsgToTcp(msg) {
this.client.write(msg);
},
// 手动关闭连接
destroyTcp() {
this.client.destroy();
},
tcpClick() {
console.log(this.msg);
this.sendMsgToTcp(this.msg);
},
},
};
</script>
<style lang="css" scoped>
img {
-webkit-app-region: drag;
}
</style>
页面展示:
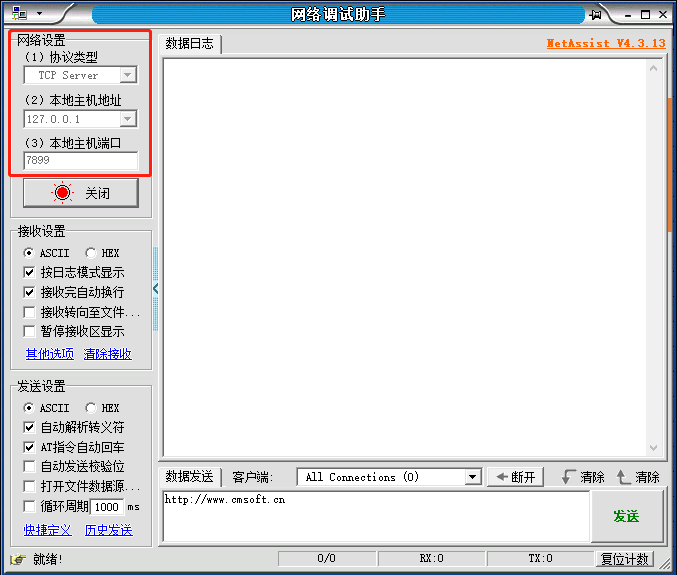
使用网络调试助手,开启一个 127.0.0.1:7899 的 TCP Server
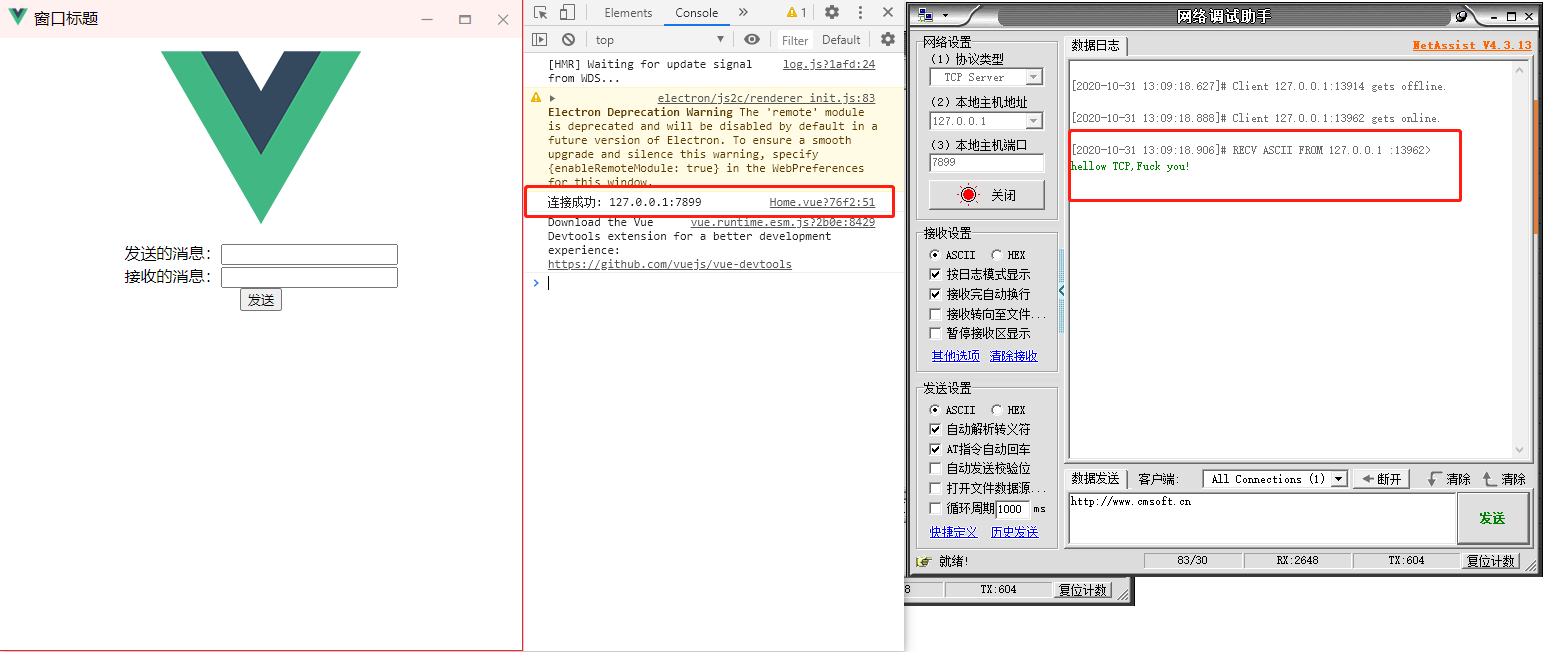
启动Electron项目,Home页面一加载,就会向TCP服务器发送一条数据,如下图所示:
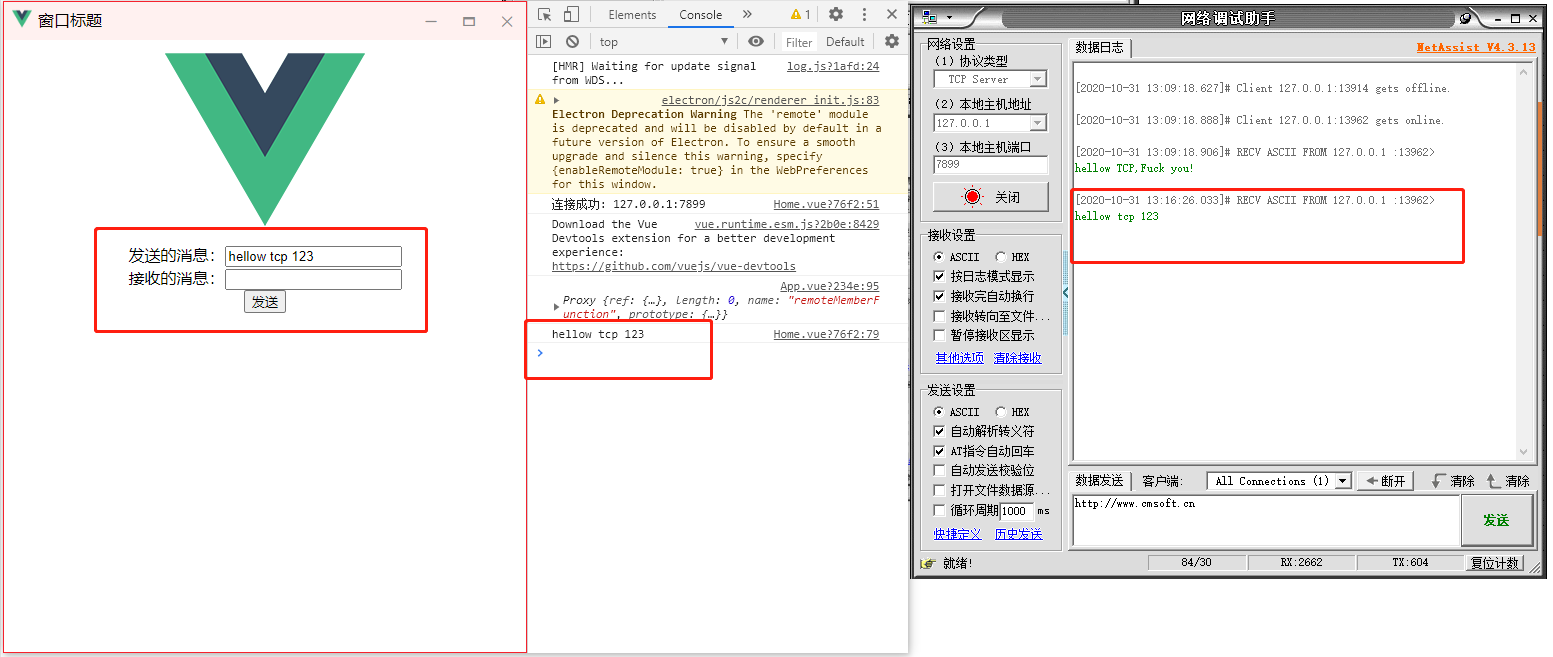
测试发送消息,在发送的消息输入框中输入消息,点击发送按钮,结果如下图:
测试接收消息,在网络调试助手中,输入消息后点击发送按钮,结果如下图所示:
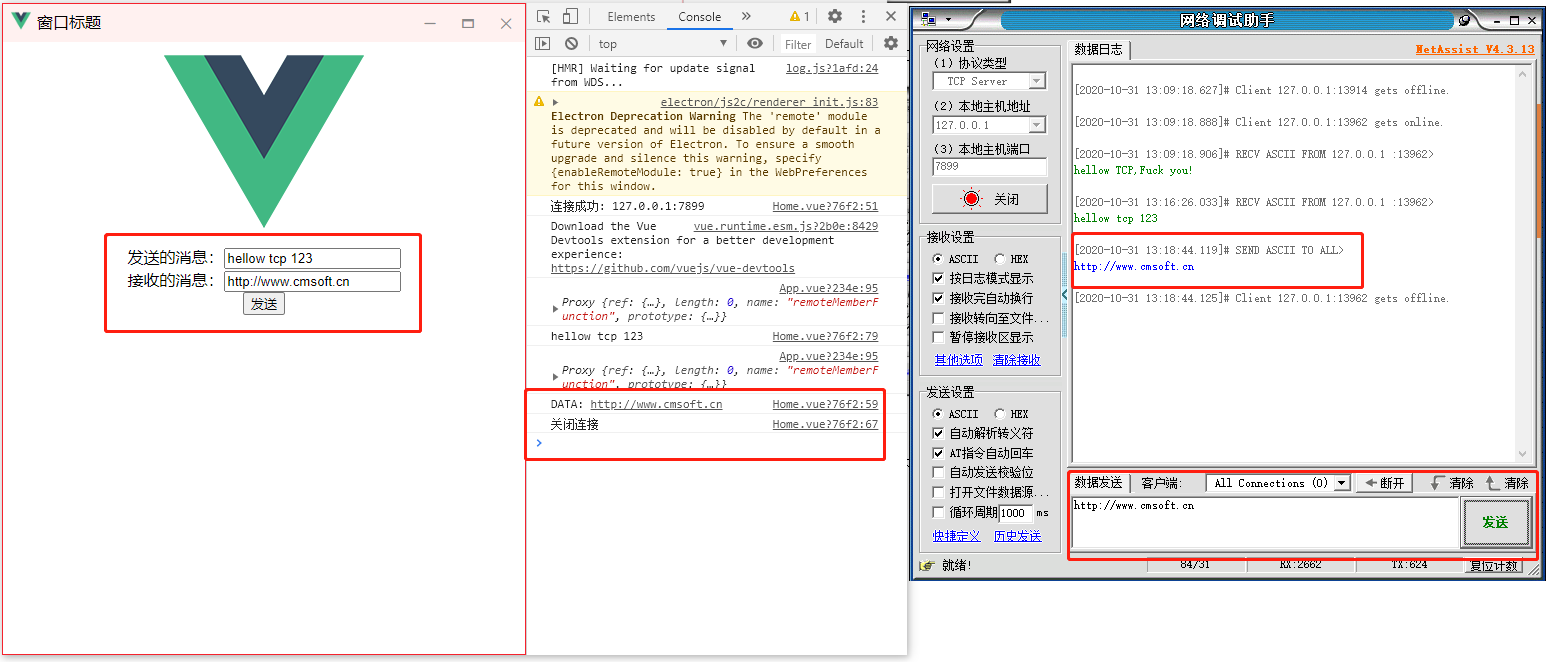
接收到消息后,我就手动关闭连接了,所以打印出了关闭连接
// 当接收到数据的时触发该事件。
data() {
   this.client.on("data", (data) => {
     console.log("DATA: " + data);
       this.msg2 = data;
       this.destroyTcp();
   });
},
// 手动关闭连接
destroyTcp() {
   this.client.destroy();
},
// 一旦 socket 完全关闭就发出该事件, 监听连接关闭事件
close() {
   this.client.on("close", function () {
      console.log("关闭连接");
   });
},
2、Electron 中使用 WebSocket 通信
Electron 中使用 WebSocket 通信是非常简单的,直接写代码即可:
<template>
  <div>
    <h1>websocket</h1>
    <el-input v-model="sendMessage" placeholder="请输入内容"></el-input>
    <el-button size="mini" type="primary" @click="send">发送消息</el-button>
    <el-input
      type="textarea"
      :autosize="{ minRows: 2, maxRows: 4}"
      placeholder="收到的消息"
      v-model="textarea2"
    ></el-input>
    <div>{{testMsg | addZero}}</div>
  </div>
</template>

<script>
export default {
  data() {
    return {
      path: "ws://192.168.43.50:8082/websocket1",
      socket: "",
      sendMessage: "",
      textarea2: "",
      testMsg: 9,
    };
  },
  mounted() {
    // 初始化
    this.init();
    if (this.socket.readyState != this.socket.OPEN) {
      console.log("连接已中断!");
      //todo...
      this.init();
      return false;
    }
  },
  destroyed() {
    // 销毁监听
    this.socket.onclose = this.close;
  },
  methods: {
    init() {
      if (typeof WebSocket === "undefined") {
        alert("您的浏览器不支持socket");
      } else {
        // 实例化socket
        this.socket = new WebSocket(this.path);
        // 监听socket连接
        this.socket.onopen = this.open;
        // 监听socket错误信息
        this.socket.onerror = this.error;
        // 监听socket消息
        this.socket.onmessage = this.getMessage;
        this.socket.onclose = this.close;
      }
    },
    open() {
      console.log("socket连接成功");
    },
    error() {
      console.log("连接错误");
      this.init();
    },
    getMessage(msg) {
      // 得到服务器返回的数据
      console.log(msg);
      this.textarea2 = msg.data;
    },
    send() {
      console.log("发送消息");
      this.socket.send(this.sendMessage);
    },
    close() {
      console.log("socket已经关闭");
    },
  },
};
</script>

<style lang="scss" scoped>
</style>
所有文章都会首发于我的微信公众号:小笑残虹,欢迎大家关注,一起交流进步

 浙公网安备 33010602011771号