
remapping重映射(如何在两幅图像之间建立坐标位置的映射)
Remapping 重映射
理论
重映射是什么意思?
-
把一个图像中一个位置的像素放置到另一个图片指定位置的过程.
-
为了完成映射过程, 有必要获得一些插值为非整数像素坐标,因为源图像与目标图像的像素坐标不是一一对应的.
-
我们通过重映射来表达每个像素的位置
![(x,y)]() :
:![g(x,y) = f ( h(x,y) )]()
这里
![g()]() 是目标图像,
是目标图像, ![f()]() 是源图像,
是源图像, ![h(x,y)]() 是作用于
是作用于 ![(x,y)]() 的映射方法函数.
的映射方法函数. -
让我们来思考一个快速的例子. 想象一下我们有一个图像
![I]() , 我们想满足下面的条件作重映射:
, 我们想满足下面的条件作重映射:![h(x,y) = (I.cols - x, y )]()
会发生什么? 图像会按照
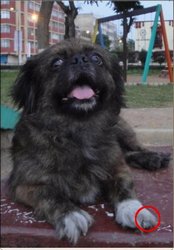
![x]() 轴方向发生翻转. 例如, 源图像如下:
轴方向发生翻转. 例如, 源图像如下:![Original test image]()
看到红色圈关于 x 的位置改变(
![x]() 轴水平翻转):
轴水平翻转):![Original test image]()
-
通过 OpenCV 的函数 remap 提供一个简单的重映射实现.
 :
:
 是目标图像,
  是源图像,
是源图像,  是作用于
是作用于  , 我们想满足下面的条件作重映射:
 轴方向发生翻转. 例如, 源图像如下:
代码
- 本程序做什么?
- 装载一幅图像.
- 程序按秒循环, 在一个窗口中顺序出现4种重映射过程对相同的图像.
- 等待用户按 ‘ESC’ 键退出程序。
- 下面是本教程代码. 你也可以从 这里 下载。
 #include "opencv2/highgui/highgui.hpp"
 #include "opencv2/imgproc/imgproc.hpp"
 #include <iostream>
 #include <stdio.h>

 using namespace cv;

 /// Global variables
 Mat src, dst;
 Mat map_x, map_y;
 char* remap_window = "Remap demo";
 int ind = 0;

 /// Function Headers
 void update_map( void );

 /**
 * @function main
 */
 int main( int argc, char** argv )
 {
   /// Load the image
   src = imread( argv[1], 1 );

  /// Create dst, map_x and map_y with the same size as src:
  dst.create( src.size(), src.type() );
  map_x.create( src.size(), CV_32FC1 );
  map_y.create( src.size(), CV_32FC1 );

  /// Create window
  namedWindow( remap_window, CV_WINDOW_AUTOSIZE );

  /// Loop
  while( true )
  {
    /// Each 1 sec. Press ESC to exit the program
    int c = waitKey( 1000 );

    if( (char)c == 27 )
      { break; }

    /// Update map_x & map_y. Then apply remap
    update_map();
    remap( src, dst, map_x, map_y, CV_INTER_LINEAR, BORDER_CONSTANT, Scalar(0,0, 0) );

    /// Display results
    imshow( remap_window, dst );
  }
  return 0;
 }

 /**
 * @function update_map
 * @brief Fill the map_x and map_y matrices with 4 types of mappings
 */
 void update_map( void )
 {
   ind = ind%4;

   for( int j = 0; j < src.rows; j++ )
   { for( int i = 0; i < src.cols; i++ )
       {
         switch( ind )
         {
           case 0:
             if( i > src.cols*0.25 && i < src.cols*