
react.js从入门到精通(三)——生命周期钩子函数的使用
生命周期的钩子函数
1、组件的定义
什么是组件?当一个页面所需要呈现出的内容过多,如果我们将所有的页面写在同一个.js文件中,会显得代码比较乱,给往后的代码维护造成困难。所以我们在编写代码的过程中,将某些部分提取出来,写在另一个组件中,然后在主页面中引入这个组件。
组件实际上是代码封装的一种,我们可以将经常使用到的一些功能及样式封装成一个组件,然后只需要调用这个组件便能调用这些功能和样式。这样做既方便了代码的管理又增加了可维护性。
2、组件的生命周期
在学习组件之前,我们必须先掌握组件的生命周期。一个组件从最开始的引入到最后的消亡,形成一段特殊的生命历程。这个生命历程成为组件的生命周期。
(1)componentWillMount
在组件DOM树渲染前调用。当进入这个组件时执行。
(2)componentDidMount
在组件DOM第一次渲染结束之后执行。
(3)componentWillReceiveProps
在组件接收到新的props时执行。
(4)shouldComponentUpdate
在组件接收到新的props或则执行了this.setState()时执行,它会返回一个布尔值。
(5)componentWillUpdate
在组件接收到新的props或者state但还没有render时被调用。
(6)componentDidUpdate
在组件完成更新后执行,比如执行this.setState()之后,组件进行刷新。
(7)componentWillUnmount
在组件在DOM中移除,被销毁后执行。
代码如下
constructor(props) {
    super(props);
    this.state = {
      data:"js是世界上最好的语言"
    };
  }
  render() {
    return (
      <div style={{backgroundColor:"#0ff",fontSize:"20px",color:"#00f"}} onClick={()=>this.click(this.state.data)}>
        {this.state.data}
        <a href="http://www.baidu.com">这是百度</a>
      </div>
    )
  }

  click=(data)=>{
    this.setState({
      data:"你说的对!!!"
    });
  };
  componentWillMount=()=>{
    console.log(1);
  };
  componentDidMount=()=>{
    console.log(2);
  };
  componentWillReceiveProps=()=>{
    console.log(3);
  };
  shouldComponentUpdate=()=>{
    console.log(4);
    return true;
  };
  componentWillUpdate=()=>{
    console.log(5);
  };
  componentDidUpdate=()=>{
    console.log(6);
  };
  componentWillUnmount=()=>{
    console.log(7);
};- 1
- 2
- 3
- 4
- 5
- 6
- 7
- 8
- 9
- 10
- 11
- 12
- 13
- 14
- 15
- 16
- 17
- 18
- 19
- 20
- 21
- 22
- 23
- 24
- 25
- 26
- 27
- 28
- 29
- 30
- 31
- 32
- 33
- 34
- 35
- 36
- 37
- 38
- 39
- 40
- 41
- 42
效果如下:
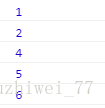
生命周期第三个涉及到接受新的props,以后再说明。第七个销毁组件时执行,因为涉及到路由跳转才能看出来,以后再说明。

 浙公网安备 33010602011771号