

centos7多网口配置同网段IP解决方案(bond)
环境
CentOS Linux release 7.9.2009 (Core)
需求
服务器eth0和eth1配置同网段IP地址、掩码不配网关,同时连接两根网线,对端是两台物理隔离的交换机。
现象
给eth0和eth1配置两个同网段的IP地址,然后用笔记本直连eth0口可以同时ping通eth0和eth1网卡的IP,但笔记本直连eth1口后,无法ping通eth1的网卡IP,也无法ping通eth0网卡IP。
分析结果
经过分析认为:是网卡路由优先级问题(可以详细了解一下路由中的Metric),eth0和eth1配置了同网段的IP,由于eth0网卡优先级高,故同网段数据均从eth0网卡通讯,此时笔记本直连eth1口后出现无法ping通的现象。如果修改eth1网卡优先级高于eth0,则会出现笔记本直连eth0后网络不通,直连eth1时能ping的现象。
解决方案
最后决定通过将两个网卡做bond,模式选择broadcast 广播模式。这样可实现两个物理隔离的交换机使用同一个IP通讯。
方案1:网卡bond
测试环境:
eth4:192.168.6.178
eth5:192.168.6.177
bond:192.168.6.179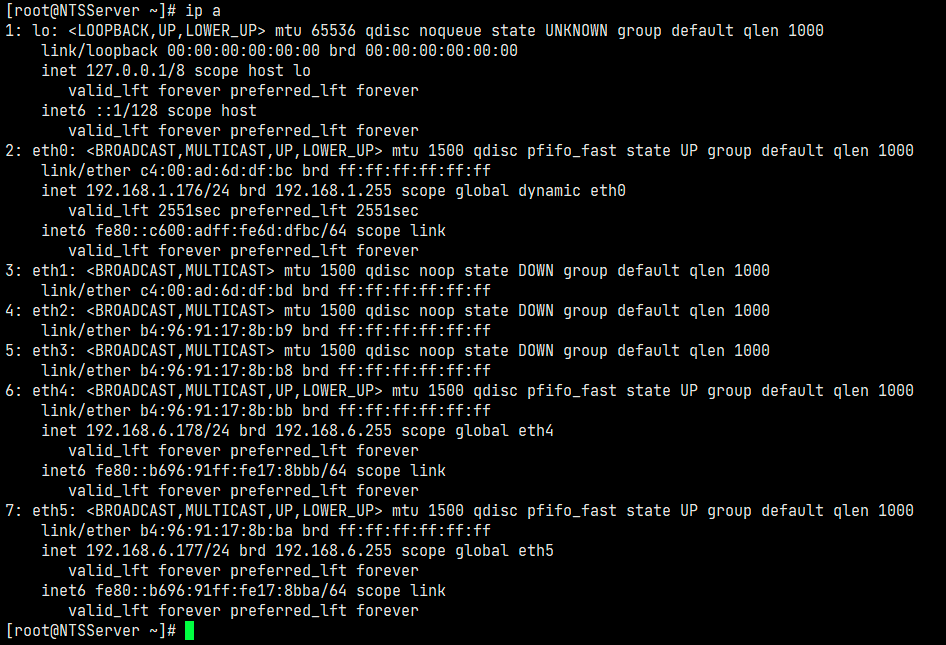
先备份网卡文件
[root@NTSServer ~]# cd /etc/sysconfig/network-scripts/
[root@NTSServer network-scripts]# mkdir netbak
[root@NTSServer network-scripts]# cp ifcfg-eth* netbak/
[root@NTSServer network-scripts]# ls netbak/
ifcfg-eth0  ifcfg-eth1  ifcfg-eth2  ifcfg-eth3  ifcfg-eth4  ifcfg-eth5
创建bond网卡
#生成bond配置文件,使用nmcli命令需要启动NetworkManager服务
[root@NTSServer network-scripts]# systemctl restart NetworkManager
[root@NTSServer network-scripts]# nmcli connection add type bond ifname bond0 mode 3
# 将网卡eth4与eth5绑定到bond0
[root@NTSServer network-scripts]# nmcli connection add type bond-slave ifname eth4 master bond0
[root@NTSServer network-scripts]# nmcli connection add type bond-slave ifname eth5 master bond0
# 查看生成的配置文件
[root@NTSServer network-scripts]# ls ifcfg-bond-*
ifcfg-bond-bond0  ifcfg-bond-slave-eth4  ifcfg-bond-slave-eth5
配置bond0网卡
[root@NTSServer network-scripts]# vim ifcfg-bond-bond0
BONDING_OPTS=mode=broadcast
TYPE=Bond
BONDING_MASTER=yes
PROXY_METHOD=none
BROWSER_ONLY=no
BOOTPROTO=static   #dhcp改为static
DEFROUTE=yes
IPV4_FAILURE_FATAL=no
IPV6INIT=yes
IPV6_AUTOCONF=yes
IPV6_DEFROUTE=yes
IPV6_FAILURE_FATAL=no
IPV6_ADDR_GEN_MODE=stable-privacy
NAME=bond-bond0
UUID=7584a8bd-d4e2-4be8-a678-5375b8eee436
DEVICE=bond0
ONBOOT=yes
IPADDR=192.168.6.179   #配置IP地址
NETMASK=255.255.255.0  #配置掩码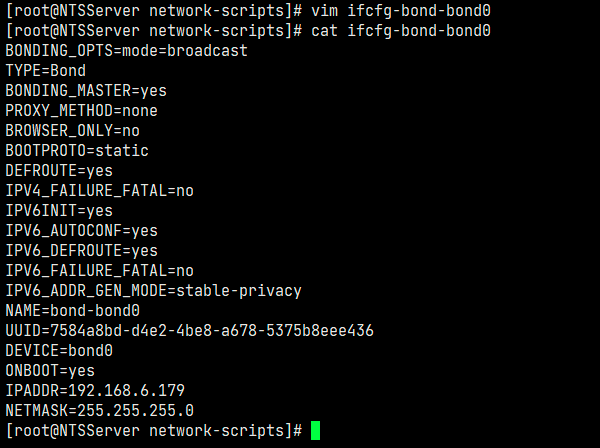
重启网络
[root@NTSServer network-scripts]# modprobe bonding
[root@NTSServer network-scripts]# service network restart
Restarting network (via systemctl):                        [  确定  ]
[root@NTSServer network-scripts]# ip a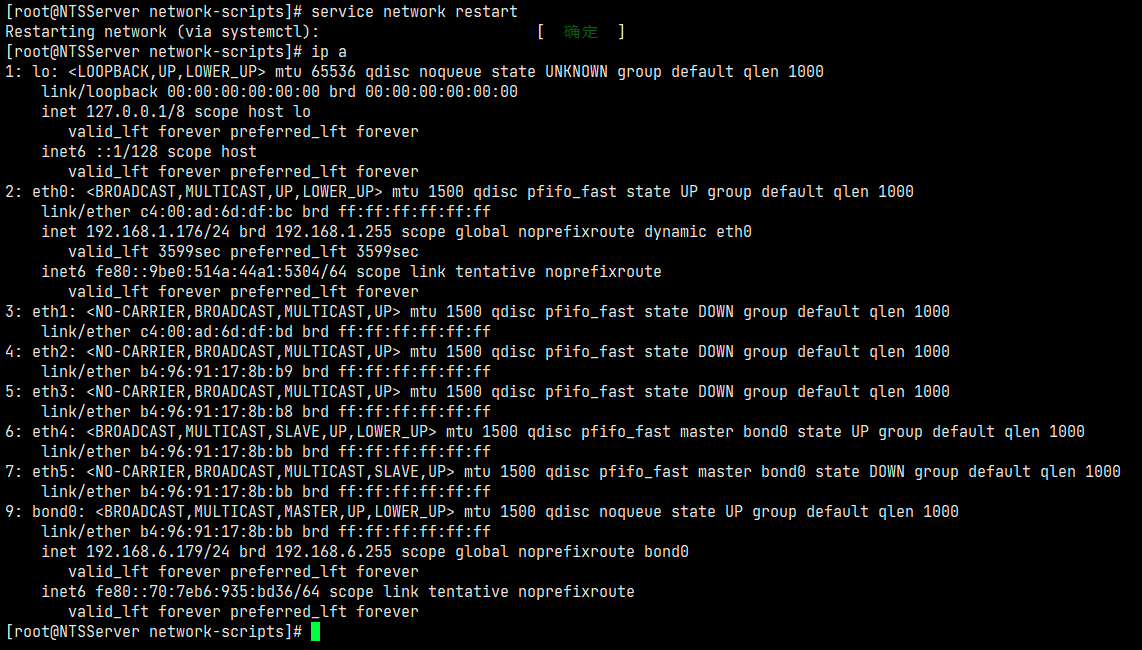
至此配置完成。
两个物理隔离的交换机直接连接eth4和eth5,使用同一个IP通信即可。
附1:给bond0绑定新网卡
如后期想新增第三台物理隔离交换机接入服务器,可将eth3加入bond0
#先修改eth3网卡信息,
[root@NTSServer network-scripts]# vim ifcfg-eth3
#network-config
TYPE=Ethernet
PROXY_METHOD=none
BROWSER_ONLY=no
BOOTPROTO=static           #dhcp修改为static
DEFROUTE=yes
IPV4_FAILURE_FATAL=no
IPV6INIT=yes
IPV6_AUTOCONF=yes
IPV6_DEFROUTE=yes
IPV6_FAILURE_FATAL=no
IPV6_ADDR_GEN_MODE=stable-privacy
NAME=eth3
UUID=8d931543-8573-4042-bfbb-90c6f4628253
DEVICE=eth3
ONBOOT=yes               #no修改为yes
IPADDR=192.168.6.166     #配置IP
NETMASK=255.255.255.0    #配置掩码
#保存,将eth3绑定到bond0
[root@NTSServer network-scripts]# nmcli connection add type bond-slave ifname eth3 master bond0
#重启网络
[root@NTSServer network-scripts]# service network restart
附2:删除bond0中的单个网卡
#先删除bond网卡,举例:这里删除eth3
[root@NTSServer network-scripts]# rm -rf ifcfg-bond-slave-eth3
#编辑bond0配置文件,删除对应的eth3的信息
[root@NTSServer network-scripts]# vim /proc/net/bonding/bond0
#Slave Interface:eth3
#MII Status:down
#Speed:Unknown
#Duplex:Unknown
#Link Failure Count:0
#Permanent HW addr:**:**:**:**:**:**
#Slave queue ID:0
#重启网络
[root@NTSServer network-scripts]# service network restart
附3:删除bond0网卡
#先删除bond网卡
[root@NTSServer network-scripts]# rm -rf ifcfg-bond-*
[root@NTSServer network-scripts]# rmmod bonding
#重启网络
[root@NTSServer network-scripts]# service network restart

 浙公网安备 33010602011771号